

 Must-Have Sailboat Navigation Equipment – Essential Gear for Safer Voyages">

从一个紧凑、多功能的配件套件开始,该套件包括一个可靠的指南针、明亮的照明和一个可靠的充电选项。. 这种设置可以在黎明和日落之后保持你的方向感,配备有罗盘座和甲板灯,可最大限度地减少图表上的眩光。展望未来,为恶劣天气来袭时建立一个简单的备用方案。.
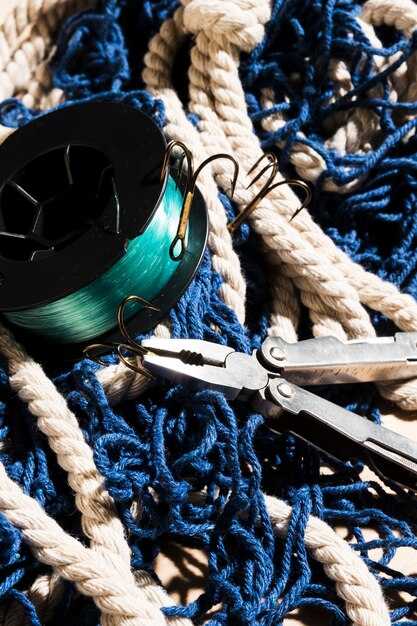
寻找清晰可见的标志:一个 300–600 流明的甲板灯、红/绿航行灯,以及一个小信号喇叭。当暴风雨来袭,能见度降低时,您会感激这额外的余地。.
为了通信和信号传递,配备一台带DSC的紧凑型VHF无线电话以及一个便携式喇叭。准备一个小标识牌,用于在海图上标记您的位置,并将备用电池存储在防水袋中。这将在海况恶劣时减少猜测。.
充电安排很重要:将10,000毫安的USB-C移动电源与安装在甲板上的6瓦或10瓦折叠太阳能电池板配对。这种组合通常可以维持海图仪和GPS接收器在一个完整的值班时间内正常工作。用橡胶带将该装置安装在扶手上,以防止磨损。.
在技术方法上,保留一个磁罗盘作为备份,以及具有离线海图的坚固防水平板电脑或手机。 将数字显示器设置为米制,以保持一致的读数,并使用硅胶套保护设备免受飞溅。.
甲板上的舒适性源于巧妙的布局:用于舵、动力和信号设备的区域小而清晰,并带有明确的标签。在航行时,将这些装备在舵位和船舱之间移动,以便在风浪中能够触及所需的物品,同时保持冷静。在计划航行时,请在打包清单中增加备用电池组和便携式信标。.
每月测试:验证罗盘偏差,确认照明设备在主电源和备用电源下均可工作,并检查充电端口是否有腐蚀。随附一份简单清单——开启、测试信号、确认可见性,并在航行后充电。.
更安全的航行和2个饮料架的必备帆船导航设备
首先,你需要一套必备的导航工具:一个完全集成、防水的绘图仪,配备GPS、AIS和VHF,并且兼容你的应用程序。这种实用的配置因其可靠性而获奖,并提供在阳光照射下也能轻松阅读的海图,无论是在甲板上还是在航行途中,包括通往岛屿的沿海路线。.
Install 2 个饮料架 在驾驶舱桌面上,配备杯托和磁铁,以便在恶劣海况下也能牢固固定。对于较长的航程,可使用从船舵处取放的全尺寸冷藏箱,并确保支架具有耐候性,适合岛屿间的短途航行。此功能可减少溢出,并保护驾驶舵柄的朋友。.
可穿戴设备 安全技术:腕式GPS设备和固定在仪表板上简易快拆插座中的手机。与全船应用程序配对,同步您的位置、天气和路线,并在舱壁上保留一个小挂钩,用于连接充电线。这种组合增加了保护,也为船上的朋友提供了实际用途。.
选择一个独特的,, suitable 根据您的位置和甲板布局选择合适的系统:自动驾驶仪、紧凑型雷达附加组件和保持电缆整洁的安装方式。使用对比度更高的显示器,以便即使在浪花中也能轻松读取海图。将备件存放在防水容器中,并遵循以技术驱动的、语言简洁明了的安装指南进行快速检查。这种充分准备的设置可提高您的船员和朋友的安全性。.
更安全航行的核心导航设备
安装一个集成了AIS、雷达和自动驾驶仪的多功能GPS/海图仪作为中央枢纽;它为远洋航行提供实时交通、航线规划和救生意识,并支持双体船和单体船。这项工作是长途航行的赢家,并帮助船员在航线的每个点都保持信心。.
关键装备和实用设置:
- 带AIS和雷达的GPS/海图仪:提供远程态势感知、交通警报以及海上防撞功能;选择具有双数据源的超亮显示屏并每隔几分钟进行基于时间的更新,并将读数与磁罗盘进行交叉核对。.
- 带有DSC和气象频道的高频无线电话:对船对船通话和气象更新至关重要;安装在驾驶舵触手可及之处,每月测试DSC呼叫。.
- 磁罗盘和航向传感器:用作GPS的备用;在远离铁磁源的刚性舱壁上安装一个经过校准的磁通门罗盘,以实现精确的点对点航向。.
- 测深仪和计程仪:监测近岸水深和浅滩进港水深,跟踪船体速度以优化帆的调整;在每次值班开始时验证读数。.
- 雷达:在低能见度下提供天气和交通数据;安装在驾驶舱上方高处,并为不同的海况和范围设置预设程序。.
- AIS应答器:看见和被看见;以接收和发射模式运行;保持MMSI最新并定期测试。.
- 自动舵/操舵系统:减少长途离岸航行中舵手的负担;与风和洋流数据配合,以最小的输入来控制最佳航向;设置安全的自动换舷限制并在平静水域进行测试。.
- 风向风速仪:真实风向和风速;将数据传输至海图仪,以实现高效的航线规划和帆计划调整;使用新一代传感器,实现更快的更新。.
- 卫星通信:选择一家具有全球覆盖范围的供应商;对于欧洲及其他地区的航海者,请确保在甚高频超出范围时提供可靠的数据和语音服务。.
- EPIRB 和 SART:救生设备;放置在易于取用的出口附近,每月测试;根据需要更换电池,并在船上备用一个遇险信标。.
- 电力和备用:一个由交流发电机和太阳能阵列充电的电池组;包括一个自动转换开关和一个强大的充电控制器;在舵手位和导航站监控电压和温度;目标是至少储备两天的基本电子设备用电。.
- 服装和船员装备:抓绒衣用于黎明检查和多风甲板;保持保暖层在手边,以便在长时间值班时保持专注。.
- 安装提示:整洁地布线,使用防水连接器,并标记每根电线;为敏感电子设备提供减震,并将显示器安装在视线水平,以获得适当的人体工程学。.
- 双体船的特殊性:考虑到双体船体和更宽的船梁;将雷达天线罩置于舱室上方,以避免甲板阴影,并保持AIS在两个船体周围的强信号覆盖。.
优先考虑的安装位置包括桅杆顶端、驾驶舱舵区、导航台、船尾横梁以及靠近机舱的位置;在一份平面图上标出这些位置,以最大限度地减少电缆长度和干扰。.
检查计划:每次航行或季节检查五次;每次值班前验证 GPS 定位、雷达范围、AIS 通信、VHF 覆盖范围和电池状态;记录任何异常情况,以便在下次靠港时纠正。.
每月一次,测试所有救生和通讯设备,并记录结果。.
GPS 和海图仪集成:选择可靠的显示器
选择一款具有日光下可视显示屏(7-9 英寸)、集成 WAAS 的 GPS 以及强大的 NMEA 2000 主干网的海图仪。 这 must-have 设置使图表、航点和航线在各设备之间保持一致,并允许直接连接到 GPS 天线,以便在波涛汹涌的海面上保持稳定的定位。它应符合航海防水和 EMI 耐受性标准,确保在飞溅和弱光下的可见性。选择具有快速重绘和直观控制的型号,以便您可以随时调整航线、跟踪 AIS 信标并让船员朝着安全航线前进。可以在单个屏幕上运行导航图和雷达覆盖图,以提高态势感知能力。.
流行的选项包括 Garmin、Raymarine、Furuno、Simrad 和 B&G;这些品牌提供 7-9 英寸的海图仪,预装了底图、矢量海图和 AIS/信标集成。寻找在日光下的可读性(目标 1000+ 尼特)、快速重绘和可靠的地图更新。几乎所有流行的选项都提供触摸或混合输入;考虑 kinds 你喜欢哪种安装方式——嵌入式、面板式还是基座式——并确保界面支持触摸和物理控制,以便在波涛汹涌的海面上快速使用。如果您正在评估价值,请进行快速并排演示,并记录切换图表所需的时间;这在以后可以节省数小时。.
电源管理很重要:选择使用12V电源的显示器,并提供专用电源或共享总线选项。注意低空载功耗以及从您的设备运行的能力。 交流发电机 或专用电池。 计划好 spend 花几分钟时间,将图表仪和NMEA 2000总线通过保险丝从船上的电源系统直接供电。检查环形端子是否腐蚀并确保接地牢固。手头备好备用耗材,如保险丝、备用电源线和备用存储模块。避免电缆垂入舱底;保持线路短而受保护,并使设备远离排气口;安装高度要足以避开热气和通风喷雾,同时还要便于维护。还要确保与雷达和自动驾驶仪的数据连接畅通,以最大限度地提高兼容性。.
数据可靠性和冗余:设置显示器从多个数据源获取图表、天气覆盖、潮汐数据和 AIS 信标。这降低了数据缺失的几率。nereide 显示器具有坚固的 IP 等级,有助于在潮湿的驾驶舱中使用;如果您需要紧凑的封闭式解决方案,请考虑它们。. 这个 提示:冗余很重要。.
甚高频 DSC 无线电:清晰通信与救援准备
启动电源 and keep the unit powered by the vessel’s 12-volt system before departure, enable DSC watch, and keep channel 16 for voice while configuring the DSC function to monitor calls on channel 70.
Store the MMSI, vessel name, and call sign in the contents so the provider can identify you quickly during an incident. If available, enable GPS-linked DSC to send your position automatically; this is specifically helpful when time matters and you need a precise signal for rescue crews.
Most models support functions for distress (Mayday), safety calls, routine calls, and group calls. These uses cover direct calling between 快艇, fleets, and coast stations; when DSC fails, use the equivalent voice channel to reach a nearby station, and you’ll still have a useful fallback.
Position the antennae as high as possible and away from heavy machinery to maximize reception. Route cables with shielded coax, check for water intrusion, and install a mounting that provides protection from salt spray. A poor installation reduces range, almost the same amount as the gains you expect from good placement.
In practice, during fishing near an 小岛 or along busy coasts, you can use group calls to coordinate with other vessels; the signal travels best when you maintain direction from the shore to the vessel. Keep the antennae oriented for optimum reception from a distant station and keep the channel 16 monitor active for voice backup.
Keep a simple diagnostic cookie in the log to confirm the unit identity, test results, and the time of the last check. Do a monthly radio check with a remote or coastal provider, and review the contents of memory to ensure the most critical numbers are current. For remote runs, ensure a spare battery is available and charged, to guarantee at least one backup power source.
Radar, AIS, and Collision Avoidance: Reading Signals for Safe Navigation
Set radar range to 3 NM in harbor, 6 NM on busy channels, and 12 NM when crossing open ocean; connect AIS to a dedicated app on your smartphone to log targets and compare directly with radar echoes; maintain a dedicated lookout. This direct workflow improves detection of smaller yachts and gives you extra time to react.
A radar with a high refresh rate and a diameter of 30–60 cm performs best on 快艇; install it high on a hard deck or in a dedicated compartment to minimize spray and vibration. Keep the radar dome clear of fleece, towels, and other fabrics that could block signals. Enable a multi-sensor overlay to merge AIS identities with radar echoes; use tecnologie that fuse GPS, compass, and autopilots for a cohesive display. Expect contacts at 5–8 NM in calm seas and 2–4 NM in rain or fog; check for electric interference from winch motors and move antennas away from windlass or battery compartments.
Read AIS data to identify vessel type, speed, and heading. Use CPA and TCPA thresholds to decide when to act: alert on CPA above 0.25 NM and TCPA under 8 minutes, then verify with radar bearing. In dense traffic near a harbor entrance, treat similar vessels as potential risks within 2–3 miles and pre-plan a safe turning arc. If a contact appears in the same location across several sweeps, verify visually and physically confirm the bearing by sighting fixed landmarks if conditions allow, then coordinate with the other vessel using direct VHF or digital messaging.
When risk appears, execute a three-step plan: slow down, adjust course by a few degrees to increase TCPA, and maintain a steady course with autopilots while you communicate with the crew. Channel your kahuna-level calm to lead the operation across all locations. If signal is lost, switch to manual steering and rely on an independent display on your smartphone as a backup. Keep extra gear ready–arrestor line, winch, and a spare battery–and return to checklists after the maneuver. Training drills on a quiet day, with towels handy to dry gear and a fleece layer for night watches, build readiness for high-ocean conditions.
Practical tips for yachts: practice cross-checks between radar, AIS, and GPS at least once a week; maintain dedicated settings for night and fog; check the diameter and mounting alignment during seasonal maintenance; create a simple routine to compare signals from similar targets and confirm their angles and distances. This disciplined routine improves safety and keeps you prepared for unpredictable turns in big seas.
Backups and Redundancy: Compass, Paper Charts, and Sextant Skills
Recommendation: Always maintain a properly stored backup navigation kit including a magnetic compass with a spare ring, a dedicated dry box, a full set of paper charts, and regular sextant practice. A saying among sailors is that two backups beat one failure, and this approach has proven reliable for years across sailboats of various sizes. Have this ready for times when electronics fail or when you face heavy weather, so you can keep steering and plotting with confidence.
Compass backups: Install the primary binnacle compass and place a second magnetic compass in a dry, fleece-lined pouch. Installation should be secure and within easy reach, without blocking sightlines or the wheel. Use both to check bearings against known waterway features at regular intervals, and note results in a log. When available, compare the spare’s readings with GPS-derived bearings to confirm accuracy, thereby sharpening your situational awareness. The ring dial on the compass helps readability in rough seas and dim light.
Paper charts: Sailboats benefit from waterproof, tear-resistant charts for the waterways you sail. The table includes chart numbers, scales, and edition dates; always carry a second copy in a protected chart case or in a fleece-lined pocket for humidity defense. Update data after new dredging, harbor changes, or chart corrections, and rotate copies so the oldest are used least. Store charts in a space that stays dry and clearly labeled; bring tide tables and current data for your routes, including coastal approaches and open-water legs. This redundancy lets you navigate calmly if the electronic path goes dark.
Sextant skills: Practice sun fixes and star sightings to maintain a viable line of position. Learn altitude measurement, apply index corrections, and use a chronometer as a time reference when GPS is unavailable. Regular drills keep you comfortable with the process and allow you to plot a fix quickly on a chart, often in minutes. Those skills hold value for years, and they deliver a dependable fallback when technology falters, thereby preserving safety and progress on long passages. This discipline lets you maintain a clear navigator’s mindset even when radios fade or screens go blank.
Storage, care, and planning: Keep a compact, buoyancy-friendly kit near the helm, with a fleece lining to protect optics and reduce noise in rough seas. The installation should be straightforward, fit in available space, and allow quick access during maneuvers. Theres a simple rule: test, use, and refresh on a set cadence across years and times. This approach links hands-on skills with tecnologie and cross-checks between charts and compasses to keep your navigation robust.
| Item | Primary role | Redundancy level | Storage location | Maintenance cadence |
|---|---|---|---|---|
| Magnetic compass (primary) | Directional reference | Basic backup | Binnacle or cockpit dry box | Check bearings weekly; calibrate annually |
| Magnetic compass (spare) | Backup reference | Dual backup | Dry pouch, easily accessible | Inspect monthly; rotate with primary |
| Paper charts | Reference navigation | Redundant editions | Waterproof case and fleece pocket | Update after changes; replace every few years |
| Chart tide/current tables | Plan routes | Supplemental | Chart case pocket | Review before each voyage |
| Sextant | Celestial navigation backup | Skills-based | Pouch in cockpit locker | Weekly practice; lens and mechanism check quarterly |
| Chronometer (time reference) | Time anchor for sight fixes | Critical | Protected case | Calibration annually |
Drink Holders: Two Secure Mounts, Spill Prevention, and Easy Access
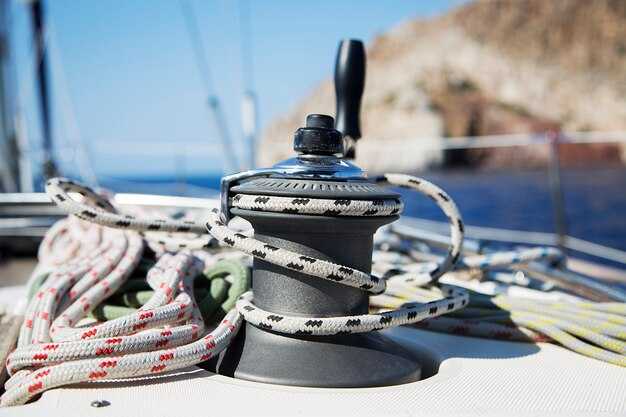
Install two secure mounts on the cockpit coaming, one within reach of the helm and one on the opposite side, using marine-grade stainless steel brackets with locking clamps to prevent loosening in heavy seas. This two-mount setup keeps cups stable when the boat heels and speeds along, so you stay hydrated without chasing contents across the deck.
Each holder features a raised splash lip, a silicone gasket, and an anti-slip liner to keep the contents steady, with a snap-on lid or flip-cap for extra spill prevention during open-boat conditions or gusts. Position the rims slightly above the deck to intercept spray and prevent liquids from traveling toward the line management area.
For easy access, place mounts so you can enter and operate the cups with one hand; the inserts accommodate 2.5–3.5 inch diameter cups and allow a clear read of the fill level. If you run a bluetooth-enabled boat, pair a sensor kit to track whether a cup is present and its temperature, aiding knowing and time management during watches. The open cockpit layout keeps access fast, and a nearby ventilator helps maintain cabin air without blowing spills onto electronics.
To boost safety, use cups with buoyancy or add buoyant inserts so a topple leaves the contents afloat rather than lost. This buoyancy helps during rescue drills and real rescue scenarios, and reduces the risk of spills onto fuel lines during heavy weather. Labeling the setup with a small rescueme cue can speed teammate response in drills and during an actual incident.
In choosing gear, check the requirements for compatibility, durability, and mounting security. The two-mount arrangement should sit about 40–60 cm apart, with mounts fixed into solid backing rather than a soft core. Stick to marine-grade materials, keep away from fuel sources, and ensure the system aligns with your boat’s management approach and buoyancy goals–this third-generation option is a winner for many marine layouts and fulfills those practical requirements.