

 How to Wakeboard – The Ultimate Guide for Beginners">

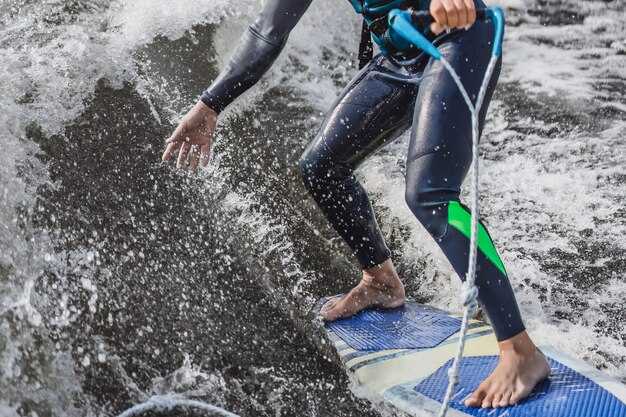
从救生员认可的救生衣和贴身潜水服或冲浪服开始。绳长约60–65英尺,船速接近20英里/小时,以实现干净的起水。 臀部位于中心上方下蹲,保持脚后跟着地,挺胸,从第一次起水起就锁定平衡。.
采用反脚站姿的滑水者应保持肩膀与船身平行,重心放在中心位置。快速立刃迎接浪,与驾驶员的沟通至关重要:准备好时竖起大拇指示意,绳索拉紧时稳步拉动。经认证的安全设置可以降低风险,冷静、可控的起步比仓促冒进更能增强信心。.
循序渐进的计划:保持小步骤;首先专注于站起来,然后是简单地穿过尾浪。随着平衡的建立,尝试在航道尾流中旋转,之后在观察员的帮助下进行故意的翻转。如果跌倒,侧身翻滚,靠近船只,将膝盖拉向胸部,并在再次尝试之前重新调整中心。保持在动量中心附近以便更快地恢复。.
练习通常在小而平静的水道上进行。天气和航道会改变,风向的变化会重塑尾流,所以选择有遮蔽的区域并保持警惕。与船员的沟通仍然至关重要,以便根据情况变化调整速度和航线;密切关注其他船只和游泳者,以确保安全。.
装备清单和注意事项:检查固定器是否合适,确保滑水服紧身,并验证安全装备。 专注于强壮的腿部和核心;保持低而集中的站姿,尤其是在快速拉动时。 当您靠近尾波或船时,保持控制,用脚后跟引导滑板沿着中心线移动。早期出现小错误是正常的;冲洗、重复,并通过稳定、经监护人批准的练习来庆祝进步。.
开始滑水你需要什么装备
选择一件合身的、有浮力的个人漂浮装置(PFD);它应该在起动和着陆时提供提升力。添加一块适合你体重的滑水板,滑水板上的固定器要牢固地锁紧。让固定器舒适但不紧绷,使胸部在操纵时能够移动并感到稳定。.
约 20–23 米长的牵引绳配有宽大的手柄,可减轻疲劳。将绳索夹在船尾附近的船牵引点上,保持绳索处于张紧状态,使骑手保持水平。使用一件具有浮力的 PFD,使其在启动拉动过程中保持胸部向上并辅助提升。.
头盔增加头部保护;如果水域繁忙或在国际水域,考虑胸部保护器或冲击背心。确保安全装备合身舒适,不妨碍行动,以便下次尝试技巧时能够平稳操纵。.
从宽大的板子和柔软的边缘开始;新手会受益于稳定性。固定器应紧密贴合,允许胸部随着抬升动作上升,并保持肩膀对齐。更少的装备意味着你可以专注于姿势。保持胸部挺直,背部平坦,臀部在肩膀下方,以改善抬升和平衡。.
随着你的进步,接下来的升级包括更轻的板子和更宽容的弧度。国际商店提供各种重量、尺寸和靴子配件;在追求速度之前,请确认你可以采取一个舒适的站姿。避免装备超载;保持简单、稳定和可预测性,以培养技能。.
根据体重和技能选择合适的滑水板尺寸
按体重选择范围:低于 60 公斤:120–132 厘米;60–75 公斤:132–136 厘米;75–90 公斤:136–139 厘米;90–105 公斤:139–141 厘米;105+ 公斤:141–143 厘米。此选择已为您提供了一个稳定的平台,改善了起飞时的抓地力,并有助于从一开始的训练中保持流畅。对于初学者来说,保持在您所在类别的中间位置可以增强稳定性并使起床更容易。.
随着你技能的提升,尤其是在跳跃和水上滑行方面,你可以尝试选用范围下限的装备,以获得更快的响应和更多的控制。在尾波滑水运动中,你范围内的较短板子能提供更快的切水速度,而圆润的边缘则能在起步时保持抓地力。此外,弯曲膝盖和放松的姿势能提升你的平衡感,减少疲劳,帮助你在尝试新花样时保持冷静。所有步骤都有助于技能发展,并且这种方法能保持进步的现实性。.
有针对性的锻炼可以增强核心、腿部和背部力量,从而提高骑行时的平衡性和控制力。 肌肉得到训练,并且这个训练计划已经帮助您顺利完成训练,防止忽略细节,并帮助您在水上运动时更加自信和专注,让尾波滑水运动保持其刺激性。.
| Weight (kg) | 板长(厘米) | 说明 |
|---|---|---|
| 60岁以下 | 120–132 | 稳定性;圆边设计提升抓握力;是初学者的理想之选 |
| 60–75 | 132–136 | 稳固的中间地带;易于滑水和保持在水面上 |
| 75–90 | 136–139 | 平衡的操控与爆发力;适合从初学者进阶到中级水平 |
| 90–105 | 139–141 | 响应更灵敏;更短的帮助跳跃和快速的方向改变;弯曲边缘增加抓握力 |
| 105+ | 141–143 | 最适合体重较重的骑手;侧重稳定性和平稳落地 |
固定器和板型:弹性、反弓和站姿
Choose a 中度炫耀 尾波滑水板搭配全脚套固定器;它们应该在你学习时提供稳定的落地和平稳的可预测的响应。.
Flex描述板子的硬度;较软的选择在初期摔倒时提供更高的容错率,而较硬的板子在刃入过渡时提供操控性和爆发力。.
弧形影响滑水性能和手感;连续弧形提供平稳加速,而三段式设置则能提前抬起板头;通过仔细的调整,可以避免像蹦床一样的弹跳,并在过渡中提高平衡性。.
站姿选择包括宽度、角度和髋部对齐;尾部先行的设置有助于后期的换刃;在练习中进行调整;前脚位置对控制和平衡至关重要;靠近脚踝的绑带位置增加额外的安全性。.
了解部件有助于与教练沟通;了解部件的名称——固定器、绑带、握柄、底座、衬垫。.
除了基础知识,还要看看专用固定器和蝠鲼形状;不匹配的硬件会导致危险的设置;骑行前必须拧紧提供的螺栓和垫圈。.
逐步推进小幅击打过渡和跳跃;当您利用基本动作,运用平衡和时机保持整个训练过程中的稳定形态时,您会注意到进步。.
专注贴合度,确保舒适和安全;检查雪靴尺寸兼容性和固定器磨损情况;必须确保贴合感舒适,没有挤压感,并且固定带应位于踝骨上方。.
初学者安全装备:救生衣、头盔和防撞背心
选择一件海岸警卫队认可的、贴身且不妨碍活动范围的救生衣(PFD)。试穿时穿着平时的内层衣物来确定尺码;系好后,进行简单的下蹲和伸展测试,以验证活动性。一件适合你身体的救生衣有助于在半转弯和基本技巧中保持正确的姿势,带来令人兴奋且可控的体验。事先检查带子、缝线和泡沫板;及时更换磨损的部件。通常情况下,即使在休闲水上活动中,专用的救生衣仍然是必不可少的。.
-
Life Jacket
- 类型:III 型 PFD,设计用于在水上活动中提供浮力支持。.
- 贴合度:舒适贴身,手臂活动不受限;肩带稳固,不会摩擦皮肤。.
- 安全须知:测试拉链和包裹带;在浅水区进行快速游泳测试,并有人员监督。.
- 维护与存放:使用后冲洗,于室内风干,存放于干燥通风的袋中,远离热源;与湿衣分开存放,以避免化学物质转移。.
-
Helmet
- 标准:具有冲击认证的水上运动头盔;检查内衬密度和外壳完整性。.
- 尺寸:头盔水平放置,下巴带收紧至足以防止移动但仍然舒适;通过从侧面和向上轻轻拉动来进行测试。.
- 用法:每次使用后进行检查;及时更换破裂的外壳或磨损的带子。.
- 保养和存放:使用后冲洗,避免阳光直射;存放于通风处,并与重型装备分开。.
-
防撞背心
- 作用:提供胸部保护;可提供一定浮力,但不取代救生衣;在高风险环境中与夹克搭配使用。.
- Fit and protection: choose a vest with padded panels over ribs and sternum; snug without limiting arm movement.
- Buoyancy note: buoyant enough for casual sessions but not as flotation as a dedicated jacket; generally about half of overall flotation when paired with a PFD.
- Care: rinse after sessions, dry flat away from heat; storage in a cool, shaded area is best; keep it apart from heavy equipment to maintain padding.
visual checks matter before stepping onto water. In groups, separate responsibilities and agreed signals help; this reduces risk during tricks and spinning. Each session should begin with a simple workout focused on stance and controlled turns; therefore, set a relaxed pace that would become intense as skills grow. Falls happen; when they do, turn hips with shoulders to regain balance, then reattempt a trick with deliberate effort. Storage habits matter: dry gear between uses, storage apart from wet equipment, and regular inspections extend longevity. Routine workouts benefit from clear drills and plenty of repetition on basic moves to build confidence and safety.
Rope, Handle, and Tow Setup: What You Need to Start
65 ft rope length; boat speed around 18 mph; center grip on handle; confirm quick-release is secure; better balance comes from stable line tension.
Thoughts from experienced wakeboarders frequently emphasize center pull and smooth transition. Bent elbows degrade control; keep wrists relaxed. Maintain shoulders square, grip firm, and balance while navigating wake edge.
If youve got a plan, use this baseline as a reference to adjust to own style.
- Step 1: Rope and handle selection
- Rope: 65 ft length, floating, high-visibility color, low stretch; helps keep line tension predictable.
- Handle: padded grip, durable core, easy to secure end; look for a center grip and a quick-release.
- Step 2: Tow configurations
- Centerline pull aligns with center of mass; slight left or right offset can support stance preferences.
- Test several configurations, several times, to identify which feels better; keep a consistent center line during runs.
- Step 3: Speed, cadence, and technique
- Start around 18 mph; increase in small increments to 20 mph as control improves. Maintain a steady cadence; avoid fast, jerky pulls that trigger spinning or losing balance.
- Move weight slowly into each new stance to prevent overcorrection and keep board flat.
- Avoid moves that cause you to lose line tension or drift off wake edge.
- Step 4: Safety and checks
- Inspect line for nicks; verify connection to tow point; check vest fit and deck grip; ensure operator has clear view of rider.
Women riders may adjust stance width and grip pressure to strengthen control; a well prepared setup helps navigate water conditions more reliably.
This concise tutorial on Rope, Handle, and Tow setup serves as baseline guidance; use it to refine style, technique, and confidence, aiming at maximum control.
Clothing and Comfort: Wetsuit, Rash Guard, and Weather-Ready Layers
Choose a 3/2 mm fullsuit for most spring and autumn riding; flatlock seams prevent chafing, and a smooth interior helps absorb moisture without adding bulk.
Underneath, wear a long-sleeve rash guard to protect skin from friction and UV; it traps a thin layer of warmth without bulk; rash guard itself offers abrasion protection and absorbs only sweat.
For variable weather, pair rash guard with a lightweight windbreaker or spray-top when wind bites; for cooler mornings, add a thin fleece under wetsuit; on hot days, switch to rash guard with board shorts; slower starts benefit from extra warmth. Riding safety shares basics with skiing discipline: stay relaxed and focused. Understand how layering affects mobility.
Fit matters: choose a relaxed cut with room at shoulders to stay able to move during riding; you should avoid tight sleeves that hinder front-side reach; ensure wrists stay covered when arms extend; stay alright by keeping gear comfortable.
Protection and comfort: booties with 2–4 mm thickness provide warmth and foot protection; make sure legs stay relaxed, ankles flex, and heels stay free for quick edge grip.
Equipment setup: if a finn fin is present on your board, check fit and secure mounting before taking off; before mounting, understand how gear layers affect stance.
Towboat operations and boats safety: establish communication with operator and spotter; use simple hand signals to indicate hazards, water depth, or your need to come in.
Weather-ready layering: carry a compact wetsuit vest or a windbreaker in your bag; when sun warms, remove outer layer gradually; wind chill can hit quickly on wakeboard sessions; this setup supports workout and recovery.
For half-day sessions, plan hydration and cooldown, though you may stay on water longer.
Learning tip: keep shoulders tension-free and jaw relaxed to support smoother front-side moves.