

 How to Take a Great Photo on a Boat – Pro Tips for Stunning Seascapes">

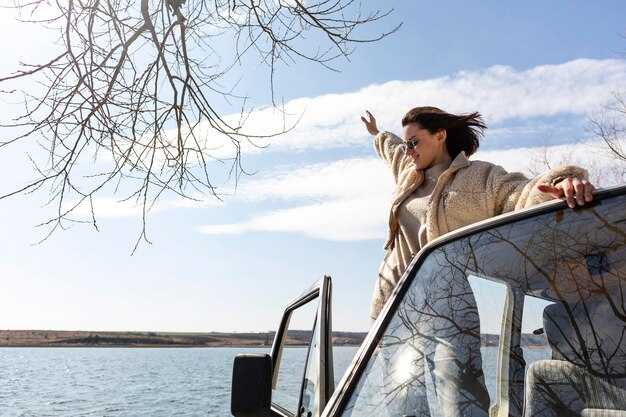
Stability on deck matters most: Plant your feet shoulder-width apart, bend your knees, and let your elbows rest against your torso. In rough conditions, use a monopod or brace against a rail to keep the camera steady. For sea spray and splashes, raise the shutter to 1/1000s or faster to capture clearest wave curls. If light drops, adjust to 1/500s but aim toward faster speeds when movements accelerate.
Techniques for focus and frame: switch to manual mode or use single-point AF, lock focus on a high-contrast edge, then recompose. On a boat, water movement creates movements of the scene; anticipate where the boat will drift and track with your focus. If you can’t lock on, switch to continuous AF in bright light, but revert to single-shot AF when you spot a clean, offshore horizon to keep the scene sharp. You wont miss the moment if you practice tracking and timing.
Composition matters in every shot. Place a foreground element (rope, cleat, or buoy) to add depth and lead the eye into the scene. Use contrast between the dark hull and white wave to pop the subject. Keep horizons level; a tilted line breaks the image rhythm in rough sea and stills the photographic value of the frame. If you face a tricky angle, swing your body with the boat’s roll to frame high-contrast silhouettes as the sun goes down and clouds glow, a moment you can capture with practice and create something unforgettable.
Lighting and exposure: In glare-rich, midday conditions, use a polarizer to cut reflections and darken skies; shoot in manual mode 或 aperture priority to balance ocean brightness. Use a small exposure compensation (+/- 0.3 to +0.7) to keep water detail and avoid blowing the highlights. As light comes and goes, speed of your reaction matters; keep speed 和 contrast in mind as sunlight shifts. If you want an unforgettable scene, be ready to press the shutter when the boat slides from shadow into sun.
Timing beats luck on a boat. Track the sequence of movements of a breaking wave and shoot in bursts to catch a peak moment. Use a faster burst mode if your camera offers it; a photographic sequence can yield a handful of frames where spray is crisp and the surface texture shows depth. In tricky lighting, shoot a few frames at exposure bracketed to preserve detail in both bright highlights and shadowy troughs.
Safety and gear: keep a waterproof bag for the camera, dry your lens often, and consider a rain shield in spray zones. Use a lens hood to tame glare, and rinse the setup after a session to prevent salt buildup. For long, exhilarating sessions, plan your conditions and bring extra batteries to avoid a mid-ride power drop; batteries can run down quickly. A clear plan helps you avoid missing your best scene moments and ensures your memories stay unforgettable.
Step 2: Adjust Your Camera Settings for Great Boat Seascapes
Set your base exposure in Manual mode and start with 1/1000 s to freeze motion on rough water. If spray hits the lens, push ISO to 400–800 and keep f/8–f/11 to preserve detail; for silky water, plan to shoot from a stable surface at 1/4–1/8 s, using a monopod or railing as a rest while you follow the movement through succession of frames. This approach improves your images and helps you compare options later.
- Selecting exposure and ISO: In bright sun, use aperture around f/8–f/11 and ISO 100–400; shoot RAW to preserve detail; if you’re using a smartphone, enable Pro mode and capture DNG when possible; for mixed light, auto white balance is acceptable and can be tweaked later in post; this here helps keep color consistent across different scenes.
- Motion and focus: Use AF-C (continuous) with a tracking focus area; employ back-button focus to lock on the subject and recompose; for spray, use 1/1000–1/2000 s to freeze motion; for a trace of motion, try 1/250–1/500 s and pan slightly to show movement through the frame.
- 稳定性与抓握力:每个人都应该收拢肘部靠近躯干,并将相机贴紧身体;倚靠船舷或使用独脚架支撑;对智能手机而言,双手握持和胸部支撑有所帮助;防水外壳可保护装备免受水花侵袭。.
- 视角和空间:探索不同的视角来强调空间和深度;从膝盖高度或更低处拍摄来夸大波浪;计划快速连续的帧来捕捉在变化的光线和波浪下的主体。.
- 装备和防护:如果你有耐用的相机或防水外壳,就能更好地应对恶劣环境;备用电池和存储卡会有帮助;智能手机用户应启用专业模式,并保持镜头清洁干燥。.
- 后期处理和工作流程:将图像以RAW格式导入,检查直方图,并调整白平衡和高光,以保持水色自然;批量处理相似的帧,以获得统一的外观;存储具有一致元数据的图像,以简化后续选择。.
船上的白平衡:预设和自定义白平衡,适用于蓝色和阳光照射的水面
在多数沿海、阳光充足的日子里,手动将白平衡设置为 5500K,以保持蓝色准确和阳光照射下的水面平衡;拍摄 RAW 格式,以便稍后调整白平衡,并在一开始就保存多个画面,这样你就可以比较不同的选项,而不会丢失细节。.
在船上,预设能帮助你快速应对变化的光线。使用自动白平衡作为基线,然后在天空晴朗、蓝色海水呈现真实色彩时切换到日光(约 5200–5500K);阴天模式可以为平静的日子增添暖色调,让肤色更自然;阴影模式则会增加更多暖色调,用于下午的光线。对于夜景或日落后的光辉,钨丝灯模式可以冷却场景,但预计水面会呈现较冷的色调。努力稳定整个序列的白平衡,以便在甲板移动和画面中出现移动时,颜色保持和谐。.
从一开始,自定义白平衡方法能让你获得最大的控制权。将中性灰卡(或干净的白色衬衫)放置在甲板上的开放阴影处,并拍摄一张参考照片。在 RAW 格式下,将白平衡设置为 5500–6000K 左右的目标值,以保持蓝色海水的真实感,同时保留阳光照射的温暖感。如果没有灰卡,可以使用场景中的明亮灰色区域,然后在后期调整白平衡,以防止水面出现偏色。这种方法有助于稳定曝光和白平衡,尤其是在静物瞬间和壮阔海景之间切换时。.
为了尽量减少船摇晃时的变化,锁定白平衡和曝光,并以稳定的快门连拍,然后选择水和天空颜色相似的帧。偏振滤镜有助于减少眩光,呈现更清晰的蓝色调,同时保留阳光在水面上的光泽。如果必须在参考有限的情况下拍摄,请拍摄一个短序列,并在后期修复白平衡;这样可以节省编辑空间,并使序列在沿海拍摄中保持连贯。.
日落时分,温度变化,蓝色调会显得更丰富或更冷。尝试将白平衡设置在 6000K 左右,获得更清脆、更冷的色调,或调整到 5200–5600K 以增强温暖天空的效果,同时保留蓝色的水面。对于夜景,自动白平衡配合后期细致调整即可,但始终要保留一张参考照片以保持连贯性。在这里,白平衡是一种塑造广阔海洋和天空的工具,而不是固定的规则——正确的预设或自定义值让您可以在平静、广阔的时刻拍摄它们,从平凡到自发,然后光芒就会显现。.
测光模式:评价测光与点测光,适用于平衡的天空和海洋
Recommendation: 在船上,使用评价测光作为默认设置,以平衡天空和大海。根据场景,此模式分析画面,为碧蓝的海水和晴朗的天空提供可靠的曝光,从而提供满足其需求的可靠的摄影拍摄。优点是它可以适应整个画面的动态光线,因此您可以享受当下,而无需不断调整。如果天空变得非常明亮,或者水面上的高光看起来很小且过曝,请切换到点测光,以锁定精确区域的曝光。锁定后,快速拍摄包围曝光或检查直方图以验证结果。.
在移动的船只上,随时做好准备。将你的装备放在手边,站稳脚跟,并靠在栏杆或甲板上保持稳定。始终监视地平线并了解你的视角:评价测光处理广阔的场景,点测光在小而亮的区域占主导地位时提供帮助。如果你想强调水中的纹理或云层图案,则在小区域上使用点测光,然后返回评价测光以恢复平衡。在拍摄过程中,以 RAW 格式拍摄以保留宽容度,并经常检查直方图以避免溢出。如果曝光过度,天空将无法在后期恢复,因此根据需要使用曝光补偿,并使你的拍摄与光线方向保持一致,以充分利用其摄影潜力。.
实用场景和技巧:在阳光明媚且天空非常明亮的情况下,从评价测光开始,如果天空过曝,则应用 -0.3 至 -1 EV;在普通日光下,您可以保持在 0 至 -1 附近。 对于高对比度时刻,可以跨 2-3 帧包围曝光,以捕捉天空细节和水面纹理。 在蓝色水域场景中,如果兴趣在于反射,则对天空进行点测光可以控制眩光,而评价测光可以保留水的色调。 在动态范围有限的场景中,评价测光通常可以平衡色调,但包围曝光仍然是确保您捕捉到完整光谱的明智之举。 一旦您建立了可靠的工作流程,您将享受快速、可重复的结果,以及在您的拍摄序列中从天空到水面的干净过渡。.
快门速度战术:凝固海浪与捕捉长曝光运动
将快门速度设置为 1/1000 秒,以在船摇晃时冻结最具动感的波浪。如果光线因阴天而受限,则将 ISO 提高到 1600–3200,并仍然保留浪花中的细节,然后调整曝光以保持照片的深度完整。小心操作,避免高光溢出并保持色彩;避免随意拍摄,专注于核心运动。这种方法可以在泡沫和盐的边缘产生清晰的线条,从而在单个框架中增强场景。.
对于运动,切换到长曝光以捕捉平滑的水面和拖尾飞溅。从 1/4 秒开始,如果光线允许,则移至 2 秒;使用稳定的栏杆或紧凑型云台,并保持双脚平稳以限制身体摇晃。专注的技巧有助于避免模糊,并在波浪中产生独特的纹理。如果租用设备,请注意重量和平衡。.
在选择模式之前,先检查天气和场景:阴天会降低对比度;阳光强烈可能会产生眩光;注意诸如栏杆反光或移动的帆等问题;然后决定哪种方法最能增强场景和您的照片。在本文中,您将找到在海上应用的实用步骤。.
器材提示:租用轻量级设备,尽量减少器材通常在船上拍摄时会有回报。使用遥控快门进行长时间曝光,固定好你的饮料和其他物品,并保持专注的姿势,以保护你的身体和你的拍摄。手头备用一块电池和一张小存储卡,以便随时应对变化莫测的条件。.
| Mode | Scenario | 快门速度 | Tips |
|---|---|---|---|
| 冰冻海浪 | 摇晃的船,可见的浪花 | 1/1000秒 – 1/2000秒 | 站稳脚跟,稳住身体;保持水平视线;短点射以锁定清晰边缘 |
| 适度运动 | 海浪轻柔拍打,泡沫细节 | 1/250秒 – 1/500秒 | 使用摇摄;使用更长的镜头来压缩景深;避免翻滚式构图 |
| 长时间曝光 | 丝滑流水,光轨 | 1 秒 – 2 秒 | 可选ND滤镜;三脚架或坚固导轨;用于稳定拍摄的遥控快门 |
光圈选择:地平线细节的景深
设置光圈为 f/11 作为地平线细节的默认设置;这个 高景深 保持近处白色泡沫和远处地平线的清晰,呈现出 great 深度感。使用焦距的超焦距,这样你就不必在移动的船上追逐焦点,而且画面可能会移动。如果你正在拍摄广角镜头,并且想要更多的水面纹理,请缩小光圈到 f/16; 如果光线不足,打开至 f/8 并使用 ISO 或快门速度进行补偿。.
On 阴天 天,对比度下降;保持从边缘到边缘的清晰度: f/11–f/16. 要冻结浪花并保持地平线清晰,请使用以下范围内的快门速度: 1/500–1/2000 秒 取决于风浪高度。如果想要前景水面更平静,可以降低到 1/60秒, but you’ll need a stable platform or waterproof cover and a strap to keep the camera from moving. Experiment with multiple speeds to balance action and horizon sharpness. When taking shots here in calmer moments, you can still aim for a clearer horizon.
Techniques: open the lens to a wider frame if you want to emphasize the horizon; manual focus using live view, zoom on the horizon to lock a clean line, then set hyperfocal distance for your focal length. These techniques help you plan the shot and keep horizon detail consistent. Take multiple shots with slight variations in aperture and ISO to cover the moment. In editing, you can balance white and blue tones for a natural look.
Gear notes: strap the camera securely to your body or rail; use waterproof housing or a rain cover when spray picks up; keep a microfiber cloth handy to wipe salt and water from the lens; adjust setting for the wind and glare, and bring a spare battery.
Next steps: practice during spontaneous moments; this article here offers more tips; try a unique look by bracketing at f/11 with different speeds, then compare in editing. Youre ready to turn a plain horizon into something memorable.
ISO and Noise: Managing ISO on a Moving Vessel
Set Auto ISO with a ceiling of 1600 and start with shutter 1/1000s, aperture around f/8 to keep the subject crisp while freezing spray. In blue hour, push to 3200 and adjust to maintain highlight control. This balance preserves detail and minimizes noise while giving you a clean lead on the subject as the vessel rolls.
Stabilize by tucking elbows, using a strap, and keeping the camera tight to your body. Stand with a solid stance to absorb the constant motion, and time your press for the moment when the boat leans toward a swell. A small lean toward the direction of travel reduces down time to a minimum; you gain better control and more space to capture clean color and texture.
Points matter: Manual gives you control; Shutter Priority works when light shifts. If you use Auto ISO, keep a cap in mind and adjust exposure with exposure compensation so the sky doesn’t wash out. For a broad vista, try a wider aperture with a shorter shutter; for a painterly look, pan with the boat using a longer focal length.
Post-processing: shoot RAW, compare frames at ISO 400–800 and 1600–3200; choose the best capture and apply noise reduction only where needed to preserve texture in spray and fabric on the subject. dont oversmooth; enhance detail in foam crests and sails. Keep a vantage on the light hour; if you miss it, the next hour offers another chance to improve color and mood.