

 Boating Electronics Fundamentals for Beginners – A Complete Guide">

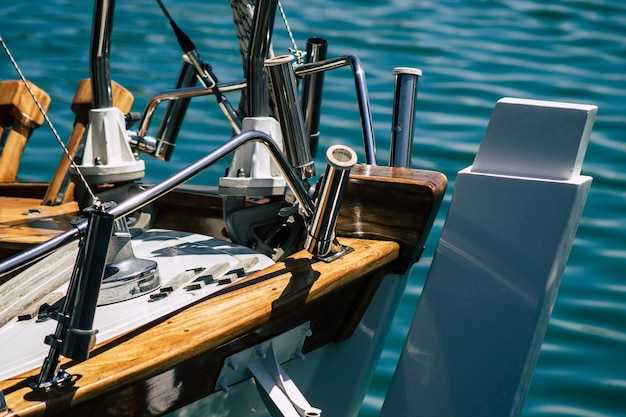
Before any wiring or mounting, ensure your centralised device is equipped to receive data from transducers and to render a cohesive picture with mapping of weather, depth, and vessel status.
Those boaters equipped with multi-sensor packages, verify that the display supports switching between sources at each point along the course, and that weather data refresh cadence matches your looking-ahead planning.
Before committing, perform targeted research на compatability between control interfaces and third-party transducers. Focus on noise rejection, data latency, and how a single device can host a clear mapping Overlay without lag.
When looking at the overall layout, insist on a simple, readable picture that shows depth, speed, wind, and current vectors at a glance. Ensure the interface remains centralised rather than fragmenting data across screens.
Plan a before/after test sequence: before installation, note baseline readings; after installation, verify that all sensors switch cleanly and that the picture updates in real time.
Those looking to improve clarity should start with a simple workflow: a single screen, a touch input, and assistance to interpret alerts. Keep the picture stable when weather shifts; if not, reassess transducer placement and cable routing to preserve data integrity.
Develop the habit to understand how the pieces connect, enabling quick decisions in the cockpit for those boaters new to this setup.
When in doubt, request assistance from the vendor or join a mapping test session to accelerate learning and adoption among those who look to improve data literacy in the cockpit.
Boat Electronics Guide
Recommendation: Install a centralised backbone with a solid earth bus, use properly shielded cables, and verify operation of each module by bench testing before sea trials.
Years of field data show some models vary in how transducers and data share on the same system; review charts and verify ground reference when selecting a transceiver.
Some boaters often prefer digital displays that update at 1 Hz or faster; keep modules centralised to minimise latency and avoid ground loops, and ensure the map shares synchronised data.
Place the transducer on the hull at the correct downward angle; verify depth readings against trusted charts during test runs, and inspect the mounting to prevent cable strain.
Maintenance: Protect the system with proper fusing, isolate power to critical modules, and document a review schedule; maintain a well-documented log and annual review reports for cables, seals and connectors.
Share access to a centralised data log; some charts export to CSV, and boaters should keep a copy on a USB drive or cloud; source.
First steps: Map all cables and route power and data earths separately; verify each station operates during steady trim at speed and adjust in small increments.
Review cycles: after years of use, conduct a full review of the wiring, replace ageing cables, and test the reliability of the transceiver paths.
Interference discipline: keep power cables separated from data lines, maintain 12-15 cm clearance where possible, and use ferrites on transceiver cables to reduce EMI.
Sonar Systems: Transducer Types, Frequencies, and Reading Echoes
Install a dual-frequency CHIRP transducer that is through-hull or transom-mount, depending on hull material. This setup allows wide coverage, accurate depth readings, and quicker validation of echoes while underway. Start with a trusted, certified unit and plan upgrading with a test run on a calm day. Set the display to the correct units (feet or metres) so you always read depth precisely. What matters is real-world test results. Most vessels benefit from this approach, and it keeps installation safe and reliable.
Transducer types include through-hull, transom-mount, and trolling-motor mounts, each with trade-offs. Side-imaging and down-imaging modules provide wider views of structure whilst keeping contact with the water to maintain signal clarity. Safety and reliability come from proper hardware and sealant; having a stable mount reduces false noise. Avoid letting the transducer touch the hull during operation to keep a clean signal.
Frequencies and CHIRP ranges: a common freshwater setup runs at 50/200 kHz. Real CHIRP units sweep a wide range (80–200 kHz or 125–250 kHz) to yield larger target separation. In deep water, use channels toward the lower end; in shallow water, push toward the higher end to improve resolution. Some models include preloaded maps and digital processing that simplify interpretation. In saltwater or turbid lakes, you likely want a CHIRP setup that covers broad ranges, and those performances translate into a simpler approach used by many users. What you need is a system that matches depth and water conditions; their capability will be clear once you test the unit in real water. Likely, a CHIRP setup will be your best choice when working wide lakes or deep sea corridors.
Reading echoes: the bottom trace shows depth as a vertical axis and echoes as brightness. Fish targets usually appear as arches or blobs; adjust sensitivity and ping rate to avoid clutter. Watch the screen as you test in known water; look for consistent returns when the boat passes over structure. Understand what a solid bottom line means regarding contact with the seabed; the mean depth is shown on the left in chosen units. Fishermen rely on precise echoes to mark shoals and depth. What matters is the distinction between large targets and noise, aiding identification while looking at water columns.
Upgrading and integration: connect the sonar with a digital display that can integrate with other devices and systems. Many units support NMEA 2000, which lets you share depth, temperature, and GPS data with a chartplotter. If you want to grow your set, choose a larger screen and a transducer that is compatible with side- or down-imaging. Owners have years of support and certified accessories. If you want easier maintenance, adding a second transducer can simplify upgrades and keep the system scalable, which is a practical approach for both fisherman and hobbyists.
Chartplotters and GPS: Waypoints, Routes, and Data Layers
Start by creating a single waypoint at the marina and verify its accuracy by using the route function in the cockpit; save this as a reusable template.
Waypoints can be entered as coordinates or tapped on the chart, with a name, symbol, and optional depth tag. Use a consistent data format such as decimal degrees or degrees/minutes/seconds, and set the datum to WGS84 because it ensures alignment across installed devices and panels.
Routes are chains of waypoints with a chosen speed and a tolerance radius for re-routing. Often, keep routes short at first to validate accuracy. If a turn is missed, the system can recalculate automatically, or you can switch to a manual route to maintain control. You can also export routes as GPX, making it easy to reuse a plan on another chartplotter or in a website editor.
That being said, that's a practical baseline for planning routes on board.
Data layers provide depth from the transducer, wind, currents, radar returns, AIS and weather overlays. Toggle visibility to avoid clutter, and arrange layers using the display panels to emphasise the most critical information in wide sea conditions. This approach helps thinking under pressure.
When connecting devices using a shared wire network, such as NMEA 2000, ensure the backbone is installed with proper terminations. Panels may be mounted in the cockpit or cabin, and communication with a smartphone or tablet is common via Bluetooth or Wi‑Fi gateways. Keep power supplies stable and separate from high-noise circuits to minimise interference in depth readings.
Plan a workflow that starts on a PC or tablet: plan routes, then export a GPX or KML file; import into the chartplotter once installed. Each step delivers practical steps that cover real-world scenarios. Also maintain backups on an SD card and on the website if supported.
Common pitfalls include ignoring unit consistency, neglecting to update software, and failing to verify data layers at shallow depths. Always verify depth readings when approaching shallow water, confirm waypoint names match, and use the memory management features to remove stale routes. The goal is to empower beginners to navigate independently whilst reducing risk.
This article also delivers concise, actionable steps that cover day-to-day navigation tasks, helping you understand how to leverage your chartplotter and GPS for safer, more confident voyages.
VHF Radios: DSC, Weather, and Channel Use
Enable DSC immediately; register a valid MMSI and run a short test call to a contact to confirm the link is clear.
DSC basics: The digital calling system transmits distress, safety, and working calls to specific contacts. Programme a proper MMSI for the boat and build a contact list that includes the skipper, marina, harbour authority, and emergency services. The source of this data resides in the radio memory; keep backups on your website and in maintenance notes. Always verify the battery is topped up before departure, and maintain a clean wiring run to reduce interference with the signal.
Interaction and setup: Treat DSC like a programmable contact book that travels with you on every voyage. An installer can help load groups such as “harbour station,” “tow service,” and “coast guard,” so you can reach the right place without paging a person by chance. Share these groups with crew members so everyone understands who to call and how to respond. Understanding how to initiate a DSC call, acknowledge a reply, and confirm reading on the receiving radio helps minimise delays during critical moments.
Weather reception: VHF weather transmissions provide local forecasts and hazard alerts. Activate WEATHER mode when you are in an area with frequent squalls or shifting fronts. NOAA/NWS broadcasts are commonly available, with updates appearing as text or symbols on connected displays. Raymarine and Maretron systems can push readings of weather data to onboard charts, giving you a quick visual of fronts, winds, and seas. Newly configured units will show forecast windows near the main display; interpret these readings using your charts to plan heading, speed and turn timing. Also, keep the aerial and power supply in good condition so weather data remains steady even in salt water environments.
Channel use and etiquette: Channel 16 is reserved for hails and distress; move to a working channel after establishing contact to discuss details. Local practices vary; check charts and the website of your regional authority to confirm which channels are typically used as working channels in your area. When you call, state your boat name and location clearly, then exchange necessary information and agree on readback. If you interact with other boats or stations, acknowledge their replies and keep transmissions concise to reduce congestion. Charts help you verify which channels are appropriate for your region and activity, including marina operations and rescue coordination.
Wiring, power and installation notes: A newly installed VHF radio should run from a dedicated DC circuit (battery) with a proper fuse and separate earthing. Route coax with shielding to minimise interference; keep labelling consistent so the installer can service the system quickly. Use a shielded microphone and secure mounting to withstand salt water spray. When integrating with displays from Raymarine or Maretron, ensure NMEA 2000 wiring is correct and that power consumption stays within the radio’s rating. Always confirm the operation of the DSC memory, MMSI, and the weather data links after wiring changes to avoid downtime at sea.
Maintenance, updates, and sources: Regularly inspect connectors for corrosion, especially in boats exposed to salt water. Update firmware when available, following manufacturer instructions on their website. Maintain a current contact list, including emergency contacts, and store a backup on your website and in your maintenance log. Sharing this information with your crew improves safety during the journey of operating in challenging conditions, although the aim remains keeping things simple and reliable.
- Verify MMSI registration and load a trusted contact list (captain, harbour master, rescue coordination centre).
- Test DSC to a contact; confirm you receive a readback and that audio quality sounds clear at both ends.
- Enable WEATHER mode if local data is available; review forecast readings and translate them to actions using charts.
- Document recommended working channels per region; practice moving from Channel 16 to a working channel and back as needed.
- Inspect wiring and battery connections; ensure a fused, dedicated DC supply with proper earthing.
- Coordinate with installer or manufacturer resources on Maretron or Raymarine integration to display DSC status and weather data.
- Keep a backup of important data (MMSI, contacts and preferences) on both the website and the radio memory.
Additional tips: Regularly review contact accessibility with crew members; use battery status readouts to avoid mid-voyage interruptions; consult charts to align channel use with local regulations; and treat the source of safety information as a living reference that travels with every voyage. Keeping interaction concise, and ensuring the operation remains stable, will help you handle any situation with confidence.
Digital Switching Systems: Wiring, Power Management, and Troubleshooting
Always mount the main switching block near the battery bank at a height that minimises splash risk, and protect it with a certified, properly rated fuse directly at the source. Use heavy-gauge, marine-grade cable (2/0 AWG or similar for main runs) and keep the run as short as practical to reduce voltage drop. Pair the setup with seastar certified components when possible to ensure compatibility with existing products and a reliable signal path. Label all connections, use heat-shrink and sealed terminals, and provide a dedicated ground bus to prevent stray currents from affecting sensitive devices. This approach shortens switch response time, enhances reliability in adverse water conditions, and reduces corrosion exposure, improving the overall system being equipped for high-demand moments. Watch for over currents and size gauges accordingly, so the setup remains robust under load.
Power management emphasises multiple insulated branches from a distribution panel, each protected by a fuse or breaker sized to the connected load. Use a separate reserve battery or a dedicated bank for critical devices to improve resilience during engine cranking or alternator fluctuations. Keep supply lengths to a minimum, use shielded routes for signal lines, and monitor bulkhead penetration to minimise moisture ingress. A high-resolution display and format-compliant gauges help with instantaneous monitoring; on-screen assistance prompts guide the crew during checks, and the format is designed to be intuitive for making quick decisions about safety and needs. Lets crew perform checks quickly with the intuitive panel, and lets favourite devices receive extra protection. If you plan an expansion, choose products with wide compatibility to cut money spent on rewiring and to support future upgrades.
Wiring and signal integrity rely on separation of supply and data paths. Run DC charging lines away from data loops, and use shielded twisted pair for NMEA 2000 or other signal networks. Maintain continuous earth paths; star earthing is recommended to minimise loop currents. Keep data and power runs apart, avoid parallel routing that can introduce noise, and ensure high-resolution indicators remain readable in bright conditions. Watch voltage and temperature at key nodes, and label potential trouble spots so crew can act quickly to protect the system in wide conditions.
What's the most common fault affecting performance? Start with power checks: verify fuses or breakers, confirm battery voltage at the distribution panel, and check for loose or corroded connections. Inspect for water ingress at bulkheads and connectors, reseal if needed. Measure voltage drop under load at critical loads; if it exceeds the target limit, shorten runs or upgrade gauge. Inspect data cables for damage or shielding issues, and replace as needed. Run a brief load test after corrections and observe all devices on the high-resolution meters for stability. This approach provides enhanced confidence and assistance when the equipment is equipped.
| Компонент | Wire Gauge (AWG) | Max Current (A) | Fuse/Breaker (A) | Примітки |
|---|---|---|---|---|
| Main feed from battery to distribution panel | 2/0 | 180–250 | 200–250 | Short run; marine-grade; seal entries |
| Heavy feeders (pumps, autopilot, charts) | 1/0 | 150–200 | 200 | Dedicated branch; check heat |
| Small devices (lighting, sensors) | 14–16 | 5–15 | 10–15 | Keep runs under 3 m |
| Signal/data lines (NMEA, etc.) | Shielded pair / 18–22 for data | – | – | Keep separate from power; format notes |
| Symptom | Action | Estimated Time |
|---|---|---|
| Displays dim or reset | Check fuses, inspect power path, verify voltage at loads | 5–10 min |
| Voltage dip under load | Measure between battery and panel; inspect wiring gauge and length; reduce length or upgrade gauge | 10–20 min |
| Noise on signal lines | Route data separately, inspect shielding, verify data earth. | 15–25 хв |
| Moisture ingress at bulkheads | Reseat seals, re-terminate cables, test for continuity | 20–30 хв |
Audio Entertainment Systems: Marine Audio Design and Source Options
Recommendation: select a compact, IP-rated head unit, a marine-grade amplifier, and two weatherproof panels mounted at the helm and cockpit to deliver clear, balanced sound amid salt spray. A rugged aegis-protected system with reliable switches minimises service interruptions, whilst keeping a clean electronic signal chain. This setup typically remains responsive under deck noises and voyage shifts, supporting an informed listening environment.
- Інтуїтивно зрозумілі елементи керування домінують у досвіді: великі ручки або яскравий цифровий екран із простими меню дозволяють приймати обґрунтовані рішення; ця простіша організація зменшує кількість переходів у меню, і вони залишаються читабельними на сонці, як за штурвалом, так і на палубі.
- Розміщення динаміків: розташуйте панелі, щоб покрити основні зони прослуховування, відрегулюйте кути для глибини та ширини, та уникайте "мертвих" зон; трохи експериментів з висотою винагороджує покриттям та чіткістю.
- Підхід до проводки: залежить від судна; один екранований провід до центрального вузла зменшує безлад; під час прокладання кабелів через корпус, використовуйте з'єднувачі та роз'єми, стійкі до солі, щоб запобігти корозії.
- Джерела, які охоплюють більшість потреб: спеціалізований AM/FM або цифровий тюнер, USB з локальними файлами, потокове аудіо через Bluetooth, доступ Wi-Fi, SD-картки та AUX-входи; багато пристроїв також підтримують мережеві програми для управління заздалегідь налаштованими параметрами.
- Цілісність сигналу: підтримуйте стабільність високочастотних або цифрових потоків; короткі, добре екрановані лінії запобігають перешкодам; додавайте феритові намистини на довгих лініях живлення та даних для зменшення шуму імпульсів.
- Аудіо діапазон та тон: більшість головних блоків пропонують 3- або 4-смуговий еквалайзер, а також підтримку сабвуфера; якщо є місце, окремий підсилювач та сабвуфер зберігають чіткість середніх частот на всіх суднах.
- Керування та перемикачі: вирішіть, чи покладатися на фізичні перемикачі чи на сенсорну панель; чітко підписуйте та групуйте за зонами, щоб уникнути плутанини.
- Живлення та заземлення: живлення від запобіжника від акумулятора з окремим заземлювальним шиною для аудіо схеми; це покращує точність цифрового сигналу та зменшує гул.
- Стійкість до бризок солі: вибирайте обладнання з захистом від корозії; промивайте після впливу; зберігайте або сушіть електроніку під час тривалих зупинок, щоб запобігти корозії в роз’ємах.
- Де куди підключати джерела: підтримуйте акуратність проводів, використовуйте екранований провід, де це можливо, і прокладайте маршрути подалі від ліній з великим струмом; це зменшує ризик перехресних перешкод і забезпечує чистий сигнал.
Системи стабілізації: Як вони працюють, налаштування та обслуговування
ось конкретне початкове правило: увімкніть систему, запустіть повне калібрування та перевірте датчики через борт та екран керування на відповідну реакцію; задокументуйте результати в бортовому журналі.
поясніть основну концепцію: стабілізаційні блоки використовують акселерометри та гіроскопи для відчуття крену та тангажу. Процесор обчислює протилежний момент і керує плавниками, гідрореактивними двигунами або векторами тяги, щоб компенсувати рух. В результаті менше нахилів навколо центру судна, більш плавна їзда та менше бризок. Залежно від моделі, система працюватиме з гідравлічними актуаторами або електричними двигунами; панелі відображають стан і просту схему придушення нахилу. Деякі конструкції дозволяють керуванню працювати незалежно від навігаційного обладнання, що спрощує налаштування. Кількість датчиків варіюється залежно від моделі, а точне налаштування допомагає узгодити форму корпусу та розподіл ваги.
setup steps: відкалібрувати у спокійній воді; закріпити панелі поблизу центральної лінії човна; прокласти кабелі подалі від керма та рухомих частин; підключити до мережі nmea 2000; використовувати втулки наскрізь, коли це необхідно; обладнати вимикач керування (Авто/Ручний) на панелі; перевірити сумісність з існуючим обладнанням та електричною системою судна. Моряк може керувати через перемикачі для налаштування поведінки в міру зміни умов.
maintenance tasks: keep sensors clean; inspect cables for wear; check thru-hull seals; replace worn components; update firmware; past fault logs help tune current settings; run a quick test in sheltered water after each voyage; keep a chart of calibrations with dates.
операційні поради: під час роботи на сенсорному екрані відображаються показники в реальному часі; ведіть журнал змін ваги, регулювань баласту та триму; обмінюйтеся даними з іншими дисплеями через мережу nmea; у неспокійних водах стежте за реакцією; якщо судно оснащено модулями sporttuun, переконайтеся у сумісності; простіші конфігурації часто покладаються на одну панель, яка використовується для керування.