

 10 Summer Water Activities Beyond the Beach – Stay Cool">

first recommendation: moonlight sailboat rides offer relief from midday glare and crowds along quiet shores.
traditional paddling along a calm inlet pairs with італійська gelato after a session; local guides offer curated routes, tipsі offers safety reminders.
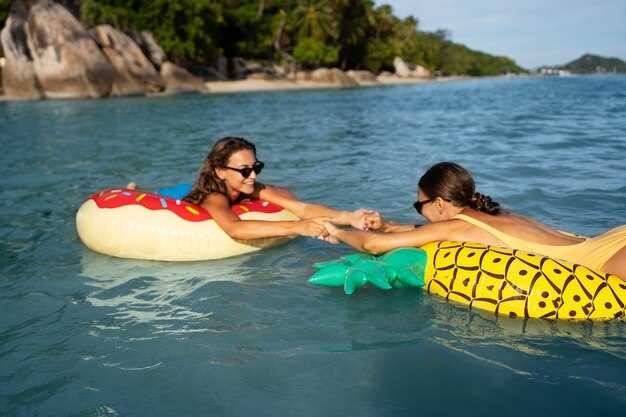
midday daylight, switch to paddle excursions along sheltered bays; before entering a wave, listen to wind and dockside music, whilst keeping eyes on buoys. For advanced paddlers, start longer routes with occasional spontaneously detours.
Coronado coastlines provide sheltered coves named for sailors, ideal for paddling and quick swims; before longer arcs, check gear, buoyancy, and wind with local guides.
Nearby mountain lakes let you pair paddling with river-view rambles, while music drifts from hillside lodges; plan a tips-driven wrap-up to refine technique for future outings.
Comprehensive Plan for Exploring Water Activities Beyond the Beach and Cliff Jumping At Sunset Cliffs
Recommendations: hire a beginner-friendly paddleboard or kayak near Sunset Cliffs at golden hour and join a guided session if available. Check opening times at local rental shops and arrive early to secure a lightweight buoyancy aid and a dry bag.
Safety first: start with a slow warm-up on a calm shoreline, test gear in a shallow pocket, and wear a life jacket. Partner with a local guide; some shops assign a guide named Juan for sunset routes, or join a small group that offers single sessions.
The itinerary blends parks, museum stops, and California's coastal attractions, with a southbound arc from Sunset Cliffs toward natural coves, passing by homes along bluff edges. Begin with a full loop along easy paths, then extend to longer segments as confidence grows. Include opportunities to soak in sea breezes, take rustling breaks, and listen to local music from street vendors or park stages.
Rental hours are typically 9:00–17:00; some shops offer sunset sessions up to 19:00 in August. Crowds might shift access points during peak days. Always book in advance, especially at weekends. Permits aren't required for casual launches from seawall access points, but respect posted restrictions at nature reserves and naval sites.
Equipment list: Buoyancy aid, whistle, leash, dry bag, sunscreen, and a lightweight towel. For yourself, assess limits before each push. Keep to shallow zones during first sessions; gradually test longer distances if conditions allow. If crowds tighten, switch to quiet mornings or weekdays. For cooling between sessions, a pool at a nearby hotel can help.
Alternatives include guided paddles from Juan’s shop or a museum visit in the San Diego area to balance the day. If crowds increase in August, opt for early sessions when currents are calmer and traffic lighter along the sea wall. Always carry a fully charged phone in a sealed case and have emergency numbers ready, including the local lifeguard service and marina crew.
Keep a flexible plan that fits beginner pace and August heat. Maintain a short list of attractions along parks, museum stops, and natural coves to visit between sessions, including musical moments and scenic viewpoints along sea wall.
Choose Safe Cliff Jumping Spots at Sunset Cliffs
Begin at a marked overlook with stable footing – this minimises slips. Choose spots located along coastal bluffs with clear exit routes and sightlines. Pack light gear: non-slip shoes, a compact first aid kit, sun cream, and a small torch for night checks. Take photos to compare footing, rock colour, exposure, and vista across options; you'll spot which ledge feels calmer. Keep a simple page guide in your pack to reference distances and exit paths.
During approach, checking ground stability, algae, and plant growth helps avoid slips. If you spot a native flower amongst plants, observe from a distance and avoid trampling. Do not pass beyond posted boundaries; favour spots with clear safety margins. Seals may rest on slick rocks; give space and avoid crowding.
Beginner-friendly jumps exist at calm coves with gradual entry. Whether you jump or observe, stay aware of surroundings. This option benefits beginner climbers. Always jump with a partner; create a simple signal for exit. Know your limits; if spray or current feels strong, skip that ledge. While choosing, verify possible options for less-angled drops. Recorded moves can be kept on a page or photo log.
Night sessions shine when lamps highlight rock texture; night visibility varies. Check wind, tide, and swell; conditions shift after dark. Capture the scene with photos; this helps plan future trips.
Hotels nearby offer simple lodgings after coastal patrols; booking ahead is recommended. I recommend checking a charter for coastal access. From cove outlooks to cliff ledges, parks and coastal pathways offer safer routes. Charter boats can arrange safe access to bays with seals and calmer seas. Use a quick page-based checklist before heading out to avoid missteps. Pass on crowded zones; respect wildlife.
Check Water Depth and Hidden Dangers Before Diving In
Only jump when depth above 2 metres and area shows no submerged hazards.
- Depth verification: mark a pole or stick, raise it to measure bottom; record depth in feet; if depth is 5 feet or more, proceed; otherwise pause until conditions improve.
- Hazards scan: inspect entry zone for rocks, ledges, submerged logs, or fishing lines; choose a spot with clean footing and no hanging cords or weeds that could snag a foot.
- Current and flow: river sections can tug unexpectedly; there's potentially risk during gusts or when boats come near; have a mate nearby to assist if needed, and keep full attention on footing.
- Visibility check: in murky liquid, bottom may hide holes; if you cannot see bottom clearly within arm’s reach, postpone; note that warm, sunny days show more detail, while dusk reduces visibility.
- Location context: plan visit near cedar path or botanic garden area; this year August hours shift; strolling families populate nearby fields; Pacific breeze keeps air cool; check posted signs for admission and free parking near aquatica.
- People and supervision: keep groups small; school groups should split into pairs; never jump alone; a nearby lifeguard or staff member can advise.
- Foot placement and landing: land feet together, toes forward, knees soft; avoid white rock ledges or white-painted steps that look slick; stay away from rides or crowded zones.
- Rules and pace: start with shallow jumps; increasing depth gradually is better; never risk a huge leap without confirming depth.
- Post-activity checks and tips: reduce risk by rinsing sand from skin, inspecting footwear, and noting any injuries; if anything feels off, pause and revisit daylight hours; tips include carrying a full bottle for hydration and spare shoes during August visits.
Pack a Practical Gear Kit: Footwear, Wetsuit, and First Aid
Opt for closed-toe, quick-drying footwear sized for each participant; team with a compact 2-3 mm wetsuit for chillier spells; carry a compact, well-stocked first-aid kit.
These shoes require non-slip soles, rapid-dry fabric, and reinforced toe protection for coves or sea wall approaches.
Wetsuit notes: opt for 2-3 mm thickness for chilly mornings or breezy coastlines near coves, waterfalls or harbours.
First aid kit contents: eight core items, including plasters, antiseptic wipes, sterile gauze, alcohol wipes, blister plasters, medical tape, scissors, emergency blanket.
Storage and transport plan: store gear in a single dry bag, label each part with name, add a wee spare bag, checking before excursion.
Gabby and friends draw on these tips, locations like a cove, sea wall, and waterfall, to shape safety culture in any outing.
Photos from past excursions provide the right visuals for outdoor transport and little checks, helping group bonding and friendship.
| Footwear | Closed-toe, quick-dry, non-slip soles; size for each participant; carry spare socks |
| Wetsuit | 2-3 mm, flexible seams, cuffs; choose based on air temps and wind near coves |
| First Aid Kit | Eight core items: adhesive bandages, antiseptic wipes, sterile gauze pads, alcohol wipes, blister plasters, medical tape, scissors, emergency blanket |
| Storage & Transport | Dry bag, label with name, little pockets for small parts; spare bag available at start |
Progression Guide: Start Low, Then Increase Jump Height
Begin with a stable 6-inch height on a solid platform (box or mat). Do 3 sets of 5 reps, twice weekly. Prioritise soft landings, knee alignment, and upright torso. If form stays clean for two sessions, raise height by 2 inches. Continue this pattern until you reach a practical ceiling around 18–28 inches; avoid exceeding 30 inches without supervision.
- Baseline setup – 6 inches on a sturdy surface. Feet shoulder-width apart, toes slightly outward. Land with a quiet knee bend, then rise back to starting position. Use full movement through hips, knees and ankles; keep gaze forward.
- Incremental loading – every 7–14 days add 2 inches if reps stay controlled. Maintain 3 sets of 5 reps; introduce a jump variation (vertical, squat, or box-to-box) in one set per session to improve proprioception and stability.
- Technique cues – prevent hips from sagging, keep chest tall, land softly, absorb via ankles first, then knees, then hips. Perform 2–3 soft landings per rep before rising again. If knee pain arises, reduce the height.
- Program integration – pair with mobility work, plus 20–30 minutes of light biking or jogging to aid recovery. Schedule sessions on non-consecutive days; this enhances consistency, builds miles of practice, reduces risk.
Training options across mountain regions or popular waterfront spaces vary. Some centres offer guided plans through service providers, with entry features and lots of supportive cues. Available programmes span evenings, weekends and spring sessions; many locales located near embarcadero or oceanside provide safe, supervised zones for progression, including pool decks for low-risk drills and cliffside paths for confidence building. This makes progression possible through varied drills outside, in vista spots, or along city biking routes.
This plan can be part of a broader routine for overall fitness. Across neighbourhoods, access is available near embarcadero or oceanside. Evening sessions outdoors often combine the beauty of vista views with practical drills, creating a popular rhythm that fits busy schedules. Spring weather enhances comfort, while guided coaching helps refine form and prevent injuries.
Settings to consider: a park near mountain views, a plaza near embarcadero, or pool deck at a community centre. Access options vary; look for entry-level clinics, guided coaching, and flexible sessions that fit your schedule. If you can, join a popular group in neighbourhoods with a passion for outdoor fitness; feedback from a coach helps you stay on track and reduce injury risk. Spring evenings are especially pleasant for outside work, offering beauty and focus to each session.
Establish a Safety Routine: Buddy System, Clear Signals, and Emergency Steps
Before any kayaking trip, pair up with a mate, share contact details, and set a return window of hours you both commit to; establish mid-point check-in and agreed signals for switching roles if currents change. This routine should work nearly year long. Both partners want clear directions; ensure their radios stay on.
Agree on clear signals: a single whistle blast, a raised paddle, or a bright towel waved from shore; if signals fail, switch to mobile call or VHF radio where available. During trips near waterfall or rapid, keep partners closer and increase check-ins to ensure rapid response. If harbour fronts include a naval facility, respect restricted zones and avoid entering marked channels. Always keep at least one alternate plan. Adjust plan for different currents, visibility, or wind.
Emergency steps: carry a compact waterproof pouch with local emergency numbers, a map, and a basic first aid kit; know where to arrive for help, keep a phone in a waterproof case, and practise rescue moves such as assisted re-entry, rolling to shore, and signalling with a mirror or whistle if needed. A good plan reduces risk. Partners check their comfort level during drills. If something goes wrong, reset plan.
Pack smart: sandwich for energy, towels for drying, sun cream, hydration, and a lightweight layer for evening chill; after return, plan a wrap at Belmont Loop, nearly year-round access in California's nature, or head to nearby restaurants for debrief, carrying a cocktail for celebration, and note architecture along riverbank, trees overhead, and cultural landmarks. If conditions allow, a short ride along shore can boost team cohesion.