

 Wakeboarding for Beginners – The Beginner’s Guide to Getting Up">

Börja med att ställa in linjen till 18–21 meter och att välja en bräde runt 135–140 cm for most riders. Ensure you are equipped med tÄta bindningar och en väst som tillåter fria armrörelser. En smidig start kommer från en stadig dragning och en kontrollerad uppstigning när brädkanten glider in i vattnet.
Värm upp med 5–7 minuter av dynamiska stretchövningar, med fokus på bröst, axlar, höfter och rygg. Utför milda armbåge bjningar och fotledsrotationer, och avsluta sedan med 20 knäsqu att l{å}tta upp kn{å}na. Dessa stretch{å}r hj{å}lper ryttare att vara avslappnade och redo att reagera n{ä}r linan dras {å}t.
För att resa dig, håll dig centrerad: böj knäna, håll bröstet uppe och titta framåt. När du känner båten dra, pressa genom benen och lyft dig upp på den. heelside edge, behålla armbåge mjuka och dina armar avslappnade. Sikta på att gå från en knästående position till ett fullständigt stående på ungefär 1–2 sekunder, så att brädan kan skära en jämn båge mot vågen.
Linje och hastighet spelar roll: en 18–21 meter rope gives enough slack to react; boat speed around 15–22 mph (24–35 km/h) fungerar för de flesta nybörjare, men du justerar baserat på vikt och vattenförhållanden. Ridare som är lättare kanske börjar på den lägre änden, medan tyngre ridare behöver lite mer fart. Denna inställning requires en stadig utförande och en lugn start, vilket gör att du tänker mindre och svarar mer.
Vanliga hinder att hålla utkik efter inkluderar chop, spray och vågor från närliggande båtar. För åkare som är nya inom sporten utmanar funktionerna balansen, särskilt om du försöker dra dig upp för tidigt. Var uppmärksam på din bröstposition, håll vikten över brädan och böj knäna för att absorbera stöten. Håll din armbåge mjuk och låt dina armar vara avslappnade när du återhämtar dig från en gungning.
Progression plan: träna 2–3 sessioner i veckan på lugnt vatten, och flytta sedan gradvis till små vågor när din balans förbättras. Åk med en kompis för att upptäcka faror från bryggan och för att uppmuntra smidiga starter. Bär alltid en väst och kontrollera dina bindningar efter varje set. Ju mer konsekvent din träning är, desto snabbare växer din kontroll.
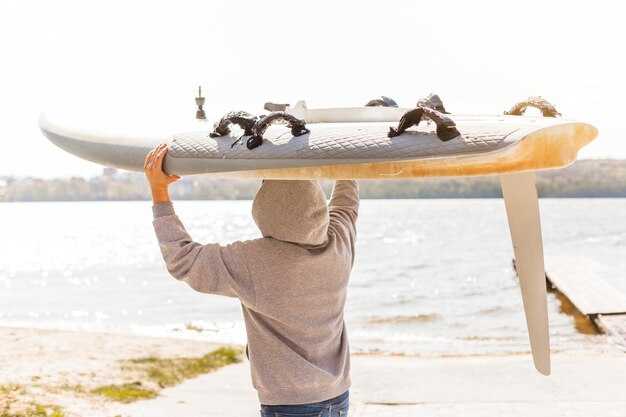
Gear note: pick a vest with a vinge-stil tillbaka för flytkraft, och välj ett handtag med ett bekvämt grepp för att undvika att trötta ut dina händer under långa sessioner.
Getting Up: Step-by-Step for Beginners
För att resa dig snabbt, dra repet mot höfterna och ställ dig upp i en jämn rörelse, och håll din vikt centrerad över mitten av brädan. Denna instruktion stöder inlärningen när du börjar på vattnet och hjälper dig att hålla dig konsekvent genom försöken.
Centrum är källan till balans. Behandla det som fokuspunkt när du avslutar pop och stående sekvens; rotera din torso för att anpassa dig till den riktning du vill ta dig.
| Step | Action | Tips |
|---|---|---|
| 1 | Sätt stållning och grepp | Placera fötterna nära mitten, knäna mjuka, vikten centrerad över mitten; håll fena anpassade till brädan; detta steg spelar en närmare roll i stabiliteten. |
| 2 | Pop to feet | När repet dras åt, dra mot höfterna och rotera höfterna för att vända framåt; håll axlarna raka och blicken framåt; rörelsen bör kännas som en kontrollerad lyftning. |
| 3 | Lås position | Stå stadigt med böjda ben, tyngden centrerad; behåll samma ställning när du reser dig mot vågen och gör dig redo för brädans drag. |
| 4 | Håll balansen på vaken | Håll höfterna under axlarna, titta framåt, tryck jämnt genom båda fena och håll knäna lätt böjda för att ligga närmare vattenytan. |
| 5 | Återfå eller förläng | Om du faller, nollställ snabbt, ta ett andetag och ställ dig upp igen; använd det andra försöket för att förfina rotation och balans för en mjukare tur. |
Utrustningsgrunder: brädstorlek, bindningar och repetlängd
Börja med en wakeboard på 136-139 cm och delgoffe-bindningar, inställda på en neutral hållning med axelbredd. Denna konfiguration håller farten hanterbar, stödjer smidig rörelse och minskar risken för klumpiga tapp när du reser dig upp.
Brädstorlek baserat på vikt: under 60 kg: 131-134 cm; 60-75 kg: 134-136 cm; 75-90 kg: 136-139 cm; 90+ kg: 139-142 cm.
Bindings: välj en typ med enkel instigning och bra passform. Delgoffe designade bindningar med vadderade liners och en stabil bas, och placerade dem ungefär axelbrett isär. Justera framåtlutningen för att hålla knäna böjda, och se till att båda fötterna sitter säkert utan överdrivet tryck.
Rope length: start at 60-65 ft (18-20 m). This keeps the pull close to your body and helps you stay in the plane of the wake while building momentum. If you feel sideways pressure, adjust your stance slightly and keep the board flat to reduce sideways pull. As you gain confidence, move to 65-75 ft (20-23 m) for more room to maneuver.
Teknik och positioner: behåll en centrerad kropp, titta framåt, med axeln inriktad mot din riktning. Att hålla kanterna engagerade och utföra smidiga rörelser hjälper till att undvika att störa brädan. Håll dig nära båten, fördela trycket jämnt mellan båda fötterna och rör dig genom olika positioner med kontroll.
Hopp: börja med små lyftningar eftersom du kan åka mjukt. Varje hopp bör fungera med din nuvarande momentum; emellertid, skynda inte, och håll rörelsen lugn tills du känner att tajmingen är rätt.
Avslutande notering: denna utrustning är utformad för att stödja nybæginnare och hjälpa till att göra framsteg på ett säkert sätt. Denna setup är utformad för att ge dig en stabil grund för att gå vidare bortom grunderna och njuta av sporten.
Ställning och hållning: fotplacering, böjning i knäna och viktfördelning
Placera dina fötter över bindningen, ungefär axelbrett isär, med din vikt centrerad under surfbrädan och dina knän lätt böjda. Låt dina ben vara sträckta tillräckligt för att hålla dina höfter över dina anklar, med vikten vilande genom bollarna på dina fötter så att du kan känna kanterna på brädan när du lutar.
Keep your shoulders aligned with your hips and your eyes on the line ahead. For heelside starts, press down through the heels and ride the binding edge; for toeside, roll onto the balls of your feet and ride the inner edge. Maintain a closed stance to reduce wobble as you start performing while you gain confidence.
Stay relaxed in the upper body; let hands hang naturally in front of you to help balance. Keep your weight under the midfoot and slightly toward the tail as you start, then center again once planing. Maintain soft knees and extended ankles, with boots snug in the binding and the board rails ready for edge changes. With each session, you gained balance.
Practice with a friend watching and the operator signaling for starts; aim for persistent, small gains in control. Different body shapes require slight adjustments to stance width; if you have delgoffe boots, ensure they sit snugly in the binding for accessible progression. Begin with a narrow stance and take small taking steps wider as you gain confidence. Because easy starts reduce fatigue and improve balance, stay relaxed, avoid tensing, keep hands forward, and focus on smooth, deliberate movements without forcing your body.
Getting up technique: the step-by-step process to stand on the board
Step 1 Keep movement controlled and your weight centered over the board. Based on a simple, smooth pop, set the board on the water and grip the handle with both hands. You’ve been told this setup is the route to a clean rise, with your waist over the point where rotation begins, and you should think of the water as the floor you push off from.
Step 2 As you rise, avoid yanking the rope; instead pull with your torso and keep your arms relaxed to use less effort, so the line stays steady. You need to stay relaxed to maintain control. The rope should be pulled taut, and the board’s edges grip the water for stability. This step plays a major role in controlling the motion rather than relying on strength alone.
Step 3 Align your waist over the board’s center and begin with the front foot. As the board starts to rise, the front foot lands first, then the back foot follows. Keep the movement smooth and deliberate to avoid quick shifts that ruin balance. However, keep the same calm tempo you’ve practiced on land to keep control.
Step 4 Use a controlled rise by bending the knees, keeping the shoulders square, and holding the handle in a straight line with your chest. Press the edges of the board with your feet to grip the water; this stabilizes your body as you come up. This not only feels acrobatic in early attempts but becomes simple with repetition, and it helps you avoid over-rotation.
Step 5 When you’re upright, shift weight first to the back foot and then to the front foot to lock the stance. This flow reduces the chance of slipping and keeps balance under the boat’s wake. Maintain a tall chest while keeping your hips centered; small, consistent adjustments beat big, rushed moves. If you’ve been training, you’ll notice the stance feels more stable with practice.
Step 6 Stay aware of those tiny corrections that make the difference. If you sense a dip in the line, re-focus on a smooth movement and stabilize the torso; the same approach works for riders at different skill levels. This method has evolved from a stiff pop to a smoother, more reliable rising technique and helps you shred the basics without shredding the water. Together they reduce the disadvantages of rushing and set you up for controlled rides.
Step 7 If you fall back or the board slips, reset by lowering into a ready stance and starting again. Those who train with repetition while keeping a centered, front-focused approach avoid most mistakes. This progression helps you blast through early attempts toward steadier rides and even small jumps on kickers, based on consistent movement, and you’ll notice how each run improves from the last.
Rope tension and timing: how to pop up smoothly and accelerate

Start with tensing your legs and core to generate a clean pop. youll feel the rope’s tension build as your hips extend and the wakeboards lift toward the surface. Maintain a touch of slack in the line during the setup to avoid a sharp jerk, then drive your chest forward and prepare for the landing with hips extended and knees soft.
Timing depends on rope length and boat speed; when the rope tightens and you feel resistance, pop quickly and rise with full-body extension. Extend through the ankles, knees, hips, and shoulders; your arms pull the handle toward your hips to keep the line close. Aim for a rise of about 0.3 to 0.8 metres depending on your weight and speed.
Keep eyes forward and shoulders square; avoid twisting. The pop should feel like a clean lift with the same balance on the board each time. During landing, absorb with soft knees and allow the wakeboards to slide a little to maintain momentum. If the line slackens or the board shifts, adjust your stance around the wake to keep the board close to your center and stay balanced.
Practice with a friend, gradually increasing distance to build confidence. Start with around 2 metres of rope-out to rehearse the pop, then extend to 3–4 metres as you improve. Use a wing-like cue from your shoulders to help keep balance, and focus on strength from the legs and core. Keep the pulls smooth and controlled so you stay centered; they keep you safely on the surface.
Safety checks and common mistakes: tips to avoid falls and injuries
Always perform a safety check before you try to get up, then follow these steps for a controlled, ready rise.
- Equipment and fit: for beginners, wear a life jacket that fits snugly; confirm the bindings are secure on the board; wear shoes with good grip; inspect the board for cracks or delamination.
- Tow rope and handle: inspect for frays, test the quick-release, and keep the handle above waist level to avoid catching the ankle or shin.
- Boat and crew: ensure the driver maintains a smooth, steady speed in the best range for your weight and skill; have a spotter and a rescue plan ready; keep a safe distance from swimmers.
- Water and environment: choose open water with clear visibility; avoid areas with heavy chop; winter conditions demand warmer exposure and faster reaction, so limit to calm days.
- Environmental signals: observe wind shifts, currents, and signs that the water is too rough; if unsure, postpone the session.
- Footwear and stance: wear shoes with grip; position front foot in the binding and prepare the back foot; stay balanced with a ready, knees-bent stance and your hips squared to the board.
- Safety gear extras: have a whistle, optionally a helmet if conditions require, and a rescue throw rope within reach.
- Progression source: источник of best practice is to follow your local coaching program and rescue protocols. This note helps you stay aligned with proven guidelines.
Tip: imagine your arms as a paraglider–open, relaxed, and naturally extended. This helps you keep movement controlled and your head up, which makes a good rise easier and reduces the chance of a fall.
Common mistakes and how to avoid
- Pulling the rope too hard or standing up too early leads to a fall; move with slow, deliberate motion and stay in a ready position until the board starts planing.
- Staying too far forward or sideways; keep your weight centered and adjust from toes to heels as you ride through the point where the board lifts off the water.
- Holding the handle too low or below chest level; keep the rope above your chest and the handle above your shoulders to maintain control.
- Looking down or losing sight of the boat path; keep a forward gaze toward the wake and your intended direction to stay oriented.
- Jumping too soon; wait until you can stay up for several seconds, then introduce small jumps as progression allows.
- Skipping steps in progression; work through a gradual sequence from calm water to light wakes to build confidence and avoid injuries.
- Ignoring the rescue plan or signaling when needed; practice fall recovery and keep signals clear for rescue if you drift behind the boat.
Progression plan to build confidence and safety: work in clear, controlled stages, then push your boundaries only after you master each step.
- Start on calm water with minimal chop, short line length, and low speed; practice getting up with a slow, controlled rise and a good breath pattern.
- Shift weight to edge the board gradually; practice both front and back foot control while maintaining a centered stance.
- Introduce sideways and backwards movement after you can stay up for 3–5 seconds; keep movement natural and gradual, then extend duration.
- Once you can ride straight, add small edge changes and light jumps only when you feel balanced and relaxed.
- Finish with a quick gear check and a quick reflection on progress to stay motivated and safe.
Rescue and fall handling
If you fall, stay calm and release tension; signal the boat and float on your back with arms away from the line while the life jacket keeps you buoyant. If entangled, loosen the line and use a controlled swim to reach the board; always prioritize rescue readiness above all else.
Good preparation and strict adherence to these checks and steps minimize risk and maximize progress. Then you’ll find wakeboarding becomes a safer, more enjoyable life sport, with each session offering clearer milestones for beginners to reach. источник