

 Understanding Roller Furling Systems – A Comprehensive Guide for Sailors">

Börja med ett passande rullsystem från en pålitlig tillverkare och planera installationen med hänsyn till båtens förstag och segelplan. En ren passform minskar friktionen och gör revningen enklare i vindbyar. Fundera på om du behöver motoriserad hjälp, särskilt på större båtar, eller om en enkel, icke-motoriserad installation räcker. Detta ökar understanding av hur installationen påverkar hanterings- och underhållsbehov.
Att förstå vad du köper beror på types av rullsystem: ett system med mjuk fastsättning som fungerar med strumpa jämfört med en rulle med förstag. Varje variant har olika installation steg, spänningsområden och kompatibilitet med dina fall. article du bör läsa för att få reda på lastklasser, rotationshastighet och garantin; rådfråga источник tillverkardata för att jämföra mätvärden före köp.
Planera installationen för att minimera däckarbete; använd lower fästpunkter för att minska lovgirighet vid revning och säkerställ att beslag monteras på en ren, torr yta. Vissa steg kan vara utmanande om du byter förstagets beslag eller justerar trumman. För en basenhet, rikta in förstaget, säkra trumman och trä linan genom lämpliga block. På en båt under 35 fot, räkna med ungefär 4–6 timmars praktiskt arbete; större båtar kan kräva 6–10 timmar, plus tid för eventuellt byte av förstag.
Kostnader kan vara expensive i förskott, men du vinner väsentlig vinster i revningshastighet och segellivslängd. Om du förväntar dig tung användning, överväg en motorized rullösning för smidigare hantering på däck med board hårdvara. Efter installationen, serva enheten årligen: applicera smörjmedel på rörliga delar, inspektera trumman och kragen och byt ut slitna tätningar genom segelmakare eller återförsäljare vid behov.
Vid val, hänvisa till vad som article säger om segelytans kompatibilitet och bekräfta installationsmåtten med din båts planering av däcksutrustning. Kontrollera источник tillverkarens datablad och sök vägledning från en segelmakare för att säkerställa att seglets förlik passar in i rullhylsan. Om du är osäker på stegen, anlita en tekniker. Processen är okomplicerad men feljustering kan skada förstaget, trumman eller rotationsmekanismen, särskilt med en motoriserad enhet.
Grundläggande om rullfocksystem för seglare
Rekommendation: Välj ett rullsystem av profurl-typ med en robust profil och en pålitlig trumma, dimensionerad för att hantera ditt största försegel. Denna installation låter dig rulla in och ut från sittbrunnen, minskar vindfånget när den är inrullad och förbättrar hanteringen vid ensamsegling. Om du ofta seglar ensam, överväg ett motoriserat hjälpmedel; annars är manuell kontroll vanligtvis tillräcklig. Verifiera tygets kompatibilitet och förstärkning vid förliket och se till att hårdvaran är korrosionsbeständig. Använd manualen och источник för installationsspecifikationer och åtdragningsmoment. Ditt val bör inkludera tydliga serviceinstruktioner och enkel tillgång till reservdelar från din leverantör.
Oavsett om du seglar i lätta havsbrisar eller i passager med hårt väder, förändrar rätt rullsystem hur du hanterar försegel på segelbåtar. Börja med att kontrollera att ditt största försegel kan rullas in utan modifieringar och att förstagets fäste passar din rigg. Tidig planering sparar omarbete senare och håller ditt cockpit-arbetsflöde smidigt.
- Typer: Rullfockar med en folieprofil ger ett rent luftflöde och enkel revning; system med folieprofil ger styv vägledning för seglets kant. Förstå hur varje typ påverkar rulleffektiviteten och segelformen när seglet är utrullat.
- Tyg: De flesta försegel är gjorda för rullfock, men laminerade tyger slits annorlunda än Dacron. Kontrollera förstärkningen av förliket och överväg en skyddsremsa för att minska slitaget på seglets kant.
- Storlek och belastning: Anpassa systemet efter din segelyta och båtlängd. En för liten enhet kämpar i vindbyar; en för stor lägger till vikt och friktion. Målet är en balans som håller hanteringen lätt i lätta vindar och pålitlig i starkare vind.
- Leda och dirigera: Dra rullrevslinor, fall och kontrollinor genom effektiva ledningar till sittbrunnen. Ren dragning minskar ansträngningen vid rodret och minimerar risken för att fastna under manövrer.
- Motoralternativ: För ensamseglare eller båtar med tunga försegel underlättar motorhjälpen vid trimning eller revning, särskilt i grov sjö. Om din budget eller besättningsstorlek inte kräver det, är manuell kontroll fortfarande pålitlig.
- Installationsanvisningar: Följ tillverkarens installationssteg i manualen, kontrollera förstagets kompatibilitet och säkerställ korrekt smörjning och tätningsförhållanden. Se manualen för åtdragningsmoment och underhållsintervaller.
- Underhållsintervall: Inspektera strängpressningen, trumman, svirveln och ändstyckena minst två gånger per säsong. Leta efter korrosion, trådslitage i linorna och tecken på skav på seglets förlik.
- Funktionskontroller: Innan du beger dig ut till havs, öva på att rulla in och ut seglet i lätta vindar, verifiera smidig rotation och bekräfta att seglet rullar jämnt utan att kärva.
- Bedöm din seglingsprofil: båtstorlek, typiskt vindområde och tillgänglighet av besättning.
- Bekräfta kompatibilitet: största segel, segeltextur och förstagfäste.
- Planera installationen: samla ihop en komplett hårdvarusats, smörjmedel, reservdelar och den officiella manualen.
- Testa i lugna förhållanden: verifiera användarvänlighet, vajerdragning och räckvidd från sittbrunnen.
- Dokumentera inställningarna: notera spänningsinställningar och resultat av segelformen för framtida referens.
Med ett välvalt system blir det enkelt att rulla och byta segel i farten. Satsa på en uppsättning som inkluderar en solid profil, pålitlig trumma och segeldukar anpassade för rullfock. Ditt val påverkar hantering, säkerhet och hur snabbt du kan anpassa dig till skiftande förhållanden.
Vad ett storsegelrullsystem gör och när man använder det
Rulla ut storseglets rullsystem innan vindbyar anländer eller när du vill minska segelarean. Själva rullsystemet rullar seglet runt en fast förstagsprofil eller trumma, vilket gör att du snabbt kan ta bort eller lägga till segel utan att lämna sittbrunnen. Detta håller båten balanserad, minskar vindmotståndet och minskar slitage på linor och schacklar. För segelbåtar, jollar och större riggar gör ett korrekt utrustat rullsystem revningen enkel och hjälper dig att behålla kontrollen i växlande förhållanden. Systemet använder metallbeslag som är designade för styrka; inspektera dem regelbundet för att förhindra fel.
så här funkar det: seglet har ett lik som matas in i en fast profil; när du drar i kontrolllinan lindas seglet runt profilen och hålls kvar i spåret. En extra fördel är att du kan justera segelarean i små steg, vilket håller formen korrekt och minskar slitaget på linorna. Dessa funktioner, tillsammans med enkel förvaring under däck, gör denna lösning populär på både segelbåtar och jollar. Se till att beslagen är ordentligt säkrade med schacklar och att profilen och trumman är i linje; lösa delar kan orsaka fladder eller slitage. Denna typ av system fungerar bra på båtar av olika storlekar och konfigurationer.
När ska man driftsätta: vid lätta vindar (ungefär 6–12 knop) kan du lämna ut det mesta av seglet; i måttlig vind (12–18 knop) reva till cirka 60 % av full yta; i byig eller stark vind (>18–20 knop) reva ytterligare till 40 % eller rulla in seglet helt. Du bör öva på att sätta seglet i lugna förhållanden först och testa systemet i måttlig vind för att bekräfta att du kan justera snabbt och hålla rodret balanserat. För dem som väljer utrustning för små båtar, börja med en kompakt trumma och ett kortare förlik; den extra vikten är oftast minimal och hanteringen förblir enkel och säker.
Underhåll och installation: åtkomst till rullen under däck är minimal, men folien och linbanan måste hållas rena och fria. Inspektera folien efter grader eller korrosion; verifiera mastskenans inriktning och trumtätningarna. Om du upptäcker slitage eller tecken på revor på seglet, ta seglet ur bruk och byt ut den påverkade panelen. источник noterar att korrekt installation och regelbundna kontroller förlänger livslängden och minskar risken för fel; för de som är utrustade med jollar, se till att hårdvaran är dimensionerad för båten och att linorna är säkrade för att förhindra att de fastnar. I den här artikeln går vi igenom driftsättningssteg och underhållsrutiner.
Välja rätt enhet: välj en rullfock som matchar din storsegelsstil och linor; säkerställ att systemet är utrustat med korrosionsbeständig metallbeslag, en robust trumma och en liklist som matchar din segelduk. Vid installation, rikta in liklisten med masten och bommens bana; felinriktning ökar slitaget på seglet och kan kräva omarbete. Genom att välja rätt enhet och utföra regelbundna kontroller får du pålitlig kontroll i en mängd olika förhållanden, och därför kan du segla säkrare och med mindre trötthet på långa passager eller dagsseglingar.
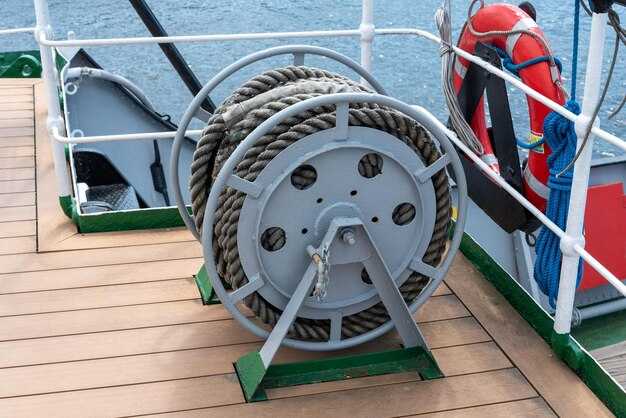
Nyckelkomponenter: trumma, folie, vridning och beslag
Inspektera trumman, folien, vridbeslaget och beslagen före havspassager för att säkerställa att de fäster ordentligt och fungerar smidigt.
Drum: Drums have developed over decades to handle reefed and unfurled lines; choose a drum equipped with a smooth bore and ample groove width to prevent wear and binding when you reef or trim sails. Wind lines evenly; mis-wraps create friction that slows furling and can jam in rough seas. If you notice burrs, cracks, or uneven wear, remove the drum from service and replace it to avoid issues offshore. This helps reduce potential problems during a long sail.
Foil: to optimize flow, place the foil so the sail line path stays straight and the luff runs close to the drum. Use a light, corrosion-resistant foil with an asymmetric profile to minimize drag and balance load. Check for nicks, bends, or delamination after long passages, and replace a damaged foil promptly to keep performance easy.
Swivel: The swivel attaches the foil to the drum and must rotate freely; choose a unit rated for the expected load and secured with a robust pin. If play develops, replace the swivel; a stiff or sticky swivel makes it difficult to manage sails offshore.
Fittings: Use corrosion-resistant hardware sized for the lines; fittings equipped with locknuts and cotter pins support reliable performance. Install with proper clearance to avoid chafe; protect line edges with solents to reduce wear. Keep fittings accessible for quick adjustments when lines bind during changes in wind or seas.
In this article, implement a practical routine to manage wear and keep the system reliable: inspect corrosion, wear, and alignment; test under light load and under full sail. A routine developed for your boat, combined with clear inspection notes, helps remove surprises and make the most of the drum, foil, swivel, and fittings setup.
How furling influences sail shape, reefing, and handling
Install a properly matched roller furling and verify the installation with care. This holds the sail shape, reduces flutter, and allows quick reefing and safer operation while cruising.
How it changes sail shape: when the sail is fully unfurled, the fabric works with the foil to hold a balanced draft. As you furl, the sail wraps around the foil, flattening the curve and lowering the overall draft. This lower draft shifts the center of effort slightly forward and aft, which can affect steering feel and weather helm. On a cruiser or sailboats with long mains and small jibs, the same adjustment tends to move power out of the windward zone and toward stability, though you may notice modest loss of top-end drive in strong winds. A comprehensive approach considers not only the furling angle but also luff tension and halyard load to avoid a crowded, wrinkled luff that reduces efficiency.
Reefing with a furling system: expect a smooth reduction in sail area without leaving the cockpit. Typical systems reduce 20–40% of the exposed area when reefed, and larger sails can approach a 50% reduction with deep reefing. Added tension on the luff helps keep a clean shape behind the reef, while maintaining enough leech tension to prevent excessive flapping. In heavy conditions, reefing early over a moving breeze profile keeps control over the boat and reduces heeling, making the operation safer and more predictable.
Handling and control: a well-designed installation improves control during gusts and waves. You can trim the sail from the helm, reducing crew movement behind the wheel and avoiding awkward maneuvers that slow speed. For cruising sailboats, this means you can maintain speed without aggressive steering corrections, while keeping the same feel in your steering system. When you need to shake out a reef, the quick reefing line and the same mechanism make it faster to restore full power, even when the wind shifts behind you. The equipment should run smoothly in all conditions, with regular checks on turnbuckle gains, foil wear, and the luff tape to prevent added friction that slows operation.
Practical recommendations for effective use:
- Match the furling design to your sail designs and fabric weight; heavier fabric benefits from a robust foil and stiffer forefoil to keep shape under load.
- Keep the installation aligned with the forestay and ensure the tracks run true to avoid binding that makes reefing difficult.
- Inspect the entire system quarterly, including the halyard, headfoil, and stitched seams; replace worn fabric or luff tape behind the foil to maintain the same performance over decades.
- Choose a sail with added reinforcement at the luff and tack to handle the compression from furling and minimize rope-on-fabric wear.
- Use a moderate amount of tension on the halyard during operation to prevent the luff from bagging, which can spoil control and reduce efficiency.
- Plan reefing before the wind spikes, especially on a cruising schedule where you move between sheltered bays and open water; delaying reefing often makes the move harder and reduces safety behind the wheel.
Bottom line: a well-chosen system, installed correctly, backed by proper maintenance, provides a reliable tool for shaping sail power, reefing quickly, and maintaining control in changing conditions. This comprehensive approach helps cruiser crews keep sailing smoothly for years, with less effort and more confidence behind the helm.
Manual versus powered furlers: selecting the right type
For boats under 30 feet, start with a manual furler. It delivers reliable furling at low cost and with minimal electrical dependency. If you sail larger sailboats or regularly fly a big genoa, then a powered furler offers smoother operation and easier handling, though it is more expensive upfront.
Manual furlers rely on a spool that winds the luff line as you turn the handle. The luff rope runs through grooves in the extrusion, aligning the sail with the forestay and preventing twisting. The system centers on a few components: the spool, grooves, locks, bearings, and mounting hardware. After you furl, verify the sail sits neatly in the roll and remove any slack by hand, then lock the unit to prevent drift. This simple layout suits sailboats with moderate rigging and keeps maintenance lightweight.
Advantages of manual furlers include reducing fatigue, lower cost, and straightforward maintenance. They avoid electrical dependencies and spare parts are widely available. On the downside, manual operation can require more effort, particularly when the sail is flying and gusts hit, which can slow down furling and test your timing.
Powered furlers add a motor–electrical or hydraulic–built into the furler. They automate spool rotation, delivering consistent furling pressure and reducing crew workload, especially when handling flying genoas or sailing single-handed. The trade-off is a higher initial cost and a need for a reliable power source and wiring aboard. They introduce more components to maintain and you must ensure the extrusion and boom fit the motor housing without interference; installation varies by brand and may involve extra controls and weatherproofing, so plan the setup accordingly.
Guide to choosing focuses on certain factors: sail size and type, number of sails you furl regularly, mast height, and whether you want to operate from the cockpit. Check compatibility with your extrusion profile; confirm grooves align with the sail’s luff and locks engage securely. Consider the number of moving parts, as fewer components reduce failure risk. If you sail with little crew and want smooth handling of flying sails, a powered unit can be worth the investment–including its ability to furl without climbing into the rig, which is especially useful on a sailboat cruising in variable conditions.
During installation, verify the spool size matches your luff extrusion and ensure the system fits your mast or boom without conflicts. For genoas and flying sails, confirm the setup accommodates a broad range of sheet and halyard layouts. After setup, test in light winds, then monitor tension and lock engagement. Remove and recheck the sail alignment after a few sessions to prevent wear in grooves or the extrusion. Regularly clean the locks and lubricate pivot points to keep components in good shape, which sustains a clear choice between manual and powered furling for your boat.
Maintenance, inspection, and common troubleshooting steps
Inspect the in-boom roller furling drum, control line, and swivel monthly, and follow the instructions to ensure even furling and avoid sail damage at sea.
Inspect the sail, luff rope, drum, swivel, and control lines for wear, corrosion, and deformation. Watch for asymmetric wear on the luff and reel; if you see it, recheck alignment and fittings and replace any worn components to prevent uneven furling.
Clean and lubricate moving parts with a marine-grade product. Wipe off excess lubricant and avoid applying it to the sail fabric. Maintenance should be done with the system powered off and the boat secured. When done, run a short hand test to verify motion.
Test the system by hand: by hand rotate the drum and manually furl/unfurl the sail a few turns to confirm smooth action and even tension. If you encounter resistance, grinding, or a sticking point, stop, inspect the sheaves, and re-lubricate the bearings. Then re-test. Offshore conditions demand extra attention; plan maintenance accordingly.
Understanding your experience with the setup helps you tailor the checks to your needs and sailing style, including offshore trips where added caution is prudent.
| Area | What to check | Tools/Notes | Frekvens | Pass/Fail |
|---|---|---|---|---|
| Drum, seals, fittings | Corrosion, leaks, loose end caps, seals | Marine grease, clean rag, torque wrench | Månadsvis | OK / replace |
| Control line and hardware | Frayed lines; top swivel and attachment integrity | Spare line, ferrules or knots as needed | Månadsvis | OK / replace |
| Sail and luff track | Wear, tears, asymmetric fabric; luff rope seating | Flashlight, cloth, spare luff rope | Quarterly | OK / replace |
| Manual testing | By hand furl/unfurl 2–3 revolutions to verify smoothness | Gloves, clean hands | With checks | OK / recheck |
When issues arise, then follow the steps above to identify the root cause and restore performance, ensuring your setup remains reliable for your sailing needs.