

 How to Take a Great Photo on a Boat – Pro Tips for Stunning Seascapes">

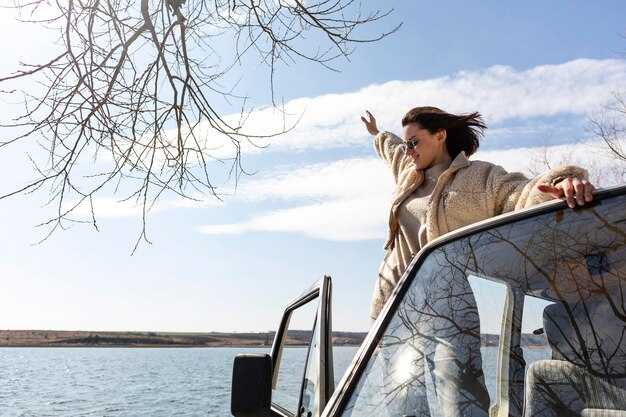
Stabilitet på däcket är viktigast.Placera dina fötter axelbrett isär, böj knäna och låt dina armbågar vila mot din torso. Vid tuffa förhållanden, använd ett monopod eller stöd dig mot ett räcke för att hålla kameran stadig. För havsspray och stänk, höj slutaren till 1/1000s eller snabbare att fånga tydligaste vågkurvor. Om ljuset råkar, justera till 1/500s men sikta mot snabbare hastigheter när rörelser accelererar.
Tekniker för fokus och kadre: byt till manuell läge eller använd single-point AF, lås fokus på en högkontrastkant, och kompositionera sedan om. På en båt skapar vattenrörelse movements av scenen; förutspå var båten kommer att driva och följ med ditt fokus. Om du inte kan låsa fast, byt till kontinuerlig AF i starkt ljus, men återgå till single-shot AF när du ser en klar, öppen horisont för att hålla scenen skarp. Du kommer inte missa ögonblicket om du övar på spårning och timing.
Kompositionen är viktig i varje bild. Placera ett förstföremål (rep, klaff eller bojfäste) för att lägga till djup och leda ögat in i scen. Use kontrast mellan den mörka skrovet och vita vågen för att få fram över objektet. Håll horisonter vågrå; en lutad linje bryter bildrytmen i grovt hav och stillar det fotografisk value of the frame. If you face a knepigt vinkel, svinga din kropp med båtens gungning för att rama in högkontrast siluetter när solen går ner och molnen glöder, ett ögonblick du kan fånga med övning och skapa något oförglömligt.
Belysning och exponeringI starkt reflekterande, halv dagsljus conditions, använd en polariserande filter för att minska reflektioner och mörka himlen; fotografera i manuell läge eller aperture priority för att balansera havsytans ljusstyrka. Använd en liten exponeringskompensation (+/- 0,3 till +0,7) för att behålla detaljer i vattnet och undvika att högdagrarna blir överexponerade. I och med ljusets skiftningar, speed din reaktion spelar roll; behåll speed och kontrast i åtanke medan solljuset skiftar. Om du vill ha en unforgettable scen, var redo att trycka på avtryckaren när båten glider från skugga till sol.
Timing slår lyckan på en båt. Spåra sekvensen av movements av ett skummande våg och fotografera i korta, snabba sekvenser för att fånga en perfekt ögonblick. Använd en snabbare seriefotograferingsläge om din kamera erbjuder det; en fotografisk sekvensen kan ge ett antal frames där sprayen är skarp och ytan visar djup. I knepigt lighting, shoot a few frames at exponering omslutna för att bevara detaljer i både starka högdagrar och skuggiga dalar.
Safety and gearha alltid en vattentät skyddsväska för kameran, torka linsen ofta, och consider en regnskydd i stänkzoner. Använd en motljusskydd för att tämja bländning, och skölj uppställningen efter en session för att förhindra saltuppbyggnad. För långa, exhilarating sessions, plan your conditions och ta med extra batterier för att undvika en strömavbrott mitt under åkturen; batterier kan ta slut snabbt. En tydlig plan hjälper dig att undvika att missa ditt bästa scen stunder och ser till att dina minnen bevaras unforgettable.
Steg 2: Justera dina kamerainställningar för fantastiska båtbilder
Ställ in din baskänslighet i manuellt läge och börja med 1/1000 s för att frysa rörelsen på grovt vatten. Om stänk träffar objektivet, öka ISO till 400–800 och behåll f/8–f/11 för att bevara detaljer; för silkeslent vatten, planera att fotografera från en stabil yta vid 1/4–1/8 s, och använd en monopod eller räcke som stöd medan du följer rörelsen genom en följd av bildrutor. Denna metod förbättrar dina bilder och hjälper dig att jämföra alternativ senare.
- Välja exponering och ISO: I starkt solljus, använd bländare runt f/8–f/11 och ISO 100–400; fotografera i RAW för att bevara detaljer; om du använder en smartphone, aktivera Pro-läge och fånga DNG när det är möjligt; för blandat ljus är automatisk vitbalans acceptabelt och kan justeras senare i efterbehandlingen; detta här hjälper till att hålla färgen konsekvent över olika scener.
- Motion and focus: Use AF-C (continuous) with a tracking focus area; employ back-button focus to lock on the subject and recompose; for spray, use 1/1000–1/2000 s to freeze motion; for a trace of motion, try 1/250–1/500 s and pan slightly to show movement through the frame.
- Stability and grip: Everyone should tuck elbows down toward your torso and keep the camera close; brace against the boat rail or use a monopod; on smartphones, two-handed grip and chest support helps; waterproof housing protects gear from spray.
- Perspective and space: Explore different perspective angles to emphasize space and depth; shoot from knee height or lower to exaggerate waves; plan a quick succession of frames to capture the subject under changing light and waves.
- Equipment and protection: If you have rugged cameras or a waterproof housing, you’re better prepared for rough conditions; having a spare battery and memory card helps; smartphone users should enable Pro mode and keep the lens clean and dry.
- Post-process and workflow: Import images as RAW, check the histogram, and adjust white balance and highlights to keep water color natural; batch process similar frames for a cohesive look; store images with consistent metadata to simplify selection later.
White Balance on a Boat: Presets and Custom WB for Blues and Sunlit Water
Set the white balance to 5500K manually for most coastal, sunlit days to keep blues accurate and sunlit water balanced; shoot RAW to refine WB later and preserve multiple frames from the start, so you can compare options without losing detail.
On a boat, presets help you respond to changing light quickly. Use Auto WB as a baseline, then switch to Daylight (about 5200–5500K) when the sky is clear and the blue water reads true; Cloudy adds warmth for calmer days and more natural skin tones; Shade pushes more warmth for late afternoon light. For night scenes or the glow after sunset, Tungsten can cool the scene, but expect a cooler water cast. Work to stabilize WB across a sequence so colors stay harmonious as the deck moves and there are movements in the frame.
From the start, a custom WB method gives you the most control. Place a neutral gray card (or a clean white shirt) in open shade on deck and shoot a reference frame. In RAW, set WB to a target around 5500–6000K to keep blue water true while preserving the sunlit warmth. If a card isn’t available, use a bright gray area in the scene, then adjust WB in post to prevent casts on the water. This approach helps stabilize exposure and WB, especially when you switch between still life moments and sweeping seascapes.
To minimize shifts when the boat rocks, lock WB and exposure and shoot in a burst with a steady shutter, then pick the frames where the water and sky share a similar cast. A polarizing filter helps reduce glare and gives you more distinct blue tones, while keeping the sun’s shine on the surface. If you must shoot with limited reference, shoot a short sequence and fix WB in post; that saves space in editing and keeps the sequence coherent for a coastal shoot.
During sunset, temperatures swing and blues can look richer or cooler. Try WB around 6000K for a crisper, cooler water tone, or push toward 5200–5600K to enhance warmer skies while preserving blue water. For night, Auto WB with careful post adjustments works, but always keep a reference shot for continuity. Here, WB is a tool to shape the vastness of the sea and sky, not a fixed rule–the right preset or custom value lets you photograph them in calm, expansive moments, from ordinary to spontaneous, and then the shine appears.
Metering Modes: Evaluative vs Spot for Balanced Sky and Sea
Recommendation: Use Evaluative metering as your default on a boat for balanced sky and sea. Depending on the scene, this mode analyzes the frame and offers a reliable exposure for the blue water and the sunny sky, providing a solid photographic taking that serves their interests. The advantage is it adapts to dynamic light across the frame, so you can enjoy the moment without constant tweaks. If the sky becomes very bright or highlights on water look small and blown, switch to Spot metering to lock exposure on a precise area. Once you lock it, shoot a quick bracket or check the histogram to verify results.
On a moving vessel, stay prepared. Keep your gear handy, plant your feet securely, and stabilize against a rail or the deck. Always monitor the horizon and know your vantage: Evaluative handles a broad scene, Spot helps when a small bright area dominates. If you want to emphasize texture in the water or cloud patterns, use Spot on a small area and then return to Evaluative to resume balance. During shooting, shoot in RAW to preserve latitude, and check the histogram frequently to avoid clipping. If exposure pushes too far, the sky wont recover in post, so use exposure compensation as needed and keep your shots aligned with the light direction to make the best use of their photographic potential.
Practical scenarios and tips: In sunny conditions with very bright sky, start with Evaluative and apply -0.3 to -1 EV if the sky clips; in ordinary daylight you can stay near 0 to -1. For high-contrast moments, bracket across 2-3 frames to capture both sky detail and water texture. In blue-water scenes where interest lies in reflections, Spot metering on the sky can control glare while Evaluative preserves water tones. In scenes with limited dynamic range, Evaluative often balances tones, but bracketing remains a smart move to ensure you capture the full spectrum. Once you establish a reliable workflow, you’ll enjoy quick, repeatable results and a clean transition from sky to water across your sequence of shots.
Shutter Speed Tactics: Freezing Waves vs. Capturing Long Exposure Motion
Set your shutter speed to 1/1000s to freeze the most dynamic waves when the boat rocks. If light is limited by overcast weather, raise ISO to 1600–3200 and still preserve detail in spray, then adjust exposure to keep the depth in your photograph intact. Do this carefully to avoid blowing highlights and to maintain color; avoid taking careless frames and focus on the core motion. This approach yields crisp edges along foam and salt, enhancing the scene in a single frame.
For motion, switch to long exposure to capture smooth water and trailing spray. Start at 1/4s and move to 2s if the light permits; use a stable rail or a compact gimbal, and keep your feet planted to limit body rocking. A mindful technique helps avoid blur and yields a unique texture in the waves. If renting gear, be mindful about weight and balance.
Before you pick mode, check weather and scene: overcast can flatten contrast; bright sun may create glare; beware problems such as reflections off railings or a moving sail; then decide which approach will most enhance the scene and your photograph. In this article, you’ll find practical steps to apply at sea.
Gear note: renting a lightweight setup with minimal gear often pays off on a boat. Use a remote trigger for long exposures, secure your drinks and other items, and maintain a mindful stance to protect your body and your shot. Have a spare battery and a small memory card on hand to stay ready for changing conditions.
| Mode | Scenario | Shutter Speed | Tips |
|---|---|---|---|
| Freezing Waves | Rocking boat, spray visible | 1/1000s – 1/2000s | Plant feet, brace body; keep horizon level; shoot in bursts to lock crisp edges |
| Moderate Motion | Waves breaking softly, foam detail | 1/250s – 1/500s | Pan with movements; use a longer lens to compress depth; avoid rolling framing |
| Long Exposure | Silky water, light trails | 1s – 2s | ND filter optional; tripod or solid rail; remote shutter for stable capture |
Aperture Choices: Depth of Field for Horizon Details
Set aperture to f/11 as your default for horizon details; this high DOF keeps near white foam and the distant horizon sharp, offering a great sense of depth. Use hyperfocal distance at your focal length so youre not chasing focus on a moving boat, and the frame may move. If youre shooting wide and want more water texture, stop down to f/16; if light is tight, open to f/8 and compensate with ISO or shutter speed.
On overcast days, contrast drops; maintain edge-to-edge sharpness with f/11–f/16. To freeze spray and keep the horizon crisp, use shutter speeds in the range of 1/500–1/2000s depending on wind and wave height. If you want smoother water in the foreground, you can dip to 1/60s, men du kommer att behöva en stadig plattform eller ett vattentätt skydd och ett a strap för att hindra kameran från att flytta på. Experimentera med flera hastigheter för att balansera action och skarphet i horisonten. När du tar bilder here i lugnare stunder kan du fortfarande sikta mot en klarare horisont.
Tekniker: open linsen till ett bredare bildruta om du vill betona horisonten; manuell fokus genom live vy, zooma in på horisonten för att låsa en ren linje, och sätt sedan hyperfokalavståndet för din brännvidd. Dessa tekniker hjälper dig att planera skottet och hålla horisondetaljerna konsekventa. Ta multiple ta bilder med små variationer i bländare och ISO för att fånga ögonblicket. I editing, du kan balansera white och blå toner för ett naturligt utseende.
Utrustningsanteckningar: strap fäst kameran säkert vid din kropp eller skena; använd waterproof beboelse eller ett regnskydd när spray blir aggressiv; ha en mikrofiberduk till hands för att torka av salt och vatten från linsen; justera inställning för vind och solbländning, och ta med ett extra batteri.
Nästa steg: öva under spontaneous moments; den här artikeln here erbjuder fler tips; prova en unique titta genom att avgränsa vid f/11 with different hastigheter, sedan jämför i editing. Du är redo att förvandla en vanlig horisont till något memorable.
ISO och brus: Hantering av ISO på en rörlig farkost
Ställ in Auto ISO med ett tak på 1600 och börja med slutartid 1/1000s, bländare runt f/8 för att hålla motivet skarpt samtidigt som du fryser stänk. Under blå timmen, öka till 3200 och justera för att behålla kontroll över högdagrarna. Denna balans bevarar detaljer och minimerar brus samtidigt som du får en ren ledning på motivet när fartyget rullar.
Stabilisera genom att trycka in armbågarna, använda en rem och hålla kameran tätt intill kroppen. Stå med en stadig hållning för att absorbera den konstanta rörelsen, och tajma din exponering för det ögonblick då båten lutar mot en våg. En liten lutning mot färdriktningen minimerar stilleståndstiden; du får bättre kontroll och mer utrymme att fånga rena färger och texturer.
Points matter: Manual gives you control; Shutter Priority works when light shifts. If you use Auto ISO, keep a cap in mind and adjust exposure with exposure compensation so the sky doesn’t wash out. For a broad vista, try a wider aperture with a shorter shutter; for a painterly look, pan with the boat using a longer focal length.
Efterbearbetning: fotografera i RAW-format, jämför bilder vid ISO 400–800 och 1600–3200; välj den bästa exponeringen och applicera brusreducering endast där det behövs för att bevara textur i spray och tyg på motivet. översmörja inte; förstärk detaljerna i skumkronor och segel. Håll utkik efter ljusets timme; om du missar den, erbjuder nästa timme en ny chans att förbättra färg och stämning.