

 Choosing a Life Raft – How to Pick the Right Survival Raft">

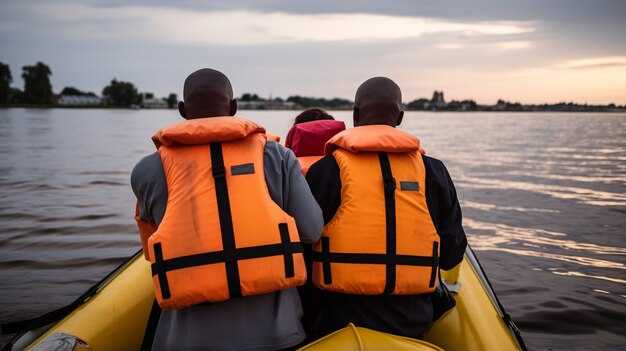
Opt for a unit sized to crew with a practical case that is easy to stow near companionways. Instructions supplied by manufacturer should be reviewed before departure, and outer fabric, inflation system, and mounting hardware must pass annual checks on onboard gear. For easy reference, follow prevailing instructions during setup and storage.
what matters most is capacity in litre volumes and number of person count; calculate buoyant mass to ensure adequate flotation. Opt for a case that fits crew, allowing room for accessories like signaling devices. Verify stow between bulkheads and outer panels, with secure straps for rough seas.
On florida nautical routes, consider gear tuned for heat exposure and daylight flashes. A unit with outer skin designed for heat resistance improves durability during long florida boating days. Sailors onboard should rehearse deployment moment and confirm stowage remains secure during rough seas.
blog post edited by experienced crew can guide future decisions: include notes about moment when deployment proved smooth, or where stow failed; still avoid panic. This record helps every person onboard make quick decisions during emergencies.
Annual maintenance plan should verify buoyant specs, case integrity, and up-to-date instructions. A blog post edited by crew stores insights for future moment choices, while still prioritizing safety for every person aboard.
Key decision criteria for selecting a life raft that fits your vessel and crew
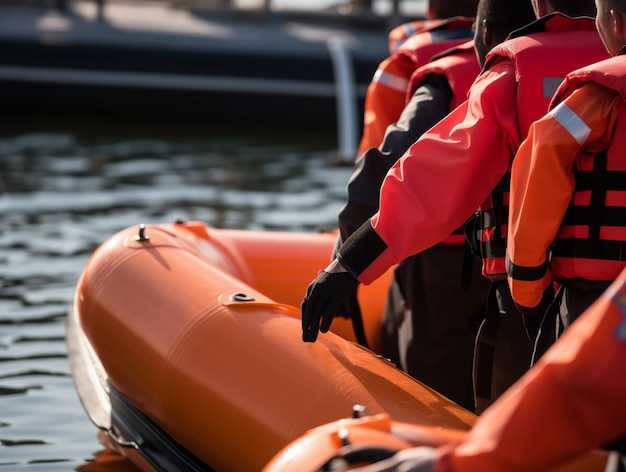
Begin with objective: select an emergency flotation package sized to groups onboard, matching vessel size and sailing mode. For yachting teams of five or more, choose a unit with full occupancy marked for five, and confirm packed components and attached inflation systems enable quick inflation upon deployment. Also ensure still valid spare parts are carried; bring a basic toolkit.
Evaluate zone coverage and readiness. Sudden weather shifts demand clear inspection; marked handles, reflective panels, and a sat-phone carried within a protected pocket enhance survivability.
Capacity shall match groups onboard; between models choose options that accommodate five or more, with different configurations so youre crew of mixed skill levels can operate. If doesnt meet capacity, add another unit or choose modular design to cover larger groups; those with limited space can rely on smaller paired units.
Maintenance plan includes regular inflate tests, ensure packaging remains intact, and checking that attachments survive salt spray. Edited training materials cover abandonment procedures, proper carrying, five-minute drills, and bringing sat-phone into action. Crew require periodic checks to keep readiness peak.
Comparison of brands may include delord options and similar packages; ensure components used are attached prior to deployment, and carried within reach; check for zone durability.
Load capacity: calculating people, gear, and weight limits
Three-step check: determine occupants; tally gear weight; compare with certified maximum payload. Stop when limits are met. Use waterproof planning to place packages, water, and appliances in containers around center of gravity. When equipping, add items like a radio and essential electronics, ensuring all items stay within safe weight bounds. This can give you a clear boundary for capacity, especially important for quick decisions in rough seas.
Step one: determine number of people (three to five) based on float size. Step two: estimate mass for each person. Three to five people commonly ride a small float, assume 75–90 kg per person. Add tens of kilograms for clothing, packs, and other carried items. Include emergency gear and spare batteries inside waterproof bags. Ensure that total weight remains within minimum safety margins stated by manufacturer. If weight doesnt meet minimum, adjust by removing packages or shifting loads into separate waterproof cases around central line of gravity.
Evaluation note: certified ratings must be checked via inspection by a recognized merchant within florida. belvoir guidelines offer a practical baseline: never exceed number or weight limits; always verify around center of gravity. within this framework, ensure waterproof seals on containers; check radio operation and appliances before departure.
Record results into a blog line with model number, inspection date, and weight figures for future reference. This habit helps know if capacity changes when equipment list expands. Because safety matters, rely on official data and keep documentation up to date; sure to conduct regular evaluation cycles.
| Occupants | 3–5 persons | aligns with model capacity |
| Per-person weight | 75–90 kg | varies by crew |
| Gear payload estimate | 60–120 kg | Tens of kilograms for packs, water, containers |
| Total payload | 180–270 kg | must stay within certified rating |
Self-righting feature: mechanism, reliability, and test results
Prioritize liferafts with verified self-righting mechanism, backed by offshore testing results and watertight seals. Use inspection reports to confirm inverted performance, load rating, and survivable depth range. Opt for models with clear documentation of anchor points, bailer operation, and personal capacity.
Mechanism overview: buoyancy bags, ballast, and bailer system drive upright orientation after capsize. Buoyancy bags and ballast are positioned above waterline when inverted, triggering automatic righting. Anchor points and a yankee line aid orientation; bailer releases water to make recovery easier.
Reliability comes from research results across offshore exercises: number of trials, depth range, and time to upright. In 12 inverted trials at depth 0.5–3.0 m, upright occurred in 11 cases, with 6–14 seconds elapsed. Failure cases stem from seal breach or operator error; such data guide design improvements. Overall, results demonstrate a high safety margin, with success rate above 90 percent under tested conditions.
Maintenance protocol: schedule inspections, verify watertight integrity, test bailer operation, and check anchor lines. Regular inspections catch wear in buoyancy bags, ballast seals, and capsize mechanism. Keep a personal log of inspection dates and parts replaced; link it to equipment file. Such steps help keep depth, bailer responsiveness, and overall readiness at acceptable levels.
For sailors in offshore boating, practical drills with liferafts reduce abandon risk and highlight needed actions. Practice abandon procedures in calm water, using yankee and other sails to practice steering around a submerged anchor. Research shows liferafts with similar reliability deliver clearer instructions, easier inflation, and less confusion. Types with watertight compartments perform better when depth exceeds standard anchor requirements.
Materials and durability: fabric, seams, construction, and UV resistance
Opt for UV50+ fabric with double-stitched seams; conduct weekly inspections and maintenance to extend service length.
Fabrics include high-tenacity nylon or polyester with polyurethane or PVC backing, delivering abrasion resistance, water resistance, och salt-water durability. Coated wovens should bear UV inhibitors for prolonged sun exposure to minimize cracking.
Seams require double eller triple stitching plus taped or welded joins; avoid weak points near bailer openings or inflation tubes. Seams protected by heat-sealed tape maintain watertight integrity under wave action.
Construction quality favors reinforced panels, cross-stitched lines, and internal ribbing; UV resistance shall thrive when fabrics incorporate additives and when coatings are crosslinked. UV shielding reduces material stiffness and prevents brittleness after annual cycles of sun exposure.
Durability metrics cover weight distribution, load handling, and impact resistance; life rescue accessories like lamp, bailer, lines, and rescue kit should be inspected and serviced; an annual package includes spare parts and seals. Damage assessment today emphasizes UV wear, salt intrusion, and mechanical abuse; failure modes include seam blowouts and punctures; fire-fighting tests verify resistance against jets and heat. Often damage occurs at seam joints after salt exposure.
Inside stowage pockets hold accessories, including lamp, bailer, rescue kit, and spare parts; package comes with included appliances for signaling and with water-length lines for emergency actions. Storage above waterline should be accessible and stowable, staying above levels of splash, and built to withstand UV and salt exposure. Weekly serviced checks verify seals and gaskets; damage prevention relies on practical routines that give peace of mind during abandon-ship drills.
Deployment and inflation: canister vs. manual inflation, valve types, and maintenance
Opt for canister inflation when rapid deployment matters in nautical emergencies. Activation occurs within seconds after pin release, withstanding rough seas, while manual inflation adds minutes to inflate and increases crew workload.
Valve types include canister-trigger outlets for CO2 release and manual inflation valves using a hand pump. Canister systems provide quick, reliable deployment, while manual valves demand operator coordination and physical effort.
Maintenance plan covers weekly inspections, checks of pressure seals, pin safety, and container integrity, plus annual tests by a certified technician. Edited instructions must remain accessible on deck and inside locker.
Stow location matters. Place canister or manual inflation unit in a dedicated deck locker with color indicators for quick identification. Color cues help person responsible and prevent cats from triggering gear.
Classification division governs compliance; director oversees emergency drills; yachting crews aboard cargo vessels meet strict guidelines.
Having options allows practical comparison across configurations; number of features matters, including make, annual service needs, and performance under load. Canister inflation typically meets ultimate reliability under emergency conditions; it takes fewer actions, while manual inflation demands more effort. youre role in checks matters, including weekly inspections and shipping tests.
Side-by-side models: Model A vs Model B self-righting liferafts – what to compare
Model B is recommended for most sailing teams due to easier inflation, larger capacity, and faster inspection readiness.
- Inflation mechanism and speed
- Model A relies on hydrostatic valve for automatic inflation; Model B adds manual backup pump, usually inflating faster (often under 45 seconds).
- Deployment sequence varies: Model B packs a simpler, more direct path from inflation to ready state if crew act promptly.
- Capacity and dimensions
- Model A length about 3.0 metres, width about 1.8 metres, depth when packed around 0.9 metres; useful for smaller boats with 6–8 people.
- Model B length about 3.2 metres, width about 1.9 metres, depth around 0.95 metres; larger volume supports 9–12 people and their gear.
- Package contents and gear include
- Both packages include floor panels, repair kit, paddles, sea anchors, and a white canopy for visibility in daylight.
- Model B typically adds more spare parts and a larger buoyancy bag to extend life-saving capability.
- Floor, canopy, and material state
- Floor construction in Model A uses reinforced panels; Model B uses higher-depth flooring to reduce wear under load.
- Canopy color white improves visibility in zones with glare; fabric is chosen for UV resistance and long service life, used under demanding conditions.
- Inspection, maintenance, and accessibility
- Inspection access to valves, seams, and inflation mechanism is easier in Model B due to simplified layout.
- Regular checks should cover valve integrity, canopy attachment, and mechanism operation; schedule is usually included in edited maintenance notes.
- Deployment zones, depth, and sea state
- Model B performs better in open-water zones with swell up to moderate state; depth of water affects flotation performance, but both models meet life-saving standards in calm to moderate seas today.
- In rougher zones, a larger model (Model B) tends to stop rapid water ingress sooner because of broader buoyancy chamber geometry.
- Manual operation and division of tasks
- Both models require crew to divide duties: open package, inflate, connect lifeline, deploy floor, and launch; Model B’s layout usually allows a cleaner division of tasks among sailors.
- Manual inflation can be required in power-down conditions; trained operators should practice this routinely.
- Safety features and life-saving equipment
- Life-saving gear such as paddles, distress signals, and line throwers are included in most packages; fire-fighting equipment is not standard, but relevant safety tools may be listed in package notes.
- Both models emphasize buoyancy, visibility, and rapid state stabilization upon water entry.
- Weight, storage, and handling
- Model A is lighter to handle during stowage and deployment; Model B weighs more but offers easier deployment once inflated, reducing stop time for crew.
- Storage package should fit within vessel compartments without obstructing access to other gear; depth of pack matters for under-seat storage zones and navigation space.
- People, gear, and everything else to consider
- For boats carrying at least 8 people, Model B provides margin for gear and personal equipment; ensure included equipment is compatible with your crew size.
- When setting up today, verify that all included items meet your division of responsibility; keep a spare patch kit on board for quick repairs.
- Operational tips and practical notes
- Upon removal from storage, verify floor alignment and ensure all cords are clear before inflate sequence begins.
- In real tests, some crews noted that edited instruction sheets clarified steps more than older manuals; use updated package guides.
- Least exposure to entangling lines occurs when sailors maintain organization around gear and avoid clutter near deployment space.
- Miscellaneous considerations
- Tests show performance remains robust even with extra loads; cats onboard should be secured away from lines to prevent interference with deployment.
- Today’s checks favor Model B due to broader range of use cases and faster readiness; keep both models within sight of safe passage plans and emergency drills.