

 The Ultimate Boat Tool Emergency Kit for the Holidays – Essential Gear &">

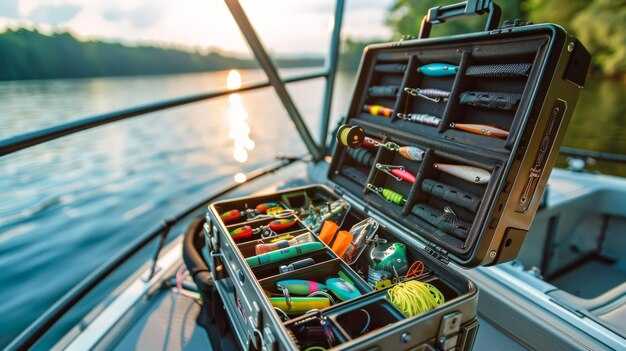
to je jadro: majte na palube kompaktný, vodotesný multifunkčný nástroj a rolku námornej pásky. Táto kombinácia zvládne väčšinu rýchlych opráv, ušetrí ti drahé cesty na breh a zabráni malým problémom, aby ťa zdržiavali v dosahu kormidla. Ak sa niečo zadrhne, rýchlo to opravíš. Toto nie je o efektných vychytávkach; je to o spoľahlivom vybavení. Moderné vybavenie, navrhnuté tak, aby odolávalo soli a striekajúcej vode, zaberá menej miesta a zostáva spoľahlivé, keď sa loď kýva.
Okrem samotného jadra, zostavte súpravu s dvomi kladivá pre ľahké ťuknutia, súpravu hadicových svoriek v niekoľkých priemeroch, náhradné O-krúžky a tesnenia, opravný tmel, elektrikársku pásku a sťahovacie pásky. Pridajte kompaktné svietidlo, náhradné batérie a malý batériový blok, aby there je sila na nočné opravy. Udržujte clean náhradné vrecko, ktoré vodotesne tesní a navrhnuté aby ste zostali organizovaní, aj keď je balíček down. Zahrňte opravujem zásoby, aby ste väčšinu upchatí, únikov a uvoľnených armatúr zvládli bez ponáhľania sa.
Na sviatky potrebujete veci needed na zvládnutie bežných porúch: prasknutá hadica, uvoľnené svorky alebo skorodované terminály. Prenosná vzduchová pumpa, náhradné terminály a niekoľko prídavných konektorov vhodných pre lode vás udržia nad vodou, zatiaľ čo počasie alebo hostia zostanú v teple. Táto súprava je relatívne kompaktný, ale modern dosť na to, aby sa im dalo veriť, a overenie každej položky pred cestou trvá len niekoľko minút. Uložiť them v suchom vrecku, aby nič nezostávalo stáť.
Premeňte nastavenie na army naučením členov rodiny, kde ktorý nástroj býva. A husky lano na opravy vedení, malá pílka na drobné úpravy a pár náhradných poistiek zabránia tomu, aby sa z menšieho incidentu stalo veľké zdržanie. Súprava itself by mal byť navrhnuté aby zostal kompaktný a fungoval there keď na tom záleží, a malo by to udržiavať loď čistú a bezpečnú a nie zahlcovať kajutu. Toto kind prístup zaisťuje, že aj keď sa niečo pokazí, môžete rýchlo obnoviť kontrolu.
Lodný nástrojový núdzový balíček na sviatky
Zaobstarajte si kompaktný multifunkčný nástroj lodnej kvality s čepeľami odolnými voči korózii. Tento typ nástroja zvládne väčšinu opráv na palube. Napríklad, hľadajte model so 14 – 20 funkciami, pevným prenosným puzdrom a čepeľami lepšie odolnými voči korózii. Trocha plánovania teraz ušetrí čas na palube, keď je potrebná rýchla oprava, a uvoľní miesto pre náhradný diel v súprave.
Udržujte súpravu usporiadanú pomocou rozloženia, ktoré oddeľuje nástroje medzi palubou a elektrickou skrinkou. Spárujte multifunkčný nástroj s vodotesnou skrinkou, ktorá obsahuje náhradné poistky, dĺžku námorníckeho kábla, krimpovacie konektory, teplom zmršťovacie hadice a pásku. Ak potrebujete spojiť, malý drôt pomôže; inak si nechajte náhradnú zálohu. Výmena vypálenej poistky alebo poškodeného konektora trvá len niekoľko minút, keď máte správne komponenty.
Na vybavenie a palubné vybavenie zabaľte náhradné svorky, strmene, malé cievky lana a kompaktný lanársky nôž. Toto vybavenie vám umožní rýchlo opravovať veci medzi jazdami a znižuje potrebu improvizovať inde. Označte súčasti, aby ste v prípade potreby rýchlo chytili to, čo potrebujete, a vyhli sa pomiešaniu veľkostí počas zhonu.
Zásobte sa malou sadou dielov, ktoré sa zvyčajne opotrebúvajú ako prvé: O-krúžky, tesnenia, hadicové spony, teflónová páska a záplaty na netesnosti. Keď sa na súčiastkach objaví opotrebovanie, vymeňte ich skôr, ako zlyhajú; malá proaktívna výmena ušetrí väčšie problémy, keď sú moria rozbúrené. Vyberajte si diely s pravou povrchovou úpravou pre námorné prostredie a presnou toleranciou.
Súpravu noste v pevnom kufríku a majte ju na dosah pod sedadlom alebo v špeciálnej skrinke. Kompaktná sada skrutkovačov, náhradné skrutky v označenom vrecku a malý zvinovací meter zvyšujú spoľahlivosť počas opráv. Kvalitné prenosné riešenie vám pomôže udržať všetko pohromade, od poistiek až po lanový materiál, takže už nikdy nebudete hľadať správny diel.
Či už plávate blízko domova alebo počas víkendovej plavby, obmedzte obsah na to, čo skutočne používate. Keďže priestor je počas dovolenky obmedzený, uprednostňujte predmety s multifunkčným využitím a rýchlo prístupnými vreckami. Medzi elektrickými a lanovými potrebami sa uistite, že váš systém vyzerá usporiadane a pripravene, potom vykonajte rýchly test v doku, aby ste potvrdili, že je všetko bezpečné a pripravené na ďalšiu etapu.
Keď sa dobalíte, skontrolujte zoznam a poznačte si prípadné nedostatky pre ďalšiu cestu.
Základná súprava náradia pre núdzové situácie na lodi na prázdniny: Lepidlá a tmely
Uchovávajte kompaktnú dvojzložkovú súpravu námorného epoxidu a silikónový tmel s neutrálnym vytvrdzovaním vo vodotesnom puzdre. Táto kombinácia pokryje núdzové situácie, od malých trhlín v trupe až po netesnosti paluby, pričom poskytuje silné spojenie a flexibilné tesnenie v slanej vode a na slnku.
Vyberte si správne veľkosti: tuby s epoxidovou živicou a tužidlom v rozsahu 10 – 20 ml poskytujú dostatok materiálu na drobné opravy, zatiaľ čo 30 – 50 ml tuba silikónového alebo polyuretánového tmelu zvládne škáry paluby a armatúry. Na prácu s tkaninou na plachtách alebo krytoch pridajte lepidlo na lodné tkaniny určené na plachtovinu a tmel na švy na ochranu línií prešívania.
Na elektrické opravy treba starostlivo vyberať materiály: pridajte malú súpravu epoxidu na upevnenie uvoľnených svoriek a rýchlo tvrdnúce kyanoakrylátové lepidlo na drobné plastové komponenty. Pridajte teplom zmršťovacie hadice v dvoch veľkostiach na obalenie spojov vodičov a ochranu spojov počas pohybu a vibrácií.
Opravy látok a plachiet si zaslúžia špeciálne lepidlo: použite lepidlo na lodné látky alebo kontaktné lepidlo na plátno a plachtovinu, plus tmel na švy na zabezpečenie vodotesnosti prešitého priestoru. Vždy najskôr otestujte na odrezku, aby ste overili priľnavosť, flexibilitu a farebné zladenie pred nanesením na skutočnú látku.
Tipy na aplikáciu a časy vytvrdzovania vám pomôžu pri plánovaní počas núdzových situácií: epoxid je na dotyk suchý približne za 20 – 60 minút a dosahuje plnú pevnosť za 6 – 24 hodín v závislosti od teploty; silikón tvrdne pomalšie, ale zostáva pružný, s časom bez lepivosti približne 1 – 2 hodiny a úplným vytvrdnutím za 24 – 48 hodín. Používajte malú miešaciu tácku a rozotrite tenko, aby ste minimalizovali vytláčanie a tvorbu kože.
Umiestnenie a skladovanie puzdra sú dôležité: súpravu uchovávajte v malej vodotesnej krabičke v skrinke kokpitu alebo v skrinke toalety, pričom každý predmet jasne označte jeho veľkosťou a účelom. Skladujte na chladnom a suchom mieste a sezónne kontrolujte dátumy exspirácie, aby ste sa uistili, že je pripravená, keď je to potrebné, najmä počas sviatkov, keď si plavby a zmeny počasia vyžadujú rýchle opravy.
Navigácia pre majiteľov lodí na plavbách: tento článok sa zameriava na výber lepidiel a tmelov, na ktoré sa vaša loď môže spoľahnúť počas dovolenky. Zamyslite sa nad veľkosťou plachty, typmi látok a bežnými opravami, s ktorými sa stretávate, aby ste si mohli prispôsobiť súpravu svojim potrebám a mali tie správne veci pripravené na mieste, keď nastanú núdzové situácie.
Rýchlopristupné lepidlá na palubné opravy
Majte so sebou kompaktnú sadu s tromi základnými lepidlami: námorný epoxid, CA lepidlo a silikónový tmel. Pre plavbu na plachetnici alebo akejkoľvek lodi táto súprava pokryje väčšinu opráv medzi kontrolami a udržuje trup tesný, preto sa na ňu námorníci spoliehajú.
Na utesnenie trhlín v trupe a opravu malých prierazov zmiešajte dvojzložkový morský epoxid a naneste záplatu v jednej rovine s povrchom. Krytie upevnite račňovým popruhom alebo tyčovými svorkami, kým nestvrdne. Doba spracovania je približne 5–15 minút; manipulácia za 2–4 hodiny; úplné vytvrdnutie za 12–24 hodín v závislosti od teploty.
Menšie elektrické opravy, utesnenie spojov proti vlhkosti a opravy krytov majú prospech z kyanoakrylátového lepidla (CA) na čistých, suchých povrchoch. Použite tenkú vrstvu a podržte 30–60 sekúnd. Ak oblasť vykazuje vibrácie, skombinujte CA s ľahkým mechanickým upevnením, ale na konštrukčné úlohy si vyhraďte epoxid alebo silikón.
Silikónový tmel ponúka flexibilné, vodotesné spoje pre poklopy, odtoky a kryty elektroniky. Aplikujte a nechajte vytvrdnúť 24 hodín; vyhnite sa povrchom nasiaknutým olejom, ktoré môžu zhoršiť silikónové spojenie.
Epoxidový tmel vypĺňa medzery a slúži ako rýchla záplata trupu alebo montážna podložka, keď sa nič iné nehodí. Vytvarujte tmel, pritlačte ho na miesto a nechajte ho vytvrdnúť; takto zostanú ložiská a malé konzoly stabilné aj na rozbúrenom mori. Húževnatý epoxidový tmel má tendenciu zostať pod záťažou nezmršťujúci sa.
Uchovávajte tieto lepidlá v ich označených vreckách vo vašej taške s vybavením a po každej oprave si veďte záznam v súboroch, v ktorom si poznačte, čo sa urobilo, aké materiály sa použili a časy vytvrdzovania. Takto nič neprehliadnete, ak vás vlečenie ťahá smerom k prístavu. Vyhnite sa búšeniu kladivami – na vyvíjanie rovnomerného tlaku počas vytvrdzovania používajte svorky alebo račňu. Udržiavanie tohto zariadenia jednoduchým pomáha udržať koróziu na uzde a zaisťuje, že vaše vybavenie zostane v poriadku pre ďalšiu cestu.
Morské tmely na palubu, trup a armatúry

Na utesnenie škár paluby použite polyuretánový tmel a na armatúry neutrálny silikónový tmel, ktorý pokryje väčšinu úloh a prostredí v podmienkach slanej vody.
Polyuretánové tesnenie utesňuje švy paluby, spoje trupu, profily kokpitu a vstupy do kajút; toleruje pohyb, je odolné voči oderu a vytvára húževnatý, flexibilný film. Počítajte s tým, že nebude lepkavé za 6 – 12 hodín a úplne vytvrdne za 3 – 7 dní pri typickej vlhkosti v kabíne. Ak je práca nákladná alebo kritická, naneste väčší pás a nechajte ho nerušene vytvrdnúť, aby ste dosiahli najlepšiu ochranu. Tento dokonalý prístup poskytne spoľahlivú ochranu počas mnohých sezón.
Silikónové tmely vynikajú v okolí priechodov trupom, WC armatúrach, hadiciach a palubných vstupných bránach, kde dochádza k dlhodobému pôsobeniu slanej vody. Zostávajú flexibilné, odolávajú UV žiareniu a udržiavajú vodotesné tesnenia, aj keď sa armatúry ohýbajú. Manipulačný čas je kratší v suchých podmienkach; úplné vytvrdnutie nastáva za 48 – 72 hodín pri 20 – 25 °C a miernej vlhkosti.
Príprava povrchu je dôležitá: odstráňte starý tmel, v prípade potreby očistite drôtenou kefou, dôkladne umyte a osušte, potom pred aplikáciou utrite izopropylalkoholom. Pre spoje hlbšie ako 6 mm použite dilatačnú šnúru a okraje zamaskujte, aby ste dosiahli čisté línie. Pri prienikoch káblov utesnite obvod kábla súvislou vrstvou a potom vytvarujte pre hladký okraj.
Dávajte pozor na tvorbu kvapiek: naneste rovnomerný prúžok okolo každého spoja a potom ho vyhlaďte vlhkým prstom alebo trojuholníkovým nástrojom. Nenanášajte hrubé vrstvy, pretože to spomaľuje vytvrdzovanie a môže zachytávať vlhkosť, čo zvyšuje prestoje a pravdepodobnosť úniku pri morskej triešti.
Čo sa týka skladovania, kazety uchovávajte v pôvodnom obale, umiestnite ich do chladnej a suchej kajuty alebo vrecka v batohu a použite ich pred dátumom exspirácie. Ak ste po sezóne intenzívneho používania v slanej vode vymenili zásoby, uistite sa, že nové zásoby sú v rámci dátumu exspirácie.
Údržba: po rozbúrenom mori alebo počas generálnej opravy skontrolujte tesnenia; ak spoj začne zlyhávať alebo vykazuje praskanie, odstráňte poškodený materiál a pretesnite ho. Ak tesnenie zlyhá, naplánujte rýchlu generálnu opravu a vymeňte kazetu za novú, aby ste obnovili ochranu.
Nosenie kompaktnej súpravy v batohu zaisťuje, že ste pripravení na úlohy v kajute; správne tesniace materiály vás ušetria od nákladných prestojov a zabránia únikom v prostredí so slanou vodou. V niektorých prípadoch možno budete musieť použiť oba typy na manipuláciu s rôznymi hlavicami a palubnými spojmi, so zmesou maskovacej pásky, utierok a drôtenej kefy na prípravu povrchov.
Náplasti: Páska, epoxidový tmel a rýchlotvrdnúce náplasti
Majte v kajute po ruke vodeodolnú pásku, epoxidový tmel a rýchloschnúcu opravnú sadu, aby ste zvládli všetko od malých kvapiek až po väčšie ryhy na trupe v náročných podmienkach.
Vyberte si kompaktné usporiadanie s tromi komponentmi: páskou, tmelom a náplasťovými listami. Súprava zakúpená na Amazone s rôznymi veľkosťami, základný nôž a brúsny papier zabezpečia, že opravy budú prebiehať bez zbytočného odkladu práce.
David, ktorý je víkendový námorník, má svoju súpravu na opravy v odolnej vodeodolnej krabici za skrinkou v kabíne. Spolieha sa na túto zmes, aby pokryl všetko od vláskových prasklín až po väčšie diery, čím často ušetrí cestu na breh, kým je možná riadna oprava.
Kľúčové komponenty, ktoré treba zahrnúť:
- Vodotesná páska: šírka 5 až 10 cm, námornícka kvalita a vystužená tkaninou, s dostatočnou dĺžkou na pokrytie poškodenej oblasti a presahovanie okrajov.
- Epoxidový tmel: dvojzložkový tmel námornej kvality, ktorý rýchlo tvrdne a dobre priľne k povrchom zo sklolaminátu, kovu a kompozitných materiálov; zmiešajte podľa návodu na obale a naneste na pripravené miesto.
- Rýchlotuhnúce záplaty: tkanina zo sklených vlákien alebo plastové záplatové fólie so živicovým alebo lepiacim podkladom; dimenzované na zakrytie otvorov s priemerom do niekoľkých palcov a schopné ohýbať sa na zakrivené povrchy.
- Nástroje a vybavenie: kompaktný multifunkčný nástroj, ostrý nôž, brúsny papier, svorky alebo nastaviteľný popruh a náhradné strmene na zabezpečenie záplat počas vytvrdzovania.
- Uskladnenie: malá vodotesná nádoba v kabíne alebo na palube, aby obľúbená súprava zostala suchá a prístupná.
Postup pri podávaní žiadosti:
- Zhodnoťte poškodenie a rozhodnite sa pre postup opravy; v prípade diery v trupe, ak je to možné, zalepte ju zvnútra pre silnejšie utesnenie.
- Príprava povrchu: oblasť vysušte, odstráňte uvoľnený materiál a zdrsnite okraje, aby sa zlepšila priľnavosť.
- Použite pásku: odstrihnite na potrebnú veľkosť, prekryte miesto s prekrývaním a pevne pritlačte, aby ste utesnili; presahujte aspoň 1 palec za poškodený okraj.
- Zmiešajte epoxidový tmel: mieste, kým nedosiahnete jednotnú farbu, naneste hrubú vrstvu na zalepenú záplatu a vyhlaďte okraje, aby splynuli s okolitým povrchom.
- Inštalácia rýchlej súpravy záplat: Umiestnite hárky záplat cez vytvrdnutý tmel, pritlačte, aby sa prispôsobili krivkám, a okraje utesnite ďalším tmelom, ak je to potrebné.
- Zaistite a otestujte: počas vytvrdzovania záplatu prichyťte svorkou alebo popruhom; po vytvrdnutí otestujte jemným vodným testom a sledujte prípadné presakovanie, v prípade potreby zopakujte s väčšou záplatou.
Tento prístup podporuje drobné opravy aj náročnejšie zásahy pri rozsiahlejšom poškodení trupu alebo paluby, čím udržuje vaše pracovné vybavenie pripravené a spoľahlivé, aj keď ste kilometre od brehu.
Nástroje a techniky: Bezpečná aplikácia lepidiel a tmelov
Vyberte si tmel námornej kvality s nízkym obsahom VOC a naneste ho pomocou nastaviteľnej pištole na kartuše, aby ste mohli regulovať veľkosť spoja. Ak nemôžete zohnať preferovaný produkt, nahraďte ho polyuretánovým tmelom, ktorý vytvrdzuje flexibilne a dobre priľne k sklolaminátu, kovu a drevu.
Pripravte oblasť očistením izopropylalkoholom, úplným vysušením a zamaskovaním okrajov. Udržíte tak diely čisté a znížite potrebu upratovania počas víkendovej prestavby. Pre víkendových námorníkov súprava pripravená na použitie urýchľuje prestavbu a minimalizuje vynechané kroky. Tento prístup pomáha aj pri drevených blokoch a palubných spojoch, kde záleží na tesných spojoch.
Vyberte si správny produkt pre danú úlohu: tmely absorbujú pohyb a medzery, zatiaľ čo lepidlá zabezpečujú spojenie. Pre spoje, ktoré nesú zaťaženie alebo vibrácie, vyberte flexibilný tmel; pre trvalé spoje medzi dielmi funguje silné lepidlo; nikdy nemiešajte produkty v jednom spoji.
Technika: Vložte tubu do pištole; odrežte trysku pod uhlom 45 stupňov; prepichnite tesnenie; nanášajte plynulým, súvislým prúdom, pohybujte sa rovnomerne, aby ste sa vyhli zastaveniam. Používajte nastaviteľnú tesniacu pištoľ, aby bol prúd rovnomerný. Po dokončení vyhlaďte vlhkým prstom alebo plastovou špachtľou.
Bezpečnosť a manipulácia: Vetrajte priestor; používajte rukavice a ochranu očí; zabráňte kontaktu s pokožkou. Nezatvrdnutý materiál utrite odporúčaným rozpúšťadlom a skladujte v cenovo výhodných nádobách. Uchovávajte mimo dosahu detí a domácich zvierat.
Špeciálne tipy: Na hlboké medzery použite tesniacu šnúru; na prechodné trupové tvarovky alebo pri rekonštrukčných prácach vŕtajte správnym vrtákom a potom použite dierovaciu pílu na vytvorenie priestoru, utesnite okolo okraja. Pripravené povrchy vyžadujú kratší čas vytvrdzovania; ak potrebujete dotiahnuť upevňovací materiál, upravte ho a znova utesnite podľa potreby.
| Task | Typ lepidla/tesniacej hmoty | Tools | Poznámky |
|---|---|---|---|
| Švy a spoje | Morský silikón alebo polyuretánový tmel | Tmelová pištoľ, nastaviteľná | Aplikujte v jednom prameni; podkladová tyč pre veľké medzery |
| Spojovací materiál | Tvrdé lepidlo (epoxidové alebo polyuretánové) | Palubný nôž, rukavice | Nechajte úplne vytvrdnúť; počas vytvrdzovania sa vyhýbajte pohybu. |
| Priečne priechody a armatúry | Tmel kompatibilný s kovom a sklom | Dierové píly, vrtáky | Udržujte povrchy pripravené; zamaskujte okraje |
| Hlboké medzery | Podkladová tyč + tmel | Aplikačná pištoľ, dištančný prvok | Zabraňuje trojbodovým väzbám |
| Čistenie a uskladnenie | Zostávajúce tesnenie | Otrepy, rozpúšťadlo podľa pokynov výrobcu | Udr[m[mZiavej v rozsahu rozpo[m[muu[muetu. |