

 Saltwater Fishing for Beginners – The Complete Starter Guide">

Choose a lightweight 7-foot spinning setup to start catching saltwater fish: 15-20 lb braided line, a 20-30 lb fluorocarbon leader, and a 2/0 circle hook on a straight, medium action rod. The 7-foot length balances castability and control for shore fishing. This setup takes the guesswork out of the first days on the water and works well for pompano and other typical coastal species.
The rod curve should be smooth and progressive; a medium-action rod helps you feel bites without pulling the lure too soon. For pompano, use a 1/8-1/4 oz jig head paired with a soft-plastic tail or live shrimp; adjust weight to keep the line tight and maintain natural sinking. Leader length around 12-18 inches protects the organs and reduces fouling during a fight. The typical spots near jetties or troughs along sandy beaches yield reliable action and allow you to practice accurate casts.
In planning your outings, consider tides, daylight, and wind direction to maximize catching. Keep a simple log of date, spot, bait, and the length of fish you measure. With a lightweight rig and a consistent approach, you can adapt to other species and refine your technique across different fishings. Note how lure color, water clarity, and tide height influence bite windows so you can adjust on the next trip.
Consistency matters after fishing, rinse gear, tighten knots, and keep reels dry to prevent corrosion. Pack spare leaders and several jig heads so you can adapt on the water. A simple, repeatable routine keeps your setup reliable for the next outing.
5 Practical Tips for a Natural Presentation of Your Bait or Lure
Tip 1: Lower your bait with one foot of slack so it travels naturally into the feeding zone under the surface. Cast beyond the breaking waves toward the spot where fish feed near the port and islands, then swing the rod with a smooth arc using a medium-action caster and a 12–15 lb leader. Keep the line smooth, making the lure swim naturally.
Tip 2: Keep the lure in the strike zone with a steady cadence. Retrieve at about 1–2 feet per second, pausing 2–3 seconds after every 6–8 inches of line reeled; adjust for current and wind. If you notice a subtle tug, stay calm and keep the rod tip steady to avoid spooking them, and use a light, controlled motion to make the lure feel alive.
Tip 3: Tailor the presentation to the species and spot. Be aware of water color, current, and structure. For conger and larger fish under structure, keep the lure near the bottom and make short hops along the seabed; for mid-water targets, lift the lure 1–2 feet and pause to let it sink back. Theyre feeding activity often peaks when the current slows, so watch the line and adjust depth with the rod.
Tip 4: Gear and clothing for control and comfort. Use a 7’–9′ rod with a medium action, 15–40 lb braid and a 12–20 lb mono leader for surf and port work. Choose clothing that dries quickly, protects from sun and wind, and lets you move freely while casting, recovering, and fighting fish.
Tip 5: Learn by doing with online resources and real-world experience. Travel to new locations, enjoy the variety of islands and spots, and try different lure types to see what works in each location. Note particular conditions like tide, wind, and seabed, and build a living knowledge of feeding times. You want to achieve excellent consistency over time.
Live-bait selection for common nearshore species
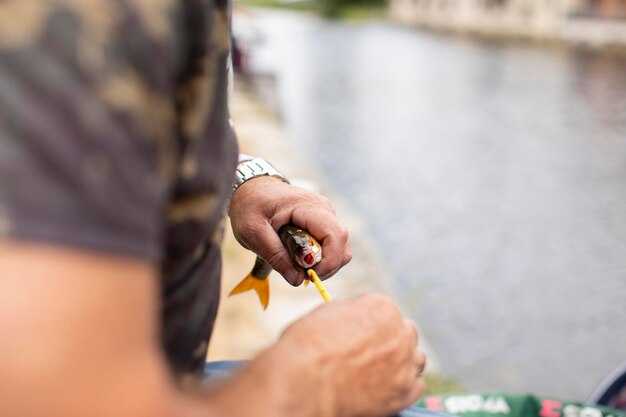
Use live mullet as your first pick for common nearshore targets such as redfish, spotted seatrout, and snook. Keep them lively in a shaded cooler with a steady inflow of water and daily changes; this reduces frustration and increases likely bites when you place the bait closer to structure along mangrove edges.
Size matters: for redfish and trout in most onshore flats, 4–6 inch mullet works best; for bigger snook or fish in deeper channels, go 6–8 inches. If a particular species seems fonder of a larger bait, adjust accordingly. In murkier water, smaller baits often produce more bites than very large ones.
Rig with a strong high-test mono leader in the 12–24 inch range, paired with a circle hook in the 1/0–3/0 range depending on bait size. Let the mullet swim naturally and keep the line loose enough to feel subtle takes; a tight setup would pull the bait away. Present the bait along the mangrove side or near drop-offs, not directly on the bank, to draw fish from the mark.
Presentation and handling: Wear gloves when handling live bait to minimize stress; be sure the bait remains lively by keeping water aerated and avoiding overheating. Focus on maintaining lively action; a slow drift along the water line yields more bites than a static bait. Night and dawn days often produce more activity; time your drop to coincide with higher tides for onshore currents.
Where to find: look for mullet along mangrove edges, spillover creeks, and tidal lines; they hug the closer side of structure and often move parallel to the bank. Location matters, so mark a couple of productive spots and return to them when the tide shifts. You’ll likely find schools that move with the current only in certain locations; once you do, you can find more reliability anywhere along the coast.
Common pitfalls: choosing the wrong size bait for the target species; using too heavy a weight that pins the bait; ignoring the right side of mangrove edges; failing to keep bait fresh for days; losing focus and letting fever or frustration creep in. Face the water, adjust your approach, and keep your focus on the end result. With this approach, you’ll have fewer days wasted and more opportunities to land fish when conditions align.
Rigging live bait to swim naturally with minimal resistance
Use a light, sliding float rig with a short fluorocarbon leader and a circle hook to keep the bait in a natural, head-up posture while you fish.
Core rig and components you’ll need: a small bead, a micro swivel, a slip float, and a 1/16–1/8 oz weight for shallow tides. Tie a 18–24 in leader with a fail‑safe knot, then attach a circle hook in the size that fits your bait. This setup minimizes resistance and lets the live bait feel the current rather than fight the line, which improves your bite window across waters near ports or in tidal channels.
- Choose bait and hook: use live mullet, pinfish, or croaker, and select a circle hook in the range that matches the bait size. Always prefer a light hook that still pierces when a tarpon or other target rolls.
- Build the rig: thread the main line through the slip float, add a small bead, and tie on a micro swivel. Clip in the 1/16–1/8 oz weight below the float to set depth without pulling the bait backward.
- Attach the leader: tie an 18–24 in fluorocarbon leader to the other end of the swivel and finish with the circle hook. This keeps the bait moving freely while reducing line visibility in clear waters.
- Depth tuning: start with the bait 1–3 ft below the surface in calm waters; in tidal or current‑rich areas, drop to 3–6 ft and adjust with weight or by sliding the float slightly higher on the main line. If you see the bait fighting the current, shorten the leader a bit to regain a natural drift.
- Deployment: cast toward likely feeding spots and let the float drift with the current. If there’s a frenzy feeding near a head or channel mouth, keep the float on the move and watch for a quick submersion indicating a bite.
Practical tuning tips: in still waters, keep the float near the surface and use a lighter weight to avoid spooking wary fish. In strong tidal runs, increase depth slightly and use a tiny weight to prevent dragging the bait into currents. This approach works well in many places where tarpon and other big predators cruise along channels and near docks, especially around port entrances where current shifts can create a favorable feeding lure action.
Common mistakes to avoid: using a heavy rig that pulls the bait tail‑first, letting the leader rub on structure, or adding multiple hooks that slow the swim. There’s a clear difference between a bait that moves naturally and one that malfunctions under pressure. If you notice the bait standing still or hooked awkwardly, re‑tie the leader with fresh fluorocarbon and test the float depth before you resume fishing today.
Rationale and outcomes: a properly rigged live bait swims into the current with minimal resistance, improving strike detection and reducing stress on the fish. This method keeps the bait feeling like a real meal and helps you read subtle head shakes or line tightness more reliably. For future sessions, save this setup as a standard resource and tailor the weights and hook size to local species and tides. Remember, every bite you miss today can become data you use tomorrow in your next trip’s planning, and this article’s approach is built to scale with your growing skills across waters, whether you’re near a port or along open coast.
Lure action basics: slow retrieves with subtle pauses
Start slow: use a good, slow, steady retrieve and short pauses after every 5–8 casts, aiming for about 0.6–0.9 m/s on the reel, depending on current and depth. This pattern keeps their targets in the strike zone and reduces splash that spooks wary fish.
Choose a lure with specific action for saltwater. For outdoors sessions on british piers or beachcasting, prefer suspending soft plastics or slow-sinking plugs that stay in the water column where predators hunt. Pair baited lures with a natural wobble and a subtle tail kick to trigger bites from spotted schools.
Retrieve pattern details: begin with 20–30 cm of line out, then reel to a cadence of about 2–3 turns per second, with a 0.5–1.5 s pause after every 5–8 pulls. If you feel a light tap, hold the rod tip and wait a moment; if the bite comes, lift gradually to set the hook. This pause helps the lure hover near the depth column where fish roam and gives them a chance to react.
Equipment tip: choose a braid for feel and distance, then attach a 20–40 lb leader in fluorocarbon or filament. This setup is needed for clean casts and to resist abrasion. Ensure the knot is clean and pulls through guides easily; someone nearby on the british piers can lend a hand if you are new.
| Condition | Action | Lure/Setup |
|---|---|---|
| Calm water near piers | Keep lure in upper water column with a slow, steady trend and 0.5–1 s pauses | Soft plastics 60–80 mm; 14–20 lb braid; 12–18 lb filament or leader |
| Moderate current on tidal edge | Increase cadence slightly; pause 1–2 s to let the lure linger mid-water | Slow-sinking minnow or suspending jig; braid 20–30 lb; leader 20–40 lb |
| Spotted activity around structure | Fan casts across the column; vary speed every few casts | Jerkbait or small plug; braid 18–30 lb |
| Sharks nearby | Use heavier leader; cast away from schools; keep distance | Lure 70–100 mm; braid 30–50 lb; leader 40–60 lb |
Zaznamenajte si, čo vyvolalo hryzenia, a upravte vzory pre budúce vonkajšie aktivity. Sledujte príliv a odliv, keď sa voda pohybuje; s konzistentnými námetmi a jemnými prestávkami, získavate sebavedomie pre potreby pobrežného lovu a prístavnej práce.
Zladenie hĺbky, prúdu a priehľadnosti vody pre prirodzený vzhľad
Umiestnite nástrahu do strednej hĺbky – približne 2–3 m pod hladinou v čistej vode so slabým prúdom; doladte o 0,5–1 m, kým nezaznamenáte záber. Ak ste objavili zábery v určitej hĺbke, zablokujte toto nastavenie na zvyšok vlečenia.
V silnom prúde zväčšite dĺžku lídra a pridajte záťaž, aby nástraha zostala v cieľovej vrstve; v pomalom prúde znížte záťaž a udržujte dlhý, plynulý kĺzanie. Ak sa zber nastane hlbšie, ponorte nástrahu o 1–2 m a otestujte znova. Tento prístup pomáha nástrahe zostať v zóne hryzenia, keď sa mení hladina vody.
Priehľadnosť vody riadi farbu a vzor: v čistej vode používajte prírodné vzory; v znečistenej vode sa zamerajte na jasnejšie, kontrastnejšie vzory. Hlboká voda drží ryby odlišne, preto farbu a spôsob vyťahovania prispôsobte.
Pretože kajaky a iné plavidlá, vznášajte sa prúdom, aby ste prezentovali prirodzenú oblúku; udržujte koniec tyče vysoko a meniť rýchlosť, aby zodpovedala prúdu. Keď sa nájde štruktúra, ryby ju často nasledujú a útočia na ňu.
Odporúčania: preskúmajte každú reláciu, aby ste zistili, ktorá hĺbka, prúd a čistota spôsobili hryzenia; zaznamenávajte, čo sa deje a v ktorom hĺbkovom rozsahu a dĺžke nástrahy bolo najlepšie. Táto prax môže byť časom jasnejšia; výhodou je konzistentnejšie budúce úlovky pri rybárčení. Tieto odporúčania poskytujú praktické kroky na doladenie vášho nastavenia a pomáhajú vám rásť ako rybár.
Minimalizácia striekania a maximalizácia kontaktu vody počas odovzdávania
Použite krátky, hladký sidearm hádž na tesnej oblúk, aby ste minimalizovali striekanie a maximalizovali kontakt vody s povrchom. To znamená čistejšiu vodu a lepšie detekovanie hryzenia počas každého prevliekania.
Udržujte zápästie uvoľnené a zrýchlite pohyb pri uvoľnení, ťahajte špičku prúta smerom k vode. Tento nízky, presný hod zabraňuje dlhému oblaku a pomáha vašej nástrihe plávať po povrchu – skvelé pre makrely a tuniaky, ktoré hľadajú pri pobreží pri súmraku, zatiaľ čo lovíte z člnov alebo kajakov. Možno začnite s hodmi 10–15 stôp, aby ste sa zoznámili s pocitom a získali sebadôveru.
Výstroj je dôležitý: vyberte si prístupnú súpravu, ktorá sa zmestí do rozpočtu začiatočníka. Palica so strednou akčnosťou o dĺžke 6’6″-7’0″, spletený hlavný priemer okolo 20 lb a fluorokarbónový predsádzok 18–24 lb vyvažujú citlivosť s odolnosťou. Použite malú, širokú povrchovú nástrahu alebo plytkú zásuvku v rozmedzí 1/8–1/2 oz, aby ste zabránili ponárajúcej sa brušnej časti nástrahy a vlasca. Pre jazerá alebo blízko prístavu udržujte nástrahu vo vode v hĺbke 15–25 stôp, aby ste maximalizovali kontakt s vodou a znížili striekanie. Odhoďte mimo vlnu a ťahajte stálym tempom, aby ste udržali dosah a kontrolu.
Pri precvičovaní za súmraku alebo v pokojných podmienkach sa zamerajte na ľahko dostupné prístupové body – hrany prístavu, doky, vodné porasty alebo pobrežie. Ak sa snažíte chytiť tuniaka alebo makrelu, zameranie sa na kŕdle s konzistentnými, nenápadnými hodmi vám dá viac šancí ich chytiť; tento prístup skutočne zlepšuje vašu kontrolu a zvyšuje potenciál úlovku. Očakávajte lepšie zásahy, ako získavate skúsenosti, a udržujte vysoký kontakt s vodou, aby ste si udržali nádej na stabilný úlovok dnes a zajtra.