

 How to Get Started in Wakesurfing – A Beginner’s Guide to Riding the Wake">

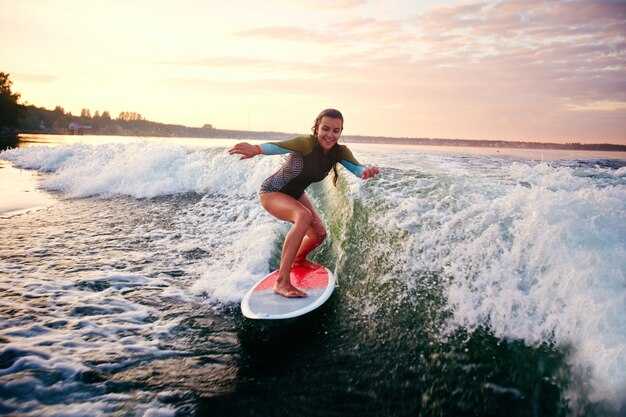
For beginners, začnite so stabilným postojom a trénujte hands v uvoľnenej polohe. Kolená maj mierne pokrčené a ťažisko umiestnené nad doskou, aby si udržal rovnováhu pri vstávaní. Toto je where Začínaš stavať skills and the perfect jazda. before jazda, rýchla kontrola: topánky utiahnuté, plutvy nastavené a napätie vlasca pohodlné – tieto kroky ensure a best začať. Zdieľajte učenie s surfers vieš; keď sa učíme spolu, cesta je ľahšia enjoyable for beginners a them cítiť sa v skupine podporovaný. Niektoré jednoduché tips zrýchliť postup a udržať things sweet.
Vyberte si dosku, ktorá zodpovedá vašej hmotnosti a výške; bigger dosky ponúkajú väčšiu stabilitu pre beginners prechod z kľaku do stoja. Začnite so stredným rockerom a postojom nakloneným dopredu; pričom positioned Mierne naklonenie dopredu na doske pomáha zachytiť vlnu skôr. Vždy jazdi s priateľský k študentom dĺžku lana a udržujte stály moment plynulým hranením. Tips: maj svoj pohľad upretý na bod, kam sa chceš dostať, pravidelne dýchaj a vyhnúť sa preťažovať ruky.
Keď vstanete, zatlačte s vaším hands a zatlačte hruď dopredu a potom sa postavte do vzpriamenej polohy jedným plynulým pohybom. Držte hlavu hore, aby ste sa vyhli driftovaniu nesprávnym smerom; to vám pomôže čisto jazdiť na vlne a rozvíjať skills rýchlejšie. Precvičte si tri pohyby: priblíženie okrajom, zdvih a jazda; keď sa budete cítiť pohodlne, môžete advance po malých prírastkoch a otestujte väčšie vlny v bezpečných podmienkach.
Vytvorte si jednoduchý plán: dve 20-minútové sedenia týždenne plus jedna dlhšia víkendová jazda. Vyhľadajte radu od knowledgeable inštruktor alebo dôveryhodní spoluhráči; tí ti to môžu ukázať where ako umiestniť boky a ako vyhnúť sa bežných stánkov. Viesť si záznam o things naučené a sweet zlepšenia, ktoré si všimnete vo svojej forme, a pocítite pokrok vo svojom hands a držanie tela.
For a more enjoyable začať, ponechať relácie steady a zarovnajte telo s brázdou. Ten best prístupom je konzistentný tréning, férová hra s ostatnými surfistami a zameranie sa na positioned rovnováha a depth vedomostí. Pamätajte si: before tlačíš na väčšie lajny, ovládni základy, udržiavaj perfect držanie tela a advance iba ak ste si istý. Dodržiavaním týchto tips, premeníte brázdu na ihrisko a spravíte z každej jazdy sweet pre seba a svojich kolegov.
Praktický Wakesurf Kickstart: Od prvých chvíľ na doske po jazdu na vlne
Začnite s doskou určenou priamo na wakesurfing a 20–25 stopovým lanom; udržujte nízky a vycentrovaný postoj, kolená pokrčené približne o 20–30 stupňov a ramená kolmo k doske. Toto nastavenie je možné pre väčšinu typov postavy a poskytuje vám priestor na úpravu pri vstávaní, kde sa rovnováha stáva stabilnou. Každé sedenie začnite rýchlou 60-sekundovou skúškou vášho postoja a dýchania, aby ste si vybudovali dôveru predtým, ako nastúpite do člna.
Na pohybujúcej sa vode sa zdvihnite z drepu a potom sa postavte, keď vás loď ťahá dopredu. Pre preniesenie váhy jemne dozadu na zadnú nohu formujte dosku proti vlne a snažte sa o kolmý uhol medzi doskou a vlnou, aby ste maximalizovali rovnováhu a kontrolu. Tí, ktorí s wakesurfingom začínajú, môžu sledovať tento vzor na vybudovanie spoľahlivej prvej jazdy.
Uvoľnite lano, keď je línia čistá a cítite, že sa rovnováha ustálila. Či už ste skúsení alebo sa niekedy len učíte, potiahnite krátko štyrikrát až šesťkrát, potom jazdite 30–60 sekúnd bez lana, aby ste si upevnili pocit a plynulosť.
Na rýchlosti záleží: 9–11 mph funguje pre väčšinu lodí; prispôsobte sa vetru, vyváženiu lode a hĺbke vody, aby ste zostali v optimálnom rozsahu. Najprv trénujte v ľahkej, pokojnej vode, potom prejdite do tečúcej vody, keď sa vaše schopnosti zlepšia. Tí, ktorí chcú extra výzvu, si môžu vyskúšať pohyby na tvarovanie vĺn pozdĺž okraja vlny, pričom dosku držte kolmo na dráhu lode, aby ste vyrezali dlhšiu líniu. Tieto cvičenia fungujú obzvlášť dobre, keď držíte boky v pokoji a pozeráte sa dopredu.
Sledujte bezpečnosť a pokrok: zaznamenávajte najazdené kilometre, všímajte si priebeh každej jazdy a zdieľajte klipy s novinárom alebo trénerom, aby ste získali objektívnu spätnú väzbu. Dokumentujte tipy vo svojom sociálnom kruhu a uchovávajte si svoje poznámky pre seba, keď si budujete flexibilnú rutinu špecifickú pre wakesurfing, ktorá funguje pre každého, či už ste na oceáne alebo na jazere.
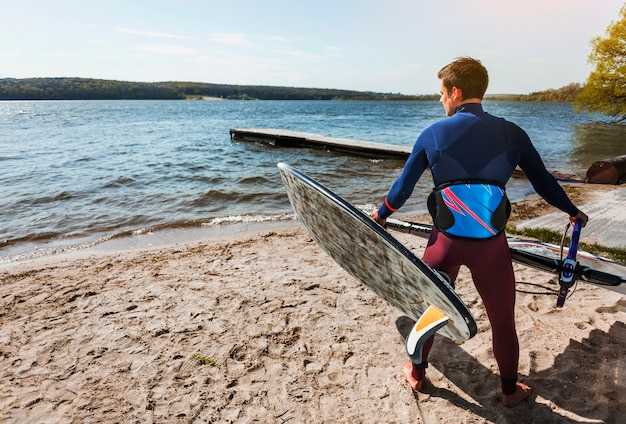
Výber dosky: Vyberte si správnu wakesurfovú dosku podľa svojej váhy a úrovne zručností
Konkrétne odporúčanie: vyberte si dosku s objemom, ktorý zodpovedá vašej hmotnosti bez toho, aby ste obetovali stabilitu. Pre jazdcov s hmotnosťou pod 63 kg, zamerajte sa na 22–26 l a 4’0″–4’6″. Pre 63–77 kg, mierte na 28–34 l a 4’6″–5’0″. Pre 77–95 kg, zvoľte 34–40 l a 5’0″–5’4″. Pre 95+ kg, 40–45 l a 5’2″–5’6″. Tieto rozsahy pomáhajú rozložiť hmotnosť po doske a podporujú hladký a istý štart. Ak chcete extra istotu, zvoľte o niečo väčšiu dosku v rámci vašej kategórie a vyberte si dosku, ktorá zostane nadnášaná, kým sa naučíte svoj postoj a načasovanie.
Úroveň zručností ovplyvňuje výber tvaru dosky. Začiatočníci profitujú zo širšieho obrysu a plochejšieho rockeru, čo uľahčuje planing a robí riadenie stabilnejším, kým si neosvojíte svoj postoj. Ako si vyvíjate svoj prístup k vlne, môžete prejsť na trochu užšiu dosku s mierne väčším rockerom, aby ste zlepšili riadenie a uvoľnenie pri carvingu. Premýšľajte o tvarovaní ako o nástroji na podporu vášho pokroku: chcete niečo, čo pôsobí predvídateľne od prvého popu až po prvý cut, udržuje vašu rovnováhu v strede a vaše pohyby zámerné.
Štýl dosky je dôležitý pre kontrolu a pocit. Dosky v štýle skim s rozsiahlejšou rovnou plochou a zaoblenou zadnou časťou sú odpúšťajúce a stabilné, zatiaľ čo kompaktné dizajny sa prikláňajú k rýchlemu otáčaniu a ostrejším líniám. Luxusné jadrá a vystužené lamináty pridávajú tuhosť pre silné ťahy, keď chcete nabrať rýchlosť, ale stále budete chcieť dosku, ktorá sedí rovno na vode a smeruje s jasným zámerom. Zvážte svoj surfový štýl: ak preferujete plynulé, uvoľnené línie, pomôže vám doska s väčším objemom a mäkkými hranami; ak prenasledujete agresívne línie, doska so stredným objemom a mierne vyšším rockerom vám poskytne rýchlejšie uvoľnenie a ostrejšiu spätnú väzbu.
Nastavenie plutiev a hardvér ovplyvňujú riadenie a dopadanie pri uvoľnení. Väčšina jazdcov začína s dvomi plutvami pre stabilitu a jednoduché sledovanie dráhy; prechod na usporiadanie s tromi plutvami alebo jednou plutvou môže zlepšiť zatáčanie a znížiť odpor, keď ste pripravení posunúť sa ďalej. Rozloženie vašej váhy po doske – rovnováha na pätovej a prstovej strane – ovplyvňuje smerovanie a kontrolu, preto si vyberte nastavenie, ktoré je intuitívne a umožní vám udržať si stabilný postoj. Ak si nie ste istí, skúsený predajca alebo tréner vás môžu naviesť na kompletnú konfiguráciu, ktorá zodpovedá vašej telesnej hmotnosti, výške a osobným cieľom, aby existovala jasná cesta od vašej prvej jazdy až po sebavedomé prekonávanie vĺn.
Nastavenie vlny za člnom: Ako nájsť čistú vlnu a nastaviť bezpečnú rýchlosť
Start by placing the boat on the lee side to create a clean wake, then set a safe, steady speed around 9–11 mph (14–18 km/h) with ballast balanced. The источник of a smooth ride is a consistent wake, so keep momentum light and drive smoothly to avoid abrupt changes that throw riders off balance.
- Assess the water and wind: look for glassy or lightly choppy water and avoid wakes from other boats. A light, steady surface makes those first starts easier for riders and helps fins and boards track true. When the wind shifts, adjust speed by 1 mph to hold the same wake height and quality.
- Distribute ballast and weight: keep ballast amount balanced between the bow and stern to preserve a clean, symmetrical wake. If you’re loading in two riders, share the weight evenly; if solo, place weight toward the center to maintain body alignment and momentum in the water. Those small shifts change how the wake rises and ease of skim.
- Set the speed to your wake size: start at 9–11 mph (14–18 km/h) in flat water. Increase up to 12–13 mph (19–21 km/h) for bigger wakes created by extra ballast, but avoid pushing beyond the point where the wake becomes choppy. Know that a faster pace makes the wake taller but can reduce control for beginners.
- Choose the right rope and length for starting: use a shorter tow rope (roughly 15–25 ft) for initial pops and to keep light tension. As confidence grows, you can extend to 25–30 ft to allow more time for a patient, controlled setup. A longer line gradually reduces the momentum transfer and helps you stay balanced into the first airs and skim attempts.
- Position and drive: sit in an athletic stance with knees soft, hips over the feet, and eyes forward. Drive through the hips rather than the shoulders and keep the handle low in the hand to maintain a stable pull. Those details keep your body aligned with the wake’s direction and prevent sudden twists.
- Starting and riding with a rope: for starting, keep the rope taut and the board facing the wake. As you rise, transfer weight from heels to toes smoothly and keep the fins engaged to preserve edge control. There’s almost no substitute for a steady drive and a deliberate, shallow edge into the wake.
- Check for safety and readiness: ensure a clear path, spotters in place, and riders aware of the board’s motion. If someone cant keep balance or feels rushed, slow the speed a notch and work through the stance and line until you understand the rhythm. Those adjustments prevent mishaps and make the hour on the water more productive.
- Tune for different styles and riders: some riders prefer a higher, steeper wake for airs, others seek a flatter, smoother surface for skim tricks. Adjust ballast and speed in small increments to match the rider’s weight, skill level, and confidence. Those small changes give every person a better chance to progress safely.
- Practice with a head-ready mindset: run a few dry passes at walking pace to get a feel for the boat’s response, then begin your first attempts. Those practice hours strengthen the connection between drive, momentum, and the wake, making starts smoother and more predictable.
There you have it: a practical setup workflow that delivers a clean wake and a safe speed. By focusing on weight balance, steady speed, appropriate rope length, and deliberate on-water technique, everybody can ride with confidence and enjoy progress through consistent, repeatable conditions.
Getting Up: A Step-by-Step Protocol to Stand Up on the Board
Stand up in one smooth motion: push with your hands, rise to your knees, then pop to a balanced stance, keeping your eyes on the spot you plan to ride and your weight centered over the board.
For beginners, treat this as a customizable system that aligns with the fundamentals. A steady tempo works: stay compact, chest up, hands ready to push, and weight centered while you keep a steady level of focus. The goal is control that translates into smooth starts and reliable rides. Experienced riders tighten the sequence to stay strong as they rotate into the wake.
Think through the phases: getting stable before the lift, then rotate your hips as you push through the hands and bring your knees toward the chest. This structure gives you a clear path and allows you to progress to airs and longer rides as you gain confidence.
As you progress, youll notice faster starts and smoother transitions, allowing you to ride with more confidence on their wakes.
| Step | Action | Key Cues | Common Mistakes |
|---|---|---|---|
| 1. Setup | Lie on the board with chest up; place hands near the centerline; spot the line you plan to ride; keep elbows tucked. | Eyes forward, hands under shoulders, board flat on water. | Lifting hips too early; uneven weight distribution. |
| 2. Push to Knees | Push through your hands, lift chest, bring hips forward, tuck knees toward your chest. | Shoulders square to wake; board stays level. | Elbows splaying; hips rising before your chest. |
| 3. Stand Up | Shift weight from knees to feet, rotate hips, plant front foot forward and back foot at 45–60°. | Shoulders aligned, knees softly bent, eyes forward. | Knee locks or feet misaligned; rushing the lift. |
| 4. Balance | Stand tall, keep weight over mid-foot, relax arms, adjust stance for the wake; look along your riding line. | Core engaged, chest up, breath steady. | Leaning back; overextension of arms. |
| 5. Progression | Repeat sequence until seamless; aim for 3–4 seconds from start to full stand; practice from a consistent spot. | Rhythm, smooth motion, refined stance for your board. | Rushing; inconsistent timing. |
Stance and Edge Control: Front–Back Balance and Subtle Weight Shifts
Place your feet shoulder-width apart on the board, with the front foot angled slightly and the back foot flat. Keep your knees soft, hips level, and chest up to maintain an athletic form. Maintain even weight distribution between both feet and stay centered over the board as you ride; theres no need to chase perfection from the first ride.
Front–back balance is about moving your weight along the board’s length. To climb the wake, shift a bit toward the front knee and ankle, then reverse to drive the tail and ride the back edge. With practice you’ll learn to keep the board stable and respond to the wake with the right amount of tilt and foot pressure, adjusting your stance as you go.
Edge control comes from subtle weight shifts and proper alignment. To hold a steady edge, keep your hips oriented toward the direction you want to go and use your back knee to adjust rail pressure. Stay over the center and distribute weight between the balls of your feet and your heels so your distribution supports quick responses to the wake, speed, and line you’re on. A sure tension in the core helps you avoid overreacting.
Moving from one edge to the opposite edge requires calm, small shifts. Rotate your hips and shift your distribution toward the new front foot, keeping your hands relaxed for balance and your knees soft. Stand tall, keep your chest open, and use your legs to absorb motion. Think in terms of a smooth throw of the hips rather than a forceful shove, so you can stay in control as you turn, not fight the wake.
Training plan for beginners: 3–5 sets of 5–8 seconds on each edge, with a brief reset between reps. As you started learning, you’ll notice the amount of weight you need shifts with wake height and boat speed. If you’ve logged miles already, length matters less than your ability to stay balanced. Surfers with miles of practice notice their balance improves. Their stance isnt perfect, but their understanding grows and their form can be mastered. Stay patient, have both feet planted, and keep your hands light so your upper body stays quiet.
Styles of Wakesurfing: Surf Style, Skim Style, and Hybrid Approaches
Start with Surf Style as your foundation. Position your feet shoulder-width apart, knees bent, and your weight slightly back to keep the board on planing line. Look over the wake line, not down at the board, to anticipate the ripples and prepare your massive turns. Most beginners benefit from a 5’0″ to 5’4″ board for stability and buoyancy. A coach says this setup is the most reliable way to build feel and set a clear progression path. Wear a snug vest and a leash; safety is a priority and increases confidence when you try new moves. When you master the setup, you’ll find your level of control improves quickly and you can focus on the core movements rather than fighting the board. This style is crucial as a foundation for rides in different water conditions, and it makes these sports enjoyable for you and your crew. People on the boat often comment on the rhythm you gain, and you can enjoy the process as you build your confidence in the water.
Skim Style prioritizes speed and lift with a shorter, flatter board. You stay lower and more forward on the wake, enabling quick, shallow turns and smoother transitions along the water line. While skim can feel brisk, control comes from small edging and a centered stance. This isnt about brute power; positioning stays forward to keep the board light on the surface, and the pace remains manageable. When you ride skim, you’ll feel the water gives you a lively, responsive feel that’s social and enjoyable for spectators, and it’s a great way to build confidence for more advanced moves. For most riders, a board around 3’4″ to 4’0″ works well; heavier riders may prefer 4’2″ to 4’6″. If youve tried skim, you know the pace is brisk and the transitions are tight; you can push toward the upper end if you want more stability and longer lines.
Hybrid Approaches blend Surf and Skim to adapt to conditions. A mid-size board around 4’6″ to 5’2″ gives a solid foundation for both glide and stability. Use Surf Style foot placement for early pops, but borrow Skim’s light edging for tight turns near the wake. Your approach is to adjust balance and stance quickly, depending on the water and boat speed. This level of versatility is crucial when you ride in different spots or when the wind shifts. Social sessions on the boat give you feedback from people watching; use that to refine timing and positioning. When you find your rhythm, you’ll enjoy a smoother ride with reduced fatigue. This approach suits most riders and a wide range of skill levels, and it can be the most enjoyable path if you want to explore massive turns and long lines across the wake.