

 Land-Based Fishing for Beginners – The Ultimate Starter Guide">

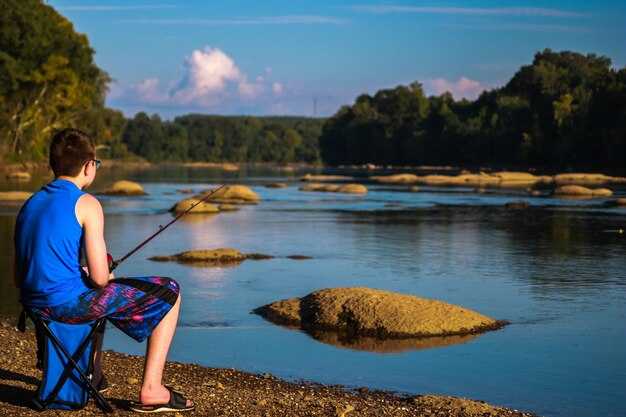
Begin with a simple land-based setup: a 7-8 ft rod, a 4000-6000 size reel, 12-20 lb line, a swivel, and a 2/0 to 4/0 hook. Check the knot, trim tag ends for neat lines, and practice a few clean casts from shore or pier. Keep the rig well balanced to improve accuracy, and test a few casts to confirm landing where you intend, so progress comes more quickly.
Choose two to three land-based spots to learn the basics: a gentle beach slope for long, steady casts; a rocky headland or jetty where currents concentrate prey; and the heads of a pier where sheltered water holds fish. Use a digital tide table to plan your days, then test distances and angles to learn which landing yields the cleanest results. Review weather, wind direction, and water clarity, which all influence bite windows. This approach helps you catch more.
Develop a retrieval pattern that engages bites rather than waiting passively: start with a steady cast, pause briefly, then a slow, smooth retrieve. Try various speeds to determine what triggers a strike, and keep your line taut to ensure the hook sets quickly when you feel a bite, helping you engage bites more reliably. The stretch in the line gives you immediate feedback, and a well-balanced rig typically lands fish more reliably when casting from sand, rocks, or piers.
Safety and practicality: apply sunscreen, wear a hat, and stay hydrated. Pack spare hooks, swivels, leader material, and pliers in a small box, and check local rules before fishing near protected areas. When you arrive, check the landing point and keep your heads up for changing tide currents and waves. A quick check of tackle between runs keeps you well prepared for the next catch.
From the first outing, keep notes on where you landed the best casts, which rigs performed, and how wind or current affected the line. This practical approach provides a steady path to improve, providing confidence with each session and helping you feel less overwhelmed as you gain hands-on experience.
Beginner’s Practical Blueprint for Land-Based Fishing
Start with a simple, versatile setup: a 7-8 ft medium-action rod, a smooth spinning reel, and 8-12 lb line (mono or braid). Pick one type of line to keep tension steady, and pack a couple of soft plastic baits for quick, quiet hookups. This starting combo works well in most park ponds and river edges, making your first trip straightforward.
Before you head out, check the best regulations for your park and season. Know gear limits and which species you can target. Carry a small checklist: license, pliers, a flashlight, and a compact rain cover for your gear.
Online options let you compare prices and read advice from other anglers, then purchase gear from home or a local shop. For starting, purchase 2-3 soft plastic lures and a basic jighead. Choose among mono, braid, or fluorocarbon leaders; usually your first setup uses mono for ease.
Carry a compact starter kit: rod sleeve, a small tackle box with hooks and split-shots, a spare spool, pliers, and a lightweight rain jacket. Along with gear, bring water and sunscreen. Use a simple map of nearby spots from the park office to plan your route along the water.
Wear comfortable clothing and shoes suitable for damp banks. A hat and sunglasses reduce sun glare. If it’s chilly, layer up; if hot, choose breathable fabrics.
On the water, keep things simple: cast, retrieve, and watch for bites. Try a slow, smooth reeling motion to feel the strike. Try different plastics or a small inline spinner; this fantastic approach helps you learn quickly.
Types of fish you can target early include sunfish, perch, and small bass. Use a light jighead paired with a plastic lure, or a small spoon. If you fished before, you know what works nearby; otherwise, ask a park ranger or review local guides for region-specific tips.
Choosing Rods, Reels, and Line for Shoreline Casting
Go with a 7’6" medium-fast spinning rod paired with a 4000-series spinning reel, and braid 20–30 lb with a 15–25 lb fluorocarbon leader. This setup gives reliable distance from shore and solid feel when you cast under docks or near the heads of structures where flathead and other targets often lie. Pair it with appropriate bait, such as shrimp or cut bait, to increase your catch chances. You’ll feel them bite and take the line, which helps you set quickly. It offers a nice balance between distance and control. Use a smooth, fluid cast and let the braid cut through wind for the best results.
Rod choice matters most for control. For shoreline casting, a 7’6" to 8’6" rod in medium-fast action balances feel and power. Shorter 7′ models are easier to manage in tight spots between pilings, while 8’6" rods help you reach farther locations. Generally, choose a tip that’s flexible enough to feel bait contact and stiff enough to drive lures beyond breaks. Between locations, you’ll use different rod lengths; keep a versatile option in your kit for various conditions.
Reels: Spinning reels generally win for beginners because they’re easy to load and cast. A 3000–4000 size reel with a 5.2–6.2:1 gear ratio matches 20–30 lb braid well. If you fish heavier current or bigger targets, a 5000-size may be worth it, but avoid oversized reels that slow your retrieve. Regularly check the bail and spool alignment to prevent tangles near the mouth of the rod when casting from a crowded shoreline. If you have questions, they will guide you toward the best match. These choices reduce guesswork and support their learning curve.
Line specifics: braid delivers distance and good near-water sensitivity; aim for 20–30 lb braid. Attach a 15–25 lb fluorocarbon or monofilament leader to protect against abrasion from rocks, shells, and rough mouths. Use a simple knot to join braid to leader, and reel tight to maintain hook-set power between waves and swells. Wear sunscreen and a hat to stay comfortable in sun and spray; keep gear well maintained so you aren’t overwhelmed on a windy day.
texas locations vary by water type, from freshwater bays to brackish shorelines. A quick chat with a guide or a local club will tailor gear to the exact spots you fish. Check tpwd guidelines for your area to stay compliant and safe.
Starter Tackle: Terminal Gear, Leaders, and Hooks
Start with a basic, ready-to-go rig: a sliding weight above a 12–18 inch fluorocarbon leader and a durable hook in a size that fits your bait. This running-sinker setup keeps the rig stable on the bottom and makes casting smoother as you learn. It’s ideal for park locations and enjoying your first trip.
Keep a small block of terminal gear in your tackle bag: weights 1/8, 1/4, 3/8 oz; a couple swivels; beads; and hooks in sizes 1–4. In your hand, these items let you swap parts for different conditions without retying. Keep them organized in the bag so they stay with you on a trip. At park locations, you’ll notice how the rig runs cleanly, reducing tangles and wasted time on a trip.
Leaders: choose fluorocarbon for a nearly invisible profile, or monofilament for stretch. From park locations to deeper channels, a 12–18 inch leader with 12–20 lb test works well; for rough bottoms or targeting bigger fish, move to 20–30 lb test with an 18–24 inch leader. A stiff leader resists wear from rocks and shells, so you can fish longer without frequent reties. This setup is highly reliable for beginners.
Hooks: start with two to three types: straight-shank J-hook, small circle hook, and a larger offset hook. For flathead, use a size 2–4 hook depending on bait. Ensure hooks are sharp and rust-resistant; check them after a little bit of casting and replace any that look bent or dull. In your shop, ask for locally recommended sizes and make a note of what works best for your most-fished locations. If you’re targeting bigger fish, opt for a stronger hook and keep the point sharp.
Casting and bite feel: cast along edge structures and drop-offs near park locations where anglers fished for years; keep line tight and look for subtle movement. When you feel a bite, lift with a firm hand and reel steadily to set the hook. This practice yields more consistent catches as you gain experience, enjoying better results on each trip.
Maintenance and safety: inspect line wear where it passes the weights and knots; replace any frayed segments before they fail. Wear gloves when handling sharp hooks on rough days, and rinse gear after salt or brine to extend life. By paying attention to wear and safe handling, you reduce the chance of losing gear and harmful tangles during a day out. fished spots will reward careful preparation and smart, simple rigs.
Lure and Bait Selection for Common Land-Accessible Spots
First, pick a versatile rig: a 1/4 oz jighead paired with a small paddle-tail plastic, tied to a 6–12 lb line with a short fluorocarbon leader. This design covers estuary banks, mouths of creeks, and vast flats where flathead and other species lurk. Cast along seams where current meets structure, and keep your finger on the line to feel the action. Coordinate with your member и angler partner on the trip plan to improve the likelihood of a catch, and decide in advance if you’ll release undersized fish.
In estuary spots, there, along the mouth of a channel, work parallel to the shoreline. The edge near mangroves or reed beds concentrates bait, boosting the action. Use a slow-to-moderate retrieve to keep the lure on the bottom, and adjust weight to maintain contact in changing currents. For bottom-bite species such as flathead, a short pause followed by a slight pull often triggers bites; diversify with occasional faster pulls to probe structure.
Begin with lures for precise control, then add bait options as conditions demand. For bread-based baits, crumble a small piece and thread it on a light hook as a simple, forgiving option when visibility is low. Keep the hook small and avoid overfeeding; the details matter for bait presentation. Target mouths of channels and estuary benches where currents funnel prey, and use a subtle, steady casting rhythm to keep the lure or bait within the strike zone. With each attempt, you’ll improve your catch rate and refine your techniques.
Safety and gear care: wear sun protection and masks for sunny or dusty days. Check your knots and lures after every few casts, and replace worn hooks promptly. Log trip data on a digital device–note lure type, water clarity, tide stage, wind, and fish response. When you land a fish, handle with wet hands or gloves and release promptly if required; for bigger fish, use a proper unhooking and release technique. This habit reduces losses and keeps waterways open for others.
Small details matter: start with a simple rig and practice from a calm shore to build real-world action. Use your finger as a guide for distance and retrieve tempo, and compare results with other spots to learn what works. This approach significantly improves the likelihood of a successful catch on your next trip; thats why you log details and keep an eye on weather, tides, and water clarity.
Casting Techniques for Beginners: Overhead, Sidearm, and Quick Casts
Start with overhead casts, which give you the best balance of distance and accuracy for beginners, providing a solid baseline for refining timing and line control. This helps you build consistency before moving to trickier angles. To choose gear that fits your strength and aims, treat practice like bread for your skill–fresh, steady reps build memory. Read this article online for quick refresher points, and remember depth and line influence each cast.
Set your stance with feet shoulder-width apart, knees soft, and weight balanced. For a right-handed caster, place your left foot forward; grip the rod with a relaxed, palm-down hold, and keep the line running along the top of the spool. If you use braid, you’ll notice greater sensitivity and easier feel for depth and lure response, whereas mono can be more forgiving in windy conditions. Choose a reel with a smooth drag and a line that matches your target species, and keep the line taut from reel to lure to reduce tangles.
Perform the backcast with a smooth wrist hinge, raise the rod to about a 90-degree arc, then accelerate forward with the hips and shoulders. Reach the front stop and release a fraction before it so the lure lands softly in the water–thats why a clean stop matters for a predictable arc and good depth control. Practice in little increments, stretch your practice time as you gain depth and accuracy, and visualize the stroke shaping the water ahead of you.
Switch to sidearm when obstacles behind you or along the bank mask your overhead path. A sidearm sweep keeps the rod near your hip, with a lower trajectory that carries the line beneath branches and along the water. Keep the wrist relaxed, rotate the hips, and release near the belt to drop the lure into tight pockets behind logs or current seams. Wind masks the surface and can alter feel, so adjust tension and depth to maintain consistency.
For quick casts, use short, snappy motions to place the line quickly at a nearby target. This keeps your pace smooth and helps avoid tangles in little eddies or around rocks. Keep the cast short and deliberate, with a brief pause at the end of the forward stroke to settle the lure, then reel steadily to carry it along the stretch toward the catch. Your wrist shapes the timing and can make the difference between a clean entry and a snag, so practice that motion until it feels natural.
Cadence and rhythm matter: set a routine that includes overhead, sidearm, and quick casts in each practice session. Track points such as distance, accuracy, and line control, and note which casts yield the most confidence on rivers or lakes. Carry your technique along with you on every trip and read the water as part of your plan; regulations around fishing gear can vary, so stay compliant and carry the license and the required safety gear. And when you feel uncertain, revisit the article for a quick refresh–reels, line choice, and depth adjustments all play a role in your steady progression as a beginner who wants to catch more consistently.
| Cast Type | When to Use | Key Mechanics | Gear Tips | Common Mistakes |
|---|---|---|---|---|
| Overhead | Open water, long casts in rivers | long backcast, smooth acceleration, front stop | braid for sensitivity; longer leader; check line lay | early release, rushing the forward swing |
| Sidearm | Obstacles behind you, near-bank pockets | low arc, hip-height swing, release near belt | shorter line; ensure reel drag is smooth | over-rotation, lifting rod too high |
| Quick Cast | Tight spots, quick repositioning | short, snappy wrist action, minimal backswing | braid can help feedback; keep spool tension steady | jerky motions, over-wrapping the guide |
On-site Knot Tying, Rig Adjustments, and Simple Field Repairs
Tie a reliable improved clinch knot for mono and a Palomar knot for heavier lines before you cast; this ensures you can secure rigs quickly when conditions shift on the water. Generally, practice each knot until you can complete it quickly with damp hands and steady tension.
On-site knot tying
- Improved clinch knot (mono): thread the line through the eye, wrap 5–7 turns, pass the tag end through the small loop, moisten, pull tight, and trim close to the knot. This protects your casting setups across body and shore targets.
- Palomar knot (all-purpose): double the line, pass through the lure eye, tie a loose overhand knot, pass the loop over the lure, moisten, and pull tight. It stays strong for jerkbaits and plastic rigs.
- Quick checks: inspect for frays, ensure the knot sits flush with the lure or swivel, and practice with a spare mono spool before you rely on it in parks or on the beach.
Rig adjustments
- Leader length: in clear water, use a longer 12–24 inch leader to reduce visibility; in rough conditions shorten to 6–12 inches for better control over your lure and bait combo.
- Weight placement: slide a split shot or a small worm weight above the lure to adjust casting distance and sink rate; keep the combo balanced so the lure tracks true during casting and targeting.
- Jerkbaits and plastics: for jerkbaits, maintain a light direct connection; for plastics use a small jig head or weighted rig to preserve action; adjust hooks and split rings as needed for some targets.
- Spool management: fill the spool to about 1/8 inch from the lip; test drag and line tension under load to prevent line slip when conditions shift.
- Gear and safety: carry spare leaders, swivels, and forceps; a strip of electrical tape can secure a loose lure or patch a nick during long sessions.
Simple field repairs
- Line damage: if you spot a nick, cut above it and re-tie a fresh section using an appropriate knot; this helps maintain casting distance and reduces snag risk throughout your outing.
- Frayed leader: replace the section with a new length of mono or use a seamless leader splice; ensure the knot sits neatly and does not snag on guides during casting.
- Hook or lure tie-offs: if the knot around the eye shows wear, switch to a new lure with the same weight and balance; this prevents dropped catches when conditions change.
- General maintenance: keep hands clean and dry, store spare line in a small bag, and check gear before heading to parks or shorelines; this reduces downtime and increases catching success through every session.
- Emergency repairs: a strip of plastic or tape can hold a cracked rig together temporarily; a quick re-rig length with a spare mono spool helps you stay in the field and continue catching some fish.
Extra tips: use this medium to build confidence as an angler. Read magazines or check digital guides for details, then apply what you learn on the water. If you target jerkbaits or baits in mixed conditions, keep your body relaxed and your shirt and gear ready for long hours in parks or near shorelines. This routine helps increase your overall catch rate and makes every outing more enjoyable.