

 10 Easy, Affordable DIY Boat Improvement Projects to Upgrade Your Boat">

Начните с замены изношенных шипов и герметизации винилового настила. – это не только безопаснее, но и защищает от грязи и влаги. Установите определенный базовый уровень перед каждой поездкой, чтобы уменьшить беспокойство и задать общий тон надежной работе, минимизируя сюрпризы в последнюю минуту.
Улучшить освещение и управление электропитанием – установить светодиодные лампы освещения салона и кабины, подключенные к 12 В cells с правильным предохранением. Аккуратный systems макет сохраняется time затраты на техническое обслуживание низкими и максимально повысить безопасность при работе в ночное время. Судно становится лучше приспособленным для долгих дней на воде.
Организуйте кабину с помощью зажимов и умных систем хранения – использовать клипы чтобы закрепить тросы, добавить маркированные контейнеры и хранить dirt из трудных ситуаций. Небольшое планирование экономит time и предотвращает проникновение беспорядка, улучшая overall планируйте каждое путешествие.
Защитите виниловые поверхности УФ-защитой и ковровыми дорожками. – нанесите нескользящее покрытие на палубу в зонах с высокой проходимостью и используйте защитное средство от УФ-излучения на виниле itself. Простая настройка before Запуск снижает износ и помогает винилу служить дольше, сохраняя цвет и сцепление.
Оптимизируйте монтаж эхолота и траекторию датчика – расположите дисплей для быстрого взгляда, проложите кабели вдоль клипы и systems, и проверьте угол наклона датчика. Хорошая установка улучшает performance и помогает рыболовам считывать результаты эхолота без помех.
Обновите сиденья и подушки кокпита с помощью виниловых чехлов – заменить изношенные чехлы, загерметизировать швы и предотвратить попадание влаги. Это небольшое обновление повышает комфорт, снижает утомляемость в длительных поездках и, как следствие, overall enjoyment.
Улучшите осушение трюма и надежность насоса – чистые фильтры, проверить переключатель и добавить вторичный насос, если позволяет место. Надежный system снижает риск и сохраняет внутреннее пространство более сухим в бурном море, уменьшая беспокойство во время штормов.
Настройка уплотнителей люка и сдвижных дверей – осмотреть уплотнители, смазать направляющие и заменить изношенный уплотнитель. Герметичное уплотнение предотвращает попадание воды и сохраняет внутренние условия, что помогает поддерживать стоимость и overall readiness.
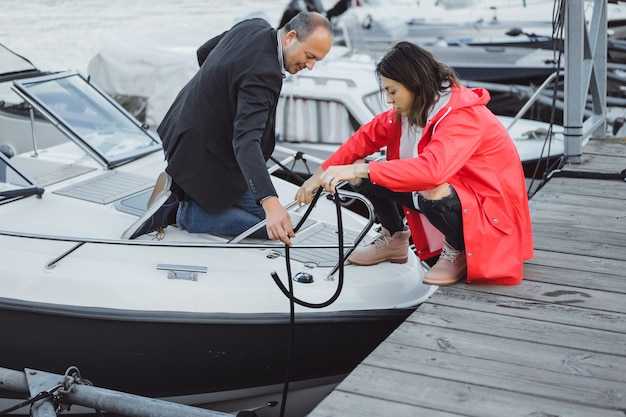
Улучшить швартовное оборудование и организацию швартовных концов – установите коррозионностойкие утки и простой органайзер для тросов, чтобы тросы оставались аккуратными под нагрузкой. С такой установкой before покинув док, становится легче управлять судном при порывах ветра, защищая палубу от грязи и потертостей.
Наладьте быстрый ритм технического обслуживания, используя поисковики и справочные журналы. – составьте небольшой чек-лист и ведите журнал; настройте распорядок дня под себя every несколько недель. Объявления и advertisement страницы журналов могут вдохновить на эффективную планировку и компактный набор инструментов. Этот план помогает максимально повысить долговечность и cells жизнь в водной среде.
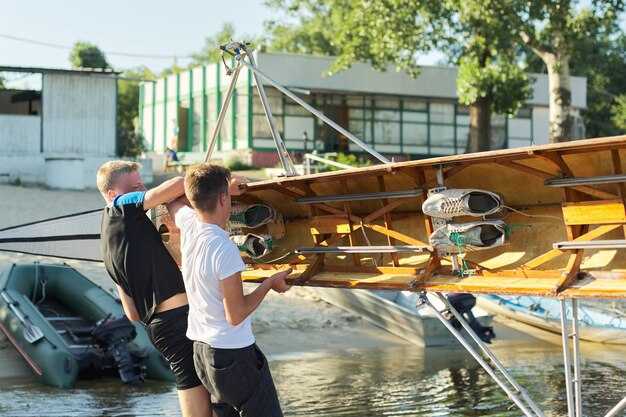
Чертеж самостоятельной модернизации лодки
Установите компактную, погодоустойчивую зарядную док-станцию для телефонов в пределах досягаемости от руля: она обеспечит стабильное питание, уменьшит беспорядок и улучшит настроение больше, чем импровизированные решения во время отплытия.
Обновление палубы: для кокпита и кормовой платформы выбирайте палубные панели морского класса – композитные, виниловые или из кедра – в зависимости от бюджета. Запланируйте 4,5-5,6 м² на площадь 1,8х2,4 м; композитные панели стоят около 3000-6000 руб. за м², виниловая плитка – около 2000-3000 руб., а цельное дерево – 4000-8000 руб., не считая крепежа. Установка проста со стандартными инструментами; измерьте перед резкой и сделайте сухую макетную укладку, чтобы убедиться в выравнивании. Этот подход поддерживает множество различных узоров.
Решение для тени: установить выдвижной теневой навес, используя УФ-виниловую ткань и фитинги морского класса; точки крепления на переднем и заднем релизах с помощью алюминиевых труб 1″ и кронштейнов из нержавеющей стали; цена 60-150 долларов за комплект «сделай сам»; тень снижает тепло и блики, улучшая настроение и защищая экраны на ярком солнце; этот навес обеспечивает достаточный комфорт и больше тени для экипажа.
Экраны и вентиляция: добавьте москитные сетки на иллюминаторы и вентиляционные отверстия каюты; используйте магнитные или шлицевые рамки; оцените 2-3 кв. м площади, покрытой сеткой; поддерживайте прохладу внутри с помощью небольшого 12-вольтового вентилятора; сетки не пропускают воду и повышают комфорт при минимальном потреблении энергии.
Обновление якоря и якорного каната: замените изношенный трос на 1/2″ плетеный нейлон, 50 футов, плюс якорь весом 6-8 фунтов для легких судов; добавьте запасной якорь для разных типов грунта; эта конфигурация обеспечивает надежное удержание на воде при ветре до 30 узлов; протестируйте в спокойном месте перед постановкой на якорь; фурнитура от надежного производителя гарантирует надежность.
Установка зеркала и организация элементов управления: установите выпуклое зеркало диаметром 10-15 см на консоли рулевого, чтобы расширить обзор сзади; расположите его на уровне глаз и под углом, чтобы охватить слепую зону; эта деталь улучшает контроль при швартовке.
Освещение: добавьте водонепроницаемые светодиодные ленты под привальные брусья для ночной видимости; подключите к отдельной цепи 12 В с выделенным выключателем; используйте диммирование для экономии энергии; это улучшит настроение и обеспечит более безопасное передвижение в темное время суток.
Техническое обслуживание и тестирование: ежемесячно проверяйте фитинги, анкеры и шурупы крепления настила; при необходимости подтягивайте; перед каждой поездкой убедитесь, что все крепления надежны, винты затянуты, индикаторы уровня показывают выше минимума, а заряд батареи остается выше 12,6 В; эта процедура предотвращает отказы и обеспечивает надежную работу.
Обновление электрооборудования: Экономичные решения для проводки, предохранителей и аккумулятора
Установите компактную, погодоустойчивую распределительную панель рядом с рулевым постом и закрепите герметичную AGM или LiFePO4 батарею в вентилируемом поддоне; используйте толстые кабели основного питания (от 2/0 до 4 AWG), чтобы минимизировать падение напряжения, и защитите их качественным отключателем с предохранителем. Это изменение может обеспечить чистое, надежное основание для всех систем, оставаясь при этом в разумном бюджете.
Прокладывайте цепи с помощью легких, жаростойких каналов, маркируйте их цветными самоклеящимися маркерами и закрепляйте трассы вдали от грязи, вибрации и источников тепла; обеспечьте легкий доступ для тестирования и обслуживания, сводя к минимуму беспорядок для владельцев. Если вы раньше заменяли проводку, читаемость и быстродоступная схема будут очевидны.
Стратегия предохранителей ориентирована прежде всего на защиту: разместите погодоустойчивый главный блок рядом с аккумулятором с номиналом 60–100 А, с ответвлениями предохранителей на 5–15 А для навигационных огней, УКВ, помпы откачки воды из трюма и критически важных аксессуаров; рассмотрите отдельные автоматические выключатели для критических нагрузок, чтобы уменьшить ложные срабатывания во время прохождения волн. Используйте предохранители с ножевыми контактами или автоматические выключатели морского класса и монтируйте все на крепеже из нержавеющей стали.
Charging and monitoring: install a smart charger compatible with AGM or LiFePO4 chemistry and add a compact battery monitor to track state of charge; ensure the charger output matches battery type; verify that the charging sources (shore power, alternator, solar) are isolated with proper diodes or a charge controller; keep the access panel and wiring clean for finders. This setup could be easily expanded later if the need arises.
When completed, the system stays lightweight and accessible, usable by people who value reliability aboard; the plan is nice for weather exposure and salt spray, with a yete-like toughness that minimizes worry for owners handling older wiring and dirt-prone installations.
| Компонент | Recommendation | Примечания |
|---|---|---|
| Battery | Sealed AGM or LiFePO4, 12V, mounted near center | Weight savings with LiFePO4; ensure venting for AGM |
| Main feeder | 2/0–4 AWG copper | Short, protected runs reduce loss |
| Fuse/Breaker | Main 60–100A; branch 5–15A | Weatherproof, marine-rated |
| Charger/Monitor | Smart charger compatible with chosen chemistry; battery monitor | Readings aid maintenance; keep access for tests |
Deck and Interior Upgrades: Non-skid surfaces, seating, and smart storage
Install interlocking vinyl deck tiles with a textured, non-slip surface thatll provide real grip when wet and clean quickly. Choose marine-grade vinyl designed for outdoor exposure, UV-stable and with a grit pattern that reduces slips. For a grill area, mark a dedicated zone with a higher-contrast color to keep feet away from flames, increasing safety and aesthetics.
Optionally, apply gritty, non-slip epoxy or textured plastic mats that can be trimmed to fit hatch openings and edges. These surfaces stay put under heavy traffic and resist acid or cleaners used in saltwater environments, providing long-lasting traction.
Choose adjustable, weatherproof seating components equipped for rugged use, mounted with clips to secure on deck and minimize movement in chop. Cushions should be vinyl-covered with closed-cell foam to resist water and dry quickly; consider handheld cushions that can be removed for cleaning and storage. A modular layout keeps the mood flexible and makes best use of every inch.
Smart storage starts with under-seat drawers and wall lockers with gasketed lids. Use plastic bins and dividers designed to survive salt spray; clips and tie-downs keep cords and lines organized, providing quick access for everyday routines. A shallow, mirror-backed cabinet can help detect leaks or spills in the bilge area without bending over.
Install LED lights along gunwales and under seating for even visibility at night. Dimmer-ready options let you adjust mood from bright work light to subdued ambience, making late-evening tasks more convenient.
For vessels equipped with seakeeper, offset loads with a balanced layout and secure fasteners; low-profile mounts reduce vibrations and keep components in place. Use a system that can be accessed with handheld tools to tighten fasteners quickly, avoiding clutter and maintaining a calm, focused environment.
Costs vary by materials and scale; the best value comes from modular sets designed for quick installation and future tweaks. A well-planned project can be completed in a weekend, especially when using clips and ready-to-install panels that come equipped with fasteners and seals. Keep a handheld drill handy for speedy work.
Exterior Protection and Hardware: Hull protection, sealant, rails, and fasteners
Apply marine-grade polyurethane sealant along all hull seams, deck transitions, and rail bases. Use backer rod for gaps over 3 mm, tool with a caulking gun, and follow manufacturer guidance for cure times (approx. 24–48 hours at 20–25°C; longer in cool or humid conditions). There are kinds of sealants; polyurethane and polysulfide are common choices. This protects the whole shell from saltwater intrusion and reduces maintenance cycles over time, often after each wash, and always when storing for the season.
For exterior protection, choose a coating strategy suited to saltwater exposure: epoxy primer with polyurethane topcoat or a vinyl wrap above the waterline. Recoat every 6–12 months depending on time on the water, usage, cleaning frequency, and fouling. The vinyl option is appealing for color variety and UV resistance, though it requires thorough surface prep and compatibility checks with your hull material, which makes you wonder about long-term durability, and without compromising breathability or performance.
Rails and fasteners: inspect all rails, stanchions, anchor fittings, and deck cleats every 3–4 months. Tighten hardware and replace any corroded 316 stainless components. Use marine-grade sealant at flanges and lock with Nylock nuts or locking washers. Isolate dissimilar metals with plastic washers or barrier gaskets to prevent galvanic action, check the anchor and cords passage points, and keep corrosion from creeping into the whole installation. Always check before every trip, and after heavy seas.
Decking and cushions: apply non-slip decking tape in high-traffic zones; secure cushions with cords or straps to avoid movement in chop. This setup improves comfort and keeps gear from sliding during maneuvers. When stowing nets or gear, place lightweight items on shelves to keep deck clear and productive.
Windshield and electronics: seal around windshield frames; use silicone sealant and gaskets to prevent spray intrusion. Route cords and cables through grommets and clamps; protect navigation electronics and gyro sensors from salt spray with compliant enclosures or shielding. Regularly check for cracks or moisture ingress around visibility panels and vents, while keeping the area comfortable for crew and always ready for quick checks during rough conditions.
Covering and storage: use a breathable cover when not in use to reduce UV degradation and salt buildup. Before covering, wipe the hull and check seams for cracks. A proper cover lowers repaint costs and prices over time, while preserving the finish and reducing maintenance efforts.
Check schedule and quick actions: perform little checks for anchor hardware, nets, cords, and fasteners each week. Verify shelving and gear placement on deck to prevent clutter. Whenever trouble appears, address it before it worsens; this keeps the whole system appealing and comfortable, while making trip planning more productive and ensuring you can enjoy a smoother, wind-swept ride.
Maintenance and Safety Refresh: Cleaning, corrosion prevention, and routine checks
Immediately after any saltwater use, rinse surfaces with fresh water, wipe down and dry, focusing on the windshield, console area, and transducers. This 15-minute step effectively reduces salt buildup that accelerates corrosion and electrical issues. Log each session online for reference and trend spotting.
Cleaning protocol relies on marine-grade materials and non-abrasive solutions. Use microfiber cloths, soft brushes, and a dedicated degreaser designed for aluminum and stainless. Avoid chlorine-based cleaners near metals. Rinse twice after cleaning to remove residue; ensure surfaces dry completely to prevent moisture pockets in electronics enclosures and around the fishfinder mount. Schedule moments after use to keep aesthetics and comfort high.
Corrosion prevention targets hardware and electrical connections. Install zinc anodes on stern gear and prop shaft; inspect them monthly and replace when more than 50% worn. For aluminum fittings, use marine-grade fasteners and avoid mixing dissimilar metals. Treat terminal connections on a lead-acid battery with protector and a light dielectric grease; ensure clamps are tight and cords are secured. These steps protect systems and extend life.
Routine checks by areas: engine compartment, electrical panels, bilge area, hull deck fittings, and transom hardware. Inspect hoses for cracks, seals for leaks, delaminating fiberglass, and loosened screws; review elements like clamps, wiring conduits, and brackets. Test bilge pump operation and check the battery charge level using a basic multimeter or on-board monitor; verify that the battery is secure and vented properly. Clean debris from air intakes and vent areas to maintain performance.
Dockside safety: inspect fenders, lines, cords, and shore power connections. Make sure cords remain dry and fully coiled when not in use; use a dedicated shore-power cord reel to prevent trips. Confirm that the fishfinder and windshield electronics stay moisture-free with protective covers. Keep a simple, waterproof phone case handy for shore calls and emergencies; store them in a secure, dry place when underway; remove toys from the deck before getting underway to prevent trips.
Organization and stowage: build a basic, smaller-gear kit accessible at hand reach. Include a basic tool pouch, spare fuses, spare bulbs, terminal clamps, and marine-grade fasteners. Use labeled bins to separate maintenance materials, cords, and spare parts. This approach ensures quick access and reduces losses in moments of need, improving comfort and safety.
Learning and ongoing improvement: review online checklists from reputable sources, compare materials, and test small fixes before full deployment; keeping a log helps identify repeat issues and determine when to replace items like gaskets or seals. This approach supports safer handling and smoother outings while you enjoy time afloat.
Lighting Makeover: 7 LED upgrades for cockpit, cabin, deck, and navigation
-
Cockpit overhead replacement: Install a slim, adjustable LED module in a weatherproof housing, 12V operation, 4000K (adjustable 3500–4200K) with a 350–500 lumen output. IP65 rating to withstand weather and spray; driver integrated with lithium-ion packs for clean current supply; to install, mount to the overhead console or bulkheads using rail adapters. This provides crisp task light for charts and controls, reduces glare on displays, and can be dimmed from the dash door area. Once installed, the setup works with standard devices and could be controlled by a small remote or switch in reach. which article notes these benefits in the simplest form?
- Power: ~5–7 W; Current: 0.4–0.6 A at 12 V
- Mounting: overhead or rail bracket
- Environment: weather-resistant, suitable near bulkheads
-
Cabin bulkhead ambient strip: Fit a 1.2–2 m flexible LED strip along the port or starboard bulkhead for even mood lighting, 2700–4000K (selectable where possible), 120–240 lm per meter, total 240–480 lm. 12V supply, CRI >80, IP65 rating. Diffuser in a plastic channel reduces hotspots; colors can be tuned to warm or cool ambience. Installation is simple: route along the bulkhead and connect to the existing distribution; the whole setup stores neatly behind a cabinet door or under a shelf. Colors and dimming options add flexibility for any occasion.
- Placement: along bulkheads near cushions
- Power: ~4–8 W per meter
-
Deck floodlight upgrade: Replace with two high-output LED fixtures, 6000–6500K daylight, ~1000–1500 lm total, 12 V, IP67 rating with a wide beam (~120°). Mount on rail brackets or deck edge to illuminate accessways and work zones without glare into cabins. These devices withstand spray and weather, and their beam angle minimizes shadows at the helm. Simple wiring routing away from wear points keeps the installation durable.
- Power: 20–40 W total (depending on number of fixtures)
- Mounting: rail brackets or deck screws
-
Navigation panel backlighting: Add compact, dimmable LEDs behind the instrument cluster and switch panel for legibility in low light. Target 4500–5500K for clarity, ~100–200 lm per panel, low current draw, and diffusion through a plastic lens to avoid hot spots. Wiring keeps off the main harness to prevent interference; installation behind the bezel with a thin strip or puck lights improves readability whenever charts are used.
- Power: 1–3 W per panel
- Location: behind instrument bezel and map area
-
Under-cushion ambient glow: Run a low-profile LED strip under seating to provide indirect light in the cabin. Use 2700–3200K warm tones, ~60–120 lm per meter, IP54 rating, 12 V with a dimmable driver. Simple to install by tucking the strip under the cushion lip; this approach is comfortable at night and helps locate cushions and cushions’ edges. The effect feels cohesive across the whole living space and can be programmed to suit mood.
- Power: 4–6 W per meter
- Mounting: under cushion lip, with adhesive channels
-
Red night-vision courtesy lighting: Place a small red LED strip or puck near the helm and companion area to preserve night vision. 620–630 nm wavelength, 5–15 lm per unit, low current draw (12 V), IP65 rating. Red tones minimize pupil shift and glare; install near overheads so the glow stays indirect and non-intrusive.
- Power: 0.5–2 W per unit
- Locations: helm, companion console
-
Storage and bilge illumination: Install motion-activated LED puck lights in lockers, dry storage, and bilge compartments for hands-free access. Choose 3000–4000K or selectable temperature for visibility, ~60–100 lm per unit, IP65 rating, 12 V with a current-limiting driver. This keeps tools and spare parts easy to find without unnecessary spending, and the lights can be tucked into the whole store area for quick access during maintenance.
- Power: 1–3 W per unit
- Locations: lockers, under shelves, bilge areas