

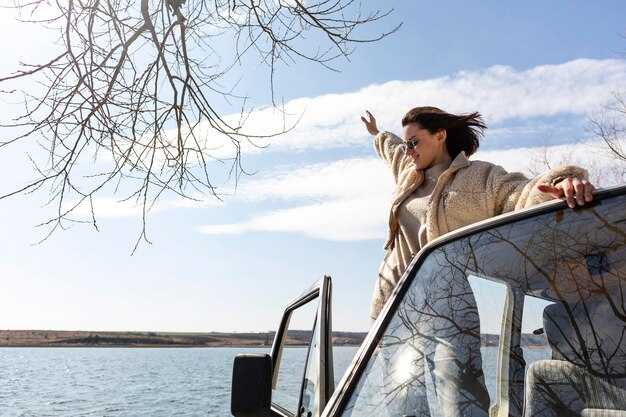
 How to Take a Great Photo on a Boat – Pro Tips for Stunning Seascapes">

Stability on deck matters most: Plant your feet shoulder-width apart, bend your knees, and let your elbows rest against your torso. In rough conditions, use a monopod or brace against a rail to keep the camera steady. For sea spray and splashes, raise the shutter to 1/1000s or faster to capture clearest wave curls. If light drops, adjust to 1/500s but aim toward faster speeds when movements accelerate.
Techniques for focus and frame: switch to manual mode or use single-point AF, lock focus on a high-contrast edge, then recompose. On a boat, water movement creates movements of the scene; anticipate where the boat will drift and track with your focus. If you can’t lock on, switch to continuous AF in bright light, but revert to single-shot AF when you spot a clean, offshore horizon to keep the scene sharp. You wont miss the moment if you practice tracking and timing.
Composition matters in every shot. Place a foreground element (rope, cleat, or buoy) to add depth and lead the eye into the scene. Use contrast between the dark hull and white wave to pop the subject. Keep horizons level; a tilted line breaks the image rhythm in rough sea and stills the photographic value of the frame. If you face a tricky angle, swing your body with the boat’s roll to frame high-contrast silhouettes as the sun goes down and clouds glow, a moment you can capture with practice and create something unforgettable.
Lighting and exposure: In glare-rich, midday conditions, use a polarizer to cut reflections and darken skies; shoot in manual mode sau aperture priority to balance ocean brightness. Use a small exposure compensation (+/- 0.3 to +0.7) to keep water detail and avoid blowing the highlights. As light comes and goes, speed of your reaction matters; keep speed și contrast in mind as sunlight shifts. If you want an unforgettable scene, be ready to press the shutter when the boat slides from shadow into sun.
Timing beats luck on a boat. Track the sequence of movements of a breaking wave and shoot in bursts to catch a peak moment. Use a faster burst mode if your camera offers it; a photographic sequence can yield a handful of frames where spray is crisp and the surface texture shows depth. In tricky lighting, shoot a few frames at exposure bracketed to preserve detail in both bright highlights and shadowy troughs.
Safety and gear: keep a waterproof bag for the camera, dry your lens often, and consider a rain shield in spray zones. Use a lens hood to tame glare, and rinse the setup after a session to prevent salt buildup. For long, exhilarating sessions, plan your conditions and bring extra batteries to avoid a mid-ride power drop; batteries can run down quickly. A clear plan helps you avoid missing your best scene moments and ensures your memories stay unforgettable.
Step 2: Adjust Your Camera Settings for Great Boat Seascapes
Set your base exposure in Manual mode and start with 1/1000 s to freeze motion on rough water. If spray hits the lens, push ISO to 400–800 and keep f/8–f/11 to preserve detail; for silky water, plan to shoot from a stable surface at 1/4–1/8 s, using a monopod or railing as a rest while you follow the movement through succession of frames. This approach improves your images and helps you compare options later.
- Selecting exposure and ISO: In bright sun, use aperture around f/8–f/11 and ISO 100–400; shoot RAW to preserve detail; if you’re using a smartphone, enable Pro mode and capture DNG when possible; for mixed light, auto white balance is acceptable and can be tweaked later in post; this here helps keep color consistent across different scenes.
- Motion and focus: Use AF-C (continuous) with a tracking focus area; employ back-button focus to lock on the subject and recompose; for spray, use 1/1000–1/2000 s to freeze motion; for a trace of motion, try 1/250–1/500 s and pan slightly to show movement through the frame.
- Stability and grip: Everyone should tuck elbows down toward your torso and keep the camera close; brace against the boat rail or use a monopod; on smartphones, two-handed grip and chest support helps; waterproof housing protects gear from spray.
- Perspective and space: Explore different perspective angles to emphasize space and depth; shoot from knee height or lower to exaggerate waves; plan a quick succession of frames to capture the subject under changing light and waves.
- Equipment and protection: If you have rugged cameras or a waterproof housing, you’re better prepared for rough conditions; having a spare battery and memory card helps; smartphone users should enable Pro mode and keep the lens clean and dry.
- Post-process and workflow: Import images as RAW, check the histogram, and adjust white balance and highlights to keep water color natural; batch process similar frames for a cohesive look; store images with consistent metadata to simplify selection later.
White Balance on a Boat: Presets and Custom WB for Blues and Sunlit Water
Set the white balance to 5500K manually for most coastal, sunlit days to keep blues accurate and sunlit water balanced; shoot RAW to refine WB later and preserve multiple frames from the start, so you can compare options without losing detail.
On a boat, presets help you respond to changing light quickly. Use Auto WB as a baseline, then switch to Daylight (about 5200–5500K) when the sky is clear and the blue water reads true; Cloudy adds warmth for calmer days and more natural skin tones; Shade pushes more warmth for late afternoon light. For night scenes or the glow after sunset, Tungsten can cool the scene, but expect a cooler water cast. Work to stabilize WB across a sequence so colors stay harmonious as the deck moves and there are movements in the frame.
From the start, a custom WB method gives you the most control. Place a neutral gray card (or a clean white shirt) in open shade on deck and shoot a reference frame. In RAW, set WB to a target around 5500–6000K to keep blue water true while preserving the sunlit warmth. If a card isn’t available, use a bright gray area in the scene, then adjust WB in post to prevent casts on the water. This approach helps stabilize exposure and WB, especially when you switch between still life moments and sweeping seascapes.
To minimize shifts when the boat rocks, lock WB and exposure and shoot in a burst with a steady shutter, then pick the frames where the water and sky share a similar cast. A polarizing filter helps reduce glare and gives you more distinct blue tones, while keeping the sun’s shine on the surface. If you must shoot with limited reference, shoot a short sequence and fix WB in post; that saves space in editing and keeps the sequence coherent for a coastal shoot.
During sunset, temperatures swing and blues can look richer or cooler. Try WB around 6000K for a crisper, cooler water tone, or push toward 5200–5600K to enhance warmer skies while preserving blue water. For night, Auto WB with careful post adjustments works, but always keep a reference shot for continuity. Here, WB is a tool to shape the vastness of the sea and sky, not a fixed rule–the right preset or custom value lets you photograph them in calm, expansive moments, from ordinary to spontaneous, and then the shine appears.
Metering Modes: Evaluative vs Spot for Balanced Sky and Sea
Recommendation: Use Evaluative metering as your default on a boat for balanced sky and sea. Depending on the scene, this mode analyzes the frame and offers a reliable exposure for the blue water and the sunny sky, providing a solid photographic taking that serves their interests. The advantage is it adapts to dynamic light across the frame, so you can enjoy the moment without constant tweaks. If the sky becomes very bright or highlights on water look small and blown, switch to Spot metering to lock exposure on a precise area. Once you lock it, shoot a quick bracket or check the histogram to verify results.
On a moving vessel, stay prepared. Keep your gear handy, plant your feet securely, and stabilize against a rail or the deck. Always monitor the horizon and know your vantage: Evaluative handles a broad scene, Spot helps when a small bright area dominates. If you want to emphasize texture in the water or cloud patterns, use Spot on a small area and then return to Evaluative to resume balance. During shooting, shoot in RAW to preserve latitude, and check the histogram frequently to avoid clipping. If exposure pushes too far, the sky wont recover in post, so use exposure compensation as needed and keep your shots aligned with the light direction to make the best use of their photographic potential.
Practical scenarios and tips: In sunny conditions with very bright sky, start with Evaluative and apply -0.3 to -1 EV if the sky clips; in ordinary daylight you can stay near 0 to -1. For high-contrast moments, bracket across 2-3 frames to capture both sky detail and water texture. In blue-water scenes where interest lies in reflections, Spot metering on the sky can control glare while Evaluative preserves water tones. In scenes with limited dynamic range, Evaluative often balances tones, but bracketing remains a smart move to ensure you capture the full spectrum. Once you establish a reliable workflow, you’ll enjoy quick, repeatable results and a clean transition from sky to water across your sequence of shots.
Shutter Speed Tactics: Freezing Waves vs. Capturing Long Exposure Motion
Set your shutter speed to 1/1000s to freeze the most dynamic waves when the boat rocks. If light is limited by overcast weather, raise ISO to 1600–3200 and still preserve detail in spray, then adjust exposure to keep the depth in your photograph intact. Do this carefully to avoid blowing highlights and to maintain color; avoid taking careless frames and focus on the core motion. This approach yields crisp edges along foam and salt, enhancing the scene in a single frame.
For motion, switch to long exposure to capture smooth water and trailing spray. Start at 1/4s and move to 2s if the light permits; use a stable rail or a compact gimbal, and keep your feet planted to limit body rocking. A mindful technique helps avoid blur and yields a unique texture in the waves. If renting gear, be mindful about weight and balance.
Before you pick mode, check weather and scene: overcast can flatten contrast; bright sun may create glare; beware problems such as reflections off railings or a moving sail; then decide which approach will most enhance the scene and your photograph. In this article, you’ll find practical steps to apply at sea.
Gear note: renting a lightweight setup with minimal gear often pays off on a boat. Use a remote trigger for long exposures, secure your drinks and other items, and maintain a mindful stance to protect your body and your shot. Have a spare battery and a small memory card on hand to stay ready for changing conditions.
| Mode | Scenario | Shutter Speed | Tips |
|---|---|---|---|
| Freezing Waves | Rocking boat, spray visible | 1/1000s – 1/2000s | Plant feet, brace body; keep horizon level; shoot in bursts to lock crisp edges |
| Moderate Motion | Waves breaking softly, foam detail | 1/250s – 1/500s | Pan with movements; use a longer lens to compress depth; avoid rolling framing |
| Long Exposure | Silky water, light trails | 1s – 2s | ND filter optional; tripod or solid rail; remote shutter for stable capture |
Aperture Choices: Depth of Field for Horizon Details
Set aperture to f/11 as your default for horizon details; this high DOF keeps near white foam and the distant horizon sharp, offering a great sense of depth. Use hyperfocal distance at your focal length so youre not chasing focus on a moving boat, and the frame may move. If youre shooting wide and want more water texture, stop down to f/16; if light is tight, open to f/8 and compensate with ISO or shutter speed.
On overcast days, contrast drops; maintain edge-to-edge sharpness with f/11–f/16. To freeze spray and keep the horizon crisp, use shutter speeds in the range of 1/500–1/2000s depending on wind and wave height. If you want smoother water in the foreground, you can dip to 1/60s, but you’ll need a stable platform or waterproof cover and a strap to keep the camera from moving. Experiment with multiple speeds to balance action and horizon sharpness. When taking shots here in calmer moments, you can still aim for a clearer horizon.
Techniques: open the lens to a wider frame if you want to emphasize the horizon; manual focus using live view, zoom on the horizon to lock a clean line, then set hyperfocal distance for your focal length. These techniques help you plan the shot and keep horizon detail consistent. Take multiple shots with slight variations in aperture and ISO to cover the moment. In editing, you can balance white and blue tones for a natural look.
Gear notes: strap the camera securely to your body or rail; use waterproof housing or a rain cover when spray picks up; keep a microfiber cloth handy to wipe salt and water from the lens; adjust setting for the wind and glare, and bring a spare battery.
Next steps: practice during spontaneous moments; this article here offers more tips; try a unique look by bracketing at f/11 with different speeds, then compare in editing. Youre ready to turn a plain horizon into something memorable.
ISO and Noise: Managing ISO on a Moving Vessel
Set Auto ISO with a ceiling of 1600 and start with shutter 1/1000s, aperture around f/8 to keep the subject crisp while freezing spray. In blue hour, push to 3200 and adjust to maintain highlight control. This balance preserves detail and minimizes noise while giving you a clean lead on the subject as the vessel rolls.
Stabilize by tucking elbows, using a strap, and keeping the camera tight to your body. Stand with a solid stance to absorb the constant motion, and time your press for the moment when the boat leans toward a swell. A small lean toward the direction of travel reduces down time to a minimum; you gain better control and more space to capture clean color and texture.
Points matter: Manual gives you control; Shutter Priority works when light shifts. If you use Auto ISO, keep a cap in mind and adjust exposure with exposure compensation so the sky doesn’t wash out. For a broad vista, try a wider aperture with a shorter shutter; for a painterly look, pan with the boat using a longer focal length.
Post-processing: shoot RAW, compare frames at ISO 400–800 and 1600–3200; choose the best capture and apply noise reduction only where needed to preserve texture in spray and fabric on the subject. dont oversmooth; enhance detail in foam crests and sails. Keep a vantage on the light hour; if you miss it, the next hour offers another chance to improve color and mood.