

 How to Get Started in Wakesurfing – A Beginner’s Guide to Riding the Wake">

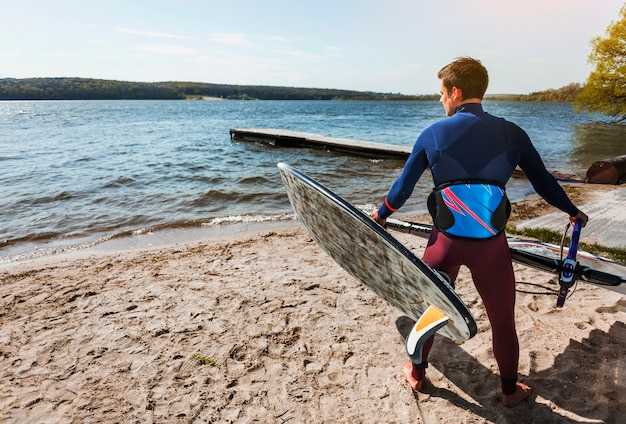
For beginners, start with a stable stance and practice hands in a relaxed position. Keep knees slightly bent and weight centered over the board to stay balanced as you rise. This is the where you begin building skills and the perfect ride. before you ride, run a quick check: shoes tight, fins positioned, and line tension comfortable–these steps ensure a best start. Share the learning with surfers you know; learning together makes the path more enjoyable for beginners și them feel supported in the group. Some simple tips speed up progress and keep things sweet.
Choose a board that fits your weight and height; bigger boards offer more stability for beginners transitioning from kneeling to standing. Start with a medium rocker and a forward-leaning stance; being positioned slightly forward on the board helps catch the wake earlier. Always ride with a learner-friendly rope length and keep momentum steady by edging smoothly. Tips: keep your gaze fixed on a point you want to go, breathe steadily, and evită overexerting your arms.
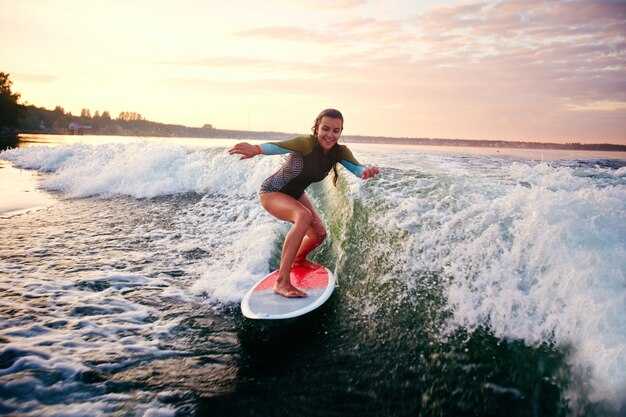
When you get up, press with your hands and push your chest forward, then stand tall in one smooth motion. Keep your head up to avoid drifting in the wrong direction; this helps you ride the wake cleanly and develop skills faster. Practice the three moves: edge in, rise, and ride; once comfortable, you can advance by small increments and test bigger wakes in safe conditions.
Build a simple plan: two 20-minute sessions per week, plus one longer weekend ride. Seek advice from a knowledgeable instructor or trusted teammates; they can show you where to place your hips and how to evită common stalls. Keep a log of the things learned and the sweet improvements you notice in your form, and you’ll feel progress in your hands and posture.
For a more enjoyable start, keep sessions steady and align your body with the wake. The best approach is consistent practice, fair play with other surfers, and a focus on positioned balance and depth of knowledge. Remember: before you push to bigger lines, master the basics, maintain perfect posture, and advance only when you feel confident. By following these tips, you’ll turn the wake into a playground and make every ride sweet for yourself and your peers.
Practical Wakesurf Kickstart: From First Moments on the Board to Riding the Wake
Begin with a wakesurf-specific board and a 20–25 ft rope; keep your stance low and centered, knees flexed about 20–30 degrees, and shoulders square to the board. This setup is possible for most body types and gives you room to adjust as you rise, where balance becomes stable. Start each session with a quick 60-second rehearsal of your stance and breathing to build confidence before getting in the boat.
On moving water, rise from a squat, then stand tall as the boat pulls you forward. Keep your weight slightly toward the back foot to shape the board against the wake, and aim for a perpendicular angle between board and wake to maximize balance and control. Those new to wakesurfing can follow this pattern to build a reliable first ride.
Release the rope when the line stays clean and you feel the balance settle. Whether you’re experienced or some days you’re learning, run four to six short pulls, then ride 30–60 seconds without the rope to reinforce the feel and the flow.
Speed matters: 9–11 mph works for most boats; adjust to wind, boat trim, and water depth to stay in the sweet range. Practice in light, calm water first, then move to moving water as your skill grows. Those who want extra challenge can try wake-shaping moves along the wake edge, keeping the board perpendicular to the boat’s path to carve a longer line. These drills work specially well when you keep your hips quiet and your eyes forward.
Keep an eye on safety and progress: track miles logged, note the shape of each ride, and share clips with a journalist or coach to get objective feedback. Document tips in your social circle and keep your notes yours as you build a flexible, wakesurf-specific routine that works for everyone, whether you’re on the ocean or a lake.
Board Selection: Pick the Right Wakesurf Board for Your Weight and Skill
Concrete recommendation: pick a board with a volume that matches your weight, without sacrificing stability. For riders under 140 lb, target 22–26 L and 4’0″–4’6″. For 140–170 lb, aim for 28–34 L and 4’6″–5’0″. For 170–210 lb, go 34–40 L and 5’0″–5’4″. For 210+ lb, 40–45 L and 5’2″–5’6″. These ranges help distribution over the deck and support a smooth, confident start. If you want extra security, size up within your class by a little and choose a board that stays buoyant while you learn your stance and timing.
Skill level drives shape choices. Beginners benefit from a wider outline and a flatter rocker, which makes planing easier and steering steadier until you lock in your stance. As you develop your approach to the wake, you can switch to a slightly narrower board with a touch more rocker to improve steer and release while carving. Think of shaping as a tool to support your progression: you want something that feels predictable from the first pop to the first cut, keeping your balance centered and your moves intentional.
Board styles matter for control and feel. Skim-style boards with a generous flat area and a rounded tail are forgiving and stable, while compact designs lean toward quick turning and tighter lines. Luxury cores and reinforced laminates add stiffness for hard pulls when you want to drive speed, but you’ll still want a board that sits flat on the water and points with clean intention. Consider your surf-style: if you prefer smooth, relaxed lines, a larger volume board with soft edges helps; if you chase aggressive lines, a mid-volume board with a slightly higher rocker gives you quicker release and sharper feedback.
Fin setup and hardware influence how you steer and how you land a release. Most riders start with two fins for stability and easy tracking; moving to a three-fin or single-fin arrangement can sharpen turning and reduce drag when you’re ready to advance. Distribution of your weight across the board–heelside and toeside balance–affects pointing and control, so pick a setup that feels intuitive and lets you keep a consistent stance. If you’re unsure, a knowledgeable shop or coach can guide you toward a complete configuration that matches your body weight, tallness, and personal goals, so there’s a clear path from your first ride to confident surges over the wake.
Boat Wake Setup: How to Find a Clean Wake and Set Safe Speed
Start by placing the boat on the lee side to create a clean wake, then set a safe, steady speed around 9–11 mph (14–18 km/h) with ballast balanced. The источник of a smooth ride is a consistent wake, so keep momentum light and drive smoothly to avoid abrupt changes that throw riders off balance.
- Assess the water and wind: look for glassy or lightly choppy water and avoid wakes from other boats. A light, steady surface makes those first starts easier for riders and helps fins and boards track true. When the wind shifts, adjust speed by 1 mph to hold the same wake height and quality.
- Distribute ballast and weight: keep ballast amount balanced between the bow and stern to preserve a clean, symmetrical wake. If you’re loading in two riders, share the weight evenly; if solo, place weight toward the center to maintain body alignment and momentum in the water. Those small shifts change how the wake rises and ease of skim.
- Set the speed to your wake size: start at 9–11 mph (14–18 km/h) in flat water. Increase up to 12–13 mph (19–21 km/h) for bigger wakes created by extra ballast, but avoid pushing beyond the point where the wake becomes choppy. Know that a faster pace makes the wake taller but can reduce control for beginners.
- Choose the right rope and length for starting: use a shorter tow rope (roughly 15–25 ft) for initial pops and to keep light tension. As confidence grows, you can extend to 25–30 ft to allow more time for a patient, controlled setup. A longer line gradually reduces the momentum transfer and helps you stay balanced into the first airs and skim attempts.
- Position and drive: sit in an athletic stance with knees soft, hips over the feet, and eyes forward. Drive through the hips rather than the shoulders and keep the handle low in the hand to maintain a stable pull. Those details keep your body aligned with the wake’s direction and prevent sudden twists.
- Starting and riding with a rope: for starting, keep the rope taut and the board facing the wake. As you rise, transfer weight from heels to toes smoothly and keep the fins engaged to preserve edge control. There’s almost no substitute for a steady drive and a deliberate, shallow edge into the wake.
- Check for safety and readiness: ensure a clear path, spotters in place, and riders aware of the board’s motion. If someone cant keep balance or feels rushed, slow the speed a notch and work through the stance and line until you understand the rhythm. Those adjustments prevent mishaps and make the hour on the water more productive.
- Tune for different styles and riders: some riders prefer a higher, steeper wake for airs, others seek a flatter, smoother surface for skim tricks. Adjust ballast and speed in small increments to match the rider’s weight, skill level, and confidence. Those small changes give every person a better chance to progress safely.
- Practice with a head-ready mindset: run a few dry passes at walking pace to get a feel for the boat’s response, then begin your first attempts. Those practice hours strengthen the connection between drive, momentum, and the wake, making starts smoother and more predictable.
There you have it: a practical setup workflow that delivers a clean wake and a safe speed. By focusing on weight balance, steady speed, appropriate rope length, and deliberate on-water technique, everybody can ride with confidence and enjoy progress through consistent, repeatable conditions.
Getting Up: A Step-by-Step Protocol to Stand Up on the Board
Stand up in one smooth motion: push with your hands, rise to your knees, then pop to a balanced stance, keeping your eyes on the spot you plan to ride and your weight centered over the board.
For beginners, treat this as a customizable system that aligns with the fundamentals. A steady tempo works: stay compact, chest up, hands ready to push, and weight centered while you keep a steady level of focus. The goal is control that translates into smooth starts and reliable rides. Experienced riders tighten the sequence to stay strong as they rotate into the wake.
Think through the phases: getting stable before the lift, then rotate your hips as you push through the hands and bring your knees toward the chest. This structure gives you a clear path and allows you to progress to airs and longer rides as you gain confidence.
As you progress, youll notice faster starts and smoother transitions, allowing you to ride with more confidence on their wakes.
| Step | Action | Key Cues | Greșeli frecvente |
|---|---|---|---|
| 1. Setup | Lie on the board with chest up; place hands near the centerline; spot the line you plan to ride; keep elbows tucked. | Eyes forward, hands under shoulders, board flat on water. | Lifting hips too early; uneven weight distribution. |
| 2. Push to Knees | Push through your hands, lift chest, bring hips forward, tuck knees toward your chest. | Shoulders square to wake; board stays level. | Elbows splaying; hips rising before your chest. |
| 3. Stand Up | Shift weight from knees to feet, rotate hips, plant front foot forward and back foot at 45–60°. | Shoulders aligned, knees softly bent, eyes forward. | Knee locks or feet misaligned; rushing the lift. |
| 4. Balance | Stand tall, keep weight over mid-foot, relax arms, adjust stance for the wake; look along your riding line. | Core engaged, chest up, breath steady. | Leaning back; overextension of arms. |
| 5. Progression | Repeat sequence until seamless; aim for 3–4 seconds from start to full stand; practice from a consistent spot. | Rhythm, smooth motion, refined stance for your board. | Rushing; inconsistent timing. |
Stance and Edge Control: Front–Back Balance and Subtle Weight Shifts
Place your feet shoulder-width apart on the board, with the front foot angled slightly and the back foot flat. Keep your knees soft, hips level, and chest up to maintain an athletic form. Maintain even weight distribution between both feet and stay centered over the board as you ride; theres no need to chase perfection from the first ride.
Front–back balance is about moving your weight along the board’s length. To climb the wake, shift a bit toward the front knee and ankle, then reverse to drive the tail and ride the back edge. With practice you’ll learn to keep the board stable and respond to the wake with the right amount of tilt and foot pressure, adjusting your stance as you go.
Edge control comes from subtle weight shifts and proper alignment. To hold a steady edge, keep your hips oriented toward the direction you want to go and use your back knee to adjust rail pressure. Stay over the center and distribute weight between the balls of your feet and your heels so your distribution supports quick responses to the wake, speed, and line you’re on. A sure tension in the core helps you avoid overreacting.
Moving from one edge to the opposite edge requires calm, small shifts. Rotate your hips and shift your distribution toward the new front foot, keeping your hands relaxed for balance and your knees soft. Stand tall, keep your chest open, and use your legs to absorb motion. Think in terms of a smooth throw of the hips rather than a forceful shove, so you can stay in control as you turn, not fight the wake.
Training plan for beginners: 3–5 sets of 5–8 seconds on each edge, with a brief reset between reps. As you started learning, you’ll notice the amount of weight you need shifts with wake height and boat speed. If you’ve logged miles already, length matters less than your ability to stay balanced. Surfers with miles of practice notice their balance improves. Their stance isnt perfect, but their understanding grows and their form can be mastered. Stay patient, have both feet planted, and keep your hands light so your upper body stays quiet.
Styles of Wakesurfing: Surf Style, Skim Style, and Hybrid Approaches
Start with Surf Style as your foundation. Position your feet shoulder-width apart, knees bent, and your weight slightly back to keep the board on planing line. Look over the wake line, not down at the board, to anticipate the ripples and prepare your massive turns. Most beginners benefit from a 5’0″ to 5’4″ board for stability and buoyancy. A coach says this setup is the most reliable way to build feel and set a clear progression path. Wear a snug vest and a leash; safety is a priority and increases confidence when you try new moves. When you master the setup, you’ll find your level of control improves quickly and you can focus on the core movements rather than fighting the board. This style is crucial as a foundation for rides in different water conditions, and it makes these sports enjoyable for you and your crew. People on the boat often comment on the rhythm you gain, and you can enjoy the process as you build your confidence in the water.
Skim Style prioritizes speed and lift with a shorter, flatter board. You stay lower and more forward on the wake, enabling quick, shallow turns and smoother transitions along the water line. While skim can feel brisk, control comes from small edging and a centered stance. This isnt about brute power; positioning stays forward to keep the board light on the surface, and the pace remains manageable. When you ride skim, you’ll feel the water gives you a lively, responsive feel that’s social and enjoyable for spectators, and it’s a great way to build confidence for more advanced moves. For most riders, a board around 3’4″ to 4’0″ works well; heavier riders may prefer 4’2″ to 4’6″. If youve tried skim, you know the pace is brisk and the transitions are tight; you can push toward the upper end if you want more stability and longer lines.
Hybrid Approaches blend Surf and Skim to adapt to conditions. A mid-size board around 4’6″ to 5’2″ gives a solid foundation for both glide and stability. Use Surf Style foot placement for early pops, but borrow Skim’s light edging for tight turns near the wake. Your approach is to adjust balance and stance quickly, depending on the water and boat speed. This level of versatility is crucial when you ride in different spots or when the wind shifts. Social sessions on the boat give you feedback from people watching; use that to refine timing and positioning. When you find your rhythm, you’ll enjoy a smoother ride with reduced fatigue. This approach suits most riders and a wide range of skill levels, and it can be the most enjoyable path if you want to explore massive turns and long lines across the wake.