

 WakeFoil and Surf Foil Buyer’s Guide – How to Choose Wings, Boards, and Gear">

Start with a 900–1100 cm² wing for wakefoil when learning behind waves; this size balances stability and lift, letting you accelerate to 9–12 mph (14–19 km/h) without fighting the foil. Most riders, including mulheres e riders, gain confidence quickly with this middle ground, then adjust as you gain control. For advancedexpert setups, stepping up to 1100–1400 cm² increases glide and reduces pump on longer runs.
Boards should be 90–110 cm long and 35–50 cm wide, with a flat to mild rocker for stability. For rider weight under 70 kg, 90–100 cm length improves balance; heavier riders benefit from 100–110 cm. Look for an acessível entry package that includes deck, foil, and fins. You can download a toolkit of setup tips and tuning steps to maintain performance after sessions.
Front-wing geometry matters. Choose a front wing with a moderate aspect ratio (4.0–4.8) and a span of 44–60 cm; pair it with a smaller tail wing for stable spin and precise turns. For learning, use a larger front wing (1100–1400 cm²) for early lift and forgiving takeoffs, while advancedexpert riders may favor 900–1100 cm² for speed and efficiency. When equipped with the right balance, you maintain control in winds 12–18 mph and light chop. Refer to marine guides and a straightforward toolkit to compare feels on the water.
Women and lighter riders benefit from smaller wings: 700–900 cm², then grow to 900–1100 as technique improves. If you’re heavier, consider 1100–1400 cm². Pick a board with a durable surface and good water drainage to maintain performance in saltwater. For wakeboarder transitions, keep momentum with consistent stance and knee-bent posture to spin into clean turns.
Keep a ready-to-go download toolkit listing checks before each session: fins, straps, mounting screws, and foil balance. Always inspect hardware after sessions to manter safety and reliability, aiming to keep gear acessível for regular use behind waves. Save our guides to your device and revisit the most setup steps before you ride.
WakeFoil and Surf Foil Buyer’s Guide: Practical Wings, Boards, and Gear Guidance
Start with a mid-size wing around 1000 cm2 and a 34-inch board for most riders; this pairing delivers stable lifting behind a wakeboard or boat wake without sacrificing control, and it keeps the buyer confident as you begin.
For jumping and quick acceleration, add a bigger wing later in the 1100–1400 cm2 range to improve planing and early lift, while keeping overall speed manageable. If you prefer smooth, steady cruising, stay in the 900–1100 cm2 band.
When riding behind a sterndrive, a wider stance and a softer lift profile help you stay ahead of gusts and chop; choose a wing with generous wingspan and a forgiving profile, and pair it with a 32–36 inch board for balance.
Board choice matters as much as wing size. Opt for a 32–36 inch board with 16–18 inch width to maintain a stable stance; shorter boards respond faster but are less forgiving, while longer boards reduce drag and increase balance behind busy wakes.
Material and feature options exist today; modern wings use carbon for performance or fiberglass composites for softer landings and lower price. Look for rounded leading edges and a smooth trailing edge to prevent catching when you land behind the wakeboard or other riders.
Mounting and base systems should be simple; todays top-level setups offer quick-swapping wings and adjustable stances without tools. Check the base, pin or bolt option, and whether the wing can be rotated for forward or backward balance depending on your aspect and riding style.
Which gear features matter most? Start with lift onset, turning responsiveness, and stability in chop; every feature, from softer edges to bigger tail plans, affects your ability to progress without big waves. Ask questions about wing feature, mounting ease, and warranty timing.
To compare effectively, consider a buyer’s table of specs below with todays recommended baselines and a plan for progression.
| Aspect | Recommended range | Why it matters |
|---|---|---|
| Wing size (cm2) | 900–1100 cm2 (general); 1100–1400 cm2 for jumping early lift | Balances stability and lift; bigger aids planing behind wakeboard or boat wake |
| Board length (in) | 32–36 in | Stability for learning; longer boards feel more controllable behind wakes |
| Board width (in) | 16–18 in | Wide stance improves balance and reduces spinning |
| Rider weight (kg) | 60–95 kg typical; adjust toward 90–110 kg for larger riders | Weight affects lift and planing speed |
| Construction | Composite or carbon | Composite softer; carbon stiffer; choose per budget and feel |
| Mounting system | Universal 4-bolt or quick-swappable | Faster swaps between wings; reduces downtime |
| Wing edge | Softer edges; rounded leading edge | Prevents catching and improves comfort |
Wing Sizing: match wing area to rider weight and desired wake or surf performance
Begin with a wake wing around 260–300 cm² for riders 60–85 kg and a surf wing around 700–800 cm² for everyday sessions to cover a broad range of conditions.
These ranges provide a solid starting point; for beginnerintermediate riders, they balance ease of planing with stable handling on todays wake and surf surfaces. Use the tabs on dealer and manufacturers pages to compare area, span, and aspect ratio, and call your dealer for a test ride to feel the sensation before buying. The guidance provides a framework that adapts to the rider’s weight, board length, and riding style.
- Under 60 kg (130 lb): wake 180–230 cm²; surf 550–650 cm²
- 60–85 kg: wake 230–300 cm²; surf 650–800 cm²
- 85–110 kg: wake 290–360 cm²; surf 750–950 cm²
- 110 kg and above: wake 340–420 cm²; surf 900–1100 cm²
For a two-wing setup, pair the wake wing with the mid-to-lower end of its range if you’re new to foil, and reserve the upper end for more aggressive turning or faster wave sections. For surfers focusing on surface speed, choose a larger surf wing within the range to increase lift and stability on the wave face. In practice, if you’re beginnerintermediate and your board is under 5 ft, start in the mid-range–these are common starting points recommended by experts and dealers alike. This approach mirrors how snowboarding and other sports balance stability with control, making it easier to progress in the heyday of watersports.
- Mounting and troubleshooting: position the front wing forward or back within the recommended range to tune lift and glide.
- Check with dealers and manufacturers: use the largest catalogs and comparison tabs to verify area, span, and AR before buying.
- Testing and feedback: request a trial from your dealer to compare sensation between wake and surf setups; these tests help beginners and older riders build confidence.
- Practical notes: for sterndrives or boating contexts, use the same sizing logic to maintain smooth takeoffs and stable transitions on the surface.
Foil Geometry: planform, aspect ratio, and lift-to-drag tradeoffs for stability
Recommendation: Start with a mid-AR front wing around AR 6–7 and a broad, gently tapered planform to keep early takeoffs forgiving. For wakeboardsdesigned setups, pick a root chord around 140–170 mm and a tip chord around 60–110 mm, with a span near 0.75–1.0 m, to help you watch for stability while keeping the ride predictable.
Planform shapes drive lift distribution and drag. A rectangular planform yields even lift but higher tip-vortex drag; a tapered planform reduces tip stall and sustains lift as speed rises. A taper ratio (tip/root chord) around 0.4–0.6 works well for stability and easy planing. A wider root with a modest tip helps keep the wing forgiving and makes it easier to move from learning to performing on the water. For those learning on heavier rigs, upsize S a bit while preserving a steady AR in the 6–7 range, so the wing remains predictable as you accelerate out of the wake.
Aspect ratio dynamics, defined as AR = b^2 / S, shape stability and efficiency. Low AR improves low-speed lift and stability, but drags more at speed. Mid AR (6–7) balances stability and speed, delivering a steady glide without demanding high speed to stay on plane. A higher AR (7–8) boosts lift-to-drag and efficiency at cruising speed, yet it can reduce low-speed forgiveness if the wing becomes too long and narrow. For beginners, start with AR around 6 and adjust by swapping wings rather than rebuilding the setup.
Lift-to-drag tradeoffs for stability hinge on maintaining a high enough L/D without sacrificing forgiveness. Increasing planform area raises lift at low speeds but adds drag; increasing AR improves L/D but may shrink stall margin if the wing becomes too slender. The sweet spot for learning is roughly AR 6–7 with S in the 200–320 cm^2 range, delivering steady lift during early planing and a predictable ramp into speed. Trailing-edge tabs can fine-tune lift without major reconfigurations, helping you keep the nose up during takeoffs and transitions.
Fine-tuning with tabs and geometry, then, is practical. Use adjustable tabs to shift lift distribution without rebuilding the wing, which helps rebound when you pop up and ride roughly with chop. A modest washout of 2–4 degrees toward the tip reduces tip stall in rough water and makes turns more predictable. When evaluating three core questions about stability, consider where the lift concentrates at low speed, how drag changes with speed, and what needs to adjust to stay confident in wake energy. This approach keeps learning progress steady and reduces surprises on the water.
Practical picks by rider profile matter. Light riders up to ~70 kg do well with S 170–230 cm^2 and AR 6–7; midweights (70–90 kg) use S 200–280 cm^2; heavier riders (>90 kg) can go S 260–380 cm^2 while keeping AR in the 6–7 range. If you ride a boat or supra-style craft, plan to increase planform area to match wake energy and choose rocker lines that match your speed needs. Tabs and build reliability are critical; a wakefoil with solid tabs and strong materials keeps you in learning mode longer and reduces trips to the bench for repairs.
Where to start, and what to ask, can define your early experience. Choose wings with mid-range planform and AR, and check build quality and spare-parts availability–reliability matters for those long sessions. Ask about materials, tab accessibility, and how easy it is to swap wings or add new tabs as you grow. If something feels off, test with a smaller or larger wing in calm water and watch how the wing behaves when weight shifts. The goal is to keep head-turning confidence high and avoid surprises on the first rides, so you can progress with less disruption and more freedom to learn.
Board Selection: length, width, rocker, and stance for wake vs. surf foiling
For wake foiling, set up with a larger board: 38–40 inches (96–102 cm) in length, 18–21 inches (46–53 cm) in width, and a flat to mildly curved rockera profile (rockera) that keeps planing stable at low speed and helps handle obstacles in the wake. They provide more stability through chop and keep you on plane.
For surf foiling, go with a shorter, narrower board: 32–34 inches (81–86 cm) long, 16–18 inches (41–46 cm) wide, and a distinct rocker that’s moderately curved to pop onto waves early without catching edges.
Stance matters: wake rides benefit from a slightly wider stance around 19–22 inches (48–56 cm) between the feet to drive control through chop; surf stance tightens to 17–20 inches (43–51 cm) for quicker turns and tighter rail-to-rail work.
Surface and shape: larger surface area increases stability for cruising across a wake; switch to smaller surface for surfing waves to reduce drag and improve response.
Wedges, sliders, and forgiving geometry: consider wedges or adjustable sliders to tune stance width without swapping boards; for beginners, softer, more forgiving edges help you stay upright.
Hybrid options: many riders choose a hybrid board that can cover both styles with a modular setup; ask the dealer or expert about a multi-setup system and which fins or wedges pair best for your weight and riding group.
Rockers and nose/tail shapes: if you ride waves, prefer a curved nose for easy entry; if you cruise flat water, a flatter underbody reduces drag; a distinct balance helps you stay afloat and feel confident on the surface.
Fit to you and value: measure height, weight, and stance width to pick a board within your group and capability; when you’re new to foiling, a larger board helps balance and confidence; test rides show which length and width you truly ride well, and investing in a larger board early yields value and a longer heyday on the water.
Hardware and Integration: mast height, fuselage length, and mounting compatibility
Choose a mid-range mast height of 75–85 cm for most wake foil and surf foil setups; this height provides stable lift on flat water and smooth turns as you progress. For smaller riders or boards, begin at about 70 cm and move to 75 cm as you gain confidence; for taller riders or a forward stance, step up to 90 cm or more to increase leverage and height on bigger water. This approach aligns with the heyday of modular foils, when buyers learned that small changes in height dramatically affect balance and surface flow through different periods. Taller masts interact with water more gradually, delivering smoother transitions when you keep inputs deliberate and controlled.
Opt for a mid-length fuselage around 45 cm to balance stability and responsiveness. Shorter fuselages in the 38–40 cm range suit smaller boards or lighter riders and deliver quicker pivots. Longer fuselages in the 50–60 cm range provide steady tracking in chop and reduce wing cavitation during hard turns. Beginners benefit from the mid-range to keep surface control forgiving, while experienced riders can experiment with longer fuselages to widen stance and ease pumping transitions without sacrificing control.
Check mounting compatibility when choosing foils: confirm base footprint and bolt pattern match across mast and wing; most brands use standard fittings, but some designs shift bolt count or hole spacing. Verify bolt length, thread pitch, and whether the plate fits your board inserts. If your setup uses a sterndrive-style base or a nonstandard pattern, plan for an adapter plate or a dedicated mounting kit. Carry extras like spare bolts and washers to keep the system secure across sessions. Buyers should prefer brands that publish exact hole spacing and supported wing sizes for their mast, ensuring a clean, above-water surface that remains forgiving during turns and stance changes.
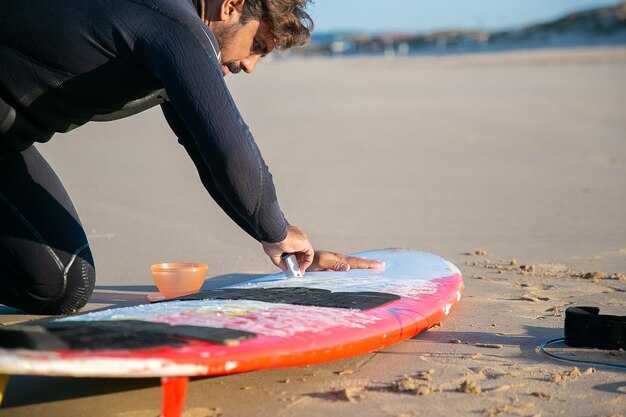
Care, Safety, and Maintenance: inspection routines, replacements, and storage tips
Inspect wings and front-to-back hardware before every ride; tighten bolts and check for play. They should fit firmly to the board, which prevents unexpected deflection in a wave and keeps you upright. This advice helps you enjoy these sessions with confidence and reduces risk on the water.
Inspection routines
- Check the front mounting area for cracks, loose screws, or signs of delamination on the wing roots; if you see any, stop riding and replace the affected part right away.
- Verify the integrated quick-release or locking hardware is secure; any looseness acts like a hinge and can detach during a session–address it immediately.
- Examine all fasteners, cotter pins, and safety clips for corrosion, wear, or bending; replace with marine-grade parts from the manufacturers to keep fits tight.
- Look for salt crust or dirt buildup; wash with fresh water after a wave session and dry completely before storage.
- Test the connection between foil and board at the front and rear points; a small amount of play indicates you need a tighter fit or new hardware.
Replacements
- Replace any cracked wing skins, bent brackets, or damaged end caps immediately; use parts that are rated for your model and size to ensure the correct load paths.
- When choosing replacements, consider the larger or smaller sizes that fit your board setup; switching to the right size keeps balance predictable and reduces fatigue on longer sessions.
- Consult the manufacturer guides; today’s deals often include integrated kits that simplify swapping components without guesswork.
- Keep a small spare parts kit onboard or in your bag, so you can act quickly after a ding or crash rather than waiting for a return home.
Storage tips
- Rinse foils with fresh water after saltwater use, then dry all surfaces before disassembly; moisture accelerates corrosion on metal hardware.
- Disassemble wings and store them in protective sleeves or bags; keep the front and rear parts separated so long edges don’t contact each other and cause dents.
- Store in a cool, dry place away from direct sun; excessive heat can degrade plastics and adhesives over time.
- Use a dedicated carry rack or stand to keep different sizes spaced; this prevents weight from warping components and makes it easy to grab what you need for the next session.
- Place heavier items toward the bottom of the stack and avoid stacking foils on top of each other; this preserves integrity for longer and reduces the chance of impact damage during transport by boats or on racks.
Cadence and knowledge checks
- Questions to ask yourself after each tow: do the front mounting points feel solid, is there any unusual vibration, are any fasteners loose or discolored?
- What’s the right replacement cycle for your gear? Manufacturers’ guidelines vary by model, but a visible crack or looseness means you act now, not later.
- How do you carry and store parts when traveling? Use integrated cases and ensure your gear stays dry; today’s deals can help you equip a compact, protective kit for trips.
Expert notes
- Stay with your expert or experienced rider when you first introduce new sizes or a different fits setup; their advice helps you feel confident and prevents avoidable mishaps on the water.
- For boats and cross-asset trips, inspect mounting points and edges more often; vibration and motion can reveal wear that isn’t obvious at home.