

 11 Best Lakeside Campgrounds for RVers, According to Two Full-Time RVers">

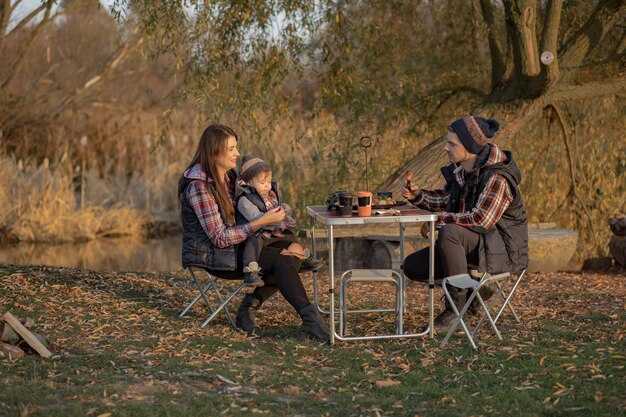
Recommendation: Bloqueie um local à beira-mar na região oriental da Virgínia, perto de portos e com ligações sólidas e sombra. campsitese tables durante as refeições; planear as noites em torno de trilhos de caminhada e uma zona ribeirinha calma. O par enfatiza que um layout bem escolhido faz a diferença entre manhãs difíceis e noites tranquilas, especialmente perto de islands e o spray das ondas. Isto não é um anúncio direto – é uma ideia prática retirada de anos na estrada.
Na seleção de locais, os exploradores priorizaram a acessibilidade, critérios sólidos de planeamento e um equilíbrio entre noites tranquilas junto à água e cidades animadas a uma curta distância de carro. Procuram locais que ofereçam energia fiável, gestão de águas claras e casas de banho limpas; o acesso para remar é uma mais-valia. Espere que a região apresente uma mistura de portos, pequenos cais e vistas magníficas sobre baías extensas. As tarifas noturnas rondam os 25–60 €, com algumas opções premium perto de islands comandando rendas mais altas durante a época alta. A Virgínia reaparece como uma paragem comum ao longo da maré. Espere que a Virgínia figure proeminentemente nessa mistura, especialmente ao longo da costa oriental da Virgínia. Um pôr do sol imponente sobre um porto tranquilo coroa o dia.
A maioria dos locais oferece sombra, água potável e organização. tables para apoiar as refeições, tornando a limpeza rápida após longas caminhadas. O manso ritmo junto à água convém a campistas que procuram sossego e paisagens preservadas; os planeadores enfatizam a necessidade de preserve vegetação e evitar pisar as dunas. Os preços variam normalmente entre os vinte e poucos e os sessenta e tal euros por noite, com algumas lagoas e portos a preços mais elevados durante a época alta. Alguns parques oferecem aluguer de equipamento no local, incluindo caiaques e bicicletas, reduzindo a trabalheira de trazer o equipamento de casa.
O formato do artigo favorece uma abordagem prática: avaliar como cada opção se alinha com planning necessidades, quer esteja a perseguir um remo ao nascer do sol ou um pôr do sol régio. Considere a logística, como ligações elétricas e de água, cidades próximas e campsites densidade. Os próprios viajantes aconselham a tirar notas sobre terrenos acidentados, vento e ciclos de maré, e depois traçar um percurso que toque islands e portos abrigados, mantendo o risco baixo. Utilize esta estrutura para selecionar a sua próxima paragem à beira-mar e preservar a experiência, para que outros a desfrutem mais tarde. Isso cria um excelente equilíbrio entre o acesso à água e os trilhos terrestres.
Guia Prático para Avaliar Parques de Campismo para Autocaravanas à Beira de Lagos
Confirmar o acesso à eletricidade e as licenças no momento da reserva; se algum dos aspetos for incerto, optar por uma opção perto do lago com detalhes claros.
- Acessibilidade e estradas – avalie a qualidade da estrada, os raios de viragem e a facilidade de trazer um veículo grande; verifique uma área de aterragem que acomode o seu comprimento; considere o percurso para aceder ao estacionamento e sair sem manobrar em espaços apertados; um ritmo lento minimiza os danos nas bermas moles.
- Infraestruturas e licenças – assegure-se de que a eletricidade corresponde à carga planeada (amperes/voltagem), confirme a disponibilidade de água potável através de poços, quando aplicável, e verifique os requisitos de licenciamento junto do parque ou gestor do terreno; tenha consigo cópias digitais e um plano para renovar quando necessário.
- Água, poços, drenagem – inspecionar a fiabilidade da fonte de água, testar se possível, e rever a drenagem para evitar acumulação após tempestades; notar a inclinação e o potencial de escorrência, especialmente perto de monólitos ou margens íngremes, e em zonas selvagens onde a escorrência se pode deslocar inesperadamente.
- Tempo e duração – registe a hora de check-in e um plano para a duração; janelas flexíveis ajudam durante as épocas altas; um destino anseia por noites mais tranquilas quando as multidões chegam, por isso escolha horários a meio da semana, se possível.
- Cenário, paisagem e maravilhas – avalie a vista para o lago; uma vista esplêndida aumenta a satisfação, e maravilhas escondidas ou marcos famosos nas proximidades acrescentam valor; prefira opções costeiras com água mais calma e fácil acesso para nadar.
- Segurança, comodidades e limpeza – verificar oportunidades de natação, segurança da linha costeira e presença de nadadores-salvadores, onde relevante; verificar casas de banho, chuveiros e um spray fiável para controlo de insetos; tomar nota da disponibilidade de refeições ou vendedores nas proximidades e o estado geral das estradas e caminhos.
- Custos, políticas e cancelamentos – compare as tarifas noturnas entre estados para entender as diferenças; analise opções mais económicas versus configurações premium e leia os termos de cancelamento; calcule o total com impostos, taxas e duração.
- Planeamento e abordagem da viagem – construir uma ideia simples do percurso, hora do dia e ritmo; escolher locais que impliquem um tempo de viagem razoável e lembrar que Catalina ou outros destinos costeiros podem exigir um ferry; esquecer as pressas, é preciso tempo para saborear a paisagem, e procurar uma cadência muito relaxada.
Critérios de seleção: como é que os dois RVers a tempo inteiro escolheram estes locais
Começando com a fiabilidade do acesso rodoviário, sombra e espaços cobertos; planear visitas longas para minimizar a preparação diária e maximizar o tempo na estrada. Esta abordagem mantém toda a expedição eficiente e previsível.
As janelas meteorológicas definem os calendários: na Califórnia, primaveras secas, outonos mais frescos e menor risco de incêndios florestais orientam a escolha do local, com manhãs que permanecem sombreadas.
Sítios com uma vasta extensão de espaço e alcance fiável desde a estrada reduzem o stress; lendas de trilhos e flores silvestres nas proximidades atraem um casal viciado, adicionando valor memorável durante as estadias, quer caminhem, quer andem de bicicleta.
Preferir locais situados perto de terrenos suaves, onde os buttes se elevam como marcos e o cenário massivo convida a uma exploração fácil, conduzindo os visitantes aos miradouros certos.
Zonas de sombra, quebra-ventos e espaços cobertos ajudam a evitar o calor durante o sol intenso; assegure que as noites se mantêm confortáveis durante longas conversas e planeie refeições sem pressa.
Lembre-se do básico de segurança: acesso fiável à água, casas de banho limpas onde disponíveis e um plano para lidar com escassez usando instalações próximas ou armazenando água extra; tenha sempre uma rota alternativa.
Avalie os mais vendidos entre os serviços próximos, mas priorize a fiabilidade em vez do preço: gás propano, mercearias, manutenção e apoio à mobilidade devem ser fáceis de encontrar ao longo da estrada.
Se um local não oferecesse o equilíbrio certo, a dupla abandonava-o; em vez disso, preferem percursos que comecem com um reconhecimento cauteloso, atinjam miradouros deslumbrantes e terminem com um plano que possa resistir a uma mudança de clima durante fins de semana ou feriados intensos.
Acesso ao lago e disposição do local: o que torna um local de RV à beira de um lago funcional
Opte por um terreno à beira-mar com acesso imediato à água e um layout simples, orientado por um entalhe, que mantém a atividade perto da linha de água, mantendo ao mesmo tempo uma entrada estável.
Colocar as plataformas paralelas à linha costeira com espaços de 6–8 m para reduzir o ruído, permitir uma manutenção eficiente e proporcionar espaço para piqueniques e um pequeno parque infantil, sem sobrecarregar a orla.
Escolha uma península ou uma enseada em forma de buraco de fechadura onde a navegação se mantenha calma; estas formas oferecem proteção contra ventos e ondas.
Priorize margens longas e suaves com um declive pouco acentuado, para que canoas e pequenas embarcações possam ser lançadas sem grande esforço.
Os caminhos devem estar claramente marcados, com alguns espaços entre aglomerados, para que os visitantes caminhem calmamente e o ambiente se mantenha intacto.
As árvores dão sombra, mas mantêm uma distância segura da berma; em território de ursos, seja cortês e proteja o lixo para proteger a vida selvagem.
O design atento ao entalhe adiciona vistas dramáticas, mantendo a propagação controlada, permitindo que as pessoas desfrutem de privacidade sem perturbar os vizinhos.
Manter a superfície intacta e uniforme; o caminho parecia suficientemente resistente para crianças e animais de estimação.
Práticas conhecidas na área de Lawrence enfatizam ambientes imersivos, com layouts que permitem a um visitante integrar-se rapidamente no cenário e passar tempo na costa.
Rios e picos formam um cenário dramático; a acessibilidade deve funcionar ao longo de elevações variadas, com rampas e degraus suaves.
Conclusão notável: um local funcional equilibra o acesso ao lago, as características de entalhe e buraco de fechadura e as zonas desimpedidas que honram a vida selvagem, o brincar seguro e o uso responsável.
Comodidades e ligações: água, eletricidade, despejo de resíduos, sanitários e Wi-Fi essencial.
Escolha parques de campismo com ligações robustas: serviço de 30/50 amp, um abastecimento de água constante e uma estação de esgoto nas proximidades e de fácil acesso ao espaço de estacionamento. Procure espaços abertos em áreas desimpedidas, com espaço para passar mangueiras e cabos sem amontoar vizinhos – provavelmente meia dúzia de lugares num circuito e talvez outra fila a uma curta distância a pé.
Noções básicas de Wi-Fi: procure redes com a designação "em todo o parque de campismo" com pelo menos 20–25 Mbps por dispositivo; se o sinal for fraco perto da costa, considere um hotspot portátil ou uma antena de alto ganho para cobrir piqueniques e fotos ao final da noite.
Disposição e acesso: priorizar uma enorme variedade de lugares abertos e uniformemente espaçados; evitar locais enterrados por florestas densas onde o sinal e a pressão da água diminuem. Alternar entre vistas para o lago e cantos abrigados; muitos viajantes vão querer um espaço pessoal perto de casas de banho e estações de despejo, facilitando as transições entre aventuras. Os viajantes partilham dicas no quadro de avisos ao longo da época.
Practical tips: bring spare hoses, power adapters, and a collapsible water container; keep lengths of cords and hoses tidy to prevent tripping and to maximize privacy. In tropical or desert landscapes, check for daily temperature shifts and prepare accordingly; water lines may shift and pumps stall during peak times. Photos from travels illustrate how plants and rocky shores shape campsite choices in virginia, polk, and other landscapes throughout the nation.
| Location | Water | Power | Dump | Restrooms | Wi‑Fi | Notas |
|---|---|---|---|---|---|---|
| virginia lakefront area | Sim | 30/50A | Sim | Flush | Strong | easy access; cleared lots |
| polk county lakeside loop | Sim | 30A | Sim | Flush nearby | Moderate | mid-week calmer |
| japan-inspired shoreline | Sim | 50A | Sim | Flush | Good | scenic; photos likely |
| virginia forests edge | Sim | 20A | Sim | Restrooms | Weak | use hotspots |
Booking strategies: timing, reservations, and securing prime spots
Lock premium shore sites at least six months ahead during peak season; set cancellation alerts so openings appear within minutes. Maintain a three-option plan: if the top pick is unavailable, shift to a nearby site with a similar vibe, a flexibility that saves time and avoids stressful searching.
Strategy that straddles peak and shoulder seasons helps secure spots more reliably; winter windows can reveal amazing access to secluded pockets, while gaps in the calendar often appear midweek, inviting a quick move to a quieter option.
Reservations: use official portals; place refundable holds if allowed; leverage offers like early-bird or multi-night discounts; set alerts when rates drop.
Prime spots: Once you locate a site with blazes from nearby trails, pick a classic shoreline view; aim for a back row if you plan quiet mornings; check access to water, restrooms, and a meal prep area; know what nearby hikes offer, and what places nearby share the same appeal.
Regional tips: In kabetogama region near voyageurs routes, sites located along countrys parks often provide better access; the ecosystem of islands and plants yields a secluded backdrop; staying near these options reduces hard decisions.
Planning steps: map out a 3-night itinerary, noting where you stayed and which county road leads to terre-adjacent launch points; tally minutes to water access across the gaps; ensure your chosen spots located near trails.
Meal and gear: plan meals, pack a compact stove, and choose green, lightweight essentials; keep a back-up water supply; learn how to minimize noise and odors as you camp.
This wont disappoint.
Day trips and nearby recreation from Black Elk Peak area: routes, trails, and lake activities
Begin at Sylvan Lake Trailhead and ascend Harney Peak Trail to the summit; the route runs about 7.5 miles round trip with roughly 1,400 feet of elevation gain, typically 3–4 hours (180–240 minutes) of steady hiking. The view broadly spreads across the entire Black Hills, with rugged granite, pine forests, and open meadows that cling to the skyline; switchback steps punctuate the ascent.
Want a shorter option? Cathedral Spires Trail from the Needles Highway corridor delivers dramatic rock spires on a 1.3–mile trek (loop) capped by wooden planks and switchbacks; walkers return within 1-2 horas.
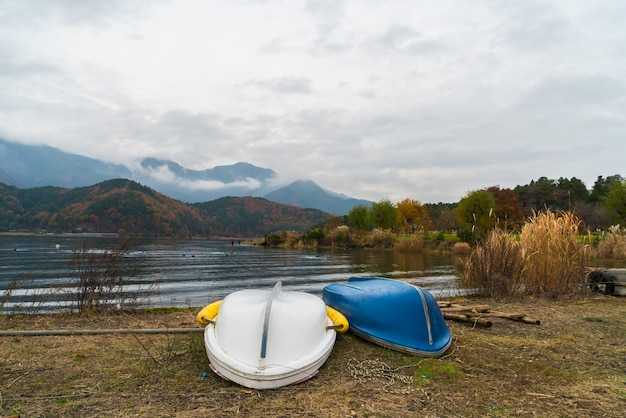
Pactola Reservoir offers lake adventures: kayak or canoe rentals, stand-up paddleboards, and guided fishing from nearby Outfitters; reservations are highly recommended on weekends when marina docks get crowded. The full experience could include a scenic peninsula overlook and chances to see wildlife seen along the water’s edge.
Roam the three-summit loop along the rim of canyons: start near a lower trailhead, traverse through canyons, then climb a ridge for sunset; bring a meal, snacks, and plenty of water.
Self-guided adventures abound through canyons and over open meadows; a flexible plan lets walkers choose alternate routes based on weather, wildlife sightings, or a burst of energy.
One memorable option includes a peninsula lookout on the east shore, a crater-like bowl at the canyon rim, and a japan-known chashu ramen pop-up in nearby towns during peak season.
Safety and planning tips: check reservations, weather, and park alerts; keep in mind that some routes are hard in wet conditions, open ridges can gust, and crowded periods create congestion at popular trailheads; carry layers, water, snacks, and Leave No Trace gear.
Wyoming-like long horizons spread across the landscape, and the entire circuit reveals wildlife and plants whose lives invite a bucket-list mindset, with roaming creatures seen along the way.