

 How to Tie a Boat Knot for Beginners – Step-by-Step Tutorial">

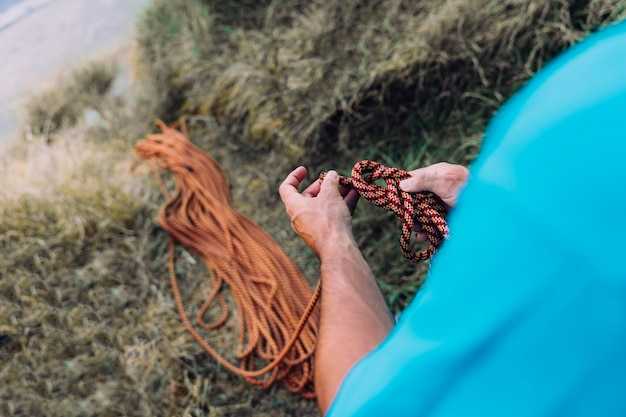
Begin with a basic bowline to secure a line around a cleat or post. This knot isnt a mystery and makes tying simple for beginners because the loop stays fixed while you work the tail. Practice on a dry rope to build confidence before testing real conditions on the water.
For practice, grab a pair of ropes of about 6–8 mm diameter and handy to manipulate. Choose a lead rope for the line you’ll use on deck and a standing rope that you can control. Ensure you’re using a similar diameter to what you’ll ship, so the knot behaves under conditions like calm water. Keep the tail clean and the wrap wrapping neat, not overlapping itself, and avoid stiff or kinked sections that slow your progress.
Key steps: form a loop in the standing part, pass the working end around the loop, then bring it back through and pull tight. This structure isnt arbitrary; it provides a reliable finish when done under moderate heaving on the line. If you notice the knot lying flat or the tail slipping, that’s a wrong finish and you should redo it. Keep the tail attached and avoid too much wrapping around the standing part.
Once you’ve got the feel, practice in safe conditions, ideally with a partner spotting you online. Check that the węzły are attached to a cleat or post before you load, and that theyre snug but not jammed. If a knot has been slipped or looks loose, redo it instead of forcing a finish. If the tails arent secure, redo the knot. In rough weather, a well-tied knot remains useful, even as you’re heaving on the line.
To speed up learning, set up a fixed practice station with a short section of ropes and a cleat. Use aids to mark each step and keep a line that you can untie quickly. Focus on a clean finish, not letting any wrapping creep that can cause jams. When you’re ready, move to real lines on the boat and repeat the steps until theyre automatic under real conditions.
Practical Knot-Tying Guide for Beginners
Start with the figure-eight knot, then add two half-hitches to secure the end. For beginners, this sequence builds confidence and keeps things predictable.
Keep holding the standing part in one hand and the running end with the other, to keep the rope aligned and prevent twists.
Knowing when to pull tight matters: each knot should finish with the loop sitting neatly, and bends should be crisp rather than sloppy. This approach has been proven useful for many crews.
Practice a clove hitch after the figure-eight and half-hitches; boaters often use this to fasten to posts, cleats, and rings.
Keep a thinner rope handy for quick sessions; thinner rope makes the motions faster while you learn the exact hand positions.
Add an animation routine at least once per session: run through the steps visually, then execute them with the actual rope.
Be mindful of over-twists and misaligned ends; this wastes energy and makes knots less reliable.
Once you have mastered the basics, try joins that connect two thinner ropes, or reset when a rope has bends.
Keep practicing, and you’ll gain much confidence; knowing the function of each knot helps you pick the right one, then repeat until it’s perfect.
Choosing the Right Knot for Docking, Mooring, and Line Tying
Choose a bowline for quick, reliable attachment that stays attached but can be untied after launching. For lines that must be released quickly, pair a cleat hitch with a half hitch, or wrap a round turn with two half-hitches around a cleat. These types provide dependable control when docking and line tying across boats, including sailing and boating scenarios.
Know whats best for the task; the standing part and the loop define how the knot behaves under load, across the cleat or piling. The figure-eight on a bight prevents slips, the clove hitch grips across a post, and the round turn with two half-hitches secures a line. Thats why learning these basics helps you learn without overcomplicating setups; theyre reliable in boating contexts. These knots work well for boats together on a calm slip or a busy marina. Consider what the line comes with–short tails, long tails, or attached ends.
For docking, mooring, and line tying, prioritize knots that balance turns and release: a round turn across the cleat, finishing with two half-hitches, holds tight while the line still has some give to absorb waves. For adjustable lines, use a taut-line hitch that tightens when you pull and loosens when releasing. Launching or docking occasions require that the line stays away from propellers and other boats, preventing tangles.
Common mistakes: untied or loose lines create slack that lets boats drift. This setup creates slack that can snag fenders or props. Check the attached ends and ensure theyre not crossing; keep them tidy and ready for the next turn, whether sailing, boating, or simply moored.
Quick reference list of knots for dock, moor, and line tying, including Bowline, Cleat Hitch, Clove Hitch, Figure-Eight on a Bight, Round Turn with Two Half-Hitches, Taut-Line Hitch.
Check Your Gear: Line Type, Length, and Safety Before Tying
Check your gear: choose a line type and set a fixed working length before tying. For boating, polyester offers low stretch and good holding; nylon provides some give; polypropylene floats but can sag under heavy loads. This isnt complicated if you follow a fixed plan. knowing your needs, a simple rule helps: pick a line thick enough for your boat, and keep a tail ready for finish.
Line choice matters for knot-tying success. Polyester holds knots well under steady loads; nylon absorbs shock but stretches; polypropylene stays afloat and dries quickly. Master the setup with aids like gloves, a knot-tying guide, or a marked length on the coil to speed selection. common tasks near post, behind a piling, or on deck may demand different line types. Knowing your gear creates a smooth part of every boating routine.
Tail length and finish: extend the tail longer for stubborn knots or heaving conditions; a 6- to 8-inch (15–20 cm) tail works for most knot-tying on boats, while larger lines or heavier loads may require 12 inches (30 cm). This longer tail reduces slipping and gives you room to tighten without the knot changing unexpectedly.
Safety checks: inspect line for fraying, glazing, or stiff spots; replace worn sections. Confirm the line isn’t twisted or kinked, and ensure nothing will behind a post or piling during tying. Verify that hardware like cleats and posts are secure and won’t fail under load. Keep the line dry to maintain grip and avoid slipping. If something looks untied or a knot is tied wrongly, reset and retie properly.
Important habits: never rush; a fixed length and a tidy tail improve reliability. If a line wont hold or you notice slipping, cut back and re-tie with a longer tail or different knot-tying approach. This understanding becomes part of every boating outing and helps you finish each task with confidence after loads of practice.
Bowline: Step-by-Step Tie and Common Variations
Start with the classic bowline for reliability and easy inspection.
The knot itself creates a fixed loop that holds under load while the tail stays accessible, making it a great base knot for many tasks across the boating season. It also stays reliable when lines run across posts or cleats, and you can tie it with one hand for a quick setup. For beginners, practice with a thicker line first; thinner rope requires a lighter touch to grab and seat properly. After tying, safety check by gently pulling the standing line and tail to confirm the loop remains open and the knot does not slip. If you want extra guidance, look for online tutorials or references used by midshipmans, boaters, and safety manuals; they often show the same steps and variations, and you can compare different rope types and sizes. Note the path and tension can be captured in the wp-contentthemesvanisleimg70th-anniversary-logosvg style of historical boating logos.
- Form a small loop in the standing part to create the base of the knot; the tail to the right controls the tie.
- Pass the working end up through the loop from underneath to form the initial turn.
- Wrap the working end around the back of the standing part to seat the tail against the base.
- Bring the working end down through the loop again to complete the structure.
- Grab both the standing part and the tail and pull to snug, leaving a reasonable tail length to act as a stopper if needed.
- Trim the tail to about 1/4 to 1/2 inch beyond the stopper, then test by applying load to ensure it holds and remains easy to release.
Common variations help across different boats and rope types, offering a different balance of security and release.
Common Variations
- Bowline on a Bight
- Fold the rope to form a bight that yields two standing strands; tie a bowline around the bight so you end with a fixed loop that can be placed around a post or line.
- Dress the knot and secure by pulling on the standing and working ends; this keeps a larger loop ready for towing or attaching equipment.
- Double Bowline
- Tie a standard bowline, then pass the tail around and back through the loop again to add resistance to slip.
- Ensure the extra wrap sits neatly and test under load.
- Slipped Bowline
- Tie a bowline but leave the end outside the loop so you can pull to release quickly.
- Use this when you need rapid release or when the line will be hard to reach in emergency.
- Figure-Eight Bowline
- Tie a Figure-Eight knot on a bite, then bring the working end through to form a bowline-like loop.
- This yields a more visible structure and a solid hold, especially on thinner lines or in rough water.
When choosing a variation, consider rope types, exposure to sun and salt, and the task at hand. For safety, avoid over-tightening, check the tail length, and keep the knot easily releasable for quick release. This knowledge serves beginners, boaters, and midshipmans who want a dependable, repeatable knot throughout the season.
Cleat Hitch: Secure Mooring with Quick, Reliable Holds
Use a cleat hitch for docking: it delivers quick, reliable holds that stay secure in wind and current. Keep lines taut, ensure the rope is attached at the boat, and avoid slack when passing across the cleat. This relies on wrapping the rope smoothly around the cleat. Ends join at the cleat, forming a secure base.
theres a simple sequence that makes learning easier for boating season. The goal is to keep the rope across the cleat, produce round turns, and finish with a lock instead of knots. If sails are up, leave enough room so the bend of the rope around the horn isn’t strained, then test with a gentle load before leaving the mooring. online guides can help, but this table covers the core steps you’ll use again and again.
| Step | Action |
|---|---|
| 1. Position and base turn | Lead the rope from the dock side to the cleat, loop around the base once, keeping it across the front so the line sits across the horns. |
| 2. Two wraps around horn | Wrap the working end around the nearest horn twice, maintaining even tension; each turn tightens the bite. |
| 3. Finish and lock | Cross over the standing part, tuck the working end under the last wrap, and pull tight to lock the hitch. |
| 4. Check and test | Give a firm pull on the standing line; if it slips, rewrap and refinish, then test again. |
| 5. Trim and maintain | Trim the tail to 2–3 cm, keep the line neat across the cleat, and note this method is great for boating when you want fast, reliable holds. |
Problem-Solving: Common Knot Mistakes and Quick Fixes
Check the line for wear and replace frayed rope before tying; this quick step prevents slipping under load and keeps the knot fixed at the intended point.
A common mistake is miscounting wraps during wrapping, which can make the overhand base unreliable. Start with 2-3 even wraps, keep the line flat across the rope, and pinch the base to keep each turn aligned and evenly tensioned.
If the tail seat is off, the knot may back out. If the wont hold, guide the tail down the same side as the wraps and tighten the last turn toward the load so the end sits cleanly and the knot won’t creep under stress.
Thinner lines behave differently from thicker ones: for thinner rope, tighten earlier and use fewer wraps to avoid bulk; for thicker line, add one extra wrap and keep pressure evenly distributed across each turn to prevent slipping and ensure reliable holding.
Practice across basic scenarios on a calm day, running through the motions at a post or railing and checking with quick online resources. If you see slipping, undo and re-tie with a fixed grip, confirm the load is distributed evenly, and repeat until the process feels natural across many situations on the water.