

 Best Underwater Cameras of 2025 – Top Compact Cameras for Snorkeling">

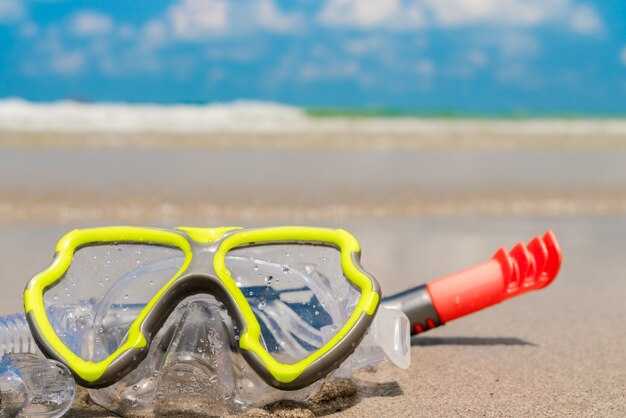
Choose a pocket-size, waterproof unit with ultra durability, s-ttl control, wireless data transfer, proprietary stabilization, and built-in filters to preserve color in bright sun and shadow.
In aquatica environments, djis-enabled modules from nowfantasea integrate seamlessly with layout kontrole i wireless transfers, delivering the most convenience during travel and adventure, with online sharing via a single tap.
Depth scenes currently reveal microscope-level detail: color fidelity, subtle gradations, and strong white balance under mixed lighting; select models with robust seals and IP ratings, plus filters that tame greens in turbid water.
The corner of the field room and the shoreline lab tests shows how a device earns love from travelers who value grip, quick menus, reliable triggers, and stable behavior in salt spray; these traits boost adventure velocity and all-weather usability.
Durability beyond splash resistance comes from rugged shells resisting salt, sand, and temperature swings; verify ability to swap filters to adjust color in turbid water, and confirm that systems support s-ttl and djis within the same ecosystem, ensuring exposure remains consistent in varied lighting.
GoPro Hero 12 Black and Other Leading Pocket-Size Devices Ocean Adventures
Recommendation: The GoPro Hero 12 Black delivers the perfect balance of tough build, ease of use, and qualitya improvements that matter in changing light and current. It includes advanced focus and sensors that work together for reliable results whether you’re snorkeling or following a diver.
Key strengths and practical guidance:
- Smallest in its tier? The Hero 12 Black sits among the compact options that still offer high image quality, giving you flexibility to move around without encumbering the day on the reef.
- Includes a tough build: rigid frame, splash resistance, and a protective housing option for oceanic environments, which reduces the risk of damage on trips.
- Focus and sensors: improved focusing system and robust sensors deliver sharp details in bright sun and murky water; this helps maintain highest-quality footage with minimal manual tweaks.
- Improvement over earlier models: notable gains in stabilization, color science, and battery efficiency that extend run-time in the field.
- Convenience and ease: direct controls, quick-access modes, and an intuitive touchscreen enable fill-in shots even when wearing gloves; this supports workflow during social moments in open water.
- Direct mounting and fill options: works with standard mounts; included accessories reduce setup time and keep the unit level within the frame during choppy water.
- Video formats and quality: supports up to 5.3K60, 4K120, and 1080p240; in typical snorkeling light, you’ll see strong detail and smooth motion.
- Depth and protection: depth rating 10m without housing, with a protection housing you reach up to 60m; this makes it suitable for reef snorkeling and occasional wreck exploration when applicable.
- Diver-friendly tests: commission-based tests with professional divers showed improved color fidelity and lower motion blur in moving water; previously harder shots now come out clean.
- Alarms and safety indicators: built-in LEDs and status alerts warn about overheating or storage issues, helping you avoid losing footage mid-snorkel.
- Choosing tips: when deciding, focus on weight, balance with your mount, and the convenience of editing; whether you shoot in auto or manual, the unit handles both well.
Other strong options in this category include compact devices from rival brands that typically offer similar sensor layouts and versatility, but the Hero 12 Black remains a recommended pick for divers who want a single device that handles high-activity sea days with minimal setup.
GoPro Hero 12 Black: key underwater specs for snorkeling
Choose the GoPro Hero 12 Black if you want huge, stable footage with a simple setup when recording subjects under the surface.
Key specs for water-bound use include a waterproof rating to 10m without housing and robust stabilization that keeps shots smooth in chop. A dome port setup helps flatten distortion on close subjects and Gets crisper edges at wide angles.
Video modes reach up to 5.3K60 and 4K120, with extended dynamic range for blues and greens, which yields better result when light shifts in sub-surface spaces. The processor handles noise well in moderate light, extremely helpful for reef scenes.
Stills reach 20MP, enabling image-making with fine detail on sealife and reef texture; quick toggles let you swap between photo and video to capture both scenes and subjects.
Lenses: built-in ultra-wide offers a huge field of view; you can add external macro or wide adapters via compatible housings, expanding creative options. A dome port helps flatten reflections and sharpen edges on curved surfaces.
Setup and accessories: simple controls and Horizon Lock stabilization keep horizons steady in chop; the menu remains easy to navigate, and compact packaging helps travel. Theyre a popular choice where order via digidirectcomau is offered, with commission incentives on qualifying purchases.
Cost and value: while expensive, the cost is balanced by durable performance, easy footage management, and strong resale potential. In sub-zero conditions, rely on protective housings to maintain reliability.
Sealife enthusiasts and reef shooters benefit from consistent color and detail; offered bundles at digidirectcomau frequently include dome ports, lenses, and mounts.
Stabilization modes and shot tricks for steady snorkel footage
Recommendation: Enable tg-7s gyro-based stabilization and keep elbows tight to the body; set shutter to 1/125s at 60fps, so between frames the motion stays smooth and the frame remains solid, delivering professional-looking results across depths, and sharper pictures.
Five modes worth leveraging include electronic image stabilization (EIS), gyro-linked stability, horizon-level locking, pop-up screens aiding framing, and a slowed playback option in post. The system offers stability you can rely on in busy currents, with the frame staying on track onto the subject as it moves between bursts. has been refined through field testing, across scenes where water between motion can be tricky.
Shot tricks to maximize steadiness: maintain small, deliberate motions rather than sweeping pans; use a shorter focal length to reduce leverage; tuck the hands and press the housing against bulkheads to minimize drift; time breaths so the press aligns with shutter release; attach a diopter to keep subjects sharp; review scenes on screens between takes to confirm consistent framing, requiring minimal adjustments between shots.
Practical setup notes: travel-friendly housings shine when a lightweight, balanced rig is used; opt for a custom grip that sits between your palm and the bulkheads; ensure the diopter is tuned and that the link to a monitor is solid; tg-7s units boast capabilities that get you smoother results in choppy surface conditions. Theres no need to complicate things, requiring only a quick grip adjustment, simply selecting the easiest-to-use configuration among the five modes cuts setup time.
Teardown and testing: plan five hours of practical shoots in a single day, keeping the rig balanced; check bulkheads compatibility, ensure a travel-friendly setup, and review a link to sample deals on housings; with a custom grip and the diopter dial, you can push this setup toward professional results even in windy seas; the stability becomes routine after hours of hands-on practice.
Battery life, charging options, and storage on snorkeling trips
Opt for tg-7 with USB-C charging, a spare battery, and a 128GB microSD card to maximize uptime. This combination adds flexibility, reduces anxiety during long reef days, and produces clean clips across bright and low-light moments.
Battery life varies with mode and settings; in normal stills mode, expect roughly 320–420 shots on a full charge; video time ranges 60–90 minutes depending on 1080p vs 4K, ISO, and stabilisation. With submergence into cooler water, the runtime tends to drop by 10–25%.
Charging options include USB-C with a 2A wall charger, power banks, and solar recharging on longer expeditions. A 10,000 mAh bank adds huge runtime; during a trip, switch to a slave battery when the primary is low.
Storage needs: microSDXC cards rated UHS-I or better; typical models accept up to 512GB; consider including a spare card. Video clips at 4K high-bitrate produce heavy storage demands; plan accordingly.
Smartphone transfer: SnapBridge works with iphones to move clips quickly; the process saves time in camp. Nownauticam housings maintain size and balance, but the combination adds to equipment weight.
Qualitya outputs hinge on lighting, sensor performance, and tracking. Never complicate the setup: choose a straightforward charging plan, avoid convoluted cable rigs, and rely on dedicated USB-C power banks.
| Model | Battery life (stills) | Video time | Charging options | Storage media | Submersion rating | Uwagi |
|---|---|---|---|---|---|---|
| tg-7 | 320–420 | 60–90 min | USB-C, ładowarka 2A, power bank | microSD do 512GB | 15 m | Zawiera kompatybilność ze Snapbridge |
| tg-7 + nownauticam housing | 350–450 | 70–100 min | Zewnętrzne zasilanie przez platformę wiertniczą | microSD do 512GB | Zależy od mieszkania | Zachowuje rozmiar, rośnie waga. |
Ocena głębokości, uszczelki i kompatybilność akcesoriów pod wodą
Konkretna rekomendacja: wybierz urządzenie o głębokości roboczej co najmniej 30 m i sprawdzonym systemie uszczelnień, idealnie IP68, z podwójnymi o-ringami we wszystkich portach. To połączenie zapewnia dłuższą pracę pod wodą i zmniejsza ryzyko wycieków przy zmianach ciśnienia między płytkimi a głębokimi strefami. Jeśli twoje plany obejmują eksplorację raf i sporadyczne wycieczki w otwartą wodę, 30 m wystarczy; nurkowie, którzy wypływają głębiej, powinni celować w 60 m lub więcej.
Uszczelnienia i konserwacja: sprawdź materiał uszczelki (silikon), policz uszczelki na każdy punkt dostępu i zweryfikuj interwały serwisowe. Wymieniaj o-ringi co roku lub po długim przechowywaniu. Smar ma znaczenie; używaj smaru zgodnego ze specyfikacją producenta, aby uniknąć wysychania i pękania.
Kompatybilność z akcesoriami: zweryfikuj obsługę zewnętrznych stroboskopów, portów makro i systemów filtrów; port makro o średnicy 90 mm jest powszechny, a zoom 20-45 mm występuje w wielu modelach, umożliwiając elastyczne pole widzenia. Kompatybilność portów wpływa na jakość obrazu poprzez czystą ścieżkę światła i minimalne winietowanie. Wybierz systemy, które pozwalają na szybką wymianę bez użycia narzędzi, redukując długi czas konfiguracji pod wodą.
Wytyczne dotyczące marki: ekosystemy panasonic i nikon różnią się opcjami obudów i przepływami pracy z mediami; należy zweryfikować oficjalne obudowy od tych marek oraz zaufanych podmiotów trzecich. Solidny wyświetlacz pomaga w ustawianiu kadru i natychmiastowym przeglądaniu scen o wysokim kontraście, a możliwość fotografowania w formacie RAW pomaga podczas postprodukcji - to ustawienie zapewnia oszałamiające rezultaty tuż po nurkowaniu.
Wybieranie punktów: autofocus speed ma znaczenie; szukaj modeli z szybkim autofocusem, który utrzymuje ostrość na obiektach znajdujących się blisko, gdy odległość szybko się zmienia. Wyzwalacze na pokrętłach sterujących powinny być intuicyjne, unikając pominiętych zdjęć; ulepszenie w stosunku do poprzednika często pojawia się w bardziej szczelnych uszczelkach, inteligentniejszych opcjach portów i dotykowych, trwałych elementach sterujących. Zacznij od punktu odniesienia: opcja może stać się wyraźnie lepsza, gdy jest wspierana przez elastyczny zestaw obiektywów i niezawodną kompatybilność akcesoriów, zapewniając doświadczenie wysokiej klasy.
Ekonomia i pakiety: Zestawy deluxe sprzedają się w cenie od 1000 do 2000 USD, w zależności od zestawu; dodatkowe porty, stroboskopy i obiektywy makro podnoszą łączną cenę. W mediowych workflow wysokiej jakości karty microSD i czytniki skracają czas realizacji i zapewniają niezawodny transfer danych. Istnieje różnorodny ekosystem, ale unikaj modeli ze słabymi uszczelkami lub niespójnym wsparciem akcesoriów. Upewnij się, że szybko poczujesz się komfortowo z systemem, zapewniając stabilność pomiędzy nurkowaniami i przeglądaniem mediów.
Nauka o kolorach, balans bieli oraz oświetlenie w różnych warunkach wodnych
Zalecenie: Zawsze ustawiaj ręczny balans bieli za pomocą neutralnego odniesienia (szarej karty lub białej płyty) w każdych warunkach wodnych, aby zachować dokładność kolorów i zminimalizować post-processing. Podczas fotografowania w błękitnej wodzie tropikalnej, celuj w temperaturze barwowej około 5200–5600K; w zielonkawych lub mętnych zatokach, przesuwaj się w kierunku 6000–6500K i przetestuj jeden lub dwa kadry, aby znaleźć dokładniejsze dopasowanie do rzeczywistych tonów. Kalibracja jest prosta w terenie.
Zachowanie kolorów zależy od medium: czerwone światło szybko zanika z głębokością, pozostawiając odcień niebieskozielony, który musi zostać skorygowany przez balans bieli (WB). Na większych głębokościach, odcień magenta może przywrócić naturalne odcienie skóry; w czystej, błękitnej wodzie, cieplejszy balans bieli w zakresie 5200–5600K zwykle daje bardziej naturalne zdjęcia, podczas gdy w mętnej wodzie, chłodniejszy balans może uwypuklić zielenie. Używaj kombinacji poprawek wykonywanych na aparacie i, jeśli są dostępne, filtrów lub adapterów, aby ustabilizować kolory w różnych scenach; porównanie wyborów pomaga ocenić, która metoda działa najlepiej podczas przygód.
Strategia oświetleniowa: polega na wykorzystaniu źródła światła do przywrócenia koloru, gdy światło otoczenia traci czerwony. Stroboskop umieszczony blisko obiektu redukuje rozproszenie wsteczne i zapewnia bardziej wierne kadry; podczas codziennych wycieczek wystarczy prosta dioda LED z adapterem dyfuzyjnym. Olympus WG-80 pasuje do odpowiednich obudów, a dzięki portowi przylegającemu do obudowy, widok i kadr pozostają ostre. Po zamontowaniu adapterów lub filtrów korygujących kolor zwiększasz gęstość światła i możesz zmniejszyć czas migawki, co ułatwia użytkowanie w słabej wodzie. To podejście również zmniejsza ryzyko wycieków, utrzymując uszczelki nienaruszone i unikając uszkodzeń wody podczas przygód.
Przepływ pracy i koszt: wykonaj serię klatek z różnymi ekspozycjami; porównaj zdjęcia obok siebie, aby zdecydować, które ustawienie WB i oświetlenia wygląda najlepiej w tej lokalizacji. Często jest to kompromis pomiędzy wiernością kolorów, czasem otwarcia migawki i ruchem; weź pod uwagę zdolność swojego ciała do pozostawania w bezruchu oraz tempo ruchu obiektu. Kiedy dodajesz adaptery do podłączenia zewnętrznego światła lub filtra, koszt wzrasta, ale większa dokładność kolorów uzasadnia inwestycję w wielu scenach. W notatkach terenowych, zachowuj widok każdego zestawu i dokumentuj, które wybory dały najbardziej konsekwentne i codzienne rezultaty tworzenia obrazów.