

 Wake Surfing for Beginners – Top Tips to Ride Confidently">

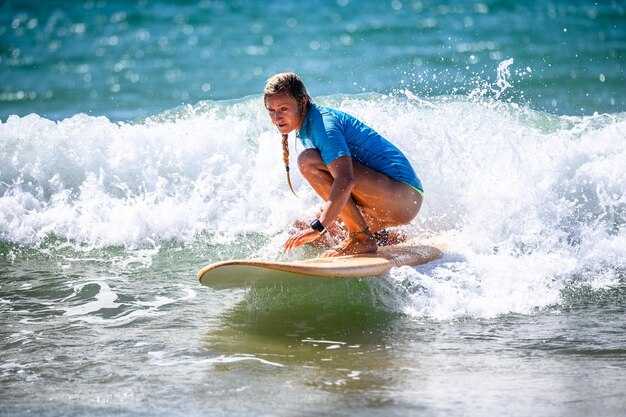
Begin with this concrete recommendation: wear a helmet and a well-fitted vest, and lock in a low, athletic stance as your foundation before you ride the wakes. This setup keeps you balanced when the boat pulls you forward and helps you recover quickly after a wobble.
Set the boat speed to about 10–12 mph (16–19 km/h) and keep the driver informed; this range helps you maximize stability and makes the wake easier to ride. Stay against the wake as it comes and shift your weight slightly toward the back foot to stay centered.
For the best technique, keep your foundation en stance with a relaxed upper body: knees flexed about 15–25 degrees, chest up, and eyes forward. Being calm helps you react smoothly to each pull.
Rise smoothly by using your hips to drive forward along the wake; this keeps you on plane and ready for the next move. Also, keep your arms loose and your shoulders level to avoid pulling the board off balance.
Progression: once you feel stable, try a basic trick such as a shallow spin or a simple surface maneuver; soon you’ll gain confidence and ride farther from the boat. deze wakesurfer routine helps every rider progress with practice.
Safety and etiquette: wear a helmet and a PFD, stay clear of the line, and signal the driver with a wave if you need to adjust. Alsjeblieft keep the session efficient and hydrated by taking short breaks between runs.
Beginner Wake Surfing: Core Steps to Ride Confidently
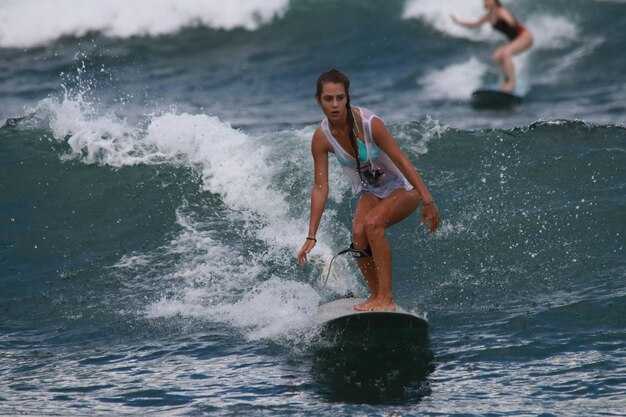
Use a solid, beginner-friendly board and a level wake to start; this setup makes the first rides easy and builds confidence today.
Keep a relaxed, balanced stance: hips over the board, knees soft, shoulders over the hips, and eyes forward. Both feet stay active, and the body stays centered so you can absorb wake hits without tensing.
During starts, pop to stand with your weight evenly distributed, then shift a touch toward the back foot to rise, keeping the board flat. As you ride, tilt into the lip to initiate controlled turns on flat water, building momentum for longer sessions.
As skills grow, add simple tricks and practicing mastering basics: begin with clean carve lines, then attempt a varial when you feel ready; keep motion smooth and deliberate to avoid a wobble. This approach helps new riders build confidence while developing rhythm and balance.
Structure each session in short, building blocks: quick starts, a handful of reps, then a quick reset on the shore. This approach improves accessibility for today’s learners and helps you progress soon, while keeping you in a relaxed rhythm and supporting your dream of long, smooth sessions on the lake.
Safety and progression: measure progress by longer balance holds and cleaner edge control, then gradually increase speed and wake distance. Experienced riders may push farther, but beginners should stay within comfortable limits and only advance when stability remains solid throughout turns.
| Fase | Focus | Action |
|---|---|---|
| Getting up | Flat water, relaxed stance | Pop and stand with weight centered; keep body loose |
| Riding basics | Edge control | Shift weight to carve; keep board flat early on |
| Tricks | Varial basics | Practice small, repeatable moves; build confidence |
| Progression | Consistency | Gradually extend ride length and balance holds |
Right-Size Board and Setup for Your Weight
Start with a 5’0″–5’4″ wakesurf board if you weigh 140–190 lb; lighter riders go 4’6″–4’10” and heavier riders 5’6″–6’0″. Using this sizing provides stability and lift, building a solid foundation for your progression onto the wake.
Foundation and specs to check when choosing your board:
- Length by weight: 4’6″–4’10” for <120 lb, 4'10"–5'2" for 120–160 lb, 5'0"–5'4" for 160–190 lb, 5'4"–5'8" for 190–230 lb, 5'6"–6'0" for 230+ lb.
- Width: 18.5″–20.5″ suits most riders; if you’re heavier, 20″–21.5″ adds accessibility through greater balance.
- Volume: aim for higher buoyancy–roughly 28–38 L for lighter weights, 34–45 L for heavier weights–to keep movement centered and reduce effort getting up.
- Rocker: flatter nose and tail supports easy planing and a natural ride; avoid deep curves that slow your pop and require extra strength.
- Fin setup: start with a single center fin 4″–5″ for tracking; add side fins 3″–4″ if you want more grip, then remove them later as your balance improves.
Setup and technique to optimize for most riders:
- Stance: shoulder-width or slightly wider; toe angle 10–20 degrees outward for natural balance and easy weight transfer.
- Body alignment: stay centered on the board; a slight knee bend (about 15–22 degrees) helps with lift and control.
- Weight distribution: start with roughly 60% on the back foot to load for lift, then shift as you trim speed along the wave.
- Movement: keep smooth, deliberate body movement; let the hips lead and the shoulders follow to avoid spinning or overcorrection.
- Slack and feel: keep the upper body relaxed but avoid slack in your arms; a taut core supports balance and stability.
- Getting up: pop to stand in a single fluid motion, board flat, weight centered, eyes looking toward the wake to maintain stability and lift.
- Progression mindset: most riders start with short, controlled rides, then eventually build longer sessions and add basic tricks while preserving balance and control.
In this order, choosing size, dialing stance, setting the fin system, and refining body movement will maximize your confidence and accessibility on a wake wave. Finding the right balance from the start helps you feel the wave sooner and push your skills toward advanced tricks with a supreme sense of control.
Hip-Driven Stance: Align Hips, Shoulders, and Feet
Set baseline with a hip-driven stance. For beginners, place feet shoulder-width apart and angle them about 10–15 degrees outward. Align hips square to the direction you plan to ride, and keep shoulders over hips to maintain a neutral spine. This setup improves balance, control, and accessibility on the wake.
To create movement from the hips, rotate the hips first as you edge, while keeping the chest pointing forward. Avoid letting the knees or lower back dominate the action. A clean line from hips through shoulders to feet helps your turns stay steady and predictable.
Foot placement specifics: front foot near the board’s midline, back foot toward the tail, with feet parallel or a gentle outward angle. Maintain about 50/50 weight when stationary; as balance builds, nudge weight slightly toward the back foot to help prevent the nose from rising during cuts behind the wake.
Drill cue: practice with a calm lake, follow a slow speed, and hold short. Focus on gradually increasing hip rotation to create controlled movement. Start with small habits: 15–20 degree hip rotation, hold 2–3 seconds, then release. Repeat to build consistency; some spins from the hips help you learn direction control.
Common mistakes and fixes: hips facing too far outside the board pull you off line; keep shoulders aligned with hips; if the board nose lifts, soften the back knee and shift weight slightly back; glance at a spot ahead and reset alignment whenever you feel off balance.
Progression tip: as you gain comfort, add small spinning moves to both directions and tiny trick-like cuts while maintaining the hip-driven base. Those steps build confidence and direct control behind the wave.
Pop-Up Drill: Smooth Transition from Knees to Standing
Pop up in one smooth motion: plant your front knee on the deck, push your chest forward, and bring your back foot under you until you stand tall. This quick transition keeps surfers confident and moving toward riding with control and a clean line from kneels to standing. This stance improves moves on the water.
lets,start with a tight dry-run on land: repeat the motion 8–12 times, no board, to lock the feel of the hips and spine as you pop.
When you move to the water, set up your stance by keeping weight centered and using your core. Align your hips so your torso stays perpendicular to the direction of travel, then drive upward with a quick hip thrust, guiding the front foot forward onto the board in a single sweep. If you feel unsure, dont rush the pop; reset and try again. From there you can carve the board and create forward momentum, keeping a smooth rhythm as you ride.
Wear a helmet and stay mindful of the marine environment: give people space, check the boat’s wake, and practice in calm conditions until you’re comfortable. A coach said that patience pays off. Enough room and proper gear allow you to learn without risk and help you stay in control.
With repetition you’ll build the best technique: you become more confident, your rides become long, and you’ll feel freedom as you move from kneeling to standing without hesitation on moving water. Focus on keeping the front foot active and the back foot driving the pop to keep your balance clean and fluid. Please stay patient as you keep drilling this until the transitions feel effortless.
Weight Transfer and Edge Control on the Wake
Place weight on the rear foot and keep knees soft as you approach the wake; hold the edge and ride level. Using a steady edge gives you freedom on the water and sets a reliable foundation for the series of moves ahead.
As the wake arrives, shift weight slowly toward the rail edge to establish a clean carve. Maintain a low center of gravity and keep hips quiet; this gives control and helps you maintain balance when the boat rolls you side to side.
To change direction, apply a gentle hip move and tilt the board along the rail with your chest facing the line. This lets you adjust and find a clean arc for a first turn.
Remember the foundation: balance and edge control come from steady practice with wakesurfers, not big jumps. Focus on a relaxed upper body, maintain a steady line with your core, and let the boat do the work. Advice here is to practice short edge moves on calm water, then extend the edge duration gradually to build confidence.
Fall-Safe Techniques: Safe Bailouts and Quick Re-entries
Bail toward your back and let the board slip away toward the boat, then rotate to face the wake with a level, well-relaxed spine and eyes up.
Remember to keep your legs soft and slowly bring them in, using a steady pump to rise back into position. This approach reduces impact against the water and helps you recover quicker in marine conditions.
For this wakesurfing path, regular and goofy riders both benefit from solid bailouts and fast re-entries; which stance you started with sets the direction, but the core moves stay the same: stay calm, face the boat, and use your legs to control the return.
- Safe bailout drill (begins at the start of every session): if you started in regular stance (left foot forward) or goofy stance (right foot forward), rotate your shoulders toward the water, loosen your grip, and let the board slide away while you roll onto your back. This keeps your face away from the board and prepares your hips for the next move.
- Head and body protection: tuck your chin, keep your eyes on the boat, and keep your hands up to shield your face. A calm breath and a slow exhale help you stay relaxed through the fall.
- Board clearance: allow the board to move away toward the boat so it won’t strike your legs or torso; you should feel the water against your back as you settle into a stable float.
- Quick re-entry setup: facing the boat, drop your hips a touch and place your hands on the deck, then use a small pump with your legs to lift your chest and bring your hips under you.
- Foot placement and stance: as you rise, plant the front foot on the board while the back foot slides up; keep their toes pointed toward the edge and your knees slightly bent to maintain balance.
- Stand and ride away: push through your legs, rise to a solid stance, and look toward the boat to steer away from the wake. This sequence increases stability and helps you regain rhythm quickly.
Beginner starts benefit from repeating these steps with slow, deliberate movements until they become muscle memory; remember that practiced rhythm makes your bailouts and re-entries smoother, and builds confidence in their face of unexpected falls.