

 Your Ultimate Jet Ski Equipment &">

Recommendation: 간편 수리 키트를 방수 가방에 넣어 여행하는 날을 위해 보관 구역에 보관하십시오. 이렇게 하면 부두를 떠날 때 필요한 물품을 쉽게 구할 수 있습니다.
jackets and a jacket 선선한 아침에는 간편하게 꺼낼 수 있는 주머니에 넣어두세요. 이러한 구성은 물보라로부터 몸을 따뜻하게 보호해주며, 휴대하기 좋은 소형 PFD는 이동 및 광범위한 영역 커버에 대비할 수 있도록 해줍니다.
간단한 키트에는 수리 테이프, 케이블 타이, 여분의 나사, 소형 펌프, 선박용 실란트와 작살총 만약 당신이 해안에서 낚시를 한다면, 각 아이템은 낚시 여행 동안 유용할 것입니다.
어부의 마음가짐: 오리발은 하단 보관함에 넣고 스트랩을 고정하여 움직이지 않도록 합니다. 하단을 건조하게 유지하는 것이 성능을 뒷받침하며, 간단한 탑승 전 점검을 통해 밀봉 상태와 가방 잠금 상태를 확인하여 모든 것이 건조하게 유지되도록 합니다.
잘 정리된 키트에 익숙해지면 모든 여행에서 준비된 상태를 유지할 수 있습니다. 이 구성은 라이딩을 위한 믿을 수 있는 기준이 되어 일상을 흥미롭고 단순하게 만들어 주며, 도크 근처 공간은 깔끔하게 유지되어 다음 사용을 위해 준비됩니다.
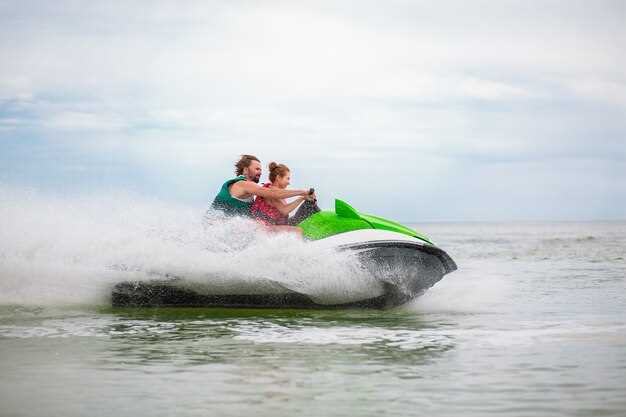
보트 타는 재미를 위한 필수 선박 장비
기본적인 구명조끼와 견인 로프로 시작하여, 휴대용 공구 키트와 필수품을 위한 방수 파우치를 추가하십시오.
부식에 강한 크롬 하드웨어와 빠른 유지 보수를 위한 간단한 잠금 장치가 있는 염수용으로 설계된 장비를 선택하십시오.
장비를 실을 공간이 있고, 안정적인 승차감을 제공하며, 항해 중 거친 물결에서도 조작하기 쉬운 구동 제어 장치를 갖춘 모델을 선택하십시오.
선상 오디오의 경우, 방수 스피커와 밀폐형 채널을 선택하여 습기 침투 없이 물 위에서 즐거움을 만끽할 수 있습니다.
하중 제한, 부양 용량, 일부 모델의 햇빛 및 물보라 처리 방식에 대해 질문하고 보관 공간과 무게 배분을 확인하십시오.
체크리스트로 간단하게 준비하세요: 예비 부품, 견인 가능한 가방, 드라이 백, 펌프, 그리고 구급 상자; 이 준비만으로도 멋진 평온함과 신나는 항해를 만들 수 있습니다.
안전을 염두에 두세요: 스트랩으로 물건을 고정하여 가라앉는 장비를 방지하고, 견인 가능한 앵커 가방을 사용하고, 구명 장비가 부착된 상태를 유지하도록 하세요.
몇몇 정보 채널에서는 어떤 모델이 당신의 계획에 적합한지 제시합니다. 후회하지 않도록 구매 전에 리뷰를 살펴보고, 시운전도 해보고, 방 크기도 재보세요.
간단한 설정은 나중에 발생할 질문을 줄여줍니다. 크롬 액센트, 훌륭한 그립감, 믿을 수 있는 부력을 갖춘 모델을 선택하여 흥분을 극대화하세요.
제트 스키를 타는 동안 귀중품을 건조하게 유지하는 방법
출발하기 전에 꼭 필요한 건식 보관 설정을 결정하십시오. 가방이나 상자를 사용하고 물보라가 적게 닿는 선박의 시원하고 조용한 표면에 부착하십시오. 특히 산 근처의 거친 물속에서 물품을 안전하게 보관하려면 IPX8 씰과 용접된 이음새를 찾으십시오.
두 번째 레이어를 추가하면 도움이 됩니다. 전자기기는 5~10L 드라이 백에 넣고, 더 큰 물품은 콤팩트 상자에 담으세요. 이 설정은 물품을 건조하게 유지하고 구조 상황을 지원하여 팀원들이 필수품에 빠르게 접근할 수 있도록 돕습니다. 민감한 장비를 격리하고 습기가 옮겨가지 않도록 다른 내부 파우치를 고려하세요.
분류별 포장: 반드시 건조하게 보관해야 하는 것, 약간 젖어도 괜찮은 것, 그리고 비상시에 즉시 필요한 물품. 밀봉하기 전에 내용물을 표기하여 상황이 바뀌었을 때 신속하게 찾을 수 있도록 하십시오.
데크의 고정 지점에 홀더를 부착하고, 꽉 조이는 스트랩을 사용하여 회전 시 상자와 가방이 미끄러지는 것을 방지하여 파도와 물보라 속에서도 안전하게 항해할 수 있도록 합니다. 모든 것을 고정하면 분실 위험을 줄이고 주머니 안쪽 표면을 건조하게 유지할 수 있습니다.
녹을 최소화하려면 습한 곳 근처에 금속 부품 사용을 피하고, 플라스틱이나 코팅된 고정 장치를 선택하십시오. 금속 물품은 방수 가방에 넣어 보관하고 염수 분무를 피하며, 라이딩 후에는 헹구고 건조하여 수명을 연장하고 부식을 방지하십시오.
발사 전, 빠른 점검을 실시하십시오: 각 가방이나 상자의 밀봉 상태를 눌러 방수 여부를 확인하고, 물보라가 심해지면 추가 잠금장치를 설치하십시오. 이 조용한 루틴은 귀중품을 건조하게 유지하고 생명을 구할 장비가 즉시 사용 가능하도록 보장하는 가장 좋은 방법입니다.
요약하자면, 궁극적인 목표는 물품을 완전히 건조하게 유지하는 것입니다. 가방, 상자, 홀더를 명확한 표시와 정리된 레이아웃과 결합하면 조건이 변하더라도 모든 여행이 더 안전하고 탐색하기 쉬워집니다.
빠른 액세스가 가능한 방수 휴대폰 케이스를 선택하세요
빠른 접근이 가능한 상단 패널 또는 측면 개방형 케이스를 선택하고, 풀탭 래치와 IP68 보호 기능이 있어 휴대폰을 분무에 노출시키지 않고도 라이딩 중 화면을 읽고 빠르게 응답할 수 있습니다. 투명한 전면은 장갑을 낀 상태에서도 엄지 손가락 사용을 도와 바쁜 순간에도 신속하게 응답할 수 있도록 해줍니다.
휴대폰을 안전한 곳으로 옮겨야 할 때 손이 닿는 곳에 있도록 휴대 옵션을 앞면 하네스에 부착하거나 플랫폼에 스트랩으로 고정하세요. 끈이나 클립을 사용하면 한 번에 잡아서 안전한 위치로 돌려놓을 수 있어 몇 시간 동안 라이딩할 수 있습니다.
데크 위의 바구니, 상자 또는 전용 랙 공간에 핀, 여분의 열쇠 또는 작은 장비를 정리하십시오. 걸려 넘어지거나 줄에 걸리지 않도록 모든 것을 보관하여 자신 있게 움직이고 다음 운행을 위해 장비와 물품을 준비할 수 있습니다.
접근 방식 및 잠금 방식을 결정합니다. 안전한 밀폐를 위해 이중 잠금 장치를 선택하고 한 손으로 조작할 수 있는 모델을 우선적으로 고려하십시오. 물결이 심하거나 물보라 또는 비가 오는 특정 조건에서는 떨어뜨렸을 때 뜨거나 똑바로 서 있는 케이스를 선택하고 케이스를 제거하지 않고도 센서를 작동할 수 있는지 확인하십시오. 보호 수준, 청소 용이성 및 휴대폰 모델과의 호환성을 비교하여 라이딩 루틴에 가장 적합한 옵션을 선택하십시오.
| 모델 | Access | 보호 | Best Use |
| 사례 A | 상단 탭 풀 탭 | IP68, 투명 전면, 이중 밀봉 | 정말 빠른 확인; 화면을 특정 지점으로 가져와야 할 때 유용합니다. |
| 사례 B | 마그네틱 래치가 있는 측면 입구 | IP68 방수 방진, 물에 뜸, 견고한 모서리 | 물보라를 막아주어 물이 튀는 곳에서도 제품을 안전하게 보관할 수 있습니다. |
| 사례 C | 스트랩 걸이 클립 | IP67, 투명 창, 생활 방수 | 부피는 최소화하면서 장거리 라이딩에 적합한 로우 프로파일 휴대성 |
IP 등급 및 용량을 기준으로 드라이 백 선택
권장 사항: 대부분의 라이딩에는 IP68 등급의 20~30L 용량 드라이 백을 사용하십시오. 장치, 지갑, 여벌 옷 등을 건조하고 안전하게 보관할 수 있으며, 분실물 및 부식 방지 기능과 함께 장비를 깔끔하게 정리할 수 있습니다.
IP 등급 설명: IP67은 먼지를 막고 최대 1m 깊이에서 30분 동안 침수를 허용합니다. IP68은 더 깊거나 더 긴 침수에 대한 보호 기능을 확장하지만 정확한 깊이와 지속 시간은 모델에 따라 다르므로 결정을 내리기 전에 항상 제조업체의 사양을 확인하십시오.
용량 가이드: 5–8 L는 열쇠, 소형 휴대폰, 지갑 등 필수품을 수납하기에 적합합니다. 10–15 L는 가벼운 재킷과 수건을 넣을 수 있습니다. 20–25 L는 하루 분량의 옷과 오리발 세트를 수납할 수 있습니다. 30–40 L는 여벌 옷, 음식, 물병, 호루라기를 담을 수 있습니다. 이 구성은 튼튼한 솔기 처리된 정사각형 가방 모양으로 각 품목을 깔끔하게 보관합니다.
결정 요령: 평소 사용하는 키트만 계산하고, 차량으로 이동할 때 일상용으로 가방 하나만 사용할지 여러 개를 사용할지 결정하십시오. 균형 잡힌 접근 방식을 단순화합니다. 건조한 옵션이 제한된 상태로 정기적으로 라이딩하는 경우, 20–25L 가방이 몸에 장착하는 설정에 더 안전합니다. 산이나 외딴 해안으로 더 긴 여행을 떠날 때는 30L 이상으로 선택하고 분실 위험을 줄이려면 두 가방에 물품을 나누어 넣으십시오. 부피를 줄이고 시간을 절약하기 위해 무엇을 입을지 고려하십시오.
건설 및 안전: 용접 심이 있는 롤탑 잠금장치, 부식 방지 원단, 강화 손잡이, 장비를 안정적으로 유지하는 내부 스트랩 시스템과 같은 특정 기능을 찾으십시오. 호루라기나 휴대폰에 빠르게 접근할 수 있는 특정 포켓이 있는 가방을 선택하십시오. 욕조나 수영장에 담가 모든 것이 시간과 돌풍 속에서 건조한 상태를 유지하는지 확인하십시오. 이는 각 설정에 고유한 특징이 있으므로 어떤 시스템이 귀하의 활동 및 장비 루틴에 적합한지 결정하는 데 도움이 됩니다. 특정 라이딩 스타일에 적합합니다.
지갑, 열쇠 및 소형 전자기기 보관용 드라이 박스 사용
Buy a compact, waterproof dry box with an IP68 seal and a simple, reliable latch; it suits a wallet, keys, and a small electronics panel, keeping contents dry when waves splash the deck.
Place it near the dock or in a towable bag; also include a dedicated first-aid kit with tubes and a spare care kit; this ensures quick access during minor incidents and after hours of use; if you carry food snacks, keep them separate from electronics.
Packing plan: main items go inside the main pocket: wallet, cards, and IDs; a separate case holds spare keys and a small USB drive; consider a custom foam insert and a budget-friendly model that still fits your gear, and label it so you can grab it fast, rather than a bulky option.
Corrosion resistance matters: rinse after salt exposure, dry completely, and inspect the seal; if the box looked worn or the panel shows gaps, replace the gasket rather than risk water intrusion; safety comes from proactive care.
Practical tips for use: keep the dry box low and secure so items don’t shift when the craft rocks; select a design that minimizes a sunk risk of moisture, and choose a model with a sturdy lanyard for a towable setup; this also reduces risk of lost essentials.
Follow a certain routine: check the seal below the lid before each trip, test it in a shallow puddle, and store the box in a dedicated place on deck; longer trips reward with less worry and more uptime on the water.
Attach Lanyards and Tethers to Prevent Loss
Install a marine-grade tether system: fixed deck anchor, stainless clip, and a durable nylon line 1.5–2.0 m long. This setup prevents items from drifting away during reboarding and adds convenience. It has become a general, budget-friendly improvement that fits most models, delivering a perfect balance of reliability and drive confidence. Use a breakaway end clip to minimize snagging and, avoiding entanglement, keep the line clear during time-sensitive maneuvers.
For newer models with wireless safety features, pair a wireless option with a traditional lanyard to provide redundancy. Youre reboarding without hunting for gear; plan for time-efficient transitions into the platform. This approach works in their engine bays and is suitable for different configurations.
- Choose tether type and length: a UV-resistant nylon line 1.5–2.0 m long; a stainless clip rated for at least 150 kg pull; route the line to avoid sharp edges and abrasion around engine vents and hinges.
- Two-point anchoring: attach the primary tether to a fixed post or stern deck anchor, and attach a secondary tether to a belt loop or PFD; anchoring this way reduces the chance of losing items if one point loosens.
- Route to avoid snagging: keep the line away from throttle, steering, and foot wells; use protective sleeves on edges; consider a small dry bag attached to the tether for valuables like keys or a phone.
- Maintenance and checks: inspect monthly; replace frayed segments; verify clip springs and corrosion resistance; store spare parts in a waterproof bag mounted to the tether for convenience.
- Testing and practice: rehearse reboarding with the tether in place; ensure retrieval is quick and there is no entanglement; if equipped, test wireless backup and confirm the engine shut-off response is immediate.