

 The Essential Guide to Sailboat Parts – Mast, Hull, Sails, Rigging, and More">

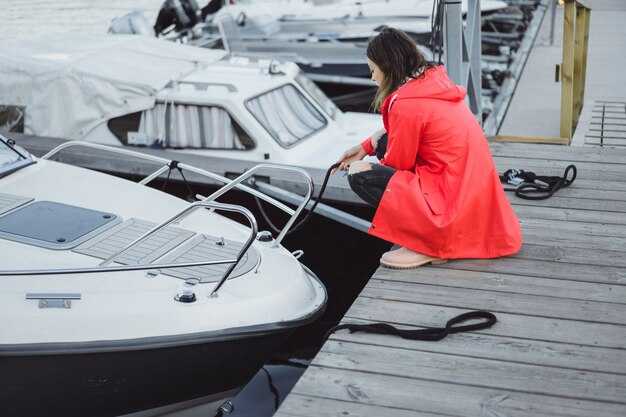
출발 전 간단한 점검을 통해 마스트 베이스와 체인플레이트를 살펴보고 부식이나 마모 여부를 확인하십시오. 움직임이나 느슨한 부품이 발견되면 즉시 교체하여 안전하게 추진하고 다음 항해를 위해 양호한 상태를 유지하십시오. 출발 전 철저한 점검만큼 위험을 줄이는 방법은 없습니다.
돛대, 선체, 그리고 돛은 디자인 함께 작업하려면 보트 길이와 세일 플랜에 맞는 장비를 선택하십시오. 작은 크기의 선박의 경우 간단한 메인 세일과 지브로 일반적인 요구 사항을 충족할 수 있지만 큰 보트는 다음의 이점을 누릴 수 있습니다. advanced 설정들 및 a parallel 분수 돛대를 가진 리그. Whether 레이싱이든 크루징이든, 다양한 날씨 속에서 믿을 수 있는 제어력을 제공하는 적절한 부품을 선택하십시오. 레이싱의 경우, 돌풍 사이 트림을 유지하기 위해 낮은 스트레치 시트와 업그레이드된 할야드를 사용하고, 빠른 사용을 위해 편리한 공구 키트를 갑판에 보관하십시오.
선체 건강 점검: 선체 옆면의 균열, 물집 또는 손상 여부를 검사하고, 용골 볼트와 선체 관통 하드웨어의 누수 여부를 확인하십시오. 선체를 청소하고 왁스를 칠하여 저항을 줄이고 물을 쉽게 헤쳐나가십시오. 예보된 바람과 파도를 확인하여 날씨 변화에 대비하고, 가능한 경우 악천후를 피하도록 경로를 계획하십시오.
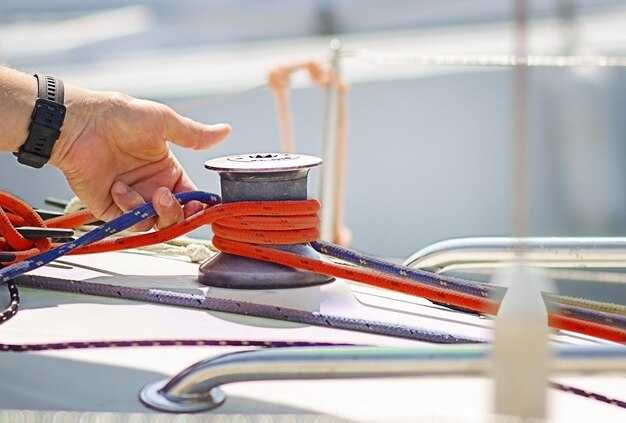
장비 및 조종줄: 도르래, 시트, 조종줄을 조종석 옆으로 늘어뜨려 쉽게 접근할 수 있도록 하십시오. 부식 방지 블록과 페어리드를 사용하고 줄의 직경을 승무원 하중에 맞추십시오. 승무원이 많을수록 안전을 위해 더 두꺼운 줄을 사용해야 합니다. 꼼짝 않고 고장난 윈치보다 더 나쁜 것은 없으므로 드라이 백에 여분의 클레비스 핀과 작은 매듭 묶는 도구를 휴대하십시오.
접근 및 안전 장비: 구명 조끼, 구급 상자, 소형 공구 세트를 방수 가방에 넣어 갑판에 보관하십시오. 엔진 또는 보조 추진 장치가 즉시 사용 가능하도록 하고, 여분의 연료와 오일을 밀폐 용기에 보관하십시오. 해상 수리를 위해 부품을 명확하게 라벨링하여 시간이 중요할 때 로커에서 올바른 부품을 꺼낼 수 있도록 하십시오.
선상 및 해상에서 부품에 접근하려면 사전 계획이 필요합니다. 명확한 예비 부품 목록을 유지하고, 매번 출항 전후에 정기 점검을 실시하며, 간단한 로그로 마모를 추적하십시오. 리그, 선체 및 돛을 시스템으로 취급하십시오. 디자인 조화롭게 작동하여, 다양한 기상 및 해상 조건에서 보트가 효율적으로 움직이도록 유지하고 안전 여유를 확보할 수 있습니다.
돛단배 부품 가이드: 마스트, 선체, 돛, 삭구 및 붐
마지막으로, 항해 전에 매번 마스트 부품과 고정식 삭구를 점검하여 제어에 영향을 줄 수 있는 마모를 확인하십시오. 턴버클의 유격, 핀, 코터 핀, 마스트를 따라 위치한 체인 플레이트 연결 상태를 점검하십시오. 부식이나 느슨한 부품을 발견하면 수리하거나 교체하여 선박을 안정적으로 유지하고 선원이 물 위에서 자신감을 가질 수 있도록 하십시오. 이 루틴은 또한 갑판에서 호기심 많은 관찰자로서 자신을 발전시키는 데 도움이 됩니다.
마스트 영역에서는 마스트 중심선을 기준으로 좌우 반쪽이 슈라우드와 체인플레이트에 의해 적절히 지지되는지 확인하십시오. 마스트는 돛과 장비를 지지하므로, 튼튼하고 잘 조율된 스파는 항력을 줄이고 돛을 둥글게 유지합니다. 핼야드가 깨끗하게 작동하는지 확인하고, 닳은 줄은 끊어지기 전에 교체하십시오. 마모된 줄은 중요한 순간에 걸리거나 미끄러져 돛을 조절하는 능력을 저하시킬 수 있습니다. 이러한 점검은 해상에서의 안정적인 핸들링으로 이어집니다.
선체 점검 시 선저 페인트, 페어링, 관통형 피팅을 확인해야 합니다. 균열, 물집 또는 물이 샐 수 있는 느슨한 하드웨어를 찾고, 정박한 상태에서 방향타 힌지와 조향 장치를 점검하십시오. 깨끗하고 매끄러운 선체는 저항을 줄여 돌풍 시 선박의 가속을 돕습니다. 배수 플러그가 작동하는지, 빌지 펌프가 안정적으로 작동하는지 확인하십시오. 이는 장거리 항해 시 승무원의 자신감을 유지하는 데 도움이 됩니다. 선체 상태가 양호할 때 항해 성능이 향상되며, 외관상의 단서는 문제가 커지기 전에 더 심각한 문제를 알려줄 수 있습니다.
돛: 주돛과 지브 세일에 찢김, 자외선 손상, 배튼 포켓을 점검하십시오. 리프 포인트와 구즈넥을 확인하고, 배튼 방향과 러프 및 풋 길이를 검증하십시오. 할야드는 걸림 없이 자유롭게 움직여야 하며, 시트는 하드웨어에 걸리지 않고 작동해야 합니다. 좋은 세일 플랜은 바람, 하중 및 승무원의 경험과 일치해야 합니다. 호기심 많은 선원이라면 안전을 염두에 두고 다양한 세일 조합을 테스트하여 더 빠른 결과를 찾으십시오. 바람이 바뀔 때는 스톰 세일의 러프를 짧게 사용하여 제어력을 유지하는 것을 고려하십시오.
장비 점검: 고정 장비(슈라우드 및 스테이)와 작동 장비(할야드, 시트, 컨트롤 라인)를 구분하십시오. 스테인리스 케이블의 부식을 검사하고, 체인 플레이트와 마스트 하단의 터미널을 확인하십시오. 도르래와 윈치를 윤활하여 저항을 줄이고 마모를 방지하십시오. 숙련된 선원은 납작해지거나 코어에 손상이 있는 라인을 교체하고, 정확한 트림과 안정적인 코스를 위해 반대쪽의 장력이 동일한지 확인합니다. 이 균형 잡힌 설정은 거친 물결과 변덕스러운 날씨 속에서도 안정적인 반응을 보장합니다.
붐: 구즈넥 정렬을 확인하여 붐이 마스트에 직각으로 놓이도록 합니다. 팽팽이, 토핑 리프트, 아웃홀이 세일을 올바른 각도로 유지하는지 확인합니다. 리프하는 경우 붐이 부드럽게 올라가고 메인 세일이 러핑 없이 완전히 유지되는지 확인합니다. 붐 엔드 피팅과 토핑 리프트의 마모를 확인합니다. 잘 조정된 붐은 세일 모양과 바람을 잡는 능력을 향상시킵니다. 데크 아래의 이러한 배치는 바람이 바뀌는 동안 선박을 제어하는 데 도움이 됩니다.
세일보트 주요 구성 요소 실용 개요
매번 돛을 올리기 전에 선체, 마스트 베이스, 고정 장비를 점검하십시오. 작동 시 유격이 없어야 하며, 모든 결합부는 염수에서도 단단히 고정되어 있어야 합니다. 기본에 집중해 주셔서 감사합니다. 이러한 훈련은 하루의 속도를 높일 때 모든 것을 예측 가능하게 해 줍니다.
- 선체, 개구부, 및 폐쇄
선체에 균열, 삼투 현상 또는 물집이 있는지 확인하십시오. 선체 관통구와 시콕을 살펴보고, 개구부가 제대로 밀폐되는지 확인하고, 해치 개스킷이 손상되지 않았는지 확인하십시오. 이렇게 하면 느슨한 것이 없고 특히 파도나 물보라를 맞을 때 누출을 최소화할 수 있습니다.
- 돛대, 마스트, 뒤 홋줄
스파(돛대)는 세일면을 지지합니다. 돛대 하단, 슈라우드, 백스테이를 점검하십시오. 턴버클에 접근이 용이한지, 백스테이가 하중을 받은 상태에서 풍상으로 돛대를 안정적으로 잡아주는지 확인하십시오. 포스테이와 부속품이 깨끗한지 확인하여 돛대를 올리거나 내릴 때 마찰로 인한 속도 저하를 방지하십시오.
- 돛, 발, 그리고 제노아
돛의 족삭과 리치를 점검하여 찢김이나 마모된 부분이 있는지 확인하십시오. 짚 세일이 설치되어 있다면 완전히 조여졌을 때 과도하게 팽팽해지지 않고 포스테이에서 부드럽게 움직여야 합니다. 닳은 헤드세일 슬라이드를 교체하고 세일 클립이 제대로 작동하는지 확인하십시오. 짧은 할야드를 사용하면 상단의 무게를 제어하고 돌풍 시 모양 제어력을 향상시키는 데 도움이 될 수 있습니다.
- 장비, 줄, 그리고 하드웨어
시트, 할야드, 윈치, 턴버클을 점검하십시오. 윈치에는 전용 핸들을 사용하고 여분의 하드웨어를 배에 보관하십시오. 라인을 기능에 맞게 라벨링하고 엉킴을 유발하는 교차 매듭을 피하십시오. 이렇게 하면 기능이 추가되고 빠른 조정이 가능합니다. 클러치 및 클리트와 같이 핸들링을 간소화하는 기능을 찾으십시오.
- 조타 장치: 틸러 및 헬름
틸러나 휠을 점검하여 부드럽게 움직이는지, 그리고 방향타와 연결이 즉각적인지 확인하십시오. 견고한 틸러 조작감은 원하는 코스로 조종하는 데 도움이 되며 파도를 헤치고 나아갈 때 예측 가능한 핸들링을 제공합니다.
- 선박 레이아웃과 전통적인 요소
통행로를 깔끔하게 유지하고 장비는 흩어져 있는 것을 최소화하는 전통적인 수납공간에 보관하십시오. 작은 해치, 여분의 스파, 그리고 몇 개의 추가 펜더는 장거리 항해에서 안전과 편안함을 높여줍니다.
Monica는 세일 트림을 간결하고 예측 가능하게 유지하는 것이 컨트롤을 향상시킨다고 언급합니다. 시트를 조정할 때는 세일을 따라 깨끗한 공기 흐름을 만들고 제노아와 메인 세일의 러프를 따라 압력을 유지하십시오. 적당한 바람에서는 밸런스 잡힌 풋으로 윈드워드 방향으로 트림하여 슬랙을 줄입니다. 약한 바람 속에서 제노아의 시트를 짧게 잡고 연습하고 러프 모양을 만들기 위해 추가적인 할야드 장력을 가하는 것이 도움이 됩니다.
이러한 접근 방식은 파도가 높아지거나 돌풍이 거세져도 선박을 관리하기 용이하게 해줍니다. 공간이 부족하다면 불필요한 장비를 치우고 지정된 보관함에 보관하십시오. 갑판이 어수선하지 않고 지체 없이 돛대, 스파, 돛을 다룰 수 있습니다.
마스트: 검사, 유지보수 및 일반적인 결함
매번 항해를 시작하기 전에 마스트를 점검하십시오. 하단, 베이스 플레이트 및 데크 부착 장치 주변의 구조적 무결성에 집중하십시오. 균열, 부식, 느슨해진 볼트 또는 변형 징후가 있는지 확인하고 조타 또는 회전하기 전에 문제를 해결하십시오.
가벼운 정비 루틴을 따르십시오. 표면을 닦고, 헐야드의 마모를 점검하고, 도르래를 통과하는 라인을 돌려 부드럽게 회전하는지 확인하고, 적절한 스프레이로 움직이는 부품을 윤활하고, 적절한 도구를 사용하여 마모된 부품을 교체하십시오.
일반적인 고장으로는 스프레더 핀 휘어짐, 마스트 섹션 균열, 슈라우드의 장기간 마모 또는 구즈넥 손상 등이 있으며, 이로 인해 항해 성능과 제어 감각에 영향을 줄 수 있습니다. 휘어짐이나 정렬 불량이 발견되면 항해를 중단하고 구조 체인플레이트와 데크의 부착 지점을 검사하십시오.
날씨 변화와 자외선 노출은 부품의 손상을 야기합니다. 마스트는 halyard를 올바르게 위치시킨 후 장력을 풀고 보관하십시오. 부식이나 균열로 인한 외관 변화를 관찰하십시오. 날씨와 상관없이 시기를 놓치지 않는 점검은 안전을 유지하고 신뢰성을 높입니다.
팁: 점검 시 마스트에 가볍게 압력을 가하여 흔들림이 있는지 확인하고, 메인 할야드가 도르래를 통해 부드럽게 회전하는지 점검하며, 모든 부속이 꽉 조여져 있는지 확인하십시오. 정기적인 점검은 비용이 많이 드는 수리를 예방하고 다음 항해를 위해 최상의 성능을 유지하는 데 도움이 되기 때문입니다.
| 항목 확인 | What to Look For | Action | Frequency |
| 시각적/구조적 마스트 | 균열, 찌그러짐, 하단 부식, 느슨한 베이스 플레이트 또는 갑판 부속품 | 조임쇠를 조이고, 손상된 부품은 교체하십시오. 균열이 보이면 전문가와 상의하여 평가하십시오. | 모든 항해 전에 |
| 돛줄 및 밧줄 | 해어짐, 매듭, 도르래 부근의 뻣뻣함 | 닳은 핼야드를 교체하고, 올바른 위치를 확인하고, 도르래를 통해 테스트하십시오. | 계절적으로 / 항해 전 |
| 데크 부속품 & 플레이트 | Loose bolts, corrosion, misalignment | Torque to spec, replace plate if needed, restore alignment | Every 6 to 12 months |
| Rigging & Turnbuckles | Corrosion, bent pins, loose fittings | Lubricate, tighten to recommended tension, replace corroded parts | 매년 |
| Appearance & Balance | Uneven look, mast flex, misalignment | Check straightness, ensure bottom clearance when rigged | 매년 |
Hull: Leakage Checks, Osmosis, and Deck Hardware Wear
First, perform a leak test before every voyage: pressurize the hull gently or fill the bilge to a shallow level and watch for damp spots around deck hardware and hull-to-deck joints for about 5 minutes. If you detect seepage, re-bed or replace fasteners and reseal with marine bedding compound. Keep a small toolkit equipped with bedding compound, sealant, screws, and a moisture meter for quick checks. Maintain safe handling during checks, and ensure the crew understands the procedure. Whether you race, cruise, or day-sail, these checks stay relevant.
- Leakage checks
- Inspect deck hardware, chainplates, stanchions, hatch rims, and mast partners; perform a lift test by gently lifting each fitting by hand; movement greater than 0.5 mm indicates bedding failure and needs re-bed.
- Check through-hull fittings and hydraulic lines for corrosion, cracks, or seepage; ensure clamps are snug and lines are free of chafe.
- Test handling in various conditions: try moving lines between wheel and tiller, check for movement through the deck, and verify that lowered hardware seats flush with the surface.
- Log known issues from previous seasons and compare them with current readings; short notes help plan repairs between sails or while tied to a dock.
- Osmosis checks
- Inspect the underwater hull at the waterline for blisters; mark them and measure diameter with a ruler; large patches or growing blisters require attention.
- Use a moisture meter on fiberglass to check laminate moisture content; readings above 12% suggest further evaluation and potential scheduling haul-out.
- Photograph reports and compare with prior haul-out data; if new blister zones appear near areas with heavy loads, escalate to a hull specialist.
- Consider racing or high-speed sailing that stresses the hull more; plan the next inspection after a season with frequent running time and heavier speeds.
- Deck hardware wear
- Inspect the wheel, tiller, and associated controls for play; ensure hydraulic steering components and lines operate smoothly.
- Re-bed deck fittings and mast bases showing movement or gelcoat cracks; replace worn fasteners and reseal with marine-grade bedding.
- Examine lines, halyards, pole attachments, and hardware for fraying or heat damage; replace worn segments and re-tie with secure knots.
- Assess traditional vs modern hardware; if you operate tall stanchions or other high-load points on vessels, consider upgrading to hardware rated for fiberglass hulls.
- Note from monica: two deck fittings showed slight movement; tighten, seal, and re-check before the next time on the water.
Sails: Wear Indicators, Material Choices, and Replacement Timing
Inspect sails annually and replace early, before fatigue damages the rig. In a sailboat, persistent shape loss or fabric thinning signals that the structural integrity of the sail is compromised and drag increases, slowing speed and complicating control.
Identify wear with a quick visual and touch check: look for fabric thinning, bleached or chalky fibers, loose stitching, torn patches, or delaminating panels along the luff and leech. If you can feel soft spots when you run your hand along the sail, or if creasing stays after you shake out the sail in light wind, take a closer look at the entire panel against the battens and plate reinforcements. Aside from appearance, assess shape under trim; persistent flattening or asymmetry means the sail no longer provides the designed camber, which degrades balance and increases drag, making steering and wheel input steadier and more effortful.
Material choices come down to how you use the boat. Dacron (polyester) sails are durable and forgiving, keep shape well with routine care, and are convenient for casual cruising. Laminates–often built from Mylar or aramid blends–hold a finer profile in higher wind ranges and generally improve early peak power, but UV exposure and frequent handling can shorten their life between freshening or replacement. For cruisers, a balanced mix of these options works best; for racers, laminate sails designed for high load and quicker response can offer greater performance, but require more attentive maintenance.
Aside from the cloth itself, inspect the reinforcement in corners, patch areas, and along seams. Corner plates and reinforced patches must stay firmly attached; when stitching begins to lift or patches shift under load, replacement becomes safer and more cost-effective than a field repair. Since wear concentrates where loads are highest, check battens and luff tapes for fraying, and verify that the connectors between sails and booms remain secure. Between routine checks, keep spares ready for quick swap-outs so you can maintain navigational control and keep the sailplan balanced even under variable wind.
Replacement timing depends on material, use, and exposure. Cruising Dacron sails typically last 8–12 years with careful washing, proper storage, and regular reefing; laminated sails in the same service often deliver 3–7 years of useful life before performance degrades enough to justify replacement. Spinnakers or specialty sails usually fall into a 1–3 year window if used heavily; if you sail in strong sun or frequently push to the upper wind range, plan earlier replacements. When a sail loses its curl, shows persistent creasing in gusts, or fails to hold its designed draft even with correct trim, it’s time to take a replacement seriously rather than chase a patch-up. For greater reliability, explore options that fit your budget and sailing goals, and time a replacement so you can align it with other systems, like halyards and hardware, to keep everything working in harmony since a misfit between sails and rigging introduces inefficiency and extra wear on the forestay, wheel, and booms.
Practical steps to take now: set a visual calendar for annual checks, note any changes in how the sail behaves under trim, and plan replacements in parallel with labor and hardware updates. A well-chosen sail design improves balance, reduces drag, and makes control easier, so you can steer with less effort and enjoy a more predictable ride. When you replace, bring a knowledgeable sailmaker into the process to verify stitching, panel alignment, and the fit against your mast and plate attachments, ensuring the new sails are designed for your wind range and rig setup, and that the take is predictable for your crew to handle with the wheel and stick.
Rigging: Safety Checks, Tensioning, and Replacement Schedules
Inspect standing rigging before every voyage and replace any damaged component immediately. In case of visible corrosion, broken strands, or dented fittings, retire the affected line and install a replacement from your spare stock.
Safety checks: examine upper and lower shrouds, forestay, backstay, and all fittings at chainplates. Look for corrosion, cracks, fretting, kinked wire, or worn sheaves; verify shackles and cotter pins are secure; inspect masthead and gooseneck fittings and examine lines that pass through blocks for wear or chafe. Confirm deck fittings stay tight and secure, test movement of lines on benches or in the cockpit where you work, and ensure that nothing can shift during a gust; check steering linkage for any play.
Tensioning: with the boat on a firm footing, loosen locknuts, rotate each turnbuckle to remove lash, then apply even tension using a wrench on the turnbuckle’s flats. Re-lock both ends and recheck alignment. If you have a tensiometer, aim for balanced tension on port and starboard shrouds to keep the mast steady under windward load; after tensioning, gently test mast bend and movement by pressing near the masthead and boom. Keep the movement controlled; grip the end with your fist to confirm the control is solid. Ensure upper stays stay aligned and that booms move freely without snagging.
Replacement schedules: standing rigging made from stainless steel wire typically lasts 10-15 years in normal sailing; in vessels exposed to frequent heavy weather or salt, plan 8-12 years. Running rigging (halyards, sheets, control lines) should be renewed every 3-5 years or sooner if there is fraying, stiffness, or obvious UV damage. Choose hardware with lightweight components and replace worn blocks; label spare parts for quick replacement on a busy day; keep spares on benches and in a weatherproof box. For community fleets, coordinate cycles so that all boats remain safe and downtime is minimized.
Maintenance habits: schedule a monthly visual check and a thorough off-season inspection. Use a bright light to inspect chainplates and deck fittings; test line movement through blocks; lubricate sheaves with a light oil where indicated and avoid over-lubrication. Confirm access to upper stays and anchor points; use a stable step platform to reach the upper section. In boats with limited access, install reliable clutches or organizers at the foot of the mast. This approach keeps vessels ready for working weather and ensures steering control remains smooth, reducing risk during sudden movement or unexpected gusts.
The Boom: Sheeting Geometry, Line Management, and Vang Setup
Set the mainsheet so the boom sits flat and the sail shapes stay clean when you trim through weather. Keep the line under light tension to prevent oversheeting and edge the sail toward the desired twist. In a fiberglass vessel, the boom responds quickly to a smaller adjustment, so you can tune on the fly while racing or cruising.
Line management remains simple: route the mainsheet through well-located blocks on the end of the boom, run the halyards and topping lift along clean paths, and keep the vang and outhaul lines away from the crew. Use smaller diameter lines for high-load segments and place cleats where each crew member can reach them without leaning over the rail.
Vang setup: The vang provides a steady downforce on the boom, counterbalancing lift as blows through the rig. Set the vang so it maintains a light but constant tension on the sail, which keeps the boom from rising and reduces weather helm. As gusts blow, increase vang tension to keep the edge of the boom down and maintain ease of trimming. If the boom tends to rise first during gusts, add more vang or move the block to shorten the line.
Downwind or light-air tuning: When the wind goes light, loosen vang slightly to allow twist and maintain shapes; when it picks up, firm the vang to keep the boom from rising.
Maintenance and checks: After each session, inspect fiberglass components and deck fittings; check line wear; confirm located blocks are secure; replace worn lines to prevent break.
With disciplined line routing and a well-tuned vang, you maintain control through gusts, keep your vessel balanced, and preserve speed in racing or cruising alike.