

 육상 루어 낚시 팁 – 해안 캐스팅 성공을 위한 필수 기술">

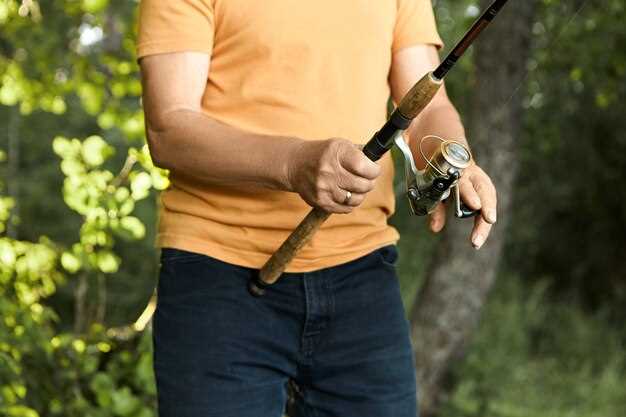
Use a front-drag reel for seaside bank throws to gain immediate bite detection and smoother drag response when a big fish pulls. Set the initial drag to roughly 25–30% of line breaking strain and adjust with the rate of retrieved line as you progress. This simply lets you manage runs and reduces the risk of breakage during a strike.
In flats and current edges, presenting baits so they are swimming naturally is critical. To match the retrieved cadence, set a pace that mirrors the rate at which fish feed: slow on the first 6–8 m, then a sharp burst to trigger 물린 자국. With the right plan, you can keep the bait swimming along the seam and lets you cover more water, increasing opportunity for bites.
Rig and gear: a fluorocarbon or wire leader protects against toothy species; choose leader length 15–30 cm depending on wind and target depth. Pair with a main line of 15–30 lb; keep the spool tension moderate when casting to prevent tangles. Pack a variety of weights from 14 g to 40 g to match depth and current, plus some topwater options for swimming action over flats. Power and control come from matching the weight to wind and current.
Wind and tide control rate; during different tides you probably see bite windows change; keep to a simple plan: when the current pushes, cast slightly down-current and retrieve with a steady rate; in calm conditions try a slower, longer pull to keep the bait on the surface. In the world of coastal angling, reading water features–edges, channels, flats, and drop-offs–is key; the best approach is to adjust the plan to stay close to structure and keep line taut so you can feel more bites, ever ready to adapt.
Gear management: keep a pack with spares, spare spools, a front-drag reel, a selection of leaders (wire and fluorocarbon), pliers, a knife, and a measuring tape. In most sessions, check the weather and tide beforehand and adjust your plan accordingly. The opportunity to land a big fish often comes in the next session, when conditions align and you stay patient. When a fish grabs the bait, feel the bite and lift smoothly to set the hook; dont jerk, just apply steady tension and let the fish take line if needed to secure the capture.
Coastal Baits and Bankside Casting: Traditional Artificial Bait Types
Start with a 10–12 ft rod and a tournament-grade setup; cast toward structure at about 40–60 degrees to maximise distance and accuracy, then keep the presentation moving with a steady, regular pace to produce bites.
Gear and Setup
- Rods: 10–12 ft, medium-heavy action for longer casts and solid control.
- Main line and leader: braided 20–40 lb with a 15–25 lb fluorocarbon leader; longer leaders reduce snagging near confined structures.
- Terminal tackle: pair of hooks or a single offset with barbs; consider barbless if regulations require.
- Weights: 1/2–1 oz depending on current and wind; adjust to keep bait moving near the bottom.
- Setup notes: ensure knot strength and forward alignment of components to minimise snag risk; this actually improves bite response.
Common Artificial Bait Types and When to Use Them
- Minnow-imitating soft baits: most versatile in clear to moderately stained water; usually produce regular catches when retrieved straight and slowly, producing a natural wobble that attracts minnows and game fish alike.
- Crankbaits: best for covering water fast; choose shallow to mid-divers to match depth at a point where fish hold; the difference between shallow and deep runners can be decisive in prime conditions.
- Surface plugs: topwater action with a surface jump or a wide walk; use when fish are actively feeding and the surface is calm to attract attention at the surface.
- Frogs: frog imitations shine in weed-choked flats and pads; stay with a longer pause between retrieves to produce a sharp splash that attracts moving fish.
- Soft swimbaits: flexible for adjusting length and color; pair with a jighead or weight that keeps the body moving just above the bottom for a strong moving profile.
- Jigs: versatile for deeper holes, drop-offs, and weed edges; use a slow, methodical bounce or a fast hopping motion to produce a noticeable vibration and snap.
- Spoons: lighter, compact spoons for a flash-and-fall presentation; often a good choice in windy, confined channels to attract attention.
Retrieval and Presentation Principles
Base decisions on a theory-driven approach; adjust speed, pauses, and rod taps based on water clarity, structure, and target species. Moving water usually calls for a faster cadence, while stagnant depths benefit a slower, deliberate crawl.
Key patterns include: forward casts with a snap retrieve, pauses to let the bait sink to the prime depth, and occasional short jumps or twitches to provoke bites. As a rule, begin with a forward cast, add a half-second pause, then a short snap to mimic a fleeing baitfish. This forward–pause–snap sequence can produce the most opportunities when bass and other predators are feeding on schooling minnows.
Carry a pair of color options and a couple of item designs to cover both murky and clear water; the best advantage is flexibility. Also, ensure regular maintenance: check hook sharpness, replace worn parts, and turn to barbs if local rules permit. The prime goal is to attract bites and convert them into catches, which usually requires a quick, decisive strike and a firm set.
In practice, frog and minnow profiles often outperform other designs in mixed weed and open-water zones; frogs excel in heavy cover, minnows excel in clear runs, and both offer strong opportunities to catch. The theory behind color shifting and action change is based on how fish perceive contrast and movement, so turning to a contrasting palette can yield a noticeable rise in catches.
Land Based Lure Fishing Tips: Shore Casting Strategies and Common Traditional Lure Types
Start with a compact sinking spoon or jig that lands tight to structure, then reel with a steady, low-angle motion to keep contact with the bottom.
Gear setup uses relatively sturdy line in the 20–30 lb range on a smooth spool, paired with reliable reels and a predictable drag; check knots and replace worn components before long sessions along the coast to ensure you find consistent performance.
Depth management targets deeper pockets: cast beyond edge lines and let the target sink longer, then begin a gradual retrieve at about 10–45 degrees of rod angle, adjusting to current and water clarity.
Items include spoons, jigs, crankbaits, and soft plastics on jigheads; popularity is supported by field notes, source reports, and здесь источник popularity confirms this trend.
Near rocks, cast slightly beyond and let the lure fall into gaps; use short, snapping retrieves to imitate fleeing prey; if you snag, pause, then pull free with a couple of smooth snaps; if you feel ikes from the current, switch color or pattern.
Seasonal tips: in shallow water, bright patterns and quick retrieves get bites; in deeper zones or on cooler days, darker colors with longer pauses perform better. Thinking ahead about tides and days helps you plan next trips; somebody with years of coast practice talked that matching patterns to water clarity is key.
Bass often respond to slower retrieves and chrome colors; Murray talked about the value of trying several items, and thinking in terms of degrees of retrieve helps you find the next pattern that gets bites.
Next steps: assemble an option kit with 4–6 items that cover shallow and deeper zones; prefer colors that match the water source and water clarity; keep notes on days and conditions to refine your approach; retrieve gradually and adjust by feel, this gives better odds on bass and other targets.
Spoon styles: cadence and retrieves along the bank
Begin with a steady, regular retrieve that keeps the spoon tracing a shallow arc near the surface, with short pauses of 0.5–1.0 seconds every 6–8 pulls to check depth response and tune cadence. The matter is consistency in cadence and line control.
In deeper zones or when wind pushes current, switch to spoons designed to sink to 3–4 ft, then perform 1–2 second pulls with 1 second stops to haul the spoon through the midwater column and trigger bites. Pulls should feel instinctively natural, not forced.
Rigging basics: tie a clean knot, add an 18–24 in fluorocarbon leader, 12–20 lb test; use a small swivel to cut twists and keep line from kinking; sizes range 1/8–3/4 oz, with 3/8–1/2 oz handling regular chop and wind; needs vary with conditions so adjust length and weight accordingly. This setup reflects the different rigs designed to meet anglers’ needs and basics alike.
Style differences matter: brass, copper, and silver finishes behave similarly yet represent different surface reflectivity; have a set that covers shallow hits and deeper action; designed to ride through surface ripple and through low-contrast water; through transition zones, switch styles; though some days a single size works, other days you benefit from multiple sizes and finishes to cover different depths; remember some rules: summer light makes brighter finishes shine; sizes matter; like the way larger spoons pull deeper than smaller ones; Somebody new to this game benefits from a two-size start and then increases when conditions demand it; certainly these choices puts you in position to strike, which affects bite timing.
Remember: an average session benefits from rotating among 2–3 sizes and at least two styles to identify the strike window that makes sense locally; instinctively you’ll tune cadence as water clears or muddy; though conditions shift, the approach puts you in position to strike; through practice, you learn deeper targets and shallower passes, and you’ll fish with confidence yourself.
크랭크베이트 및 플러그: 해안 구조물 선택
추천: 3.5cm 정도의 콤팩트한 중간 수심 크랭크베이트로 시작하여 약 1.5m까지 잠수하는 것을 선택하십시오. 험준한 지역에서는 20–30lb 합사와 짧은 카본 쇼크리더(12–18인치)를 감으십시오. 일정한 속도로 릴링하다가 구조물이 수면으로 솟아 오른 가장자리를 따라 입질을 유도하기 위해 짧은 멈춤을 줍니다. 이 방법은 암벽, 수초대, 기둥에서 효과적입니다.
일반적인 하구 해안선 구조에는 암반 지대, 해초 지대, 골, 그리고 말뚝 등이 있다. 흐름에 따라 미끼가 움직일 때 가장 활발한 구역보다 약간 더 깊이 잠수하는 크랭크베이트와 플러그를 선택하여 가장자리에 계속 닿도록 하십시오. 탁한 물에서는 더 큰 윤곽이 더 큰 대상을 유인할 수 있으며, 교체 가능한 슬러그와 테일은 옵션을 확장합니다. 변수가 바뀔 때 빠르게 적응할 수 있도록 장비를 분리하여 보관하십시오.
다양한 인기 옵션을 제공하는 시장 선택. 색상 선택이 중요합니다. 맑은 날에는 색상이 미묘하게 보일 수 있지만 탁한 물에서는 눈에 띄게 나타날 수 있습니다. 세션당 2~3가지 색상 패턴을 시도해보고, 어두운 곳이나 구조물 위에서 시선을 끄는 패턴에 집중하십시오. 적절한 색상은 주저함을 유발하지 않고 미끼를 스트라이크 영역에 배치합니다. 꼬리가 흔들리고 몸체가 구조물에 반응할 때 장력을 유지하기 위해 본능적으로 속도와 로드 부하를 조정하십시오. 입질을 느끼고 그에 따라 조정하십시오. 결과가 정체되면 다른 색상을 시도해 볼 가치가 있습니다.
하구와 연안 평탄지는 조수 간만, 조류의 세기, 물의 투명도, 바람, 선박 통행 등 여러 변수를 제시합니다. 가장자리를 따라갈 때는 미끼가 스풀에 어떻게 감기는지, 더 깊은 옵션으로 전환할지 아니면 회수 방법을 변경할지 생각해야 합니다. 수년간의 현장 테스트를 통해 최고의 결과는 단일 옵션을 고수하는 것이 아니라 접근 방식을 혼합하는 데서 나온다는 것을 알 수 있습니다. 유연한 기질을 통해 그날의 분위기에 대응할 수 있습니다. 하구 환경과 관련된 이러한 요소에는 적응 가능한 방법과 침착한 접근 방식이 필요합니다.
| 크랭크베이트 옵션 | Depth range | 구조 일치 | 색상 지침 | 참고 |
|---|---|---|---|---|
| 3.5cm 중간 크기 다이버 | 0.8–1.4 m | 가장자리 제초, 선 제초 | 자연스럽고 은은하게, 플래시 | 하구에서 일반적인 용도로 좋음 |
| 4.5cm 미드레인지 다이버 | 1.2–1.8 m | 바위 턱, 낭떠러지 | 착색된 물에서 더 밝게 | 가장자리를 따라 계속 당기십시오. 속도를 조절하십시오. |
| 4. 0–4.8cm 더 깊이 잠수함 | 1. 8–2.5m | 선반, 더 깊은 골 | 대비가 높은 패턴, 샤르트뢰즈/노랑 | 조류가 강할 때 사용 |
| 립리스/슬러그 스타일 | 0.4–1.0 m | 구조물 근처 얕은 여울 | 실버, 골드 플래시 | 조류가 미끼를 가장자리로 운반할 때 탁월함 |
해변 공략을 위한 소프트 플라스틱: 채비와 스윔 패턴
Recommendation: 하프 온스 무게, a 4–5인치 노 젓는 꼬리가 ~에 single 3/0 바늘, 그리고 15–20파운드 선두. 처음 6~10m를 꾸준하고 중간 속도로 감아 들인 다음, 멈추세요. 0.5–1초 불을 붙이다 주목할 만한 꼬리 차기. 멈추는 동안 드래그를 피하기 위해 낚싯줄을 느슨하게 유지하고, 낚싯대를 튕겨 미끼를 거품 쪽으로 되돌려 보냅니다. 이 방법은 이미 물살을 순찰하는 크고 배고픈 포식성 물고기의 공격을 더 많이 유도합니다. 최고의 결과는 조류가 바뀌고 물고기가 저지대로 이동할 때 나타납니다.
리깅 기초: 바늘을 코나 배에 달아 미끼 머리가 바닥 가까이에 있도록 하세요. 물살이 약할 때는 1/8–1/4온스; 파도가 더 거세지면 다음 단계로 1/2온스. Use a single 훅 인 더 1/0–3/0 스트레이트 와이어 스타일의 범위에서, 30–45cm 스텔스를 위해 플루오로카본 리더를 사용하십시오. 눈에 잘 띄는 대조적인 색상이나 자연스러운 색조의 소프트 플라스틱을 선택하고, 미끼 앞에 작은 구슬을 추가하여 순간적인 반짝임을 만들어 장비가 더 쉽게 눈에 띄도록 하십시오. 디자인은 콤팩트하게 유지해야 합니다. 농축된 물고기를 놀라게 하지 않으면서 깔끔하고 안정적인 수영을 만들어내는 색상 신호와 동작.
해변의 수영 패턴: 대부분의 경우 두 가지 핵심 접근 방식이 적용됩니다. 첫째, 미세한 꼬리 차기로 안정적이고 낮은 저항의 walk-the-tail 패턴을 사용합니다. 둘째, 포식 반응을 유발하기 위해 방향을 바꾸는 불규칙한 움직임을 사용합니다. 가시성을 높이려면 다음을 목표로 하십시오. 주목할 만한 리듬감 3–5 주기적인 경련, 그리고 일시 정지. 각 경련의 정점에서 급격하게 방향을 틀어 미끼를 역류 쪽으로 되돌리는 동작은 부상당한 미끼를 흉내내며, striking 배고픈 물고기에게 신호를. 반 바퀴 회전 트위치 사이의 간격을 두면 모래와 거품이 섞인 곳에서 깊이를 유지하는 데 도움이 되고, 설정을 과도하게 조작하지 않고도 더 넓은 영역을 커버할 수 있습니다. 매 캐스팅마다 똑같은 동작을 반복하지 마십시오.
종 관련 참고 사항 및 조정: 가장자리의 물골에서 송어는 느리고 촘촘한 패턴에 잘 반응합니다. 맑은 물에서는 자연스러운 색조를 선호하고, 흐린 물에서는 밝은 샤트뢰즈 색상이나 흰색이 좋습니다. Example 셋업에는 내추럴 바디에 샤트뢰즈 테일이나, 반짝이는 마감이 그대로 유지되는 60년대 팔레트. 몇 입 놓치더라도 다른 size 다음 텍스트만 번역해 주세요. 규칙: - 설명 없이 번역만 제공합니다. - 원본의 어조와 스타일을 유지합니다. - 서식 및 줄 바꿈을 유지합니다. six 캐스트하거나, 좀 더 unique 무늬; remember, 목표는 지나치게 몰두하지 않고 스트라이크 존에 최대한 가깝게 유지하는 것입니다. 패턴이 느껴진다면 favourite, 계속 진행하되, 한 가지 방식으로만 치우치지 않도록 다른 옵션을 섞어 사용하는 것을 망설이지 마세요.
기어 및 케이던스: 릴스에서 2500–3500 클래스 밸런스, 라인 용량과 캐스팅 거리를 고려하세요. 다음을 페어링하세요. 5–9 kg 라인은 느슨함을 제어하고 역회전을 방지하는 데 사용됩니다. Sizes 미끼 페이로드와 일치하도록 조정하면 입질 시 라인을 팽팽하게 유지하는 데 도움이 됩니다. After 입질이 오면 즉시 릴을 감아 팽팽함을 유지한 다음, 낚싯대 끝을 쓸어 미끼를 앞으로 나아가게 합니다. 입질이 끊기면 낚싯대 끝을 살짝 내려 미끼와 계속 접촉하게 하고, 다시 멈추는 것을 망설이지 마십시오. favourite 이 접근 방식은 두 가지 패턴의 회전, 즉 높은 정밀도를 가진 접근 방식입니다. anyone 채택할 수 있으며, lets 긴 세션 동안 꾸준히 게임에 참여하면 됩니다. 결과적으로 더 꾸준한 히트와 해변 커버 범위가 넓어지며, 특히 조수선에 크고 공격적인 틈이 있을 때 효과적입니다.
지그와 메탈 루어: 수심 조절 및 바람을 이용한 캐스팅
60–110g의 슬러그 스타일 지그를 사용하여 2–4초 안에 원하는 수심에 도달하십시오. 너울 너머로 멀리 캐스팅한 다음, 2~3초를 세어 바닥에 닿도록 기다린 후 들어 올려 잠시 멈춰 입질을 느껴보십시오. 라인 텐션을 일정하게 유지하고, 낚싯대를 적당한 각도로 사용하여 싱커가 자유 낙하하지 않고 제어되도록 하십시오. 이 방법은 정어리 및 조개류 서식지로 알려진 해안을 따라 바닥 구조와 지속적으로 안정적인 접촉을 유지할 수 있게 해줍니다.
바람을 이용한 캐스팅: 바람이 길고 활공하는 듯한 비행에 유리할 때는 몸을 바람 방향으로; 더 긴 백캐스팅을 사용한 다음, 로드를 튕겨 팽팽한 라인을 만드십시오; 착지하는 동안 라인을 팽팽하게 유지하고 즉시 릴을 감아 접촉을 유지하십시오. 해안을 염두에 두면 돌풍으로 인한 라인의 지그재그 현상이 줄고 더 잘 추적된다는 것을 알 수 있습니다.
조류 변화에 따른 수심 조절: 조류가 셀 때는 5–15g의 무게를 더하거나 쇼크 리더를 짧게 하여 슬러그가 바닥에 닿도록 유지하십시오. 바닥이 평평할 때는 더 가벼운 지그와 짧은 드롭을 사용하여 더 느린 하강을 시도하십시오. 수로 위를 맴돌고 있다는 것을 감지하면 전기 릴을 사용하여 껑충껑충 뛰듯이 호핑과 정지를 반복하여 갑각류와 기타 알려진 먹이가 있는 바닥 근처에 슬러그를 유지하십시오.
패턴 회수: 가라앉힌 후 긴 스윕 동작을 연속으로 하고 바닥 근처에서 짧게 멈춥니다. 입질을 유도하기 위해 매우 느린 멈춤 동작과 번갈아 가며 사용합니다. 7월에는 수온이 올라감에 따라 목표 대상이 해안 구조물에 더 가까워지므로, 최상의 결과를 위해 동일한 깊이에서 이 캐스팅 시리즈를 반복하십시오. 릴을 양호한 상태로 유지하고, 낚싯줄을 확인하고, 스풀에 꼬임이 없는지 확인하고, 이미 입증된 세션에서 얻은 경험을 바탕으로 다음 동작을 결정하십시오.
스피너베이트와 미노우형 루어: 실용적인 연안 활용 시나리오
20–30lb 합사와 12–18인치 플루오로카본 리더를 사용하여 1/8oz 스피너베이트로 시작하여, 파도 경계선 너머로 던진 후 다양한 릴링으로 입질을 유도합니다. 9월에는 미끼 활동이 둑 가장자리를 따라 집중되는 경우가 많아, 이 셋업이 대형 및 중형 목표에 특히 효과적입니다. 리더 길이와 캐스팅 각도를 조정하여 수심을 변경하고, 바닥 위 흐린 물에 적응할 수 있도록 여분의 블레이드를 준비해 두십시오. 이러한 기본 사항은 더 빠르게 반응하고 입질이 좋을 때 계속해서 잡을 수 있도록 도와주며, 항상 적응력을 유지하는 것이 중요합니다.
- 해변 브레이크 조류: 포말선을 넘어 캐스팅한 다음, 꾸준한 속도와 가끔씩 스냅을 주면서 회수합니다. 물이 흐릿할 경우, 더 큰 신호를 내기 위해 1/4온스 모델과 약 1인치 직경의 콜로라도 블레이드로 교체합니다. 큰 물고기를 잡으면, 로드를 높이 유지하고 압력을 유지하십시오. 걸림이 발생하면, 짧게 들어올린 후 뒤로 물러서서 벗어나십시오. 그들은 종종 먹이 활동이 활발한 곳 근처에서 그러한 액션에 이끌립니다.
- 잡초 가장자리 및 걸림돌이 많은 지역: 반응성을 유지하면서 잡초 매트를 뚫고 지나갈 수 있도록 싱글 윌로우 블레이드가 장착된 무거운 1/4온스 스피너베이트를 사용하십시오. 간격을 좁게 유지하고 짧게 톡톡 쳐준 다음 더 길게 멈춰서 포켓이 떨어져 나가도록 하십시오. 걸림이 발생하면 로드 팁을 내리고 천천히 당기십시오. 빠져나오기 어려울 것 같으면 틈새를 통과할 수 있는 더 작은 장비로 바꾸십시오.
- 맑은 물, 얕은 웅덩이: 작은 블레이드가 달린 1/8 온스 스피너베이트를 선택하고, 10~15lb 합사와 가벼운 쇼크 리더를 사용하십시오. 바닥 근처에서 느리고 촘촘한 움직임으로 수심을 고려하며 릴링하십시오. 입질이 오면 로드 끝을 높이 들어 챔질하고, 물고기를 놀라게 하지 않도록 최소한의 움직임만 사용하십시오.
- 새벽녘이나 해질녘의 빛이 적은 상황: 블레이드를 밝게 하고 둑 위의 첫 번째 깊이 변화 지점을 따라 꾸준하고 얕게 훑으세요. 이 시간대에 더 활발하므로 일정한 접근 방식을 취하는 것이 히트율을 높이는 경향이 있습니다. 물 색깔과 바람에 따라 속도를 조절하십시오.
- 미노우 타입의 미끼를 대안으로 활용: 2–3인치 크기의 자연스러운 액션을 가진 미노우 이미테이션으로 교체하고, 12–20lb의 슬림한 플루오로카본 리더를 사용하며, 메인 라인 브레이드는 10–15lb 범위를 유지하십시오. 자연스러운 스위밍 케이던스를 유지하되, 간혹 멈춤도 줍니다. 이러한 접근 방식은 자연스러운 움직임이 효과를 보이고, 표면 근처의 목표물에 주의를 환기시킬 때 주요 옵션이 될 수 있습니다.