

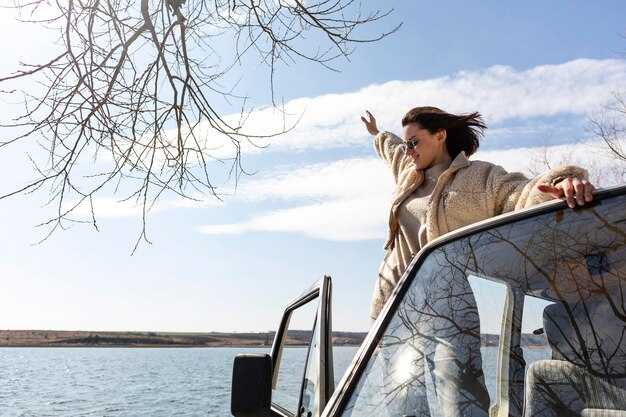
 배에서 멋진 사진 찍는 법 – 멋진 해상 풍경을 위한 전문가 팁">

갑판의 안정성이 가장 중요하다.발을 어깨 너비로 벌리고 무릎을 굽힌 다음 팔꿈치를 몸통에 얹으세요. 거친 환경에서는 카메라를 안정적으로 고정하기 위해 모노포드를 사용하거나 레일에 기대세요. 해수 분사와 튀김의 경우 셔터를 올리세요. 1/1000s or faster to capture clearest wave curls. If light drops, adjust to 1/500s 하지만 목표를 향해 더 빠른 쪽으로 움직임이 가속화될 때 속도.
기술 집중과 프레임을 위해: 스위치 전환 수동 모드 또는 사용하세요. single-point AF, 물체의 초점을 고정하고, 고대비 가장자리에 잠그고, 재구성합니다. 보트에서는 물의 움직임으로 인해 생성됩니다. movements 장면의 상황을 파악하고; 보트가 떠다닐 위치를 예측하고 초점을 맞추어 추적하십시오. 잠글 수 없는 경우, 밝은 빛에서는 연속 AF로 전환하되 다시 전환하십시오. single-shot AF 깨끗하고 먼 수평선을 찾아 시야가 선명하도록 유지하세요. 추적과 타이밍을 연습하면 그 순간을 놓치지 않을 것입니다.
구성 또한 중요합니다. 매 샷마다. 깊이감을 더하고 눈을 끌어들이도록 로프, 클리트 또는 부이를 전경 요소로 배치하세요. scene. Use contrast 어두운 선체와 흰 파도 사이에서 피사체가 튀어나오도록 합니다. 수평선을 수평으로 유지하십시오. 기울어진 선은 거친 바다에서 이미지 리듬을 깨고 잔잔한 물에서… 사진의 프레임의 가치입니다. 만약 당신이 맞서야 한다면, tricky 각도, 배의 흔들림에 맞춰 몸을 움직여 태양이 지고 구름이 빛날 때 대비되는 실루엣을 담아내세요. 연습하면 특별한 순간을 포착하여 잊지 못할 무언가를 만들 수 있습니다.
조명 및 노출눈부심이 강한, 정오의 conditions, 편광 필터를 사용하여 반사를 줄이고 하늘을 어둡게 합니다. 촬영은 수동 모드 또는 조리개 우선 바다의 밝기를 균형 있게 조절합니다. 물의 디테일을 유지하고 하이라이트가 넘치지 않도록 소량의 노출 보정(+/- 0.3 ~ +0.7)을 사용하십시오. 빛이 오가면서, speed 당신의 반응이 중요합니다. 계속 speed 그리고 contrast 마음속에 두고 햇빛이 바뀌는 것을 생각해 보세요. 원한다면 unforgettable 장면이 준비되면 배가 그림자에서 햇빛 속으로 미끄러져 나올 때 셔터를 누르세요.
때로는 운보다 타이밍이 중요합니다. 배 위에서. 순서의 시퀀스를 추적하세요. movements 파도치는 순간을 포착하기 위해 폭발하는 파도를 촬영하고 번개처럼 빠르게 촬영하세요. 카메라에서 빠른 버스트 모드를 제공하는 경우 사용하세요. 사진의 sequence는 선명한 스프레이와 깊이를 보여주는 표면 질감의 여러 프레임을 얻을 수 있습니다. In tricky 조명, 몇 프레임 촬영하기 노출 밝은 강조와 어두운 그늘 모두에서 디테일을 보존하기 위해 묶여 있습니다.
Safety and gear카메라를 위한 방수 가방을 휴대하고, 렌즈를 자주 말리고, 그리고 consider 분무 지역에서는 레인 가리개를 사용하십시오. 플레어를 제어하기 위해 렌즈 후드를 사용하고 세션 후 장비를 헹궈서 염분 축적을 방지하십시오. 장시간, exhilarating 세션, 계획하세요. conditions 중간 라이딩 중 전력 부족을 피하기 위해 여분의 배터리를 가져오세요. 배터리는 빠르게 소모될 수 있습니다. 명확한 계획은 최고의 순간을 놓치지 않도록 도와줍니다. scene 순간들을 담아내어 당신의 추억이 지속되도록 합니다. unforgettable.
2단계: 멋진 보트 풍경 사진을 위한 카메라 설정 조정
수동 모드에서 기본 노출을 설정하고 거친 물에서의 움직임을 고정하기 위해 1/1000초부터 시작합니다. 분무가 렌즈에 닿으면 ISO를 400–800으로 높이고 f/8–f/11을 유지하여 디테일을 보존합니다. 부드러운 물을 촬영하려면 안정적인 표면에서 1/4–1/8초로 촬영하고, 프레임 수열을 따라 움직임을 따라가면서 모노포드나 난간을 받침대로 사용합니다. 이 접근 방식은 이미지 품질을 향상시키고 나중에 옵션을 비교하는 데 도움이 됩니다.
- 노출 및 ISO 선택: 밝은 햇빛 아래에서는 조리개 약 f/8–f/11과 ISO 100–400을 사용하고, 디테일을 보존하기 위해 RAW로 촬영하세요. 스마트폰을 사용하는 경우, Pro 모드를 활성화하고 가능하면 DNG로 캡처하세요. 혼합된 조명에서는 자동 화이트 밸런스가 허용되며, 후보정 시 나중에 조정할 수 있습니다. 이 방법은 다양한 장면에서 색상을 일관되게 유지하는 데 도움이 됩니다.
- 운동과 초점: AF-C(연속)를 사용하고 추적 초점 영역을 활용하세요. 백버튼 포커스를 사용하여 피사체를 잠그고 재구성하세요. 스프레이 효과를 내려면 1/1000–1/2000초를 사용하여 움직임을 고정하고, 움직임의 흔적을 남기려면 1/250–1/500초를 사용하고 프레임 내에서 움직임이 나타나도록 약간 팬하세요.
- 안정성과 그립: 모두 팔꿈치를 몸통 쪽으로 당기고 카메라를 가까이 붙여야 합니다. 보트 레일로 지지하거나 모노포드를 사용하세요. 스마트폰의 경우, 양손으로 잡고 가슴을 받치면 도움이 됩니다. 방수 하우징은 장비를 파 spray로부터 보호합니다.
- 원근법 및 공간: 공간과 깊이를 강조하기 위해 다양한 원근 각도를 탐색하고, 파도를 과장하기 위해 무릎 높이 또는 그 아래에서 촬영하며, 변화하는 빛과 파도 속에서 피사체를 포착하기 위해 프레임의 빠른 연속을 계획하십시오.
- Equipment and protection: If you have rugged cameras or a waterproof housing, you’re better prepared for rough conditions; having a spare battery and memory card helps; smartphone users should enable Pro mode and keep the lens clean and dry.
- Post-process and workflow: Import images as RAW, check the histogram, and adjust white balance and highlights to keep water color natural; batch process similar frames for a cohesive look; store images with consistent metadata to simplify selection later.
White Balance on a Boat: Presets and Custom WB for Blues and Sunlit Water
Set the white balance to 5500K manually for most coastal, sunlit days to keep blues accurate and sunlit water balanced; shoot RAW to refine WB later and preserve multiple frames from the start, so you can compare options without losing detail.
On a boat, presets help you respond to changing light quickly. Use Auto WB as a baseline, then switch to Daylight (about 5200–5500K) when the sky is clear and the blue water reads true; Cloudy adds warmth for calmer days and more natural skin tones; Shade pushes more warmth for late afternoon light. For night scenes or the glow after sunset, Tungsten can cool the scene, but expect a cooler water cast. Work to stabilize WB across a sequence so colors stay harmonious as the deck moves and there are movements in the frame.
From the start, a custom WB method gives you the most control. Place a neutral gray card (or a clean white shirt) in open shade on deck and shoot a reference frame. In RAW, set WB to a target around 5500–6000K to keep blue water true while preserving the sunlit warmth. If a card isn’t available, use a bright gray area in the scene, then adjust WB in post to prevent casts on the water. This approach helps stabilize exposure and WB, especially when you switch between still life moments and sweeping seascapes.
To minimize shifts when the boat rocks, lock WB and exposure and shoot in a burst with a steady shutter, then pick the frames where the water and sky share a similar cast. A polarizing filter helps reduce glare and gives you more distinct blue tones, while keeping the sun’s shine on the surface. If you must shoot with limited reference, shoot a short sequence and fix WB in post; that saves space in editing and keeps the sequence coherent for a coastal shoot.
During sunset, temperatures swing and blues can look richer or cooler. Try WB around 6000K for a crisper, cooler water tone, or push toward 5200–5600K to enhance warmer skies while preserving blue water. For night, Auto WB with careful post adjustments works, but always keep a reference shot for continuity. Here, WB is a tool to shape the vastness of the sea and sky, not a fixed rule–the right preset or custom value lets you photograph them in calm, expansive moments, from ordinary to spontaneous, and then the shine appears.
Metering Modes: Evaluative vs Spot for Balanced Sky and Sea
Recommendation: Use Evaluative metering as your default on a boat for balanced sky and sea. Depending on the scene, this mode analyzes the frame and offers a reliable exposure for the blue water and the sunny sky, providing a solid photographic taking that serves their interests. The advantage is it adapts to dynamic light across the frame, so you can enjoy the moment without constant tweaks. If the sky becomes very bright or highlights on water look small and blown, switch to Spot metering to lock exposure on a precise area. Once you lock it, shoot a quick bracket or check the histogram to verify results.
On a moving vessel, stay prepared. Keep your gear handy, plant your feet securely, and stabilize against a rail or the deck. Always monitor the horizon and know your vantage: Evaluative handles a broad scene, Spot helps when a small bright area dominates. If you want to emphasize texture in the water or cloud patterns, use Spot on a small area and then return to Evaluative to resume balance. During shooting, shoot in RAW to preserve latitude, and check the histogram frequently to avoid clipping. If exposure pushes too far, the sky wont recover in post, so use exposure compensation as needed and keep your shots aligned with the light direction to make the best use of their photographic potential.
Practical scenarios and tips: In sunny conditions with very bright sky, start with Evaluative and apply -0.3 to -1 EV if the sky clips; in ordinary daylight you can stay near 0 to -1. For high-contrast moments, bracket across 2-3 frames to capture both sky detail and water texture. In blue-water scenes where interest lies in reflections, Spot metering on the sky can control glare while Evaluative preserves water tones. In scenes with limited dynamic range, Evaluative often balances tones, but bracketing remains a smart move to ensure you capture the full spectrum. Once you establish a reliable workflow, you’ll enjoy quick, repeatable results and a clean transition from sky to water across your sequence of shots.
Shutter Speed Tactics: Freezing Waves vs. Capturing Long Exposure Motion
Set your shutter speed to 1/1000s to freeze the most dynamic waves when the boat rocks. If light is limited by overcast weather, raise ISO to 1600–3200 and still preserve detail in spray, then adjust exposure to keep the depth in your photograph intact. Do this carefully to avoid blowing highlights and to maintain color; avoid taking careless frames and focus on the core motion. This approach yields crisp edges along foam and salt, enhancing the scene in a single frame.
For motion, switch to long exposure to capture smooth water and trailing spray. Start at 1/4s and move to 2s if the light permits; use a stable rail or a compact gimbal, and keep your feet planted to limit body rocking. A mindful technique helps avoid blur and yields a unique texture in the waves. If renting gear, be mindful about weight and balance.
Before you pick mode, check weather and scene: overcast can flatten contrast; bright sun may create glare; beware problems such as reflections off railings or a moving sail; then decide which approach will most enhance the scene and your photograph. In this article, you’ll find practical steps to apply at sea.
Gear note: renting a lightweight setup with minimal gear often pays off on a boat. Use a remote trigger for long exposures, secure your drinks and other items, and maintain a mindful stance to protect your body and your shot. Have a spare battery and a small memory card on hand to stay ready for changing conditions.
| Mode | Scenario | Shutter Speed | Tips |
|---|---|---|---|
| Freezing Waves | Rocking boat, spray visible | 1/1000s – 1/2000s | Plant feet, brace body; keep horizon level; shoot in bursts to lock crisp edges |
| Moderate Motion | Waves breaking softly, foam detail | 1/250s – 1/500s | Pan with movements; use a longer lens to compress depth; avoid rolling framing |
| Long Exposure | Silky water, light trails | 1s – 2s | ND filter optional; tripod or solid rail; remote shutter for stable capture |
Aperture Choices: Depth of Field for Horizon Details
Set aperture to f/11 as your default for horizon details; this high DOF keeps near white foam and the distant horizon sharp, offering a great sense of depth. Use hyperfocal distance at your focal length so youre not chasing focus on a moving boat, and the frame may move. If youre shooting wide and want more water texture, stop down to f/16; if light is tight, open to f/8 and compensate with ISO or shutter speed.
On overcast days, contrast drops; maintain edge-to-edge sharpness with f/11–f/16. To freeze spray and keep the horizon crisp, use shutter speeds in the range of 1/500–1/2000s depending on wind and wave height. If you want smoother water in the foreground, you can dip to 1/60s, but you’ll need a stable platform or waterproof cover and a strap to keep the camera from moving. Experiment with 다양한 속도 액션과 화질의 선명도를 모두 잡기 위해. 사진을 찍을 때 here 차분한 순간에는 여전히 더 맑은 지평선을 향할 수 있습니다.
기술: open 렌즈를 더 넓은 프레임으로 옮겨 수평선을 강조하고 싶다면; 수동 초점을 사용 라이브 뷰, 지평선을 확대하여 깨끗한 선을 고정하고, 초점 거리에 대한 초점 심도를 설정하십시오. 이러한 기술은 촬영 계획을 세우고 지평선 디테일을 일관되게 유지하는 데 도움이 됩니다. 촬영하십시오. multiple 순간을 포괄하기 위해 조리개와 ISO에 약간의 변형을 준 촬영을 했습니다. In editing, 당신은 균형을 맞출 수 있습니다. white 그리고 자연스러운 느낌을 위해 파란색 톤을 사용합니다.
기어 노트: strap 카메라를 몸체나 레일에 안전하게 고정하고 사용하세요. waterproof 분사량이 늘어날 경우 하우징 또는 빗물 덮개를 사용하고, 렌즈에서 소금과 물을 닦아내는 데 사용할 수 있는 마이크로화이버 천을 휴대하십시오. 조정 setting 바람과 눈부심을 대비하고, 예비 배터리를 챙기세요.
다음 단계: 연습하는 동안 spontaneous 순간들입니다. 이 기사 here 더 많은 팁을 제공합니다. 시도해 보세요. unique 브라케팅으로 보세요 f/11 다양한 것들을 가지고 speeds, 그런 다음 비교 editing. 당신은 평범한 지평선을 무언가로 바꾸실 준비가 되었습니다. memorable.
ISO 및 노이즈: 움직이는 선박에서의 ISO 관리
자동 ISO를 1600으로 설정하고 셔터 속도는 1/1000초, 조개수는 f/8 정도를 사용하여 피사체를 선명하게 유지하면서 튀는 물방울을 얼립니다. 블루 아워에는 3200으로 밀어내고 하이라이트 제어를 유지하도록 조정합니다. 이러한 균형은 디테일을 보존하고 노이즈를 최소화하면서 함선이 움직이는 동안 피사체에 깨끗한 모습을 제공합니다.
팔꿈치를 몸에 밀착시키고, 스트랩을 사용하며, 카메라를 몸에 바짝 붙여 안정성을 확보하세요. 끊임없는 움직임을 흡수하기 위해 안정적인 자세로 서서, 보트가 파도 방향으로 기울어지는 순간에 촬영하세요. 진행 방향으로 약간 기울어지는 것은 다운타임을 최소화하고, 깨끗한 색상과 질감을 포착할 수 있는 더 나은 제어력과 공간을 확보합니다.
중요한 것은 포인트입니다. 매뉴얼 모드는 제어 기능을 제공하고, 셔터 우선 모드는 빛이 변할 때 유용합니다. 자동 ISO를 사용하는 경우, 노출 상한선을 염두에 두고 노출 보정으로 하늘이 번지지 않도록 조정하세요. 광활한 풍경을 위해서는 더 넓은 조리개로 짧은 셔터 속도를, 회화적인 느낌을 위해서는 더 긴 초점 거리로 배를 따라 움직이며 촬영해 보세요.
후처리: RAW로 촬영하고 ISO 400–800 및 1600–3200 프레임을 비교합니다. 가장 좋은 캡처를 선택하고 필요한 곳에만 노이즈를 줄여 피사체의 스프레이와 직물 질감을 보존합니다. 과도하게 부드럽게 하지 마세요. 거품 봉우리와 돛의 디테일을 향상시키세요. 빛의 시간을 주시하세요. 놓치면 다음 시간 동안 색상과 분위기를 개선할 수 있는 또 다른 기회가 있습니다.