

 How to Repaint Your Outboard – A Step-by-Step Guide">

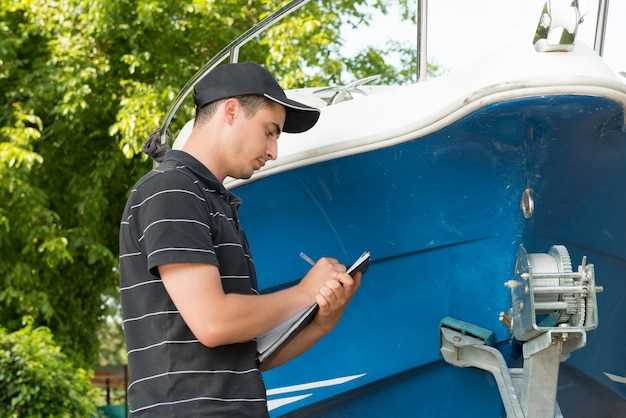
Begin with removing the cowling and cleaning the unit. I recommend beginning with this action as the foundation: remove the lower cover from the outboard motor, rinse with a bucket of warm water and mild detergent, then wipe dry. That first action reveals any corrosion or peeling paint and gives a clean canvas to work from. If you sail a dinghy or similar craft, this prep helps prevent grit from getting trapped in later coats.
Rough up the surface with sanding to create a key for primers. Use 180–220 grit to abrade the old painted layer until the surface feels matte. A scraper helps lift flaking spots, then switch to a finer grit to smooth feather edges. Wipe away dust with a damp cloth, and let it dry completely before proceeding.
Follow with primers and a gloss topcoat Apply marine primers to seal bare metal or fiberglass, then lay down the top layer in thin, even coats until the color blends. For best results, aim for a smooth gloss; gloss levels become clear after a light sand with 320 grit between coats. Painted surfaces usually benefit from a light tack cloth between steps, and a final coat is usually shinier than the first. Whether the air is humid or dry, follow the label’s guidance for drying times.
Let the finish cure and check the ending appearance Allow the final coat to cure in a shaded shop area for days until it reaches full hardness. Check for drips, uneven coverage, or thin spots; touch up carefully and re-coat if needed. Follow the product label and weather conditions to avoid peeling later.
Tools, timing, and shop setup Gather a bucket, sanding block, a scraper, a small brush, and respirator. This 프로세스 requires proper ventilation and good lighting; plan a workflow you can 따라가다, making the job smoother on a dinghy or other small craft. If you’re unsure, consult a local shop for primers and compatible gloss; this saves days and reduces rework.
Step 5 Mask Off Areas You Don’t Want to Paint
Mask off zones that should not receive paint using blue painter’s tape and masking paper. Start at seam edges around fasteners and along the throttle housing; press tape firmly to create a clear line and prevent bleed between coats. theres a simple margin to follow: set tape about 1/4 inch from the edge and maintain a consistent gap along the entire length, making crisp lines easier to achieve.
Areas to shield include cooling passages, water intake openings, thermostat housing, electrical connectors, sensor ports, wiring harnesses, fuel fittings, and gauge openings. Mask large curved surfaces with masking paper; tape edges to lock them in place for a final, crisp edge. Available options for coverage include pre-cut curves and flexible masking tapes designed for irregular shapes.
When a propeller shaft or gearcase is exposed, masking the surrounding surfaces is essential; if removal is possible, mask those parts separately and cover with paper and tape. If removal is not possible, lay tape along the boundary and apply masking film to keep coats confined to intended zones. Before applying any coats, verify that masking is secure to prevent stray paint.
Margin guidelines: aim for a 1/4 inch gap between masked edge and painted surface; for rounded areas, use pre-cut curves or fold the tape to follow contour; check edges with a straight edge to ensure level lines and a clean final result. Follow this approach along the entire project for consistency.
Winter considerations: keep surfaces dry and within normal coating temperatures; ideal range is 60-75F (15-24C). If a heated workspace is available, use it and run a small fan after masking to promote air movement; later coats require extra time to cure, which will likely extend the overall schedule. This ensures clear adhesion and reduces the risk of peel later.
Tips and servicing notes: after masking, inspect for gaps or lifting edges; if any bleed appears, pause and adjust before applying next coat, which helps avoid frustrating issues later. Following these steps preserves a smooth finish and a reliable gauge of alignment, helping the final look stay clean and consistent along every seam.
Choose marine-grade painter’s tape and protective film
Use marine-grade painter’s tape with a light, low-tack adhesive and a film backing to protect bare surfaces while you mask edges. For a dinghy or small craft, select 2-inch tape for broad panels and 1-inch tape for tight curves behind fittings and around the thrust area. Choose film that stays clear under UV and chemical exposure so coverage remains sharp and the final line stays crisp. This approach costs less than a full paint job, and tapes last longer than cheap options; they resist lift and keep lines clean, making the finished result easier to achieve during servicing between sessions.
Prep surfaces first: clean with mild soap and water, rinse, and dry completely; if wax or residue remains, wipe with isopropyl alcohol and ensure dryness. Use a plastic scraper to remove old grime from bare surfaces before masking. Apply the tape evenly along the edge; press edges firmly with a card to seal and prevent air pockets. Place film behind major areas such as the gearbox and the lower unit to ensure final coverage, tucking film behind seals to avoid seepage. Work in a warm workshop (65-75°F) and adopt non-slip footing to avoid slips that could move tape. If the engine is Mercury-powered, keep tape away from the powerhead to prevent heat or adhesive transfer. After finishing, remove masking at a shallow angle while the finish is still tacky to maintain a crisp line; this helps the finished look and reduces adhesive pull. Then reassemble components and perform a light servicing check to confirm masking did not trap solvents or moisture.
Mask around the cowling seam, mounting hardware, and trim
Mask around the cowling seam, mounting hardware, and trim with two layers of low-tack painter’s tape along the seam, then apply a third strip inward to guard the painted edge. For long runs, smooth the tape with a plastic card to prevent air bubbles and keep the internal surfaces protected. These practical steps are kept simple and will yield a gloss that stands up to salt, heat, and sun. Check online for material recommendations; if in doubt, consult manufacturers’ guidance to tailor the masking for this model. Though rare, if a mercury component sits near the seam, avoid masking over it and shield with foil-backed tape to prevent chemical contact. Use a pair of gloves to prevent skin oils from affecting the finish, and maintain pride in the finish, looking the same on both sides. If any edge lifts, you could press it back with a clean card. Doing this for yourself ensures a professional result. Then inspect the masking: look for leaves or creases, ensure last edges align, and address any gaps before applying paint or sealant. About edge transitions, ensure masking lines stay straight.
| Masking tape (2 in, low-tack) | Seals seam and protects painted surface | Apply along seam; press edges with a card; avoid over-stretching |
| Masking film or lightweight paper | Covers mounting hardware and trim | Secure with tape; avoid folds that expose edges |
| Foil-backed tape or shield | Extra protection near sensors or complex hardware | Place around any mercury components if present |
| Nitrile gloves | Minimize skin oils | Keep a pair handy during masking and removal |
Protect decals, logos, and serial numbers with precise masking
Mask decals with precision by laying thin painter’s tape along the outer edges of each element. Press the tape firmly to the surface–topsides, deck, and transom–and trim with a sharp hobby knife to create a clean edge. If any edge lifts, re-press and re-trim before applying primer or paint. This offers protection for decals, logos, and serial numbers while the surrounding area is prepped in general terms.
specifically placing masking to follow the curve of logos and numbers; the pieces should look evenly placed along the contour, and the edge follows the curve smoothly. For complex shapes, cut narrow strips that bend to follow the line and use multiple segments that follow the curve. For more options, masking film or reusable stencil sheets offer additional protection without edge bleed. This protects them during antifouling or general topsides paint on the hull, and keeps the side and deck surfaces clean as seen when looking at the finished line.
During prep, remove nearby screws if possible or mask around them to avoid seepage under edges. If hardware cannot be removed, place a second mask at the screw line and seal with a thin overlap. Where decals sit 조인트 가로질러–옆면에서 데크로, 또는 트랜섬에서 상판으로–마스킹은 날카로운 선을 유지하고 페인트가 글자나 숫자로 스며드는 것을 방지하기 위해 윤곽을 따라 진행됩니다. 이러한 배치는 실수를 줄이고 그래픽을 온전하게 유지하는 데 도움이 됩니다.
느슨한 가장자리 샌딩 작업 중 들뜰 수 있으므로, 모든 모서리를 점검하고 눌러서 들뜸을 방지하십시오. 마스킹은 임의로 배치하는 것이 아니라 선체의 형태에 따라 결정됩니다. 로고에 얇은 선이 있는지 확인하면서 섬세한 가장자리에 점착력이 약한 테이프를 사용하여 깔끔한 경계를 유지하십시오. 이 계획은 작업 과정에서 로고가 손상되지 않도록 보호하고, 특히 딩기나 소형 선박을 도크에서 장시간 작업할 때 최종 코팅까지 마스킹이 제자리에 유지되도록 도와줍니다. 주변의 하드웨어나 나사에 페인트가 묻는 것을 방지하려면 데칼 경계보다 약간 더 넓게 마스크를 씌우십시오.
마스킹 후, 데칼 가장자리가 찢어지는 것을 방지하기 위해 코팅이 경화된 후 한 번에 마스크를 제거하십시오. 번짐이 나타나면 다시 마스크하고 다시 코팅하십시오. 이렇게 하면 고통 없이 선체 다음 구역으로 넘어가기 전에 간격을 다시 밀봉하십시오. 나사와 덮개에 주의하여 상단이나 트랜섬에 비쳐 보일 수 있는 잔여물이 남아 있지 않도록 하십시오.
온라인 가이드는 구체적인 단계가 부족한 경우가 많습니다. 이 방법은 도장 중 데칼 보호에 일관된 결과를 보장합니다. 이 계획에는 추측이 필요 없으며, 선체 윤곽을 따라 균등하게 마스킹하여 측면, 데크, 트랜섬 및 상단을 마스킹하는 데 대한 명확한 지침이 있습니다. 마스크를 제거할 때는 가장자리를 검사하고 마지막으로 가볍게 다듬어 데칼, 로고 및 일련 번호의 장기적인 보호를 보장하고 선박 수명 내내 판독 가능하도록 합니다.
곡면과 닿기 힘든 모서리 마스킹
유연한 마스킹 테이프로 곡면을 마스킹하고 짧은 조각을 사용하여 딩기 측면과 카울링 반지름의 윤곽선을 따르십시오. 각 곡선을 따라 가장자리를 단단히 놓고 플라스틱 카드로 눌러 뜨지 않도록 밀봉합니다. 좁은 회전에 단일 스트립을 늘리지 말고 테이프가 윤곽선을 따라가도록 여러 개의 작은 섹션을 겹쳐 놓으십시오. 습도가 가장자리를 들어 올릴 수 있으므로 건조한 곳에서 작업하십시오. 전체 도포를 위해 곡면에 2~3회 코팅해야 할 수 있습니다. 곡면에서 커버하기 쉽도록 얇은 층으로 두 번 이상 코팅하십시오.
정리 및 가장자리 보호 준비: 빗나간 접착제에는 아세톤, 빠른 닦음에는 물통을 준비하십시오. 아세톤이 밀봉 부위 및 내부 통로에 닿지 않도록 주의하십시오. 테이프 가장자리에 가벼운 윤활제를 바르면 나중에, 특히 복잡한 곡선 부위에서 제거가 용이합니다. 코팅이 적절한 점착성을 갖게 된 후에만 테이프를 제거하십시오. 너무 일찍 당기면 층이 벗겨지고 가장자리가 들릴 위험이 있습니다.
내부 부품 주변 마스크 처리: 내부 기어 케이스와 임펠러 하우징으로 연결되는 구멍을 덮고 흡입구와 물 통로를 밀봉하여 페인트가 들어가지 않도록 하십시오. 부품 사이에 틈이 생기지 않도록 얇은 조각을 사용하고, 깨끗한 모서리를 유지하기 위해 페인트칠된 표면 위쪽에 테이프를 붙이십시오. 며칠 동안 건조 후, 곡선 모서리에 균열이나 번짐이 있는지 검사하십시오. 필요한 경우 다음 코팅을 하기 전에 사포로 가볍게 갈아 전환 부분을 매끄럽게 하십시오.
제거, 최종 점검 및 유지 보수: 마스킹을 한 번에 부드럽게 제거합니다. 접착제가 남아 있으면 아세톤으로 닦아내고 깨끗한 물로 헹굽니다. 코팅이 경화된 후 표면 높이 위의 가장자리를 확인합니다. 부품을 건조하게 유지하고 다음 사용을 위해 마스킹 제품을 적절하게 보관하십시오. 코팅의 뒤틀림이나 변형을 방지하기 위해 장기간 열에 노출되기 전에 항상 마스킹을 제거해야 합니다.
덮개 통풍구, 냉각구, 배기구, 물 흡입구
샌딩 작업 전에 마스크와 실란트로 통풍구, 냉각구, 배기구, 흡수구를 막아 보트와 해양 표면을 보호하십시오. 페인터 테이프, 마스킹 필름, 필요한 경우 2액형 해양 등급 실란트를 사용하여 과도한 스프레이로부터 견고한 장벽을 만드십시오. 따뜻하고 건조한 환경은 마스킹이 평평하게 유지되도록 돕고 두꺼운 코팅의 변형을 방지합니다.
- 단순히 모든 항목, 즉 통풍구, 물 흡입구, 배기구 및 냉각 개구부를 식별하고, 어떤 것이 분리 가능하고 어떤 것이 제자리에 있어야 하는지 판단하십시오.
- 탈착 가능한 그릴 또는 스크린은 제거하고, 분실 및 변형 방지를 위해 제거한 부품은 건조하고 라벨이 부착된 상자에 보관하십시오.
- 작은 틈새는 테이프와 종이로 마스크 처리하고, 넓은 공간은 필요에 따라 갑판에 고정된 포일 쉴드로 보호합니다. 마스킹은 가장자리 주위에 단일 레이어처럼 두껍고 균일하게 처리해야 합니다.
- 좁은 틈새의 경우 필러 게이지와 작은 바늘을 사용하여 간격을 측정하고, 페인트 침투를 막기 위해 호환 가능한 실란트로 모든 틈을 메우십시오.
- 가장 작은 틈부터 시작하여 여러 각도에서 검사하십시오. 마스크 뷰가 깨끗한지 확인하고, 가장자리가 왜곡되어 보이면 진행하기 전에 다시 마스크하십시오.
- 간단한 순서를 따르세요: 마스킹, 밀봉, 샌딩, 페인팅; 이렇게 하면 선이 깔끔하게 유지되고 재작업이 줄어듭니다. 여러 개구부에서 동일한 결과를 더 쉽게 얻을 수 있습니다.
- 임펠러 하우징이나 기타 중요 부품 주변을 가리지 마십시오. 데크와 엔진 영역에 대한 접근성을 확보하여 나중에 냉각 흐름을 재조립하고 테스트할 수 있도록 하십시오.
- 코팅 중 마스킹을 팽팽하게 당기되 과도하게 늘이지 마십시오. 이렇게 하면 벗겨짐을 줄이고 오버 스프레이로부터 보호를 유지할 수 있습니다.
- 코팅이 지정된 두께로 건조되면 페인트가 아직 끈적거리는 상태에서 마스킹을 조심스럽게 제거하십시오. 이렇게 하면 들뜸을 최소화하고 선을 깔끔하게 유지할 수 있습니다.
- 마스킹 용품은 따뜻하고 건조한 곳에 보관하고 잔여물이 남지 않도록 여러 번 확인하여 데크 라인이 선명하게 유지되도록 하십시오.
- 물 흡입구 및 배출구에 페인트 막이 없는지 확인하십시오. 막힘이 있는지 확인하고 마스킹 재료의 흔적을 제거하십시오.