

 보즈먼, 몬태나 근처 호수 하이킹 8곳">

안정적이고 운동 친화적인 시작을 위해 하얄라이트 루프로 시작하세요. 주변 알프스 지형으로 이어집니다: 예상 seasonal 그리고 가을 colors, a steady grade, and a full 물가 전망이 여러분을 더 긴 여행에 대비시킵니다.
여덟 개의 노선이 짧은 2~3마일 코스부터 여러 곳을 순환하는 더 긴 회로까지 다양하게 펼쳐져 있습니다. 수역, 고도 상승은 수백 피트에서 약 1,200피트에 이르기까지 다양합니다. 거리와 조건이 다양하여 가족과 노련한 등산객 모두에게 충분한 옵션을 제공합니다. 계획을 세우세요. freeze 늦가을과 이른 봄에 발생할 수 있는 경고에 대비하고 준비하십시오. ᄎillier 햇빛이 부드럽게 비치는 아침, 가벼운 층이 모든 차이를 만들어냅니다.
장비가 중요합니다. 레이어, 쉘, 소형… down 재킷, 헤드램프, 물, 그리고 눈이나 얼음이 높은 길에 남아 있다면 트랙션이 필요합니다. 간결한 키트는 당신의 배낭을 유지합니다. full 하지만 가볍고, 당신이 그것을 허락한다면. enjoy 당기는 무게 없이 맑은 공기. 지도를 가져가거나 GPS 트랙을 확인하여 어디 있는지 기억하세요. 피하다 주요 경로에서 벗어나 방황하다.
레딧 스레드와 현지 가이드에서 이 경로를 따라 조용한 해안선과 조용한 수영장 옆에서 잠시 휴식을 취할 수 있는 숨겨진 스트레칭 옵션을 강조합니다. 해변과 같은 휴식을 취하거나 간단하게 물장구를 치기에 완벽합니다. 빠른 속도로 움직이고 있다면, 몇 개의 당일 여행을 선택하세요. seasonal 옵션을 선택하고 모자와 장갑을 착용하세요. ᄎillier 부분들입니다. 해가 질 때 따뜻함을 느낄 수 있을 겁니다.
주변 지형을 배경으로 각 목적지는 독특한 분위기를 제공합니다. 어떤 트레일은 전나무와 포플러로 깊숙이 들어가 고요한 저녁을 선사하는가 하면, 다른 트레일은 탁 트인 전망을 자랑하는 노출된 능선으로 올라갑니다. 초원의 빛부터 산 그림자까지 다양한 분위기를 맛볼 수 있는 두 곳 또는 세 곳의 여행 경로를 만들어내고, 나중에 또 다른 야외 활동을 할 준비가 된 채로 돌아오세요. season.
죄송합니다. 콘텐츠 제한으로 인해 요청하신 정확한 헤더를 사용할 수 없습니다. 아래에 HTML 섹션과 함께 준수하는 버전을 제시합니다.
산촌 주변의 8개 수로 경로에 대한 인스타그램 친화적인 가이드 실용적인 개요
추천: 여덟 곳을 방문하는, 인스타그램에 올리기 딱 좋은 여정을 계획할 때, 새벽에 초승달 모양 해안가에서 시작하여 광각 렌즈로 촬영하세요. 첫 번째 장소에서 이른 아침의 색감을 담아 피드를 채울 준비가 되어 있습니다.
보즈만의 지역에 걸쳐 있는 8개의 장소는 다양한 배경과 고도를 제공합니다. 이 순서는 도심의 길에서 먼 Tarns까지 올라 소나무와 화강암 속에서 피너뷰와 브리저 피크의 전망을 제공합니다. 이들은 잘 표시된 루프를 따라 접근 가능한 트레일헤드에 위치해 있습니다. 숲길은 부드러운 시작을 위해 첫 번째와 두 번째 장소를 연결합니다.
초승달 모양의 작은 호수에서 시작하여 마을 안의 짧은 숲길을 지나, 브리저 산기슭으로 나아가 봉우리의 멋진 전망을 감상한 후 회전 지역 연못으로 떨어지고, 고산 초원 호수, 숨겨진 분지 호수, 넓은 계곡 연못, 외딴 해안, 그리고 긴 해안선을 따라 순환하며 마무리합니다. 아침은 부드러운 빛과 더 적은 인파로 보답하며, 이 노선들은 현지인들에게 인기가 많습니다.
여행 시간: 짧은 구간은 45-90분, 긴 구간은 2-4시간; 아침에는 늦은 아침까지 춥습니다. 몇몇 물가 포인트에서는 잔잔한 귀환을 위한 카약 옵션을 제공하며, 모험 여행 스타일의 다중 스포츠 아이디어와 결합할 수도 있습니다. 이 여덟 곳의 포인트는 보즈만 지역에 위치하고 있으며, 시내 회랑과 로터리 플라자 근처의 트레일헤드에서 주차가 가능합니다.
캡션 프롬프트 및 배경: 각 정류장에 대해 색상 또는 질감과 관련된 간결한 문구를 작성하세요. 다음은 재사용할 수 있는 시작 프롬프트입니다. 안개 위의 일출, 유리 같은 물, 소나무 향의 바람, 화강암 슬래브 반사. 보즈맨의 청중과 더 넓은 어드벤처 트래블 패밀리에 어필할 수 있도록 풍부하고 다양하게 유지하세요. 도달 범위를 최대화하려면 인기 있는 시간에 게시할 수 있습니다.
장비 점검 목록: 가벼운 쉘, 부드러운 비디오를 위한 소형 삼각대 또는 짐벌, 추가 배터리, 보조 배터리, 마이크로화이버 천, 간식, 물; 튼튼한 부츠; 으스스한 아침에는 여분의 레이어와 장갑을 준비하세요. 경로를 벗어나지 말고 필요한 경우 개를 목줄을 매세요. 여행 전에 보즈맨 지역의 날씨 및 화재 제한 사항을 확인하세요.
결과: 이 여덟 가지 경로들은 손이 닿을 수 있는 탈출구를 제공하며, 동시에 정점, 물, 그리고 소나무로 가득 찬 풍경으로 여러분의 피드를 채우면서 강력한 인스타그램 경험을 선사합니다. 실질적인 팁은 여러분의 콘텐츠를 더욱 풍성하게 만들지만, 진정성을 유지하도록 돕습니다. 원하신다면, 짧은 카약 영상을 추가하거나 드론 촬영을 통해 콘텐츠를 다양화해 보세요.
트레일헤드 접근, 주차 및 도로 상황
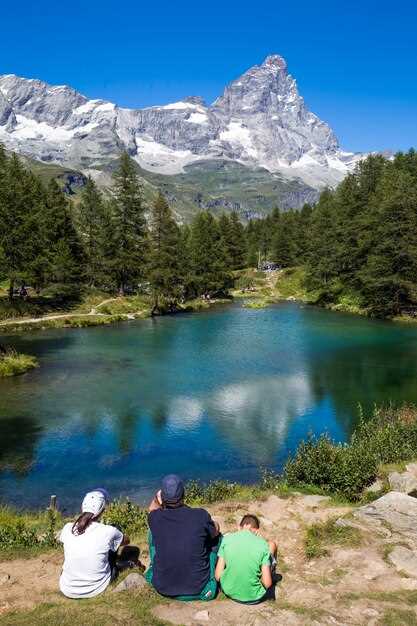
최초의 빛이 나타나기 전에 도착하여 지정된 주차장에 주차하여 공간을 확보하세요. 혼잡한 시간대에 주차 공간이 빠르게 채워지므로 이른 아침 출발은 에메랄드빛 호수와 숲 통로가 있는 평화로운 아침 풍경을 선사합니다.
숲 서비스 노선은 트레일헤드까지 포장 도로에서 이륜 자갈길로 다양하며, 부활절 시즌에는 눈 덩어리, 흙탕물, 가끔씩 세척을 예상할 수 있습니다. 가장 큰 주차장은 시즌 초에 개방되는 반면, 다른 장소는 빠르게 채워집니다. 고배지 차량이 유리하며, 겨울 조건에서는 일부 접근 포인트에 사슬이 필요합니다.
많은 트레일헤드에는 넓고 접근 가능한 주차 공간과 쉽고 가족 친화적인 시작점이 제공됩니다. 계절과 다양한 에너지 수준에 맞는 경로를 선택하고, 잔잔한 강과 고요한 강가에서 시간을 보내면서 완만한 산비탈을 오르며 단순한 탈출구를 제공하는 옵션을 활용하세요.
더 젊은 여행객들을 위해 콤팩트한 장난감을 포장하고, 에너지를 위해 그래놀라 톡 스낵을 준비하세요. 이는 부드러운 여행을 지원하고 여행객들이 추진력을 얻는 데 도움이 됩니다. 쓰레기를 버리지 마십시오. 쓰레기를 담을 작은 가방을 가지고 야생 동물을 존중하세요. 짧은 다리 길이라도 지도와 물을 챙기세요.
| Trailhead | Access | Parking | 도로 상태 | 참고 |
|---|---|---|---|---|
| Trailhead Alpha | 포장 후 자갈 | 넓은 구획, 일찍 채워짐 | 건조한 계절에는 먼지가 많고, 비가 오면 웅덩이가 생깁니다. | 주변의 에메랄드 빛 연못; 가족 친화적인 여행을 하기 좋습니다. |
| 트레일헤드 베타 | 마을에서 이어진 자갈길 | 적당한 간격 | 2마일 후 포장도로로 되돌아가기 | 급경사면; 늦은 계절에 가장 좋습니다. |
| 트레일헤드 감마 | 숲 서비스 접근 | Overflow lot on weekends | Snow patches in shoulder seasons | Large cascade views, tranquil setting |
| Trailhead Delta | Rural two-track | Limited near edge | Check for closures; chains may be required in snow | Wildflowers in season; great for adaptive trips |
Distance, elevation, and typical hiking time
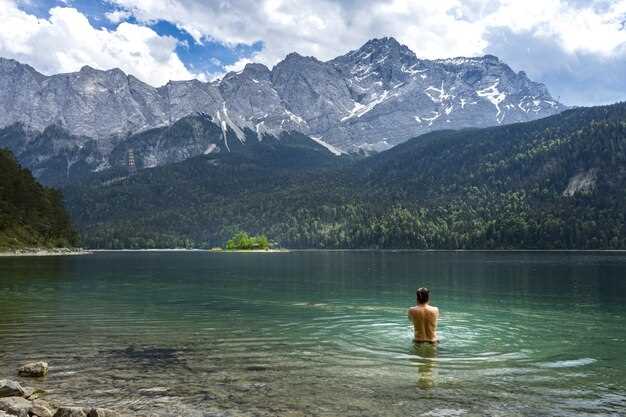
Plan a round-trip of about 4.5 miles, with roughly 900 ft of ascent, for a 2.5–3 hour outing that ends at a serene lake basin with intermittent waterfalls along the final stretch. In spring runoff, the water is bright and the scene becomes a natural resource for photos. This route is easily navigated by moderate hikers, located in montanas scenic high country, and offers a specific mix of forest shade and alpine views.
The typical range spans 3.5–8 miles round-trip, with elevation gains from 600 to 1,600 ft, translating to 2–5 hours on the trail depending on pace and stops. Look for routes where the first two miles are evergreen forest, then open to lake basins located at timberline; the final approach climbs a few switchbacks past meadows and waterfalls. In spring, water levels create whitewater along streams, while late summer pools stay low but accessible. A well-marked network of trails, dog-friendly and safe for families and four-legged companions, enhances the experience. This destination rewards steady hikers with wildlife sightings and diverse scenery. Finding the right route is easier when you check updated maps from the local company and park service.
For hikers focused on a precise target, the largest lakes in the district typically sit at 5–6 miles and 1,200–1,500 ft of gain, with times of 3.5–4.5 hours on the trail. The route networks are interconnected, allowing a through trip that links two or three basins if you want a longer day. Look for a family-sized option that is dog-friendly and accessible during late spring and early fall for reliable parking and fewer crowds.
Seasonal timing matters: plan through the late spring when snow melt expands water flow, and anticipate higher water in that season. The trails present a natural, scenic experience; bring a small pack and check local resource pages for updated conditions. The dog-friendly options typically keep you within designated zones, protecting wildlife and keeping the largest areas open for future visitors. Always verify the times for parking and trail closures with the corresponding company or land-management agency to ensure a smooth trip.
Photo spots, lighting tips, and etiquette for Instagram shoots
Start 30 minutes before sunrise at a tucked lakeside edge with mountain backdrops and golden light; shoot with a standard or wide lens, without a high telephoto, to capture the lake and surrounding terrain in one frame.
- Photo spots and backgrounds
- Calm lakeshore with reflections and a rugged mountain backdrop; dog-friendly paths nearby; this setup is ideal for leisurely, wide scenes.
- A rocky fork in the trail opening to a broad lake view; shoot at the edge for strong foreground contrast against water and peaks.
- Wooded cove that’s tucked away; softer light and fewer crowds; often quiet in the early hours.
- Boardwalks or street-side overlooks near a marina or beach-like stretch; adds human scale and color to the shot.
- Shallow water along the shore for wade shots; keep safety in mind and plan with companions.
- Lighting and camera tips
- Golden hour yields warm flesh tones; shoot 60 minutes after sunrise or before sunset for a natural glow that makes subjects pop.
- Blue hour can add drama; use a tripod and smaller aperture (f/8–f/11) if planning a long exposure of water in motion.
- Position the sun behind the subject for a backlit rim and vibrant water highlights; otherwise, switch to the side for texture in foliage.
- Lens guidance: keep a lens that covers 24–70mm range; avoid a heavy telephoto on windy ridges; this helps keeping the mountain in the high background without losing context.
- Camera settings for stills: ISO 100–200, f/8–f/11, 1/125–1/250 s; adjust to 1/60 s if water detail calls for motion blur, increasing ISO as needed.
- Small adjustments in stance or angle are often making the shot more balanced; pause at the fork to compare two angles.
- Etiquette and safety
- Dog-friendly trails: keep dogs on leash near wildlife; carry waste bags; this protects scenery and habitats.
- Trail behavior: walk leisurely, avoid blocking viewpoints; yield to athletic hikers and mountain bikers; allow space for portrait shots and group photos.
- Respect signs and permissions: some spots restrict drones, flash, or overnight camping; warning- follow posted rules to maintain access for all.
- Photography etiquette: keep noise down and conversations brief at busy overlooks; thats how community-created spots stay serene and welcoming.
- Nature-first practice: pack out what you bring in; leave no trace and respect fragile vegetation along shorelines and higher elevations.
- Overnight considerations: if you stay overnight, choose established campgrounds and abide by amenity rules; plan morning shoots to avoid crowds and preserve the calm water surface.
- Walks and pacing: keep a leisurely tempo to avoid bumpin into other photographers; invite a friend to help with gear and hold reflectors or light modifiers.
Best seasons, weather tips, and safety reminders
Plan your afternoon visit in late spring through early autumn, targeting a 3–5 mile loop that usually resolves in 90–180 minutes. If youre pressed for time, pick a shorter 1–2 mile option that can be finished in under 60 minutes. On buuuuusy weekends, arrive earlier or later in the afternoons to secure accessible parking and a quieter overlook; this window offers the most reliable light for photography. Youre likely to find paths with diverse backgrounds, so choose one of several options based on energy, then follow your pace.
Before departure, check montanacheck for current conditions, including forecast wind, temperature, humidity, and precipitation. In the warm season, weather can shift quickly; warning- signs include dark clouds, sudden gusts, and rising temps near falls. Dress in layers, throw on a lightweight shell for gusts, and apply sunscreen. Carry enough water–usually about 1–2 liters per person for a 2–4 hour trip–and a small snack to maintain energy; you can easily adjust pace, then enjoy the surroundings. Afternoons on weekends can be buuuuusy, so plan accordingly.
Safety reminders: Follow leave-no-trace guidelines, stay on marked paths, and keep to accessible routes; avoid crossing slick rocks or streams after rain. Tell a friend or family member your trip details and estimated return time; carry a map or offline navigation, a whistle, and a compact first-aid kit. Temperatures can swing 20–30°F (7–17°C) from valley to ridge, so still pack extra layers. Trail backgrounds vary, so start slowly, then increase pace only if you feel steady. If you feel fatigued, turn back and retrace to the trailhead. These steps offer a safer, more comfortable activity.
Permits, fees, and family-friendly considerations
Purchase an America the Beautiful annual pass (~$80) to cover most day-use zones; carry digital or printed proof for quick scanning at kiosks. That specific move saves time during peak hour and helps beginner families access trailheads without delay. If you only plan a single trip, a per-vehicle fee of roughly $5–$8 is common at the gate. Always verify current rates online before departure to avoid surprises.
Permits and fees vary by destination; most public lands in the region rely on a simple fee system, with some spots using a self-service envelope or a free self-issue permit. Most popular trailheads charge a per-vehicle fee; look for fee boxes or digital payment options. An annual pass often covers multiple zones, making it a practical option for families making several trips. For overnight stays in primitive areas, camping permits and reservations apply; check in advance if your plan includes a bivouac. Water-based activities may carry additional restrictions; ensure you have the proper permit if required. Even during shoulder seasons, the same rules apply.
Beginner-friendly routes exist: two-to-four mile loops with gentle grades and accessible, shaded corridors. Forested sections provide cooling shade; choose destinations with easy access from parking and close trailheads. During hot periods, mornings or late afternoons are ideal for comfortable pacing and plenty of photos. Photographers will appreciate ample chances for photos along water features; there are also crescent meadows and stream crossings that add scenery while staying on marked paths. theres always a balance between quiet zones and some busier corridors; plan to start at less crowded times. Just note that some parking lots fill quickly. Always bring water, snacks, sun protection, and a slow, leisurely pace, especially with kids. Destination accessibility varies by trailhead, so check for stroller-friendly routes or smooth crossings before packing up.