

 6 Pro Fishing Tips – How to Become a Better Fisherman">

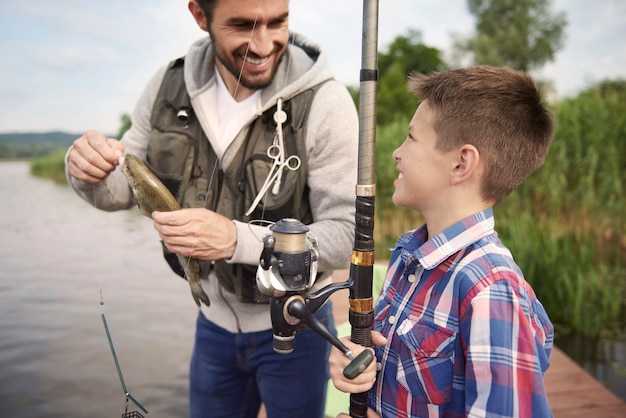
There is one concrete recommendation to jump-start your progress: set up a dependable, compact rig and test it on the water. For an adult angler aiming to improve quickly, use a 6’6″–7’0″ medium-light rod, 8–12 lb test line, and a diameter 0.28–0.30 mm line. Pair with a size 6–8 hook and a small slip-float or light jig. This combo will provide consistent feel and fewer tangles, so you can practice timing and line control more effectively and allow quicker feedback.
적용 a clean casting rhythm: stand with feet shoulder-width apart, keep your shoulder aligned to the target, and use a controlled wrist flick backed by hip rotation. This definitely builds strength and accuracy, and you can study images from local events to refine your form.
Read the water by watching weed edges, sunfish haunts, and the first drop-offs near the woods. Identify place where currents converge and baitfish swirl; these spots work well, especially early morning.
Keep a simple kit with extra jigs, hooks, and a spare bobber. If you spot sunfish showing quick movements, try a bright jig on a short line and a slow, irregular rhythm. This approach lets you test different lures quickly and learn what can happen under changing light.
Keep a compact log: date, location, wind, water clarity, lure tried, and result. Review images from your sessions to spot patterns, then apply what you learned next time. A few focused sessions raise your bites per hour and help you place consistent catches.
Advanced Angling Mastery: Practical Steps for Real Results
Start with a precise line diameter check and re-tie all critical knots to prevent failures; this gives you instant reliability on every cast and builds a sturdy platform for training, something you can count on.
Understand water structure by mapping current seams, depth changes, and forage zones where fish concentrate, especially in morning light. Note the colour of the water and bottom, then choose lures and leaders that match the forage and the pattern you expect. For brook and other species, adjust diameter and leader length to the target size; use a 0.12–0.18 mm leader in tight brooks and a 0.20–0.25 mm leader where clarity is higher. Cast unto the bank near weed edges to test how the current influences bait presentation.
Try special, uncommon rigs for shallow, calm runs; a dropper setup with a small bead and a light fluorocarbon leader keeps the presentation natural and reduces line glare, helping fish take easily. In beattie Brook, locals call the stretch beattie, a place to test subtle actions. The brook tests the method under changing light. Channel a superman mindset. Hold the rod with a steady, confident grip, and if a take occurs, lift smoothly and relax your grip. Maintain a deliberate cadence; this approach shines in green weed edges where hides are tight.
At events across various waters, compare results and log what works. Track bite windows as light shifts and adjust your cast angle to keep line quiet; short, controlled sweeps win in tight cover. Understand when to switch from broad presentations to subtle taps; this adaptation reduces the problem of missed takes and improves consistency.
Maintain gear care and place discipline into daily routine: clean reels, examine drag, and replace worn lines or beads. The habit gives training value and translates to real results, with the performance becoming smoother each week. After each session, store gear in a dry place and check knots once more; this simple step prevents surprises and keeps you on track for future catches. This approach has been tested by guides and pros, and it continues to yield reliable outcomes.
Choose the Right Rod and Reel for Your Target Species
Begin with a versatile setup: a 6 ft 6 in to 7 ft rod, medium-light power, fast action, paired with a 2500 reel. This answer gives you sensitivity for shy bites along brush and in brook pockets, plus enough backbone to handle adult fish in moderate current. Ask staff for guidance on line diameter and reel size for your local conditions, but start with 6–8 lb test in clear water or 10–14 lb in stained water. A small fluorocarbon leader (2–4 ft) helps you stay stealthy and keep everything presenting cleanly.
-
Trout, brook trout, and panfish: 6 ft 6 in to 7 ft, medium-light, fast action; reel 1000–2500; line 4–8 lb test; line diameter kept minimal for quiet presentations in shade. Fish near brush and along the bank to locate likely bites; you should be able to lodge the rod in a holder during pauses. This setup is nice for small jigs, live bait, and light lures on clear streams.
-
Bass and larger open-water fish: 7 ft to 7 ft 4 in, medium-heavy, fast action; reel 3000–4000; line 12–20 lb test; consider black braided line with a fluorocarbon leader. This tactic handles cover and be reached through weed edges and open water alike, where you need steady backbone. Use a larger spool to avoid line twist and keep pressure on the fish without overtaxing your shoulder.
-
Walleye and river species: 7 ft to 7 ft 6 in, medium, moderate action; reel 2500–3000; line 6–14 lb test; use a fluoro leader for subtle presentations in clear water. Its diameter is a compromise between sensitivity and abrasion resistance, and you can easily adjust to stealthy, accurate casts to structure and lanes where fish hide.
-
Large predators or heavy cover: 7 ft 6 in to 8 ft, medium-heavy, fast action; reel 5000+, line 20–30 lb test; consider a strong, dark braid for abrasion resistance. In thick brush or fallen timber, a longer rod helps you keep pressure on the fish while you lodge the line and keep the presentation tight. This setup is ideal when you expect big bites after a long beat along bank and rock, and it gives you control where the fish are likely to sit.
Read Water: Identify Structure, Currents, and Likely Hangouts
Start by reading water in three steps: identify structure, pinpoint currents, and mark likely hangouts. For beginners this quick read yields immediate targets and boosts confidence on the water. Note the opportunity to move to better angles; the easier you see early structure, the sooner you can target key spots with precision. Throughout the day, many guides taught this three-zone read as a simple, repeatable routine – and the beauty of it is how fast you can gain confidence and make smarter calls. Never underestimate the clarity a few minutes of water reading gives you.
Identify structure quickly. Scan the shoreline and water column for sunken cover (trees, limbs), rock piles, and abrupt depth changes. Use your eyes to trace weed edges and edge transitions. When you find a point or bend that turns toward deeper water, mark it as a target. Move your boat or adjust your approach so your cast travels along the edge, not across it–this puts the lure into the hold zones where fish sit. Elite anglers and bassmaster competitors stress structure first; regardless of lake or season, structure holds more bites than open water. Note the location of cover that breaks the current and creates an ambush zone. For coaches who teach clients, the structure read builds confidence and speed. The leader mindset follows this rule: structure first, every time. Three cues to watch: cover, ledge, and edge.
Read currents to locate seams. Look for fast water meeting slower pockets, places where a point creates a seam, and eddies behind rocks or brush. These seams concentrate bait and increase your chance to get a bite. Cast up current and drift your lure along the edge, pausing to let the bait sink into the target depth. Use a steady speed on the retrieve; speed up slightly in faster seams and slow down in slow sections. Three-second counts to depth work well for moderate water; in clear lakes you can see depth transitions with your depth finder, if you have one. What happens next often hinges on timing, so keep a mental clock and adjust accordingly. Reels should run smooth to maximize feel and efficiency.
Target likely hangouts and apply a targeted plan. Inside bends, outside bends, and points that drop into deeper water are your primary hangouts. Inside bends hold fish that feed under varying light conditions; outside bends hold cruising fish that ambush from the current edge; points offer a funnel and a quick drop to deeper holds. Regardless of lake clarity, weed lines and timber edges attract prey and bass alike. Use targeting to pick three spots on your map and run through them in order before moving to the next area. Note how many bites you get at each spot and whether your lure should run shallower or deeper to keep pace with depth change. Many followers and coaching clients see more success when they stay disciplined and targeting the obvious ambush zones.
Practical moves you can apply now. Keep reels silky; a smooth retrieve helps you feel subtle bites. Place three casts per structure to verify depth and reaction, then shift downstream to the next structure. Build confidence by repeating this pattern with different lures: a spinnerbait or swimbait on windy days, and a soft jerkbait on calm mornings. The founder of many local clubs and the sport’s leaders would tell you that consistency beats flashes; practice the same routine across three spots per lake, regardless of mood. This habit creates more opportunities, moves your average catch upward, and trains you to read water with elite-level discipline.
Set Up Your Tackle: Hooks, Lines, and Weights to Match Your Lure
Always start with a braided main line in the 60–80 lb range and a 60–100 lb fluorocarbon leader; match hooks and weights to lure size for the conditions and the windows of opportunity you’re pursuing. For muskies, use bigger gear to handle heavy plugs and aggressive hits, and keep the setup balanced so you can learn quickly and stay confident on the water.
Hooks, not leaders, set the hook. For muskies choose heavy-wire trebles in the 8/0–12/0 range or dependable singles in the 9/0–11/0 range when the lure calls for a stout bite. For smaller lures aimed at smallmouths chasing in lakes, 2/0–4/0 trebles or offset singles keep action clean and reduce missed grabs. Pick rust-resistant finishes (black nickel or mega-strong stainless) and keep gaps matched to lure mouth size; making this fit is the simple step that boosts hookups every time you swing for the front edge of weedbeds or rocky shoals.
Line choice matters as much as the hook. Use braided main line in the 60–100 lb class for muskies, paired with a leader in the 60–120 lb range when you fish through timber or rough rock. If you target smallmouths in clear lakes, a 10–20 lb fluorocarbon leader pairs well with mid-weight plugs. Wire leaders are an option for razor-sharp teeth or heavy cover, but they reduce feel; test both in local waters to see what gives you the best balance. After tying, run a quick patrol of the knot to verify security.
Weights must match lure weight and technique. Start with jig heads around 1/4–3/8 oz for finesse presentations; switch to 1/2–2 oz for mid-size swimbaits; for big musky baits, 3–6 oz or more keeps your lure deep and lively in current or wind. In backcountry lakes with deeper structure, use the heavier end; in calm, shallow bays, lower the weight to improve the lure’s action and sound.
A simple rule: heavier gear for bigger, louder lures; lighter gear for smaller, more subtle baits. This approach makes it easier to control the drop and anticipate the hit, which improves your learning and confidence over multiple sessions, last season on the water highlighted how small changes added up. If you fish with a buddy like mike or a lady angler on a local lake, share notes after each outing; multiple small changes add up to a big gain over the season.
여벌 훅, 다양한 길이의 스페어 리더, 여러 크기의 무게추 등 재빨리 교체할 수 있는 키트를 준비하십시오. 이러한 준비는 태클의 부족함을 최소화하고, 물 위에서 안전을 유지하며, 후미진 호수에서 머스키를 쫓든 브룩 스트림을 따라 스몰마우스를 쫓든 매번 출조를 개선하는 데 집중할 수 있도록 도와줍니다. 지속적인 조정은 당신을 더 빠르고, 더 정확하게 만들고, 그날 무엇이 닥치든 준비가 되도록 해줍니다.
수온 및 계절에 맞는 미끼와 루어 선택
수온 사다리를 활용하십시오. 수온이 낮으면 더 깊고 느린 채비가 필요하고, 수온이 올라 봄이 되면 중간 크기의 스윔베이트와 다용도 크랭크베이트로 이동하며, 더운 날에는 속도와 수초대 매복을 활용하십시오. 이 접근 방식은 미끼를 예상되는 섭식 시간과 일치시켜 즉각적인 이점을 제공합니다.
- 차가운 물 (10°C / 50°F 이하)
- 미끼 및 루어: 크로우 트레일러가 달린 지그, 피네스 스윔베이트 (3–4인치), 드롭샷 리그, 딥 다이빙 크랭크베이트 (모두 콤팩트하게 유지)
- 채비: 카본 또는 합사-카본 쇼크 리더 사용, 섬세한 낚시에는 6~12lb 라인, 1/8~3/8oz 지그 헤드 사용; 수초 가장자리 너머의 덤불과 깊은 안부 주변에서 낚시
- 낚시하기 좋은 곳: 깊은 평지, 완만하게 경사진 해안선, 그리고 낭떠러지 근처 구조물; 봄에는 이른 아침이나 늦은 저녁 시간이 가장 생산적임
- 패턴: 바닥에서 느껴지는 느리고 촉각적인 느낌을 찾고; 물이 차가워지면 물고기가 더 무기력해지므로 미세한 입질을 읽는 법을 계속 배우세요.
- 환절기 (10–16°C / 50–60°F)
- 미끼 및 루어: 립리스 크랭크베이트, 중간 크기 스윔베이트(4–5인치), 크리처 베이트, 컴팩트 블레이드 스피너베이트
- 세팅: 3/16–1/2oz 지그에 크로우 트레일러, 12–14lb 라인, 그리고 브러쉬와 오픈 워터 모두 커버할 수 있는 다재다능함; 색상은 자연스러운 녹색과 갈색 계열로 조정
- 낚시하기 좋은 곳: 수초 경계, 수면 아래 50–150cm 깊이의 수풀, 얕은 만과 깊은 웅덩이 사이의 전이 구역
- 패턴: 변화하는 스쿨링 활동과 상승하는 수질 투명도를 주시하십시오. 맑은 물의 기간은 종종 더 공격적인 입질과 일치합니다.
- 따뜻한 물 (16–21°C / 60–70°F)
- 미끼와 루어: 더 큰 스윔베이트(5–7인치), 바이브레이션 지그, 채터베이트, 중간 또는 빠른 속도로 움직이는 크랭크베이트
- 채비: 1/2–3/4 oz 지그 또는 헤드가 무거운 스윔베이트 사용; 더 멀리 던지기 위해 12–20 lb 라인 사용; 꾸준하고 적당한 속도로 수초 라인과 곶을 공략.
- 어디서 낚시를 할까: 수초 가장자리, 햇볕이 잘 드는 평지, 그리고 덤불과 갈대 주변의 움푹 들어간 곳; 온타리오 호수는 봄의 따뜻함 속에서 전선 통과 후 강한 먹이 활동을 보인다
- 패턴: 이른 아침과 늦은 저녁에는 탑워터 액션이 활발하고, 한낮에는 햇볕에 수온이 오르면서 미드뎁스 커버로 입질이 옮겨감
- 더운 날씨(>21°C / >70°F)
- 미끼와 루어: 빠르게 움직이는 스윔베이트, 스퀘어빌/크랭크베이트, 채터베이트, 해 뜬 직후 첫 한 시간 동안 탑워터 플러그
- 채비: 속도와 민첩성을 위해 가벼운 헤드를 사용하고, 14~20lb 라인을 쓰며, 빠른 교체를 위해 여분의 가벼운 채비를 준비한다. 얕고 햇빛이 잘 드는 평평한 지형과 수초 포켓을 노린다.
- 낚시하기 좋은 곳: 수풀 근처의 얕은 지형, 녹색 수초 경계, 흐름이 있는 지역과 인접한 곶
- 패턴: 밝은 햇빛 아래에서 무리지어 다니는 물고기를 찾으십시오. 먹이 활동 시간은 짧아지므로 핫스팟 간을 빠르게 이동할 준비를 하십시오.
시기에 따라 유연하게 대처하고 물에 대한 감각을 유지하십시오. 온타리오 지역의 낚시꾼들은 봄에 두 가지 뚜렷한 변화를 목격합니다. 시즌 초 수풀 및 수초대 활동, 그리고 시즌 중반에는 더 깊고 시원한 곳으로 이동합니다. 멈춤 없이 적응할 수 있도록 고객 맞춤형 채비를 간결하게 준비하고, 캐스팅 사이에 짧은 학습 루프를 통해 패턴 인식 능력을 향상시키십시오. 미끼를 온도와 계절에 맞춰 사용하면 실질적인 이점을 얻고 추측만 쫓는 대신 경기에 집중할 수 있습니다.
마스터 캐스팅 및 릴링: 속도, 멈춤, 그리고 챔질
규칙: 릴링 속도를 예상 수심과 입질에 맞춰 조절하십시오. 리듬을 수심에 맞추고, 로드 끝을 팽팽하게 유지하며, 입질에 집중하십시오. 정확한 캐스팅 후, 의도적인 0.5초 간의 멈춤, 그리고 2~3피트의 릴링을 반복하십시오. 타이밍을 고정하기 위해 한 번에 6~8회 반복합니다. 이 접근 방식은 첫 번째 연결을 명확하게 하고 놓치는 입질을 줄여줍니다.
일년 내내 가능한 낚시에서 힌트를 얻어 수온과 시야에 따라 속도를 조절하십시오. 신선하고 서늘한 아침에는 루어를 더 깊이 떨어뜨리고 멈추는 시간을 늘리십시오. 밝고 따뜻한 오후에는 멈추는 시간을 줄이고 더욱 적극적으로 릴을 감으십시오. 낚싯줄을 주시하면 눈에 잘 띄지 않는 희미한 입질을 감지하는 데 도움이 됩니다. 낚싯줄에 가해지는 압력과 루어를 스트라이크 존으로 계속 이동시키려는 충동 사이에는 미묘한 균형이 있습니다.
라인 굵기와 루어 액션에 대한 연구를 통해 알 수 있듯이, 최고의 성능을 내려면 상황에 맞춰 장비를 조정해야 합니다. 맑은 물에서는 라인 굵기가 가늘수록 감도가 향상되고, 수초가 많은 곳에서는 라인 굵기가 굵을수록 걸림 저항이 커지고 장애물을 헤쳐나가는 데 도움이 됩니다. 다양한 조합으로 연습하는 시간을 가지면 입질 성공률이 높아지는 것을 확인할 수 있을 것입니다.
스핀캐스트 릴은 부드러운 학습 과정을 제공하지만, 오작동에 주의하고 그에 따라 조정해야 합니다. 캐스팅 시 줄이 느슨해지거나 릴링이 거칠어지는 등의 현상이 나타나면 드랙을 약간 조이고 더 가벼운 루어를 사용해 보세요. 거기에서부터 상황이 허락할 때 더 나은 컨트롤을 위해 스피닝 장비로 발전시켜 전반적인 정확도를 향상시키세요.
훅셋은 신중하고 자신감 있는 움직임을 요구합니다. 입질이 느껴지면 어깨로 낚싯대를 튕겨 입 안으로 훅셋을 강하게 넣고, 꾸준한 장력을 유지하여 랜딩까지 이어가세요. 입질이 느껴지는 순간 빠르고 깔끔하게 반응하고, 에너지 낭비와 훅셋 실패로 이어지는 경련적인 손목 움직임은 피하세요.
분할 연습 세션은 필요한 직감을 키우는 데 도움이 됩니다. 페이스와 일시 중지에 집중하는 훈련과 정확한 훅셋에 집중하는 세션을 번갈아 가며 진행하십시오. 일관성 있는 짧은 세션이 산발적인 긴 노력보다 성능이 뛰어나다는 것이 입증되었으며, 개선된 결과는 낚시하는 모든 호수와 강에서 나타납니다. 이미 이 방법은 가이드와 낚시꾼 모두에게 신뢰를 얻고 있습니다.
| 상태별 빠른 참조 | |
| 상태 | Tip |
|---|---|
| 얕고 맑은 물 | 짧은 멈춤, 더 빠른 릴 증가, 감도를 위한 가는 직경 라인 |
| 깊은 물 또는 빽빽한 수풀 | 더 긴 일시 정지, 더 느린 회수, 걸림 저항을 위한 더 두꺼운 라인 |
| 신선하고 시원한 아침 | 더 깊이 던지고, 피크 포즈에서 유지 시간을 늘리고, 필요하다면 더 무거운 루어를 사용하세요. |
| 연중무휴 연습 | 일정한 리듬을 유지하고, 규칙 기반 의사 결정을 개선하기 위해 시간과 테이크를 기록합니다. |
신속하고 인도적인 방생을 통해 어류와 서식지 보존
신속하고 인도적으로 방생하십시오: 바늘을 뺄 때 물고기를 물속에 유지하고, 찰나의 리듬으로, 이상적으로 30초 이내에 방생을 완료하며, 미늘 없는 바늘을 사용하십시오. 이 찰나의 리듬은 시간을 절약하고 스트레스를 줄여줍니다.
젖은 손으로 몸통을 감싸 안고 아가미나 눈은 만지지 않도록 주의하십시오. 배를 받치고 물고기를 수평으로 유지한 채 물살로 부드럽게 되돌려 보내 기력을 회복시키십시오. 놓아주기 직전 아주 잠깐 멈춰 물고기가 다시 숨을 쉬는지 확인하십시오.
온타리오 수역에서 보트를 이용해 잡은 물고기를 다룰 때는 바닥에 닿지 않도록 수면 위에서 처리하고, 특히 활동량과 아가미 반응이 변하는 가을에는 똑바로 세워 돌려보내 공기 노출을 최소화하십시오. 부득이하게 들어 올려야 할 경우, 머리가 꼬리보다 위에 있도록 유지하고 몸통이 꼬이지 않게 하십시오. 이는 회복 속도를 높이고 몸체를 온전하게 유지하는 데 도움이 됩니다.
무엇을 쫓고 무엇을 할 수 있는지 아십시오. 온타리오 수역에서는 둥근 고리 바늘이나 미늘 없는 홑바늘이 내장 손상을 줄이고 방류 속도를 높입니다. 월아이, 배스, Panfish 등 목표로 하는 어종의 종류와 그들의 패턴이 어떻게 목표 성공에 영향을 미치는지, 그리고 멍이 얼마나 빨리 다루는 데 반응하는지 이해하십시오. 최근 Ellis의 전술 팁은 다른 사람들이 온타리오의 호수와 강 전반에 걸쳐 서식지 품질을 유지하는 데 도움이 되었습니다.
훌륭한 퀵 릴리즈는 좋은 습관에서 시작됩니다. 장비 준비, 훅 해제 연습, 그리고 물고기의 감각에 집중하세요. 약간의 예행연습을 통해 타이밍을 맞추면 과정이 빨라지고 서식지를 보호할 수 있습니다. 바람이 불거나 물살이 거셀 때는 침착하고 신중한 리듬을 유지하는 것이 처음에는 어렵게 느껴지지만, 일단 속도를 맞추면 물고기를 물에 돌려보내고 회복하는 모습을 볼 때 물보라 소리가 사라지는 것을 듣게 됩니다. 그 찰나의 평온함이 훌륭한 개체 수를 유지하는 데 도움이 될 수 있습니다.