

 2-Stroke Outboard Winterization – Step-by-Step Maintenance Guide">

First, gather stabilization supplies, fogging oil, and a clean container; remove 의 plugs and fog the cylinders to protect the cylinder walls during cold storage. Drain fluid from the fuel system to prevent untreated material from entering the unit; once sealed, keep the system protected. Apply a thin layer of lubricant to exposed surfaces to reduce corrosion risk.
following these actions, preparing the fuel system for long rest means adding stabilization to the fluid fuel and using clean fuel; for outboards stored for the season, fill the tank with stabilized fuel to avoid varnish or caused deposits, or drain completely if you prefer. once storage begins, inspect fittings and lines for moisture.
Lower unit gearcase care: remove the drain plug, drain the old lubricant, and inspect for water or metal particles caused by moisture. Refill with the recommended gear oil; rotate the drive shaft to ensure thorough lubrication and distribute to all surfaces, then install the plug. This is an additional step to extend service life.
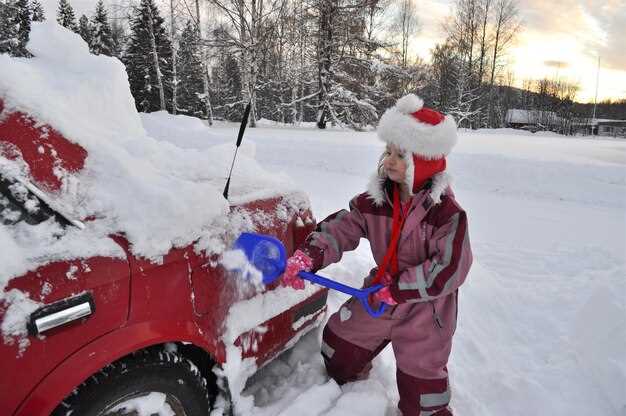
Store the unit in a dry, ventilated area; protect from condensation by sealing the intake and exhaust; keep the walls of the engine bay clean and dry. Use a breathable cover; avoid untreated moisture near seals; maintain the condition by making minor adjustments as needed.
Before returning to service, verify the ignition and sensor wiring; refresh the plugs if needed and re-gap as per manual; confirm compression across all cylinders and confirm the fuel mix for the two-stroke engine. With the unit ready, perform a cautious engine check after a short idle to confirm stable lubrication flow and absence of leaks.
Oil Filter Change during Winterization
Replace the oil filter before storing the engine. A fresh filter ensures proper lubrication after a long idle and helps prevent varnish buildup when you restart after a freeze. Use a marine-grade filter matched to your model and environment–whether saltwater or freshwater setups require different seals. This choice reduces leaks and supports stabilization of the lubrication path during startup.
Before removal, back off the oil pump and place a catch container. Procedure: remove the old filter, inspect the gasket for damage, wipe the seat clean, and lightly lubricate the new filter gasket with clean oil to ensure correct seating. Install by hand until snug, then give a quarter-turn with a filter wrench. Do not overtighten to avoid gasket damage. Then top up the oil to the correct level using the dipstick; the amount varies by engine, but fill to the full mark after a filter change. Run the pump briefly to purge air and verify there are no leaks at the seal. In cold environments, a short stabilization period after startup helps the oil reach full lubrication before extended storage; still, recheck for drips within the first minute of operation.
Post-change care matters: inspect the anode for corrosion, check the line leading to the filter area, and verify the propshaft lubrication path is clear. For salt systems, also inspect fittings for salt deposits; in freshwater setups, corrosion risk is lower but still check every season. The procedure is inexpensive but failure to perform it can be costly and lead to quicker wear on the line and related components.
| Item | Recommendation |
|---|---|
| Filter type | Spin-on marine-grade; ensure correct thread size and gasket for your model. |
| Install torque | Follow manufacturer spec; typical range is 12–18 Nm (adjust per manual). |
| Replacement timing | Change during winterizing; if engine has frequent use, consider every 100–150 hours or annually. |
| Oil top-up amount | After install, add fresh oil to reach full mark; amount depends on model. |
| Environment notes | Saltwater setups: inspect anode and corrosion; freshwater: lower corrosion risk but still verify fittings. |
| Care and checks | Inspect lubrication line, ensure prop shaft area is clean, and verify no leaks. |
Identify the correct oil filter for your engine model
Recommendation: pick the OEM filter that matches your engine model code. If OEM is unavailable, use a cross-reference that aligns with the thread pitch, gasket size, and overall height. This lets you confirm compatibility before ordering. Follow a step-by-step check to ensure the filter fits the unit and environment, especially in varying temperatures; the filter must be suited to the lube formulation and operating environment, whether powered by a common freshwater boats setup or saltwater application; in cold temperatures, selection is especially critical to maintain flow and avoid bypass.
- Model and year confirmation: check the data plate, owner manual, or the serial number to lock the correct filter family and avoid overlooking model-specific differences.
- Filter type and mounting: determine if your unit uses a spin-on or cartridge, and ensure the replacement matches intake fittings and gasket style; changed seals must match the housing.
- Coating and environment: choose a coated body if the engine will operate in corrosive environments; freshwater setups typically need standard coatings, while saltwater use demands higher corrosion resistance to prevent degradation.
- Filtration specs: verify micron rating, flow capacity, and by-pass valve settings; common values vary by model and will influence lube delivery at different temperatures.
- Installation prerequisites: change seals and gaskets; inspect the intake and passage for obstructions; lets you prevent leaks and non-uniform flow in the intake line.
- Locate the service documentation for your exact model and record the OEM part number.
- Cross-reference only with reputable catalogs; avoid substitutes that do not list the same thread and gasket dimensions.
- Obtain the filter and related seals; inspect coating and media for damage; ensure packaging indicates freshness to prevent degradation in storage.
- Prepare the unit: clean the mounting surface completely; inspect the intake path for debris that could block flow.
- Install with correct orientation; apply a light coat of lube to the gasket; avoid over-tightening; torque to the specification in the manual.
- Prime or fill the filter if required; reinstall the housing and start the unit to bleed air and verify the path from intake to lube circuit.
- Run at idle for a few minutes, then recheck for leaks and steady pressure; if anything unusual appears, reassess the fit and seals.
Next, inspect surrounding seals for wear or damage and replace as needed. Lets you maintain a clean, dependable lube path through the season and prevents premature repairs caused by improper installation. A coated filter body is formulated to resist corrosion in harsh environment(s); for boats operating in freshwater, standard coatings are usually sufficient, but saltwater applications benefit from enhanced coatings to minimize degradation. This approach ensures the unit will operate reliably, keeps intake clean, and supports a long service life of the gears and lube system.
Assemble the necessary tools, fluids, and safety gear

Collect these items now to avoid delays: a charger for the battery, two-stroke engine oil, fuel stabilizer, fresh seasonal fuel, and a reliable lubrication product designed for internal components. Have a clean rag, a funnel, and a rust‑preventive spray on hand. 이 단계들 create a tidy workspace and reduce the risk of corrosion on the gearcase and exposed fittings.
Tools and hardware to gather: metric and SAE socket sets, combination wrenches, screwdrivers, pliers, a torque wrench, a spark plug socket, a grease gun, a small funnel, clamps, a magnet tray, and a drip pan. Keep a spare spark plug set and a fuel filter nearby. For a fishing rig, mount the unit on a stable stand so the propshaft stays aligned and the lower section remains upright during service. Removed components should be laid out in order to simplify reassembly.
Fluids and lubricants: stock fresh gasoline with stabilizer and the recommended two-stroke oil, plus gearcase lubricant for the lower unit. Use a dedicated rust‑preventive spray for seasonal storage and ensure you have a compatible fuel filter on hand. Do not mix fuel and oil in the same container; label containers clearly and keep them away from heat until use. For engines with injectors, have a cleaning kit or spray ready to service them if symptoms of clogging come.
Safety gear and workspace: wear splash goggles, chemical‑resistant gloves, and a respirator or mask when using solvents. Ventilate thoroughly and keep ignition sources away. Maintain a dry surface with non‑slip mats and keep a portable fire extinguisher within reach. When winterizing, store parts upright 또는 vertical to prevent pooling and protect internal passages and the propshaft housing.
Electrical and hardware checks: verify the battery remains charged with the charger connected only when the engine is off and the kill switch is secure. Inspect the plug connections, especially the spark plug boot, and replace a worn plug if removed for inspection. If a component has joints or seals, apply a light coat of lubrication to prevent rust and ease future repair. For any repair to the lower, fuel lines, or injectors, position a drip tray to catch drips and avoid bilge contamination.
Storage and planning: document the steps and follow these steps until you finish the season. Step‑by‑step checks include verifying loose fasteners, testing injectors if present, and confirming the gearcase seals are sound. Store the assembly upright 또는 vertical during cooling, with gearcase drained and protected to minimize rust. If questions arise, consult the manual or post questions in a relevant facebook group for model‑specific guidance.
Access the oil filter: remove cowling and locate the cartridge
Disconnect the electrical harness and remove the cowling to expose the cartridge-style filter. Move the cover aside and keep tools within reach, because the space is tight and slipping can bend components.
Locate the cartridge by feel and sight; confirm the O-ring seat is intact and there’s no bent tab or distorted flange that could misalign the seal.
Often, debris and salt spray collect around the filter. Wipe the area with a clean cloth, inspect for crusted deposits, and look for any blockages in the lubrication path that would impede fuel flow or cooling.
To remove the cartridge, disconnect clamps and twist counterclockwise; support the housing to prevent damage. If it’s stubborn, apply gentle rocking and avoid forcing, which can cause gear or housing damage.
Lift the cartridge straight out and inspect it for signs of wear; bent fins or deformation indicate replacement is needed. There should be no gasoline leak or fuel seepage around the seal.
Reinstalling: coat the O-ring with a thin film of clean oil or fuel-compatible lubricant; align the cartridge with the housing, press evenly, and reseal the clamp. This helps prevent leaks and ensures a proper seal.
After reinstall, wipe spills, reconnect any lines, and reinstall the cowling. Move the unit back to its proper position and perform a brief test to verify no leaks and smooth operation, which avoids longer trouble.
cta_section: log prep notes and plan the next services; this helps longer life in marine conditions and prepares you for salt exposure. Ensure you coat exposed metal to prevent corrosion and maintain lubrication to avoid damage.
Remove old filter, inspect seals, and clean mounting surface
Replace the old filter with a fresh marine-grade unit; whether it’s a fuel filter or water separator, install the correct model and avoid reinstall until the mounting surface is clean, free of corrosion, and the seals are intact.
Steps: power down, relieve pressure, loosen hose clamps, detach lines, and remove the housing. Inspect the seals: O-rings or gaskets must be pliable and free of cracks. Replacing any damaged seals is essential. Lightly lubricate O-rings with a marine-grade lubricant before seating the new filter to ensure a tight seal and easier removal later.
Inspect and clean the mounting surface: remove old gasket residue, clean with the recommended solvent, and dry thoroughly. Check for gouges, pitting, or a loose mounting hole; if you find a hole or deep imperfection, correct before installing. Look for corrosion near the flange and the nearby anode; replacing the anode if necessary helps prevent degradation of surrounding parts.
Install and test: reinstall the new filter in the correct orientation, hand-tighten, then snug with a wrench without over-tightening. Reconnect hoses in the original routing; perform flushing with clean fuel to purge air and stale fuel, watching for leaks at the seals and mounting surface. If you detect a difference in pressure or leaks, stop, reseat, and recheck. Once confirmed, run the system briefly to verify stabilization of fuel pressure and line integrity. If the fuel is untreated, add stabilizer per the model’s spec and plan a follow-up check at your dealers; until you’re confident in the fit, avoid moving hoses or stressing connections. youve got this; this cta_section marks the next action: record the model and date so you remember the exact filter and seals used for your next service.
Install new filter, prime if required, refill oil, and check for leaks
Replace the fuel filter now to prevent fuel-line obstructions in outboards. Shut off power, access the filter housing, and install a new filter that matches the model of the engine. Use a sacrificial catch basin for spills, and ensure the seal seats evenly and clamps are tight for a proper seal. Needed supplies should be at hand today, especially when working on multiple boats, and the setup should stay connected to the line.
Prime if required: if the primer bulb remains soft after several strokes, keep cycling until fuel appears at the filter and along the line. Do not crank the engine until pressure is established; if the line still shows air, reassess connections to avoid trouble.
Refill oil: use a formulated marine-grade lubricant recommended for your model. Fill the reservoir to the correct level using the dipstick or sight gauge, wipe any drips, and reseal caps. For multi-boat usage, maintain identical lubricant throughout the system.
Check for leaks: with the system connected, pressurize by cycling the primer and inspect all joints, hose clamps, and the filter housing. Look for damp spots, a sheen on fittings, or odors. If any leak appears, stop, address the fitting or replace the part, and re-test to prevent trouble.
Winterizing notes today: confirm the area is dry, store gear protected, and have earmuffs handy for cold-weather work. Note the model and filter part, and date to aid questions later. Regular checks keep outboards ready for the next use; ensure the system remains completely sealed when idle for long periods.