

 1963 Monk McQueen 46 Trawler – 클래식 요트 개요, 사양 및 복원 가이드">

Purchase a certified survey before you consider buying the Monk McQueen 46 Trawler. A professional inspection will hear about hidden hull damage, test foam integrity under decks, and verify electric readiness. The report helps you decide whether to stage the project in the north yards or in canada, with a plan for the galley, main station, radar, and teak deck work, so you can make a confident purchase.
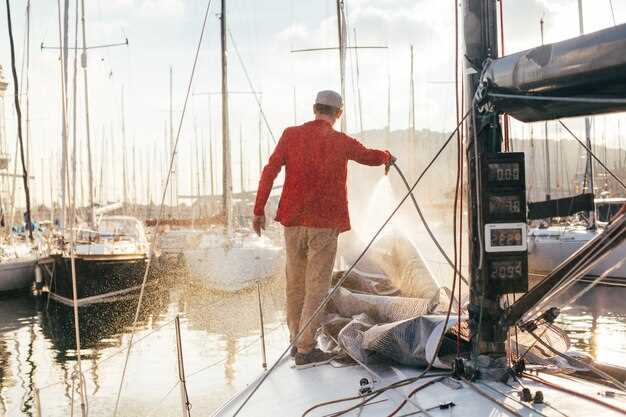
The 1963 Monk McQueen 46 Trawler presents a classic profile with a solid main hull and a practical interior. Its teak decks and joinery define the look, while a Detroit 6-71 engine type powers a reliable cruise for a perfect balance of form and function. You’ll find a well‑appointed galley, a comfortable forward cabin, a navigation station, and a radar display ready for an updated installation if you choose.
Restoration focus starts with the hull and interior. Check for damage around the stem and stern, inspect teak and deck joinery, and plan a controlled replacement of foam where needed. Align upgrades with the azzurra aesthetic while preserving authenticity, and use electric systems to meet modern safety standards. A thoughtful approach lets you display the boat’s character without overcapitalizing.
Practical tips for owners emphasize general planning and realistic milestones. Define a budget that makes sense for a scope that has been clarified by the survey. You need a staged plan to keep expenditures in check; track progress in milestones, starting with rudder, rigging, and radar installation, then tackle the galley and trim. If you’ve been researching classics, you’ll appreciate how this model sits in the market; it’s more than a display piece, and with proper care in a canada or north coast environment, it can be a dependable cruiser.
1963 Monk McQueen 46 Trawler: Plan and Overview
Begin by mapping the engine room and fuel system to set a solid restoration plan. Identify tank locations, fuel lines, valves, filters, and vent routes. Confirm how the 12-volt and 24-volt circuits interact with radar and nav gear to prevent voltage drops during operation.
Next, outline the mezzanine layout: many mcqueens 46 trawlers include a mezzanine to access deck gear and improve sightlines to the bow. Document ladder positions, handrails, and headroom.
Interior plan places the galley forward of the saloon, with a curtain to separate cooking from living space. Below deck map two cabins and a head; above deck, confirm the wheelhouse, chart table, and instrument bench.
Materials and fittings: bronze deck hardware and zinc anodes protect the hull. Wooden cabinetry and trim provide warmth under varnish, while fasteners should be checked for corrosion. The curtain may shield utilities in compact layouts, and bronze fittings are often used around the deck.
Canada links: the mcqueens tradition traces to canada, where boatworks heritage favors solid frames and practical joinery. You will see wooden planking, bronze hardware, and reliable fasteners that have been valued by owners for decades.
Most checks below deck: bilges, tankage, stringers, and the framing. This plan makes it easy to track tasks, and it really benefits owners who want to stay hands-on. You will need a detailed list of what to replace and what to restore by hand, with a clear handover for future maintenance.
Electrical and climate: ensure the novacool unit integrates with the 12-volt system and battery bank. Test radar power, navigation lights, and helm electronics. Above deck, wire controls with clear circuits and protective shielding; below, protect sensitive gear from moisture. This approach reduces volt drops and preserves performance.
Operational takeaway: to preserve the classic feel, focus on the galley layout, mezzanine access, and wooden joinery. The plan supports faithful restoration that makes the most of this hull, around mid-century design, and keeps the boat ready for coastal cruises with a practical, hands-on workflow.
Specifications: Key Dimensions, Displacement, and Performance
Verify the hull length and weight distribution before planning a refit to align with insurance, marina rules, and loading plans. A specific baseline supports safer handling at sea and smoother operations in marinas.
Key dimensions provide a clear frame: LOA 46 ft 0 in; LWL 39 ft 0 in; beam 14 ft 6 in; draft 5 ft 2 in. Lightship displacement runs about 36,000–38,000 lb (16,300–17,200 kg), with loaded displacement around 40,000–42,000 lb (18,100–19,100 kg) depending on fuel, water, and gear.
Propulsion and performance: twin diesel installation totaling roughly 380–420 hp yields a comfortable cruise in the 8–9 knot band and a top speed around 12–14 knots. At 8 knots the range typically falls between 650 and 900 nautical miles, depending on fuel capacity and sea conditions.
Fuel and water: standard tanks hold about 420 gallons of diesel (1,590 L); fresh-water capacity around 150 gallons (570 L). Endurance shifts with loading, and you should plan for a contingency tank if you expect long passages away from port.
Spaces and layout: the salon serves as the central living space with wide sightlines to fore and aft. Mezzanine access sits above the wheelhouse, and the galley lies on the port side with a practical head and two cabins forward. A curtain or removable bulkhead helps manage heat and glare in sunny marina days; there is plenty of headroom and deep settees to stay comfortable during long passages.
Maintenance and safety: use foam insulation to maintain warmth and sound; check weatherproofing; ensure controls, throttles, and engine gauges respond within expected ranges. Your plan should include a spare key start sequence and a simple panel labeling scheme. A note labeled tiltrider1 documents the aft cockpit control arrangement.
Insurance and planning: keeping displacement within design limits stabilizes behavior in open water and supports preferred insurance terms. Maintain a steady schedule of checks, keep spare parts on board, and log changes as you go; this approach helps with maintenance cycles and marinas visits.
Final reminder: schedule regular checks around time intervals to keep the Monk McQueen 46 ready for weekend trips and longer passages. The combination of a spacious salon and mezzanine, solid displacement, and reliable propulsion makes this classic trawler an accessible project for maintaining your coastline adventures.
Hull and Deck: Construction, Material, and Condition
Start with a thorough hull and deck check before any restoration or buying; focus on the main structural areas, moisture, and deck hardware. Tap for softness around the keel and bulkheads to locate found issues, document them, and plan repairs before you commit.
Hull construction centers on the keel, frames, and planking. A 1963 Monk McQueen 46 trawler typically presents a wooden hull with carvel planking or a plank-on-frame skin, while steel variants exist but are less common. Inspect the hull-to-keel junction and plank seams for loose fasteners, gaps, or rot; note what you found and plan accordingly. If you find soft patches, plan to re-caulk or replace sections before a long voyage.
Material and deck details vary by era and build. Wood hulls often use cedar or oak planks with a teak or fir deck; deck beams and a weather deck define the surface. General guidance: probe for soft spots, worn caulking, and delamination around hatches and fittings. If a foam-core deck is present, check for intrusion; damp or collapsed foam indicates core failure and potential water ingress below the surface.
Condition and fittings require careful attention to interfaces. Inspect around doors, windlass bases, and stowage areas; ensure the door seals are intact and operate smoothly. Verify the place of through-hulls, hoses, and fastenings around the deck coamings, and look for signs of leakage around curtain tracks or canvas covers. Around the windlass and winch fittings, test movement and mounting security; around tanks, inspect for dampness, staining, or leaks that hint at a broader problem.
Interior indicators and plan call for a focused checklist. Tanks and bilge spaces reveal moisture, while curtain lines and bulkheads show signs of movement or prior repairs. Test stove ventilation and fuel-line routing for safety, and verify hatch and door closures in all cabins. When cataloging issues, use a clear reply from each yard or station and reference a simple formula for budgeting: material costs plus labor plus a 15% contingency to cover unexpected repairs, ensuring you protect the main hull and deck during restoration.
Buying approach and next steps require action. Map a route through yards and surveyors, call reputable stations, and gather multiple quotes. Name at least three references and request written scope with itemized tasks. If you track measurements, tag them with tiltrider1 to keep data coherent and shareable with your chosen yard for an informed, coordinated plan.
Navigation Electronics and Electrical: Equipment, Wiring, and System Checks
Start with a complete battery health test and a dedicated DC distribution panel at the nav station. Measure resting voltages, perform a 50% C20 load test, and verify that the monitor reply matches actual capacity. Keep spare batteries hand for quick swap and store them in a ventilated, dry area of the boathouse or yards for boating reliability.
Wire with marine-grade tin copper, 105C insulation, routed in protected conduit, and keep DC and AC runs separate. Use fuse blocks or circuit breakers close to the source, label every circuit, and group navigation, cockpit, galley, and bilge-pump loads on their own banks. Bond bronze through-hulls and fittings to the main grounding system; verify continuity around the hull, and ensure electric circuits are protected from chafe and moisture.
Install radar, VHF with DSC, GPS/plotter, AIS, depth-sounder, and autopilot. Place the nav station within easy sightline from the cockpit; route antenna cables along a clean path to the mast, keeping RF and power cables separate. Include a weather box and emergency beacon as part of the electronics package.
Pre-departure checks include bilge pumps, navigation lights, radar standby power, and a test of electrical alarms. Record the plan in the words of your log to keep the crew aligned, and run a quick insulation resistance check on critical runs. Test shore power and the transformer, verify GFCI operation in the galley, and log any discrepancies so your hand can verify when you are away.
Canada-specific rules require GFCI for galley and head outlets and proper labeling of shore connections; keep a visible wiring diagram on board. Share the maintenance log with your insurer to avoid coverage gaps; many policies require documentation and spares lists. Document the location of controls and equipment; this helps anyone buying the boat, and your acquaintance at a west coast yard can verify installations.
Foam insulation around wire chases reduces vibration and protects runs near fuel lines and bronze fittings. When buying a used Monk McQueen, inspect the station and cockpit for signs of water ingress; keep the location of batteries, spare parts, and tools noted in the galley or workshop, and talk with an acquaintance in a west coast yard to verify installation with a Canada-based marine electrician if needed.
Accommodations: Cabin Layout, Berths, and Ventilation
Prioritize a forward V-berth with curtain privacy and a salon settee that converts to a double, keeping circulation clear from helm to galley.
- Cabin layout: In typical 46 Trawler builds, the forward cabin houses the V-berth with a curtain for privacy; the galley runs along the port side, the head sits to starboard, and the main saloon sits aft with dinette seating that can convert to an extra berth. You’ll often find a practical flow that keeps passagemaking easy, with plenty general storage around the hull’s centerline to minimize clutter. Where there were changes in the layout, the plan kept the main living area open for ventilation and ease of movement.
- Berths and sleeping: The setup accommodates two to four sleepers. Forward you get two, the dinette can yield a third, and an aft option may provide a fourth where space allowed. There is much headroom above berths, and you should specify foam density and cover material when buying replacements. Just verify curtain length and locker placement; specific details like curtain height and the storage layout are found in the year’s build notes.
- Ventilation: Rely on deck hatches, dorade or louvered vents, and quiet fans to move air through cabins. If the boat has been stored in a boathouse, confirm there is no musty odor and improve cross-ventilation with a small blower for warm nights. Position north-facing ports to catch cooler morning air and avoid direct afternoon sun where possible.
- 수납 및 인테리어: 창고에는 머리 위 사물함, 하단 침상 서랍, 식료품 저장실 품목 및 장비를 위한 전용 사물함이 포함됩니다. 특정 영역의 골판지 패널은 내구성이 뛰어나고 청소가 쉬운 표면을 제공합니다. 제공되는 수납공간은 의류, 침구류 및 예비 부품을 보관할 수 있어야 하며, 조리대 근처에 스토브와 조리 기구를 위한 전용 공간이 있어야 합니다. 작고 잘 계획된 수납 계획은 어수선함을 방지하고, 실내 장식을 건조하게 유지하며, 보험 검사에 도움이 됩니다.
- 장비 및 포함 사항: 목록 확인 – 레이더, 항해 장비, 스토브 종류가 포함되었는지 확인해야 합니다. Novacool 냉장 장치가 있는 경우, 장치의 안정적인 온도 유지 여부를 테스트하고 필요한 경우 서비스를 계획하십시오. 구매 시, 선박에 남아 있는 물품과 개선 사항이 보험 보장 범위 및 재판매 가치에 미치는 영향을 기록하십시오. 수년간의 항해를 위해 믿을 수 있는 스토브와 견고한 전기 레이아웃은 해상에서의 갑작스러운 문제를 줄여줍니다.
- 자재 및 제작 참고 사항: 이 시대에는 알루미늄 하드웨어와 트림이 예상됩니다. 피팅 부위와 흘수공 주변의 부식을 확인하십시오. 실내에는 유틸리티 구역에 골판지 알루미늄 패널이 있을 수 있습니다. 건조한 접합부와 해치 및 사물함의 꽉 조여진 개스킷을 확인하십시오. 이러한 세부 사항은 보관 후 보트를 물에 다시 띄울 때 장기적인 내구성과 관리 용이성에 영향을 미칩니다.
- 보트하우스 및 관리: 보트가 보트하우스에 보관되었다면 습도계를 점검하고 통풍 경로가 막히지 않았는지 확인하십시오. 정기적인 청소와 목표 습도 조절 계획은 직물, 커튼, 폼 쿠션을 보호하며, 이는 보험 평가액과 재판매 가치에도 도움이 됩니다.
- 복원 관련 참고 사항: tiltrider1
tiltrider1 주석: 그들이 그러한 맥락을 가지는 것은 커튼 배치, 보관 시설 업그레이드, 환기 개선 등을 포함하여 수년간의 복원 선택 사항들을 추적하는 데 도움이 됩니다.
갤리: 레이아웃, 가전제품, 및 안전
우현쪽 조리대 아래에 콤팩트한 12볼트 냉장고를 설치하여 부패하기 쉬운 물품을 안전하게 보관하고 움직임 위험을 줄이십시오. 냉장고의 전력 소모를 처리할 수 있는 적절한 퓨즈가 있는 전용 12볼트 회로를 연결하고 공간이 허락한다면 작은 냉동실 칸이 있는 모델을 선택하십시오. 소유주들이 더 큰 냉장고를 선호했던 시절이 있었지만, 이 방법은 여전히 유효합니다. 이 설정은 수년간 사용할 수 있으며 장거리 항해 중에 얼음을 살 필요성을 줄여줍니다.
몽크 맥퀸 46 갤리의 실용적인 면모를 소개합니다. 싱크대, 스토브, 냉장고가 일렬로 배치된 선형 레이아웃은 작업 흐름을 효율적으로 유지하고 엎지르는 경로를 최소화합니다. 작업 공간이 길이 방향으로 연속되어 있어 빠르게 청소할 수 있으며 항해 시간 동안 장비를 펼쳐 놓을 공간을 제공합니다. 깔끔함을 유지하기 위해 식기 전용 서랍과 거친 바다에서 닫을 수 있는 고정 덮개를 마련해 두십시오.
가전제품 및 자재: 전기 시스템에 적합한 스토브 유형을 선택하십시오. 짐벌형 프로판 스토브 또는 하우스 배터리로 작동하는 안전한 유도식 장치 중 하나를 선택하십시오. 조리대 아래에는 벽을 그레스 타일 또는 질감이 있는 미끄럼 방지 표면으로 덮어 열과 액체 오염에 강하게 만드십시오. 단열을 위해 캐비닛 뒤에 노바쿨 폼 패널을 설치하여 열 전달 및 소음을 줄이고 캐비닛 껍데기에는 합판을 사용하십시오. 아래쪽에서는 해양 등급 실란트 및 테이프를 사용하여 가장자리를 밀봉하여 수년간의 습기 흡수를 최소화하십시오.
간섭 및 열 손상을 방지하기 위해 레이더 장비와 기타 전자 제품을 조리실 열원으로부터 멀리 두십시오. 안전 및 환기: 누출을 방지하기 위해 스토브 위에 적절한 환풍 후드를 설치하고 가스 차단 밸브를 설치하십시오. 거친 바다에서 손상을 방지하기 위해 모든 병과 랙을 확실한 래치로 고정하십시오. CO 감지기와 화재 경보기를 사용하고 열원에서 멀리 떨어진 곳에 쉽게 닿을 수 있는 위치에 두십시오. 이상한 소리나 냄새가 나면 가스를 차단하고 승무원을 호출하십시오.
유지 보수 및 수리: 합판 베이스와 탄력 있는 덮개로 표면을 청소하기 쉽도록 유지하고, 조리대 아래에는 방습 장벽과 미끄럼 방지 바닥 매트를 사용하십시오. 엎지른 후 신속하게 재밀봉하고 건조할 수 있는 계획을 세우면 장거리 항해 중 갤리 상태를 양호하게 유지하는 데 큰 도움이 됩니다. 손상이 발생하면 즉시 해결하십시오. 추가적인 손상을 방지하기 위해 손상된 합판 부분을 교체하고 필요에 따라 유리 섬유 또는 수지를 다시 도포하십시오.
구매 및 계획: 캐나다 태평양 연안을 따라 항해할 경우, 해당 지역에서 부품 가용성을 확인하십시오. 캐나다 매장 네트워크는 구형 선체에 대한 지침과 실질적인 백업 옵션을 제공합니다. 장거리 여행을 계획하는 선주는 신선 식품을 많이 보관한다면 더 큰 냉동고를 고려해야 합니다. 특정 세부 사항이 필요하시면 선호하는 레이아웃을 알려주십시오. 배선, 환기 및 항해에 적합한 재료 선택을 포함하는 맞춤형 체크리스트를 가지고 다시 연락드리겠습니다. 이러한 접근 방식은 수년간 편안한 크루즈를 즐길 수 있도록 갤리를 준비해 줍니다.
기계: 엔진, 추진 및 정비 일정
엔진 오일은 200시간 또는 12개월마다 교체하십시오(둘 중 먼저 도래하는 시점 기준). 오일 필터도 동시에 교체하십시오. 15W-40 해양 디젤 오일을 사용하고 냉각수를 표시된 높이까지 채우십시오. 정비 내역을 정비록에 기록하고 기관실 디스플레이에 시간을 메모하여 결합된 기록을 빠르게 확인할 수 있도록 하십시오.
Mcqueens 46은 일반적인 크기의 선박에 흔히 사용되는 단일 디젤 엔진을 탑재하여, 약 180–210마력을 1.75인치 샤프트를 통해 고정 피치 청동 프로펠러에 전달합니다. 엔진 베드는 나무와 합판 프레임워크 위에 위치하며, 킬 쿨러와 골판지 호스를 통해 공급되는 해수 열교환기가 장착되어 있습니다. 연안의 잔잔한 태평양 마리나에서 순항할 때는 깊고 조용한 공회전을, 더 큰 선체 속도로 밀어붙일 때는 안정적인 부하 반응을 기대할 수 있습니다.
엔진 공간에는 전기 및 연료 시스템이 나란히 있습니다. 직렬로 연결된 두 개의 6V 배터리는 신뢰할 수 있는 12V 시동 회로를 생성하고 전자 장치 및 내비게이션 장비를 위한 별도의 하우스 뱅크가 있습니다. 통풍이 잘 되는 공간에서 배터리를 유지 관리하고, 매월 전압을 점검하고, 필요에 따라 전해액을 보충하십시오. 연료는 두 개의 탱크에 보관되며, 통풍구와 픽업을 부식 및 누출 여부를 점검합니다. 엔진 근처 공간에서 발화할 수 있는 나무 조각이 없도록 해당 영역을 깨끗하게 유지하십시오. 캐나다 및 인근 마리나는 종종 조밀한 호스 연결 및 잘 밀봉된 피팅을 요구하므로, 매 시즌 전환 시마다 골판지 호스 세그먼트와 클램프를 검사하십시오. 이 설정은 해안 전력에서 멀리 떨어진 추운 밤에 윈들러스, 레이더 디스플레이 및 난방 공간을 작동할 때 더 큰 전기 부하를 지원합니다.
보호 및 구동 정렬은 간단하게 유지하십시오. 샤프트 씰을 점검하고, 커틀러스 베어링 정렬을 확인하고, 프로펠러와 스터핑 박스에서 청동 마모가 있는지 살펴보십시오. 필수적인 보트 액세서리인 윈드리스는 집시, 체인 및 전기 스위치를 분기별로 점검하면 좋습니다. 호스 배선과 변속기 주변 공간을 주시하여 좁은 엔진 공간과 사이드 데크에 가깝게 위치한 엔진룸 공간에서 비비는 것을 방지하십시오.
포함된 유지 보수 작업은 마리나를 옮겨 다니는 동안 수행할 수 있는 실질적인 관리 방법을 강조합니다. 항해의 깊숙한 곳에서는 특히 해안에서 멀리 떨어진 긴 항해 후에는 나무, 탱크, 보관함 배치에 진동이나 습기 침투가 있는지 확인해야 합니다. 전기 패널에서 부식된 연결, 게이지의 안전한 장착 상태, 헬름의 청동 디스플레이 플레이트의 마모 흔적을 확인하십시오. 간단한 로그에 시간과 기간을 기록하여 다음 한파나 폭염이 오기 전에 서비스 시기를 예측하고 태평양에서 멕시코만, 다시 캐나다 연안까지 보트의 신뢰성을 유지할 수 있도록 하십시오.
| Task | Interval | 참고 |
| 엔진 오일 및 필터 | 200시간 또는 12개월 | 드레인, 필터 교체, 권장 수위까지 보충, 시간 기록, 누출 점검 |
| 연료 필터 및 워터 세퍼레이터 | 매 12개월 또는 1000시간마다 | OEM 사양으로 교체; 워터 세퍼레이터 물 빼기; 탱크에 물 있는지 점검 |
| 냉각 장치 및 호스 | 매년 | 호스 점검 (특히 주름관), 클램프 조임, 냉각수 보충, 누수 점검 |
| 생수 임펠러 | 매 12개월 또는 400시간마다 | 임펠러 교체; 스트레이너 점검; 열교환기 통과 흐름 확인 |
| 전기: 배터리 및 연결 | Monthly | 전압 확인, 단자 청소, 통풍구 점검, 12V 시스템 연결 및 하우스 뱅크 분리 확인 |
| 윈치 및 데크 하드웨어 | Quarterly | 가동 부품 윤활, 체인, 집시 및 로커 씰 점검, 스위치 확인 |
| 프로펠러 & 샤프트 씰 | 매년 | 청동 프로펠러 검사, 아노드 다듬기, 샤프트 정렬 및 스터핑 박스 점검 |
| 선체 및 기관실 종합 검사 | 시즌 시작 전 | 습기 점검, 합판 격벽 검사, 탱크 통풍구 확인, 풀린 잠금 장치 없는지 확인 |