

 What to Do If You Run Your Boat Aground – A Quick Step-by-Step Safety and Refloating Guide">

Stop the boat immediately and assess the surroundings. When the hull sits on the bottom, cut propulsion, secure the crew, and double-check critical gear. In some 状況, theres no benefit rushing off the sand; theres a clear plan to refloat with tide and depth. Stay calm, keep lines ready, and map the next steps. Also scan for hidden hazards around the hull, like sharp rocks or entangling lines.
Step 1: Verify depth with a depth sounder or handheld lead line, and drop a marker if you’re near a channel. Identify ground type–sand, mud, or shell–which tells you how to trim ballast and balance the load. Note if the boat is heeled; even a small heel changes how you move the weight. The idea is to keep the hull stable and eyes on the weather, currents, and obstacles.
Step 2: Check tide windows and harbour access. If you’re within reach of harbour or marina, contact the harbour master or captains for guidance; confirm the plan, the approach, and any tow arrangements. If you use a line, drop it over the bow to help control drift, and keep a crew member ready at the stern for direction. dont move aggressively toward deeper water until you have a clear plan. Communicate clearly and confirm next steps with your team.
Step 3: Execute the refloat with calm action. A traditional method here is to move forward on the rising tide with light throttle and steer to avoid obstructions; if you sit on the bottom, back off and use a stern push with a line from a tender or another boat. Always check for damage, test steering at low speed in shallow water, and confirm there are no leaks before proceeding farther.
Aftercare and notes. Log the incident with time, location, depth, wind, current, and any damage; report to harbour authorities if required. Always keep a clear plan, and thanks to good preparation, you’ll handle the next transit with more confidence. contact your captains for any further instructions.
Aground Situation Protocol: Practical Step-by-Step Actions
Shut off drive immediately; you’re aground. This stops forward motion and reduces impact risk. Keep the crew calm and prepare for a focused assessment of depth, obstacles, and available clearance before any movement.
Step 2: Read depth and hazards from the chart and depth reading. Always consult the chart and the depth reading, compare with your draft, and identify rocks hiding near the hull. Mark your position and potential escape routes on the chart for reference.
Step 3: Stabilize for lifetime safety and track three points. Deploy fenders, secure lines, and keep the crew low and balanced. Maintain a clear path and watch for tight clearance around the bow when adjusting position; avoid sudden shifts that could press the hull against rocks. Monitor the hull for signs of strain; any crack or leakage requires immediate action.
Step 4: Manage sails to prevent tangles. If a spinnaker is set, douse it and secure the halyards; keep the main and jib ready but do not drive the boat aggressively. This is a prudent move for sailing operations and reduces risk while you maneuver near shore and prevents line chafe on the hull, perfectly aligning the next move with safety.
Step 5: Plan a controlled refloat with wind, wave, and tide in mind. Check the tide window and available depth; if the water is light and a wave set could lift you clear, you can try a slow drive in reverse, then forward at low RPM. In any case, avoid abrupt throttle that creates impact with rocks; if conditions are risky, wait for a better moment–you gotta stay patient and follow the reading of the chart and the wave pattern.
Step 6: Use anchors or lines to hold position if needed. Drop an anchor from the bow or stern to reduce drift when you’re not ready to refloat; use a bridle and double up lines to spread load. Keep an eye on whether you’re pressing against rocks or a ledge; this is key to preventing further damage.
Step 7: Prepare the hull and equipment for a safe refloat. If you can refloat, ensure any cradles or supports are arranged to protect the keel; secure loose gear, and stow the spinnaker again if necessary. Verify there’s no snag on props and that the drive is ready for a gentle move.
Step 8: Re-enter open water and verify conditions. Slowly resume drive, watching the readings on the depth gauge; confirm the rocks aren’t in the way and that the channel is clear. If possible, gain speed gradually and steer to a safe heading away from the shore; continue reading the chart and log the incident for future planning, so you can plan for the next legs beyond this aground case.
Step 1 – Ensure passenger safety and wear life jackets
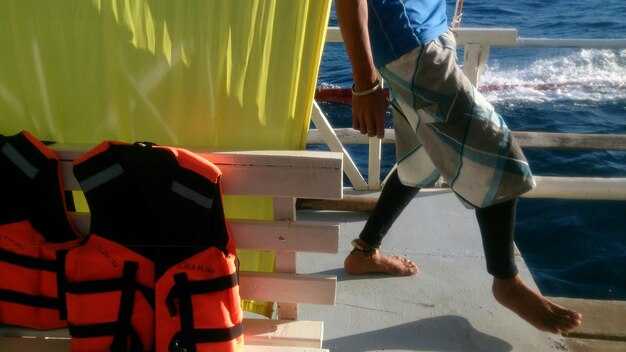
Put on a life jacket for every passenger now, then adjust the straps so a single thumb fits under the waist belt. Verify the jacket sits high on the chest and does not ride up when you bend, sit, or reach. For kids and guests with limited mobility, have a helper fasten their jackets and check fit from the front.
Here is what you need to run: inspect each vest for tears, torn seams, or compressed foam; confirm a valid marine approval label; ensure the size matches the wearer. If you find any sign of wear, replace the jacket before you continue. If someone slips, catch their arm and guide them into the jacket. Using intact gear gives reliable buoyancy and reduces risk in rough times on the water.
Keep everyone secured while you move to a safer deck area; avoid standing near the inboard side or loose anchor line. Assign a companion to help children and guests, and keep jackets on until the vessel is safe on the main deck. Note: having the right fit and clear space gives a solid start for the refloat.
| Item | Action | Why it matters |
|---|---|---|
| Fit and fasten | Check straps and adjust; one thumb width under the belt | Prevents ride-up and keeps buoyancy where needed |
| Condition | Look for tears, loose seams, crushed foam, missing labels | Damaged gear may fail when you need it and reduce performance |
| Size for each passenger | Use proper size; kids get kid models; adults use regular | Better buoyancy and keeping the jacket in place |
| Special cases | Assign a helper for children and guests with limited mobility | Reduces risk if someone panics or slips |
| Onboard flow | Keep jackets on during movement; secure anchor line away from paths | Prevents entanglement and keeps deck clear |
Step 2 – Stop propulsion, secure the vessel, and establish a safe work area
Stop propulsion by setting the throttle to idle and turning off the engine switch; confirm the ignition is off. If conditions vary, have someone watch the surroundings while you verify the stop. This reduces wake and helps youve assess the surroundings more clearly.
- Secure the vessel: lash both bow and stern lines to stable cleats, and use cradles or fenders to protect the hull. If a dinghy is alongside, secure it within reach to prevent drifting. Run a halyard to a shore point or cleat to keep lines accessible without blocking access to the deck.
- Establish access and a safe work area: clear loose gear, deploy a designated work zone, and mark it with line or fenders so you can stay within the area. Create a home base for tools within the zone, keep your eyes on the wake and winds, and perform an assessment of their impact using the compass bearings to maintain balance and position against changing conditions. Count on your crew for support and communication.
- Coordinate with your crew: count on someone nearby to assist, and ensure everyone knows the plan. If you hear an alarm or conditions shift, pause and reassess the case, then adjust lines or position as needed.
Step 3 – Assess hull condition and identify nearby hazards

Inspect the hull now for cracks, punctures, blisters, or delamination, and double-check seams above and below the waterline. Photograph any irregularities, note the incline of the hull under current, and look for signs of water intrusion that would slow your progress or threaten buoyancy. This critical check must be completed before you move. Be aware: things happen fast in shallow water. That happens when you move without care. If you are expecting a swift refloat, this check keeps you prepared.
Use a handheld light to scan the bow, keel, transom, and fittings; run your hand slowly along the hull to feel for soft spots or flex. If you detect a breach, verify its extent by pressing gently and listening for water seepage. Knowing what you find helps you decide whether to stay put, seek shelter, or start a controlled refloat.
Check nearby hazards: rocks, shoals, reefs, mud banks, and other vessels in the area. Identify many anchorages you could use to wait for a tow or better conditions. Consider inland routes that offer calmer water. Be aware of dodgy fishing gear, nets, lines, and discarded tackle that could snag your hull. These hazards require a careful lookout.
Double-check your plan against the current and wind direction; avoid race lanes and marked race buoys that could disguise hazards. Aim to move toward a safe area without hustling. Keep speed slow and controlled to protect hull integrity and reduce the risk of a sudden surge that could worsen damage. If you see signs of rapid flood or drastic changes, call for help and switch to your handheld radio and navigation aids. thats why you stay calm and follow your safety plan.
Step 4 – Notify authorities and share your exact location
Call the coast guard or local maritime authority immediately using your VHF radio on channel 16 to alert them. Provide your vessel name and call sign, the number aboard, and your current status–aground and not moving. Give exact coordinates (latitude and longitude) to six decimals if possible, plus the nearest landmark to help them lock on. If you have a plotter or a smartphone, share the GPS reading and the fix time, and confirm the message on a working channel, over. Be clear and concise so they can move through their checklists quickly; these details reduce the time they spend locating you and increase your lifetime safety.
If GPS is unreliable, describe your position with bearings from shore, distance to visible marks (buoys, breakwaters, lighthouse), and a quick, eyes on the horizon description of what you see. Use these references to aid planning and to help the guard coordinate a safe approach through the circumstances. Keep the report compact: your position, what you can see, what you cannot, and any changes you observe.
Keep the line open and stay with the vessel if staying aboard remains the safer option. If the situation changes in a sudden move due to a wave or weight shift, report it immediately. If radio contact drops, sound your horn or flash a flare to alert them, carry a spare whistle, and make yourself as visible as possible to oncoming vessels. Stay within the vessel’s limits, use bulkheads and solid handholds to stay stable, and avoid crossing into compartments or fill bilges just to shift weight.
These actions reduce risk, enable a better, faster response, and result in less time in danger for you, protecting your lifetime safety in extreme circumstances. Like any rescue, planning with responders and using precise location details makes a big difference for them and for you.
Step 5 – Plan refloat: use tide, wind, and propulsion; escalate if necessary
Brief the team now and assign roles for refloat. Discuss the action plan and establish who handles lines, who monitors depth, and who communicates with passengers. These good steps keep the operation safe and allow you to move efficiently.
Review tide, line, draft, and below-water conditions. Check the current depth against the boat’s draft and any known sandbanks. If a rising tide will clear the shallow spot within the planned window, prepare for a slow, controlled lift and a careful switch from idle to light propulsion when you have enough depth to break free without pushing the boat onto a ridge.
Plan the approach with wind and propulsion. Align your heading to minimize wave impact and work with the current, not against it. Use light engine power and short bursts to nudge the boat free, keeping the wake light and the hull properly oriented for the lift. If you have a bow thruster or stern drive, run it at low power to adjust the angle without creating drift.
Action items for hardware and lines: attach a sturdy line to a fixed place or cleat, set fenders along the hull, and have a second crew member manage a spare tether. Keep ballast tanks ready to adjust trim, but apply changes gradually to avoid a sudden incline that could harm hull or equipment.
In these cases, discuss with the crew and passengers what to expect. Explain that refloat may require several attempts, and stop if the water is not deep enough or the plan risks damage. If miscalculation seems likely or the tide window closes, escalate to tow or professional assistance and exit the water only when safe.
After you attempt the refloat, review the line setup, verify hull clearance, and confirm there is enough depth around the keel. If the boat settles into a slight incline, adjust ballast slowly and verify that propulsion remains available. When the boat exits the sand and floats freely, secure it, check for damage, and debrief the passengers to ensure everyone stays safe.