

 Top 10 Sights to See from a Boat in New York City">

最高の光と穏やかな海を楽しむには、事前に2時間の午前中のハーバークルーズをご予約ください。. この公式オプションは中央桟橋から出発し、通路の近くにプラットフォームがあるためアクセスが容易で、素早く快適な乗船が可能です。.
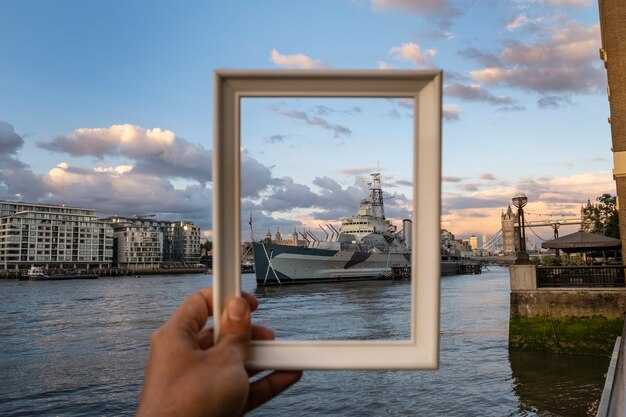
水上からは、3つの異なる視点を得られます。南側には自由の女神とエリス島、金融街に近いロウワーマンハッタンの鉄とガラスでできたスカイライン、そしてイーストリバーを挟んでブルックリンに向かう橋のシルエットです。このルートには、潮流とそよ風によって変化する多様な景色が含まれており、カメラを試して最高の角度を見つけることができます。.
絵画 太陽が昇るにつれて、光の筋がガラス張りのファサードを漂い、ワン・ワールド・トレード・センター、エンパイアステートビルディング、そして新しいタワーを暖かな色合いで染め上げます。クラシックなシルエットがお望みなら、ゴールデンアワーに乗り、西向きに進路を取って、夕焼けの川の色合いを眺めましょう。.
水上で見るべき主なスポットは、(1)リバティ島近くの自由の女神、(2)マンハッタンのバッテリーパーク沿いのスカイライン、(3)ガバナーズ島と港の上にそびえ立つブルックリン橋です。それぞれのスポットで写真撮影のチャンスがあり、一度の旅行で多様な建築様式を楽しめます。.
To maximize value, includes フェリーによっては軽食や飲み物が販売されていますが、乗船前に近くの市場で食べ物を調達することも可能です。軽量ジャケット、小型三脚、ズームレンズを持参すると、島の岸辺のディテールをズームで捉えたり、港全体のワイドショットに切り替えたりできます。.
よりスムーズな体験をご希望の場合は、以下を選択してください。 platform拠点の座席オプションを選択し、北に向かう際は右舷側に座ると、スカイラインの景色がより良く見えます。 process 手順は簡単です。15分前に到着し、公式搭乗ゲートを確認し、その後は安定した風と良好な視界で快適な飛行に備えてください。.
道中、それぞれ異なる雰囲気を持つ3つの個性的な地区をご覧いただけます。その後、ハイキングに出かけて、近くの公園や湾を探索するのも良いでしょう。もっと時間が必要な場合は、チケットを後の出発便に変更し、川岸まで足を延ばして新鮮な空気を吸ったり、美しい夕焼けを眺めたりするのもおすすめです。.
ニューヨークを水上から楽しむ: 鑑賞のヒントと見どころ
夜明けにスタテンアイランド・フェリーに乗って、自由の女神とロウアー・マンハッタンを間近で無料で見よう。所要時間は片道約25分で、ピーク時には約20分間隔で発着する。出発時は右舷側に座って、水面が揺らめく中、トーチが輝き、金融街の尖塔がそびえ立つ様子を眺めよう。.
そこから、エリス島とバッテリーパークに向かって回り込み、ワンワールドトレードセンターの建築的なシルエットと、歴史的なタワー群を捉えましょう。この撮影リストでは、ブルックリン橋のアーチや、スカイラインから覗くウールワースビルの尖塔など、壮大かつ繊細なディテールが混在しています。一つのフレームに複数のランドマークを収めることで、港を挟んだスケール感と連続性が感じられます。.
個人的には、ソニーのミラーレス一眼ボディに24-70mmレンズとコンパクトな一脚をジャケットのポケットに入れています。かさばるコートではなく、ちゃんとしたジャケットです。デッキで一番大きな窓は安定したフレーミングに役立ちますが、船が漂流するので移動した方が良いでしょう。偏光フィルターは太陽光が水面に反射するときに役立ちます。予備のバッテリーと、港湾チケットの領収書は取り出しやすいポケットに入れておきましょう。新しいアングルを見つけるには根気が必要です。レールからレールへのスイープでは、光と色の微妙な変化が明らかになります。.
週末には、観光客と地元の人々が線路沿いで入り混じり、アジアからの旅行者は最高の光を求めて最前列に陣取ることが多いです。水しぶきと照り返しに注意し、朝焼けを背景にした建物のシルエットを探して、レンガとガラスのコントラストを生み出しましょう。彼らは街の進化するスカイラインについて多くの物語を共有してきました。あなたも、後で見返して楽しめる一連の連続写真で、あなた自身の物語を加えてみませんか。.
一日の充実度を最大化するシンプルなプランをご紹介します。まずはフェリーに乗り、その後、ガバナーズ島とルーズベルト島の間を巡るハーバークルーズで、様々な角度や水面の反射を捉えましょう。メインルートから少し外れると、ミッドタウンのタワー群や橋のアーチの穴場的な景色が見えてきます。そうすることで、午後の遅い時間に光が美しく差し込む静かな場所を見つけることができるでしょう。.
ニューヨーク市のウォーターフロントに関するニュースレターに登録して、季節ごとのライトアップや彼らが注目する新しい景色の情報を入手しましょう。混雑が緩和される時間帯や最高の写真撮影の瞬間を教えてくれるので、それに応じてパスの計画や準備ができ、尖塔に一瞬現れる色彩を捉えるために目を光らせることができます。.
川沿いのコースを選ぶと、像を様々なコンテキストで捉え、広角から親密なアングルへと視点を変えることができます。一度の外出でいくつかの物語を語る一連のイメージを作成できるでしょう。像は中心であり続けますが、周囲の建物、建築上の偉業、尖塔、レンガ造りのファサード、ガラスの塔は、通り過ぎるたびに研究したくなる豊かなコンテキストを提供します。.
水面に目を凝らすと、記憶に残る数々の風景が広がり、別の日、異なる光の中で再び訪れることで、その体験はさらに深まります。その魔法の多くは、タイミング、携行する道具、そして視線が完璧な反射や、煙突や尖塔の完璧な対角線と一直線になる瞬間を待つ忍耐に宿っています。.
| ランドマーク | 最適鑑賞場所 | Time Window | Tips |
|---|---|---|---|
| 自由の女神像 | スタテンアイランド・フェリーのデッキ、バッテリーパークからの出発 | Dawn to early morning | 24-70mmレンズ付きのソニー製カメラ、適切なジャケット、最大のデッキ窓、領収書は保管。 |
| ワン ワールド トレード センター & ダウンタウン | 北行きのフェリー航路。ガバナーズ島からの眺望。 | 朝の光 (午前7時~10時) | 右舷側に位置取り。中〜長焦点レンズを使用。反射に注意。 |
| ブルックリン橋と尖塔 | イーストリバーの橋、水上タクシーのルート | Mid-morning to early afternoon | 広角でアーチを捉え、ウールワースビルの尖塔を含める。 |
| エンパイア・ステート・ビルとミッドタウン | LICの桟橋、ルーズベルトアイランド | Late morning | 他のタワーとの構図;レンガとガラスのコントラストを捉えるために露出を調整 |
| ウールワース・ビルディング & フラットアイアン | ロウワー・マンハッタン発フェリー、ガバナーズ島 | Late afternoon | 腕時計のグレア、偏光フィルターが有効、赤レンガの反射 |
| ガバナーズ島スカイライン | ガバナーズ島ドック、港の縁 | Sunset | 安定したデッキでは三脚の使用がおすすめ。長時間露光撮影に。 |
| ルーズベルトアイランド&国連本部 | ルーズベルトアイランドの海岸線;クイーンズ側 | 夕暮れ時のゴールデンアワー | 河の線や尖塔を含む垂直フレーム。光の変化に注目。 |
自由の女神とエリス島:写真撮影のための港の眺望角度
右舷の手すりに広角レンズを取り付け、自由の女神像とエリス島を1つのフレームに収めます。これにより、フェリーがニューヨーク港を航行する際に、両方のランドマークが見える整然としたレイアウトが実現します。.
フェリーのデッキから、反対側の手すりに移動して、二つの角度を見てみましょう。手前には自由の女神、そして後ろにはエリス島が見えます。この二つを組み合わせることで、異なる雰囲気を作り出し、様々なショットを生み出すことができます。光の移り変わりや、様々な状況での見え方を観察してみましょう。.
カメラ機材と設定:手持ちで船の動きに合わせ、ISO 100–400、シャッター速度1/250–1/500、絞りf/8–f/11で細部まで捉える。16–35mmまたは24–70mmのズームレンズで広角と望遠をカバー。太陽が高い場合は、偏光フィルターでグレアをカット。ランドマークに目を配り、公共デッキの混雑やイベントに注意して、無駄なフレームを避け、自由の女神とエリス島の美しい景観を保つ。.
撮影のヒント:早朝か午後の遅い時間が最高の光が得られます。穏やかな水面のリフレクションに注意し、縦構図で高さを強調しましょう。港の雰囲気は天候によって変化します。一日を通して様々なオプションがあるので、ドラマチックなシルエットと細部まで捉えたポートレートの両方を撮影できます。.
帰宅後、デバイスで撮影した写真を見返し、お気に入りの3〜5枚を選んでメディアや公開投稿で共有しましょう。以前にニューヨークシティを訪れたことがある場合、以前とは異なる記憶が蘇るかもしれません。また、フェリーから見た景色がボストンでも見られることに気づくかもしれません。.
ミッドタウンとダウンタウンのスカイライン:イーストリバーとハドソンルートからの最高の構図
Start with Gantry Plaza State Park on the East River for a bold Midtown frame, then shift to Hudson viewpoints to complete the Downtown silhouette. This approach gives you two distinct looks in one journey, with enough room to experiment between spots.
East River route: pick spots that keep Midtown crisp against water and sky, minimizing reflections and crowds. Each location offers a different horizon line, so you can test a quick sequence and choose the look that feels most incredible.
- Gantry Plaza State Park (Long Island City) – wide, straight-on views of the Midtown skyline with the Empire State Building and Chrysler Building aligned along the river. Best at blue hour; bring a phone with a quick zoom and a lightweight tripod if you have one. This outdoor location includes a clear water line and a low foreground, making the shot feel expansive.
- Roosevelt Island South Point – rotate your angle to catch the Queensboro Bridge arc over the water while keeping Midtown towers in frame. It’s a compact look that still feels cinematic, and you can switch to a tighter crop with a longer lens to isolate the tower shapes.
- Battery Park Esplanade and the Ellis Island bend – from here you’ll capture the Downtown cluster with the Statue of Liberty hints in the distance. Check the sunset orientation to ensure the towers aren’t washed out by glare; a polarizer can help if you’re checking light conditions on a busy evening.
Hudson route: for Downtown drama, stand along the riverfront where Hudson Street parks, piers, and greenways align with Lower Manhattan’s spires. This side often yields more dramatic shadows and reflections, so plan a flexible sequence and note weather checks in advance.
- Chelsea Piers and Hudson River Park overlooks – frame the skyline with the water as a mirror and adjust your angle to include the core Downtown silhouette. A longer lens helps compress the skyline while a wide angle captures the breadth of the river.
- Riverside Park South (West 72nd Street to 96th Street) – a steadier, more residential backdrop, ideal for calmer compositions that still highlight Midtown’s height. Look for lines from the trees or railings to guide the eye toward One World and the spires above.
- North Cove Marina and Battery Park City Esplanade – these spots offer intimate water-level shots of the Downtown cluster, with Ellis Island flickers and the harbor lights enhancing depth. If you’re packing light, a compact telephoto can pull Downtown details without crowding the frame.
Tips to sharpen framing across both routes: arrive early to secure a cleaner foreground, and use a low ISO to reduce noise in dusk shots. Have a backup plan for cloud cover: a cloudy sky can produce softer silhouettes, while a clear sky gives crisp geometry of the towers. Tourists often mention the thrill of comparing NYC frames to philly, boston, or washington; use that perspective to judge when a given angle feels most iconic.
Practical packing and on-site approach: bring enough memory space and a charged phone for quick checks, emails, and sharing frames with teammates. If you’re a photographer or traveler, keep a lightweight tripod and a backup battery in your outdoor location kit. Checking the wind and river spray helps you protect equipment and your clothes, especially near Ellis Island vantage points. For a well-rounded shoot, include both a wide and a telephoto lens and plan a 2-3 hour window to cover blue hour transitions.
Recommended sequence for a smooth session: start at Gantry Plaza State Park to lock in the East River framing, then move to Chelsea Piers or Riverside Park to capture the Hudson side; finish at Battery Park Esplanade for night lights. This approach suits a compact itinerary and helps keep you on track with your photos as you juggle light, crowds, and reflections.
Phone-ready note: many frames at these spots work well with a quick shot from your phone as you scout compositions, then switch to a dedicated camera for higher quality shots. The resulting look will feel incredibly cinematic, and you’ll come away with a catalog of frames that tourists and locals alike will envy. If you’re emailing a travel round-up, you can include a short lineup of the best spots and a couple of packing tips to help readers plan their own outdoor shoots around Midtown and Downtown.
Iconic Bridges from the Water: Brooklyn, Manhattan, and Williamsburg bridge viewpoints
Take the Brooklyn Bridge water view at dawn; this destination offers highlights that appear differently with each minute of light. The boat’s wake fills the lower frame, and the arches glow beautifully as the skyline wakes up. When you share the moment with everyone on board, tears of awe might appear in some eyes.
Brooklyn Bridge, from the water, delivers a quartet of views: the stone arches, the crisscrossing cables, the boats cutting the river, and the skyline rising behind. For packing, bring a versatile lens (24-70mm) to cover both wide scenes and tight portraits; with each frame you capture the place and its highlights, and you’ll find the shots come quickly when the light holds.
Manhattan Bridge from the water creates a different story: the steel trusses form a confident grid as you head toward the Manhattan shoreline. The entrance on the east side of Canal Street marks a perfect moment to switch shots; check online to time your approach and listen to the staff for the best vantage.
Williamsburg Bridge offers a longer, airy arc and views toward Queens; the riverlight here often renders the towers as if painted, with the texture of cables resembling paintings. From the water, you’ll notice links between the spans and the city blocks–an idea anyone who loves urban geometry will appreciate. If you’re cruising with friends and a craving for dramatic lines, this is the place.
Practical tips to maximize every voyage: begin early to avoid crowds; bring light packing, a map saved online, and a compact tripod if you shoot long exposures on the water. If you stay in the city for a few days, citypass can add value to boat tours; canada visitors often join these tours and stay near the pier for quick transfers. Also watch the entrance times, ask the crew about the best angles, and take a few minutes to walk along the rails and halls of the ship for steady, sweeping lines.
Islands, Parks, and Waterfronts: Governors Island, Roosevelt Island, and Battery Park glimpses
Begin with Governors Island for the closest harbor light, then weave to Roosevelt Island and finish at Battery Park for sunset reflections.
-
Governors Island
Take the Manhattan ferry from Whitehall Terminal; the ride is about 7–12 minutes, and the views arrive quickly. You’ll find room to roam on car-free paths, beautifully framed by water and skyline sights that remind you this world is reachable in a few turns of the wheel. If you plan a pocket stop, carry a light jacket and an apple for a quick snack; you’ll feel well prepared no matter the breeze.
What to see, in short: The Hills overlook for sightlines toward Lower Manhattan, while Fort Jay and Castle Williams offer a double dose of history and photo angles. Nolan Park and Colonels Row host rotating art and small collections from local artists, a reminder that culture travels with the island. A good book or map helps you choose routes without losing time.
Photo and route ideas: start near the ferry landing, walk toward the Hills for elevated harbor views, then circle toward Historic District pockets–every corner offers a different frame for the eyes. If you’re bringing someone, plan a loop that ends at the water’s edge to mirror the city’s reflected light in the harbor.
- Practical notes: check the receipt when you rent bikes; return times matter if you’re coordinating trains back to the main city. The island’s open-air feel makes it easy to create a personal itinerary that fits your pace.
- Nearby signals: Columbia-area references and distant skyline glints connect to the country’s coastal story and its ongoing dialogue with art, history, and travel.
-
Roosevelt Island
Cross to Roosevelt Island via the iconic tram–the cabin travels from 59th Street to the island in about four minutes, and the mirrored walls provide dynamic sightlines for your first glance at Midtown’s towers. The F train stops at Roosevelt Island, offering a quick alternative route if you’re hopping between neighborhoods; the ride is straightforward, and the area feels calm after NYC’s bustle.
Key spots and moods: Four Freedoms Park at the southern tip anchors a quiet, reflective area where the island’s history blends with modern views. The Octagon, a historic building with a circular, glass-willed interior, adds a touch of mystery and a nice backdrop for photos. Southpoint Park frames the skyline with a broad, open stage for conversations, and a stroll along the waterfront delivers vistas across the river to Queens and the city.
Gear up for a relaxed, practical visit: the tram cabins and the public transit links make it easy to plan a compact loop that fits anyone’s schedule. ist 音 источник: NYC Parks and Roosevelt Island Operating Corp pages provide official schedules and maps. The area offers a clear sense of how the city projects itself across water, a reminder that the country’s diverse neighborhoods all share a single horizon. If you’re curious about how the city connects, you’ll notice signals from the columbia campus nearby catching the afternoon light; even if you aren’t visiting Columbia directly, the view echoes a wider world and its studies.
-
Battery Park glimpses
Battery Park sits at the southern tip of Manhattan, a short ferry ride from Liberty Island and Ellis Island. You’ll feel the pulse of history here–Ellis Island’s stories of immigration, victims and triumphs, are etched into the water’s edge, and the real-world receipt of that history is the everyday buzz of ferries and visitors. The Esplanade lets you walk with the harbor lines, and Castle Clinton National Monument adds a dramatic, compact stop before you continue.
What to focus on for vivid views: the Statue of Liberty rises on the horizon, the harbor glimmers with ships, and the lighting around Bowling Green and the Seaglass Carousel adds a playful glow. If you’re short on time, prioritize the Battery Park waterfront path for quick photos and the Liberty Island ferry visibility, then swing toward Ellis Island for a compact, meaningful loop.
Tips that make the visit smoother: catch a ferry from Battery Park for Liberty Island or Ellis Island; the ride is typically 15–20 minutes each way, and you’ll want to keep a pocket guide or book in case you want to pause for a moment and reflect. Bring water and a light snack; a small apple works nicely as a convenient option. The area has a well’ layered history–Castle Clinton remembers the island’s role as a first defense and a storehouse for arrivals; the current esplanade offers a modern, well-maintained space where anyone can enjoy the views.
источник: official NYC Parks maps and ferry schedules provide current details for all three locations, helping you plan the sequence that best fits your day.
Timing, Seating, and Weather: How to maximize comfort and light on a boat tour
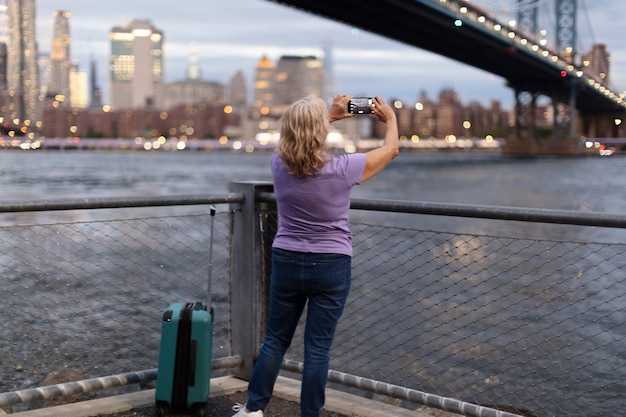
Book a late-afternoon sail around golden hour (roughly 45 minutes before sunset) and choose a forward, port-side seat on the open deck. This live light makes nycs skyline glow and the water turn a white sheen, beautifully reflecting the dark silhouettes of the bridges. Thats why this timing works for personal photography; a traveling photographer can line up the camera to catch the reflections on the islands, and the ship becomes a moving museum. The источник confirms that light at this angle remains soft and flattering, and booking via omio helps coordinate timing.
Seating matters more than you expect. Favor open-deck chairs along the rail, ideally midships where you can turn with the boat’s drift toward Battery Park and Governors Island. If craving flexibility, pick a bench with a quick turn so you can switch to a sunny pose or a shaded corner without missing a beat. The harbor vibe feels like a village afloat, and the mirrors on the rails can bounce light in cool ways that rivals any city museum.
Weather governs the scene. Check the forecast and dress in layers; a light windbreaker and hat with a brim shield you from spray and glare. On bright days, white hulls and glassy water produce strong reflections, so sunglasses and sunscreen are a must; darker jackets help you reduce glare for camera work. Sometimes a strong cross breeze makes the scene feel Boston-like, and you may need to adjust your position; keep moving slowly to stay comfortable and avoid rush shots.
Light and camera tips. できるだけ太陽を背にして撮影し、都市の塔のディテールを鮮明に保ちましょう。より長いレンズを使用すると、船が漂流しながらも建造物を際立たせることができます。コンパクトなカメラやHDRモードを搭載した携帯電話を持参しましょう。船が傾いても、鮮明な写真を撮ることができます。ミラーを賢く利用してアングルをプレビューし、最高の瞬間を選ぶために素早くシーケンスを撮影するのを恐れないでください。.
快適性と光を最大限に高めるための5つの簡単なステップ. 1) 人混みを避けて早めに到着して搭乗する; 2) 風対策に重ね着をする; 3) 太陽光の角度に合った席に座る; 4) レンズの映り込みを防ぐためにマイクロファイバークロスを手元に置いておく; 5) ランドマークを通過する際に、露出とホワイトバランスをテストする。常に仲間と一緒に旅することで、アイデアに基づいたフィードバックを得られ、生きている記憶のような、より個人的なショットを捉えることができます。.
これらの手順を踏むことで、ライバルに匹敵しない象徴的なニューヨークの風景を捉える準備が整い、いつものツアーを素晴らしく、カメラフレンドリーな体験へと変貌させることができます。.