

 Top 10 Must-Have Boat Dock Accessories for Boaters – Essential Gear for Safer, Easier Docking">

Recommendation: 耐候性Wi-Fiルーターをドックに取り付け、専用回路から電源を供給することで、天候の監視、アラートの受信、ドックサイドデータのストリーミングを中断なく行えるようにします。.
ボート愛好家必携のドックアクセサリー10選は、安全性、使いやすさ、信頼性をカバーします。まずは、クルーのための高さのある滑り止めシート、スティック式の乗船補助具、そして長いシーズンに耐える頑丈な構造から。これに、高めのクリートと高品質のフェンダーを組み合わせることで、係留中の船舶を保護します。.
ゾーンごとにレイアウトを計画しましょう。電源ハブは端の近くに配置し、実行 耐候性チャネルを通してケーブルを通す, 、ドックメディア用のHDMIスイッチを取り付けること。計画には、信頼性の高いケーブルとアクセサリを提供するブランドからの長期的なアップグレードを含める必要があります。.
商標と品質は重要です。適切なIP等級、ステンレス製金具、および耐紫外線性を備えた船舶グレードの素材を選択してください。優れた保証とサービスを確保しながら、偽造品を避けるために、パッケージに公式商標を探してください。.
安全と通信:乗組員間の連携のためにヘッドセットとリモコンを設置し、夕暮れ時のドッキング用に防水照明キットを取り付けます。コンパクトなGFCIコンセントは、濡れたドックでの電源接続を保護します。.
メンテナンスとトラブルシューティング:ケーブルは月次で点検し、摩耗したコネクタは交換、ドックのHDMI接続が清潔であることを確認してください。修理を簡単にするため、高品質なHDMIケーブルと色分けされたコネクタを使用してください。典型的な故障モードと交換時期に関するメモを保管してください。.
学習資料:YouTube動画やdaysgoogleのスレッドをチェックしてオファーを比較し、ユーザーのヒントを読み、装備がテイラーや船員のニーズに合っていることを確認します。シンプルな計画とチェックリストを作成することで、作業をスムーズに進め、順調に進めることができます。.
ボート愛好家必携のボートドックアクセサリー トップ10:より安全で簡単なドッキング – 丈夫なクリート
耐久性に優れ、316ステンレス鋼製のスルーボルト式クリートに勝るものはありません。滑らかでリアルなエッジと握りやすい頑丈なハンドルを備えた二股のデザインを選びましょう。あらゆる接岸角度に対応できるよう、ドックの同じ側に8〜12インチの間隔を空けて2つのクリートを取り付け、船首または船尾のどちらからでも素早く固定できるようにします。この設置により、スプレー、引き波、夏の太陽に耐え、すべての係留時にボートを安全に制御できます。.
2) カスタマイズ可能なドックライン:長さをカスタマイズし、色分けされた端部、あらかじめ結ばれた結び目(ボーライン、クリートヒッチ)で、すぐに使えるラインを準備しましょう。常に耐候性ナイロンまたはポリエステルを選び、予備のコイルは店またはドックボックスの防水容器に保管してください。これにより、係留時間が短縮され、すべての乗組員にとってドッキングがより安全になります。.
3) フェンダーとバンパー: 側面に取り付けられたフェンダーは、ボートが杭に向かって漂流するときに船体を保護します。ボートとドックの間に、本物のようなクッションを作る高密度フォーム製の丸型フェンダーを使用してください。荒れた水中では、フェンダーが保護の場を作り出し、船体の損傷を防ぎながら、リラックスして乗客と会話を楽しむことができます。.
4) 安全ラダー:頑丈なドックラダー(理想的にはステンレス製で、幅広の踏み板とゴム足付き)は、乗船と下船をより安全にします。ボートと岸のどちらからも手が届きやすい場所に設置し、夏場の水泳休憩に備えてすぐに使えるようにしておきましょう。ラダーのハンドルは滑りにくく、握りやすいものが良いでしょう。また、素早く収納できるよう、クイックリリースマウントがあると便利です。.
5) 滑り止めデッキとマット:クリートと端の間の滑り止めデッキは、デッキが濡れているときの滑りを軽減します。紫外線に強く、ずれにくく、カビが生えにくいマットを選びましょう。これにより、誰もが安定し、夏の暑い日や長時間の航海の後の停泊が、すべてのユーザーにとってより楽しいものになります。.
6) クリートカバーと紫外線対策:取り外し可能なカバーで、クリートを太陽光や塩分から保護します。カスタマイズ可能な色や、ハードウェアのしっかりとした商標を探し、ラインに引っかからないぴったりとしたフィット感を確認してください。カバーは、機器の寿命を延ばし、ドックを整頓された状態に保ち、次のパドラーを迎える準備をします。.
7) 夜間ドッキング用ドック照明:耐候性LED照明器具を縁に沿って設置して、離れた場所からラインやクリートを見えるようにします。迅速な照明により、乗組員は遅れて到着した後でも素早く係留でき、良好な照明はラインの取り扱いミスを減らします。オンラインでヒントを共有する場合は、LinkedInで他のボート愛好家と照明のセットアップについてチャットできます。.
8) オンデッキストレージ:手袋、予備のシャックル、フェンダーなどを整理してアクセスしやすくするための、コンパクトで耐水性の収納ボックスです。 機器を専用の場所に保管することで、散らかりを防ぎ、ボートとドック間の忙しい移動時の時間を節約できます。 このシンプルな追加機能により、すべてのドッキングセッションが向上し、初心者も自信を持って操作できます。.
9) クイックリリースハードウェア:荒れた状況でラインを外せるように、クリートフックやクイックリリースシャックルを検討してください。制御された荷重と耐腐食性についてテストされたモデルを選び、実際の状況に出る前に穏やかな水域でテストしてください。どのオプションがあなたのドックに合うかお悩みですか?まずは耐久性のあるクリートと標準的な取り付けから始めましょう。.
10) メンテナンスキットとガイダンスの源:錆取り剤、潤滑剤、ネジロック剤、ラミネート加工されたチェックリストを含む、小型のドックメンテナンスキットを用意してください。月に一度、クリート、はしご、ロープ、フェンダーを点検し、結果を乗組員のために記録します。ベストプラクティスのソースと、あなたの進捗状況をLinkedInで共有するというメモは、ボートコミュニティが共に学び、改善するのに役立ちます。.
セクション計画:安全で実用的なドッキングのためのコアアイテム
ドックの縁に、耐候性 LED 照明キットを内蔵設置し、冒険や夜間の到着時の誘導用にジュネーブスタイルの支柱を取り付けます。ドックにホリ配置を採用し、推測や読み間違いを減らし、正確なドッキングを可能にします。.
搭乗エリアの近くに、ライン、予備のフェンダー、手袋、小型のライトコントローラーなどを収納できる専用のアクセサリーボックスを保管してください。この保管されたセットアップは通常邪魔にならず、操船時のドッキングがより便利になります。.
基本キットに追加できる4つのアイテムプランは、照明、収納、フェンダー/クリート、およびシンプルな接続オプションをカバーします。各アイテムは、塩、太陽、頻繁な取り扱いに耐えるように作られています。.
腐食や摩耗に強いハードウェアを選びましょう。ステンレス製のクリート、耐UVフェンダー、耐候性スイッチなどです。これにより、ラインのねじれ、誤読、およびドックとの接触時の不必要な動きを回避できます。適切な部品を今取り付けることで、後々の手間を省けます。.
ブロードバンドハブを統合して、気象警報、ファームウェアアップデート、リモート診断のための接続を維持します。ハブは可能な限り乾燥した場所に設置し、ストレージを掘り起こさずにオンラインでシステムをアップデートできるようにしてください。.
最後に、オンラインチェックリストを作成し、共有サイトに投稿して共同作業を行いましょう。仲間のボート乗りからのフィードバックを集めることで、計画を改善し、不慣れなドックに停泊する際に全員の足並みを揃えることができます。.
| コアアイテム | Why it matters | Recommended specs |
|---|---|---|
| LED照明キット (LED) | 夜間におけるエッジの視認性、ガイドのドッキングアプローチ | 4~6mストリップ、IP65、300~600ルーメン/m |
| アクセサリー収納ボックス | ライン、フェンダー、工具を整理して保管 | 45〜60L、防水、ベンチ下設置 |
| フェンダー + ジュネーブポスト | 衝撃吸収とアライメント制御 | 6-8個のフェンダー、クイックリリースライン |
| クリートとタイオフキット | 信頼性の高いドッキングポイント、たるみを軽減 | 船舶用ステンレス、2〜4クリート |
| ブロードバンド/コミュニケーションハブ | 天気アラート、アプリ同期、メンテナンスリマインダー | ミニルーター、5 GHz、気象センサー対応 |
耐久性のあるクリート:選択、取り付け、および耐荷重
信頼できるドッキングには、コレ:6インチの316ステンレススチール製クリートを裏板で貫通ボルト留めして使用。荷重を分散し、塩害に強く、ラインがデッキを擦るのを防ぎ、ボート遊びや旅行での係留をよりスムーズかつ安全にします。.
選定と設置の指針となる主な要素:
- 材質と仕上げ: 塩分、湿度、水しぶきによる腐食に強い、マリングレード仕上げの316ステンレス鋼を選択してください。真水や海水に触れるとすぐに腐食する、通常の鋼鉄や安価なメッキ仕上げは避けてください。.
- サイズと形状:4~6インチのクリートはほとんどの船舶に適しています。6インチのクリートは25~40フィートのボートで一般的ですが、大型のボートでは8インチのクリートが適している場合があります。お好みの選択は、ロープの直径や、ドッキング時に予想される一般的な荷重によって異なる場合があります。.
- 耐荷重:メーカーはサイズや取り付け方法によって異なる使用荷重を公表しています。一般的なサイズの場合、おおよそ1,500〜4,000ポンド/クリートの動的定格を見込んでください。大型艇や荒れた状況下では、複数のクリートを使用してください。広告だけに頼らず、仕様書で正確なWLL(使用荷重)をご確認ください。.
- 取り付け方法:グラスファイバーまたは木製のデッキでは、裏板付きのボルト締めクリートが必須です。これにより、荷重が分散され、デッキの完全性が保護されます。高負荷のドック、特に荒れた海や風の強い日には、表面に取り付けられたネジのみを使用することは避けてください。.
- Internal features and construction: look for internal ribs or a robust shank with an integral, corrosion-resistant fastener system. Some models use an internal thread or ribbing to prevent wobble and extend service life, which helps when navigating gusty winds or shifting loads during mooring.
- Brand and compatibility: consider respected lines from Shoremaster or Taylor Made (taylor-made) for proven performance and broad support. You can compare these with other brands to fit your preferences and budget, including short go-to options that fit tight spaces or limited deck area.
- Line compatibility and eye opening: ensure the cleat’s eye or socket can accommodate your typical line diameter (1/2″–3/4″ lines are common). If you regularly use cables or braided lines, verify the cleat opening and groove design won’t pinch or fray the line during docking, especially when the flight of lines is long and the path must stay clean.
- Maintenance: select cleats with smooth, easy-to-clean surfaces and slotted mounting holes to simplify cleaning and inspection after days or weeks of boating. Regular inspection helps catch wear before it affects performance.
- Deck compatibility and installation path: assess deck thickness and create a solid path for mounting–use proper backing plates and sealant to prevent water intrusion. If your deck has limits on thickness, roll in a thinner backing plate or a specialized repair plate to maintain strength without compromising seal.
- Safety and aesthetics: choose finishes that won’t mar the deck or glare in bright sun; a brushed finish often hides scuff marks while keeping a tidy appearance for your favorite boat.
Mounting and layout recommendations to maximize safety and ease of use:
- Plan spacing: place bow and stern cleats so lines can form a clean, even path to dock lines. For most boats, spacing cleats about 5–7 feet apart along the beam supports balanced loading and easier maneuvering when docking in tight slips.
- Backer and sealant: install backing plates on interior structure or solid core to spread load; use marine-grade polyurethane sealant at all mounting holes to keep water out of the deck and reduce internal corrosion.
- Drill and install: mark holes, pre-drill with the correct bit size, and install through-bolts with washers and lock nuts. Tighten to manufacturer torque specs to prevent loosening under load.
- Alignment: align cleats horizontally (hori) to ensure lines sit neatly and don’t snag when docking, especially if you regularly handle crosswind berthing or maneuvering in tight spaces.
- Line management: ensure the cleats’ eye openings accommodate your lines without excessive bending. If needed, pre-fit lines to confirm fit and adjust layout before final mounting.
- Testing: after install, dock in calm water to verify line handling. Then test under light wind and current to confirm even load distribution across cleats and absence of line chafe.
Load capacity and placement guidance to handle real-life docking scenarios:
- Use multiple cleats for larger boats or frequent heavy mooring. For boats in the 25–40 ft range, two 6-inch cleats on the bow and one on the stern often cover typical loads; larger vessels may require four cleats or more.
- Distribute tension: tie lines so each cleat shares load; avoid concentrating all tension on a single point. This reduces deck stress and extends cleat life.
- Weather considerations: in exposed marinas or strong currents, add an extra cleat or upgrade to a larger size to maintain control during docking and departures, especially when you want a short, enjoyable trip without surprises.
- Deck integrity: if deck flex or core damage is suspected, reinforce with a marine-grade plate and consult a marine contractor. A damaged deck can undermine even high-end cleats.
- Path and movement: ensure lines don’t travel over sharp edges or hardware that could abrade them during docking or when the boat pivots. A tidy line path makes navigating your mooring easier and safer.
- Special cases: for boats with limited deck space, consider taylor-made compact cleats or Shoremaster options that fit tighter footprints without sacrificing load capacity or reliability.
Maintenance and safety reminders:
- Regularly clean cleats and mounting areas to remove salt, algae, and fuel residues that can corrode hardware and degrade grip.
- Inspect fasteners for looseness after each season or heavy use; re-torque to spec if needed and replace worn bolts or backing plates promptly.
- Keep internal deck surfaces dry and sealant intact to prevent water intrusion that can undermine mounting integrity over time.
- Review your choice of cleats with your crew’s preferences and boating style. If you frequently handle numerous lines or cables, a go-to setup with multiple cleats and clean line management will make trips more comfortable and safer.
- When researching and planning, look beyond advertisements; consult reviews from real users on daysgoogle and compare features and customer feedback to narrow choices (like shoremaster and taylor-made options) that match your path and flight of docking needs.
Sturdy Dock Lines and Tie-Down Systems: Material, Diameter, and Knots
Start with 3/8 to 1/2 inch braided nylon or polyester dock lines as your baseline. For smaller craft, 5/16 inch can handle lighter loads; larger boats benefit from 1/2 inch. Nylon provides cushion by absorbing shock, while polyester minimizes stretch and resists UV; blends or UHMWPE cores deliver higher strength with manageable weight. Your preferences guide color and handling, but respect load ratings and available length. Lines built into your mooring kit ensure a clean, integrated setup from reputable manufacturers to provide consistent strength and reliable handling.
Material performance and diameter specifics: choose materials based on load, sun exposure, and friction with rails and pilings. For 3/8 inch lines, typical working load limits range roughly 800–1,200 pounds; 1/2 inch lines commonly run around 1,400–2,000 pounds. Use a safety factor of at least 5:1 in marine mooring, especially in gusty conditions. Nylon’s stretch cushions shock; polyester holds shape and resists abrasion; polypropylene floats but degrades faster under sunlight; UHMWPE lines offer high strength in a small diameter but can be stiffer and pricier. For a balanced option on many builds, a 1/2 inch polyester line with a nylon core provides good handle and durability. Check the packaging boxes for exact WLL and diameter, and ensure the line is built for marine use with a braided cover and tight core. Think of the system as the hdmi cable of docking–direct, clean, and able to transfer load directly without flare.
Knots and tying: use a bowline to form a fixed eye for cleats or rails; a figure-eight follow-through secures the line end with a stopper knot; a cleat hitch provides a secure hold on mooring cleats; a rolling hitch or clove hitch helps when tying to rails or posts; finish with a couple of half-hitches to lock position. Keep the eyes visible and check that knots don’t slip under load. Understand how each knot behaves under load to avoid surprises. For adjustable lines, the taut-line hitch lets you change tension on the fly without tying a new knot.
Tie-down systems and setup: spring lines are important on larger boats–run forward and aft spring lines to dock cleats to limit fore-aft motion. When conditions demand, add extra lines and use chafe guards or rope sleeves where lines contact rails or pilings. There are scenarios where extra lines help in rough weather. Store lines in a dedicated box or bag, labeled by diameter and length, and keep spare sets ready for storms. Be cautious if you see advertising claims about “one big fix”; rely on accreditation and independent tests rather than hype. Use video guides from a recognized boating school to verify technique, compare against other sailors, and build muscle memory before entering real conditions. If you keep a grill on deck, route lines away from heat and ensure handles don’t snag or melt. Instructions from the manufacturer help you align the setup with their recommendations.
Maintenance and inspection: routinely inspect lines for fray or core exposure and replace at the first sign of wear. Store lines in a dry, shaded area away from direct sun to extend life, and rotate sets to balance wear. Label each set with diameter, length, and recommended application; review manufacturer boxes for service life and replacement intervals. Lines built with a reinforced sheath and robust core stand up to repeated docking cycles; maintain an extra set for emergencies, and track results with simple, statistical checks on failure rates across seasons. In practice, that data helps you decide when to retire a line and what to upgrade next.
Protective Fenders and Padding: Sizing, Positioning, and Maintenance
Recommendation: use weather-resistant, air-filled fenders with stainless hardware and padding along rails to make every docking safer, with lightning-fast deployment and predictable protection.
Sizing guidance for small boats (up to 20 ft / 6 m): select 4–6 inch diameter fenders, 24–30 inches long, mounted at mid-rail height so contact is centered on the hull. Place two fenders per side at the bow and one midship for balance.
Sizing guidance for medium boats (21–30 ft / 6.5–9 m): choose 6–9 inch diameter fenders, 36–48 inches long. Use at least two per side near the bow and stern plus one midship to cover flared hull sections and rub rails more effectively.
Sizing guidance for larger boats (31–45 ft / 9–14 m and above): opt for 12–16 inch diameter fenders, 4–6 ft long. Add fenders at the bow, quarters, and midships, ensuring symmetrical protection along both rails; consider 18 inch diameter for very wide beam vessels.
Positioning: align fenders so the contact point sits near the hull’s widest point and away from cleats or lines. Attach fenders to rails with proven lines or quick-release ties to allow rapid adjustment during approach and depart from the dock. Use chafing gear where fender covers contact surfaces, and keep fenders centered on each rail to minimize hull indentations; this center alignment reduces bounce and distributes impact evenly.
Padding: wrap rub rails with 1/2 to 1 inch of closed-cell padding or EVA foam plus a marine-grade vinyl cover. Ensure padding is weather-resistant, securely fastened with stainless straps or adhesive, and free of gaps where hull skin could snag. Padding should extend from bow to stern high-contact zones, especially around corners and cleats, to dampen abrupt contact at every docking event.
Maintenance: check inflation and position weekly; verify that seams are intact and covers hold under sun exposure. Inflate to manufacturer-specified pressure for your fender size (do not exceed the max rating printed on the fender). Clean with fresh water and a mild detergent; avoid petroleum-based cleaners that degrade vinyl. Rotate positions monthly to prevent permanent hull indentations and replace any fender showing cracks, tears, or loss of buoyancy. Inspect padding for compression wear and re-cover or replace when padding layers separate from rails.
Operational tips: catalog and gadget-conscious boaters keep a dedicated spare set of fenders and padding in the center storage area, ready for visits to docks or marinas. Use yearlinkedin-tagged listings to compare models featuring reinforced seams and weather-resistant materials, and select a package with stainless fasteners for corrosion resistance. A simple, user-friendly system with shoulder-high fenders is convenient for every harbor, ensuring a safer docking experience as you rate the overall protection. Also, consider a compact dock center toolkit and a small player for quick on-site adjustments during every boater visit to the slip.
Deck Lighting and Electrical Safety: Visibility, Power Management, and Weatherproofing
Install a dedicated, weatherproof LED dock lighting kit with an IP66+ rating and a separate switched circuit at the rails for quick, reliable visibility. Use marine-grade connectors and seals to keep connections dry and corrosion-free, and position the control point where you can reach it from the board or the dock.
Where to position lighting matters. Place fixtures along surfaces and vertical posts to illuminate the boarding area and the fenders without glare on the water. Keep lights low to the deck to reduce reflections on wet surfaces, and target about 3–5 lux on walking zones and roughly 10 lux at the entry point to guide steps safely. Use remotes to adjust brightness from the dock or the boat, and label each area for easy management during a breeze or a changing tide.
Power management starts with a realistic plan. Tie lighting into a dedicated, marine-grade control system that stays separate from other onboard systems. This setup uses a compact charging area for gear supplies and monitors load with a simple watt-meter. Run a dedicated circuit with GFCI protection, wired through a weatherproof junction box, and separate high-load devices from sensitive electronics. For control, use remotes or a sony dualshock–style controller to adjust lights without leaning over wet surfaces, and track power on a site map to prevent overloading during long-term stays.
Weatherproofing protects performance. Enclosures must be sealed with gaskets; route cables through glands; use stainless mounting hardware; ensure mounting height above splash zones; use drip loops and cable management to keep wires clear of foot traffic and rails. Inspect seals annually and replace worn gaskets to maintain reliability.
Maintenance and safety Keep a compact area of supplies nearby–fenders, extra grommets, silicone sealant, spare screws. Regularly inspect mounting surfaces, rails, and mounting screws for corrosion. A quick monthly visual check reduces risk. Statistical data from manufacturers show that neglecting seals increases water ingress and short circuits; replace gaskets promptly and test the ground-fault circuit every season.
どこから始めればいいか迷っていますか?まずは照明から始め、次に電源を確保し、防水対策を施し、ドック周辺や浮体構造物上のニーズの拡大に応じて徐々に機器を追加していく計画を立てましょう。スマートなレイアウトであれば、雑然とすることなく拡張を追跡でき、カロライナの潮汐や沿岸での作業に最適です。.
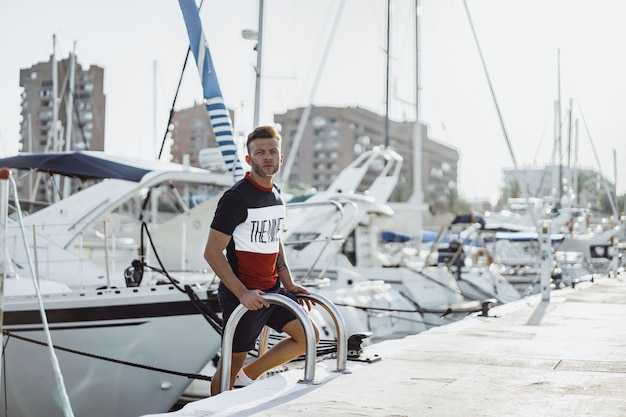
搭乗補助具:はしご、ステップ、および安全なアクセス方法
幅広で滑りにくいステップと、デッキと一直線になる最上段のステップを備えた、頑丈な伸縮式はしごを取り付けます。ワイヤーストラップでクリートまたはレールに固定し、ボートが揺れる際のずれに対応できるよう、少なくとも250kg(550ポンド)のモデルを選択すると良いでしょう。はしごの下部がドック上で水平になるように設置し、水面からデッキまで短く安定した経路を作ります。船体沿いにフェンダーを、ドックにバンパーを取り付け、接触を緩和し、はしごがボートと一直線になるようにします。乗船の準備エリアを屋外に設け、必要な物資、タオル、食事、ドライバッグなどを手元に用意しておきましょう。そうすることで、ミスを減らし、強い方の脚から踏み出し、ボートに乗り込む動作がスムーズになります。.
安全なアクセスを心がけましょう。常に3点支持を保ち、ドックに正対し、手すりやグラブラインを使って安定を確保してください。ドックの高さが異なる場合は、長さを調整できる梯子を選び、手を伸ばしすぎなくても届くように上部を固定してください。夕暮れ時には、防水ヘッドライトを追加するか、Wi-Fiビデオフィードを使って後でテクニックを確認しましょう。通路にはロープ、コード、ギアなどを置かず、水面からデッキまでの経路が短く、障害物がないようにしましょう。ウォータースポーツを楽しむ日は、小さな救急箱と軽食を近くに保管し、アクティビティの間中、集中力を維持できるようにしましょう。.
ドックのモデル選択は、伸縮式、ヒンジ式、固定式の3つの主要なタイプに分類されます。ステップの耐荷重性、耐腐食性、グリップ品質を比較し、レール、クリート、またはポストへの取り付けに関する好みに合った設計を選択してください。コンパクトなロールアウト式ラダーは、屋外収納コレクションに最適で、フェンダー、バンパー、その他の用品を1か所にまとめて保管できます。ハードウェアは毎月点検してください。monthlinkedinをリマインダーとして使用して、ヒンジ、ストラップ、アンカーを確認できます。水からデッキへの搭乗は、滑りのリスクを軽減するために、スムーズな3つの動きで行う必要があります。.