

 The Ultimate Boat Storage Guide – Expert Tips for Dry Dock, Winterizing, and Maintenance">

Start with shrink-wrapping for off-season protection to dramatically reduce exposure to the elements. A properly fitted wrap blocks rain, dust, and sun while venting moisture to prevent mold inside lockers and bilge spaces. This method works well in both dry-dock facilities and marina storage, keeping lines, fenders, and varnish protected during long stints. If you rent a berth, confirm that the facility supports winter workflows, offers straightforward access, and has a clear location plan for periodic checks.
For surfaces and systems, add a protective layer through apply coatings and proper winterizing steps. typically, technicians drain the water system, flush lines, and seal through mechanical checks to prevent corrosion. Use a marine varnish on exterior wood, and fit a uv-resistant cover to guard against sun exposure. This approach eliminates wear on varnish and deck hardware while keeping moisture out of interior compartments.
During storage, schedule routine checks to catch mechanical issues before they escalate. If you rent a berth, coordinate monthly inspections with the yard manager to verify that fenders, vents, and bilge pumps stay functional. Inspect for salt buildup on through-hulls and ensure hull clearances align with the location’s climate and elements. Keep records of battery state of charge, fuel stabilizer levels, and oil changes; this more data helps plan mid-season adjustments and reduces surprises when you revive the boat.
For luxury boats, consult a storage facility that emphasizes airflow and low humidity. A well-chosen location reduces the risk of mildew and corrosion, while a targeted maintenance routine keeps mechanical systems ready for spring launch. When you wrap, use shrink-wrapping with breathable vents, and schedule seasonal re-tightening to maintain a tight seal without stressing deck hardware, avoiding gaps in the wrap and checking that the wrap works with ventilation to minimize condensation.
Keep a simple, action-oriented checklist: shrink-wrapping inspection, oil and fuel system checks, battery health, and hull surface care with varnish touch-ups if you notice wear. With these steps, you extend the life of your craft and simplify spring commissioning, turning storage into a routine that protects value, rather than a task you dread at the end of the season.
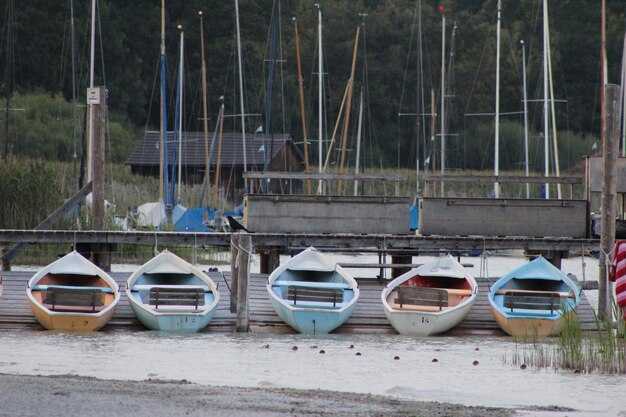
Boat Storage Guide

Choose a high-accessibility storage site with wide aisles and covered doors; it provides easy access for personnel to inspect equipment and keeps boats stored securely during the off-season, making routine maintenance faster and smoother.
Prepare a seasonal plan, allowing winterizing in a single session, lowering cost and avoiding last-minute rushes. The season’s program starts with battery care, then humidity control and cover checks, with steps listed in the following sequence for efficiency and reliability.
For accessibility, roll-down doors and clearly labeled zones cut search time for personnel, letting crews find hoses, fittings, and spare parts quickly. Maintain a rolling inventory to track stored items and simplify finding needs across areas and seasons, and keep records for other gear as well.
To manage cost and humidity, set a target relative humidity and monitor with electronic hygrometers kept in multiple areas; stored boats stay drier when humidity stays within the safe range, reducing mold risk and long-term damage.
The following table helps compare options by accessibility, humidity control, and cost, helping you pick a plan that fits seasons and single boats or fleets. If you have many boats, consider a modular system with racks and multi-area layouts to minimize handling and downtime.
| Option | Accessibility | Humidity Control | Cost | 備考 |
|---|---|---|---|---|
| Dry dock / covered slip | High | Low humidity with dehumidification | expensive | Best for boats stored long seasons; protects hulls; requires access control |
| Indoor storage building | High | Moderate humidity control | moderate | Suitable for single boats or small fleets; steady access |
| Outdoor rack with covers | Less | Higher humidity risk; use breathable covers | low | Cost-effective, but weather exposure; consider dust controls |
| Marina storage slips | Medium | Climate-controlled options | expensive | Close to operations; good for fleets with multiple areas |
Choosing a Slip Lift: Load Capacity, Beam Width, and Dock Compatibility
Go with a smart choice: your lift should have a working load capacity (WLC) at least 1.25x your boat’s dry weight, and the beam width must clear your widest point with extra clearance (about 12 inches). This approach covers safety, longevity, and quick on-site operations, even when thousands of boats enter and leave marinas each season.
Load capacity
- Calculate the boat’s dry weight and add typical gear. Then multiply by 1.25–1.5 to set the target WLC.
- Verify the manufacturer’s rated WLC accounts for dynamic loads caused by dock movement, wind, and loading angle. A little extra capacity absorbs extreme conditions without stalling the lift.
- Use real-world examples: a 5,000-lb dry-weight powerboat benefits from a 6,250–7,500-lb WLC; a 9,000-lb cruiser works best with a 11,000–13,500-lb WLC.
- When in doubt, choose a larger model now–the extra capability avoids an expensive upgrade later and reduces the risk of wear on sheaves and gears.
ビーム幅とサドル
- ボートの全幅を正確に測定してください。これには、舷縁の出っ張り部分も含まれます。安定性と容易な着岸のために、最低でも片側 6~12 インチのクリアランスを含めてください。.
- 約7.5フィートから12フィートまでのビーム幅に対応できる、調整可能なサドルまたはスプレッダー付きのリフトを選んでください。もしサイズに迷う場合は、成長や、たまにある幅広の船尾にも対応できるよう、大きめのサイズを選ぶと良いでしょう。.
- サドルの素材と接触面を確認しましょう。 フォームまたはゴムで裏打ちされたサドルは、船体のへこみや日焼けによる色あせを軽減します。.
- トラベルリフトとサポートレールが、ボートの幅に適合し、挟み込みがないことを確認してください。幅の不適合は、繁忙期には常に問題となります。.
ドック互換性
- プラットフォームの高さとドックの形状:リフトのプラットフォームの輪郭がスリップデッキと一致していることを確認し、ボートがこすれたり傾いたりせずに昇降できるようにします。.
- 電源:110Vまたは230Vの陸電があるか確認し、リフトのプラグの形状とアンペア数を確認してください。利用できるコンセントが限られている場合は、両方のオプションがあるモデルか、長くて丈夫な電源コードを探してください。.
- 現地設置要件:利用可能な取付箇所、固定方法、およびドックのタイプ(木材、コンクリート、または鋼鉄)に対する耐荷重を確認してください。安全なドックは、動きを軽減し、盗難や嵐の際のずれを防ぎます。.
- 気候と天候への暴露:屋外用スリップは、太陽、塩分、寒さにさらされます。耐腐食性の部品、シール、および極端な温度に対応できる油圧ラインを選択してください。屋内または温度管理された保管場所が利用可能な場合は、摩耗が少なくなり、寿命が長くなることがわかります。.
- セキュリティとカバー:施錠可能なコントロールボックスや盗難防止機能は、不在時の投資を保護します。サドルやコントロールを保護しつつ、素早いアクセスを妨げないカバーを探しましょう。.
- 操作性とエルゴノミクス: 1日に複数のボートを扱う居住クルーが、かがんだり手を伸ばしたりすることによる疲労を軽減するために、アクセスしやすいリモコンまたは台座コントロールを備えたモデルを選択してください。.
- メンテナンスアクセス:サービスパネル、フィルターの場所、油圧リザーバーの液面計が現場でアクセス可能であることを確認し、簡単なチェックが複雑な作業にならないようにしてください。.
追加の考慮事項
- 耐候性:寒冷地では、加熱または断熱された部品を使用したモデルが推奨されます。日光による退色はよくあるため、UV定格のプラスチックや粉体塗装されたフレームは寿命を延ばします。.
- 保証と部品の入手性:部品のサポートが広範なブランドを選びましょう。現場に数千台ものユニットが設置されているということは、サービスが迅速で、再販価値が高いことを意味します。.
- 居住環境:もしあなたのマリーナに居住目的の船舶が停泊する場合、より大きなスペース、よりスムーズなオペレーション、そして日々の利用におけるより静かな油圧装置が役立つでしょう。.
- 将来を見据えて:完全な交換なしで、追加のスリング、オプション、またはアップグレードされたモーターを追加できるモジュール式リフトを検討してください。.
ディーラーに尋ねるべき質問
- どの耐荷重モデルが自分のボートとギアに最適ですか?また、極端な場合に備えて大きめのサイズを選ぶべきでしょうか?
- ボートの全域でビーム幅を調整できますか?また、最大クリアランスはどのくらいですか?
- ドックとの互換性機能には何が含まれていますか?また、スリップのために追加で必要なハードウェアは何ですか?
- 110Vと230Vの両方のオプションを提供していますか?また、制御装置は地上レベルまたは台座に取り付け可能ですか?
- 盗難から保護するセキュリティオプションにはどのようなものがありますか?また、サドルとレール用のカバーは付属していますか?
- システムを年間を通して確実に稼働させるために、どのようなメンテナンススケジュールとサービスプランをお勧めしますか?
結論:耐荷重、ビームの柔軟性、ドックへの統合のバランスが取れたモデルを選びましょう。今日賢明な選択をすれば、再塗装、部品の劣化、繰り返しのサービスコールを減らし、最小限の手間でボートを安全かつアクセスしやすい状態に保つことができます。.
ドック設営:斜路位置、バンパー、固定戦略
ランプを緩やかな傾斜になるように配置し、船首はペアのバンクに載せ、船尾はキールブロックで支えて、積み込み時の船体へのストレスを最小限に抑えます。.
バンパー:船体の両側の接触箇所に高密度ゴム製バンパーを取り付け、船体に沿った形状で振動を吸収するものを選択してください。.
固定方法:四点式固定を行います。船首クリートから前方デッキの金具へ、船尾から後方金具へロープを張ります。船の中央にあるロープは交差させて横揺れを制御します。ボートの重量に耐えられるラチェット式ストラップを使用してください。.
ストラップの管理:ストラップを鋭利な角から遠ざけ、エッジプロテクターを追加し、変形のリスクを確認しながら少しずつ徐々に締めてください。.
監視と調整:設置後、軽く揺さぶるテストを実施し、大きな航跡や突風の後は再度締め付けを行い、点検記録をログに記録してください。.
ボーモント・マリーナ調整事項:乾ドックが今シーズンも残る場合、天候が変わる前に、担当クルーと連携して、バンパーの交換および再調整を実施してください。.
バリアフリーに関する配慮:スロープの周りの作業スペースを確保し、サービス用機器のためのスペースを確保し、長期滞在中は定期的な点検を予定してください。.
ドックでの冬支度:不凍液の注入計画、燃料の安定化、バッテリーの管理
今すぐ、厳密な不凍液計画を実行し、最初の凍結前に冷却および配管ループに循環させてください。.
海洋グレードの無毒性不凍液(プロピレングリコール)を選び、ラベルの気候ガイドに従って混合してください。ほとんどの寒冷地仕様では、水との50/50の混合でエンジン、ヘッド、ポンプに信頼性の高い保護を提供します。より厳しい寒冷地では、60/40の比率で追加のマージンが得られます。ディーゼルシステムの場合、熱交換器または閉ループ設計との互換性を確認してください。一部の設備では、より高い不凍液含有量が許容されます。エンジンまたは専用ポンプを稼働させ、排気または排水口に不凍液が現れるまで循環させ、完全なループ範囲であることを確認します。淡水ライン、ヘッド、ビルジ経路をすすぎ、排水して塩分と藻類を除去します。可能な場合は、ラインを軽くすすぎ乾燥させ、固着を防ぎます。必要に応じて海水コックを閉じ、タンクを密閉して、残った液体が凍結するのを防ぎます。マリーナ技術者のKoenは、このアプローチは温度管理されたスリップでうまく機能し、水分を遮断し、フィッティングを保護するボートが増えていると指摘しています。.
- まず水洗い、その後に不凍液:真水で塩分や藻を取り除いてから、すべての給水ラインとスルーハル継手に不凍液を循環させてください。.
- ラベルを貼り密閉する:各回路の不凍液レベルをマークし、ストレーナーとタンクのキャップがしっかりと締まっていることを確認する。.
- 監視指標:循環中に懐中電灯を使用し、ホース接続部に亀裂や漏れがないか点検する。シーズンが終わる前に、リスクの高いホースクランプはすべて交換する。.
燃料安定化計画は、ワニスとガムの形成を抑制します。製品ラベルに従って、エタノール混合燃料対応の高品質安定剤を添加し、タンクを満タンにして、水分が凝縮する空気の空間を最小限に抑えます。多くのボートでは、20~40ガロンのシングルタンクに対して、燃料全体を処理するフル量を添加するのが効果的です。放置されたタンクに保管された燃料は古くなる可能性があります。古くなった燃料は、臭いやワニスの沈殿物を示します。安定剤添加後、エンジンを10~15分間運転して、ライン、フィルター、インジェクター全体に安定剤を循環させ、均等に処理されるようにします。ボートを塩害や風の強い地域に保管する場合は、タンクを満タンにし、通気式フィラーキャップを使用して、暖かい日の結露を最小限に抑えます。エタノール含有量が高い場合は、エタノール適合性のある安定剤を使用し、可能であれば燃料研磨を検討してください。.
- 燃料タンクを満タンにし、ラベルの指示に従って安定剤を加えてください。燃料のエタノール含有量に対応した高品質の製品を選びましょう。.
- ライン、フィルター、キャブレターまたはインジェクターに安定剤を循環させるため、エンジンまたは発電機を運転し、システム内に安定化された燃料が入った状態で停止させます。.
- 春に燃料を識別しやすいようにラベルを付け、ロット番号と日付を記録し、長期保管する場合はエタノール混合燃料に触れた仮設ホースを水洗いしてください。.
バッテリーのケアは、春までクランキング能力を維持します。バッテリーを外すか、過充電せずにほぼ満充電を維持するスマートメンテナンス充電器に接続したままにします。単一のバッテリーバンクの場合は、充電器を2〜4アンペアのトリクル充電に設定し、電圧を毎週確認してください。目標は、12.4Vを超える静止電圧と、充電後の約12.6〜12.8Vの表面電荷です。ボートが温度管理されたスリップにある場合は、バッテリーを直射日光を避け、涼しく乾燥した場所に保管してください。それが不可能な場合は、換気されたラックに保管し、腐食しやすい端子は腐食防止剤で取り除いてください。液入りの鉛蓄電池の電解液レベルを確認し、必要に応じて蒸留水を補充します。端子を清掃し、保護スプレーを塗布します。再接続するときは、すべてのアクセサリ回路がオフになっていることを確認し、安全な方法でクイックスタートテストでクランキング能力をテストします。バッテリーの状態(電圧、CCA、および予備容量)を監視するための適切なツールを使用すると、交換時期を決定し、春にリスクにさらされる状況を回避できます。.
- オフシーズン中は、電圧を安定させるためにトリクル充電器を接続したままにして、不要な負荷はすべて取り外してください。.
- バッテリーボックスに湿気や腐食がないか点検し、損傷したケースは交換してください。船内にバッテリーを保管する場合は、適切な換気を確保してください。.
- バッテリーには、取り付け日とバンク構成をラベル付けして、春の再組み立てを簡素化します。.
ドックでの冬季保管中にボートを保護するための追加のヒント。露出した部分に防水シートをかぶせ、塩水噴霧や風から保護します。防水シートがバタつかないように、重みのあるコードやタイダウンで固定します。金属製の金具には薄く光沢のあるコーティングを施し、腐食を遅らせます。塩害を受けやすい外部の金具には、ワックスまたは保護スプレーを軽く塗布します。温度管理されたバースをお持ちの場合は、それを利用して温度を安定させ、結露を減らします。そうでない場合は、乾燥した日陰で風通しの良い場所を選びます。簡単な調整ができるように、小型の工具キット(ドライバー、プライヤー、ホースクランプ、ねじシーラント)を用意し、来年も自信を持って同じ作業ができるように、すべての手順を記録しておきましょう。この方法なら、よくある間違いを避け、寒くて風の強い状況でも、ボートをすぐに水に浮かべられる状態に保つことができます。.
ドックサイドメンテナンスルーチン:清掃、検査、および腐食防止
Begin with a weekly dockside cleaning that protects your investment and preserves the hull shape. Rinse the deck and hull at the slip with fresh water, apply a marine-safe cleaner, and scrub with a non-abrasive brush. Dry thoroughly to keep gel coat or paint smooth and to reduce salt residues, supporting long-term protection between sessions.
Set a monthly inspection routine and keep a simple contract-style checklist on file. Inspect fittings, through-hulls, hoses, clamps, and electrical bonding, plus zincs and anodes. Note any loosened fasteners or signs of corrosion, and address damages immediately to avoid expensive repairs. Maintain records between visits and renew the contract with your marina or service provider as needed.
Prevent corrosion by balancing electrical systems and installing sacrificial anodes on the stern and keel. Clean bilges to remove moisture and check for damp wood or foam. Use a corrosion-inhibiting spray on metal fittings and ensure proper bonding between metal parts. This leads to reduced risk and a more consistent, long-lasting finish, a great step for peace of mind.
Store spare parts, maintenance supplies, and cleaning gear in fenced-in storage or on a secure rack inside warehouses. Keep covers handy to protect the boat between uses, and maintain an organized inventory to make restocking fast and cost-effective. This setup reduces clutter and deters vandalism while keeping access smooth for the crew and open for inspections.
Track progress with a consistent cadence and share milestones to your team or followers on Instagram to build a transparent, growing program. Regular reports help you spot trends, anticipate maintenance needs, and keep the plan on track between seasons. This approach supports open communication with your left-hand crew and keeps everybody aligned with a high standard of care.
Quick checks you can run in under 15 minutes per visit: test bilge pumps, inspect cleats, rails, and chocks for movement, verify deck drains function, and look for signs of vandalism, scratches, or water intrusion. Address these early to keep your boat in great shape and avoid damages, again reinforcing a cohesive, cost-effective routine.
Troubleshooting Lift-Related Issues: Alignment, Slippage, and System Alerts
Realign the lift using a laser level to eliminate wobble and prevent uneven loading, delivering great stability. Level the platform and re-torque mounting bolts in a diagonal sequence, then verify rails stay true with the posts across all bays. Check each location where you store boats or vessels; for multiple posts, ensure each reads within 1/8 inch. Following these steps, you address alignment and set the stage for dependable operation.
If slippage occurs, inspect bunk pads for wear, tighten strap tension, and re-seat the vessel so weight sits evenly. Shift the load to a middle position and recheck with a light lift cycle. For boats and vessels that sit on bunks, replacing worn covers and pads eliminates most slipping. Where weather is a factor, ensure the base is clean and free of debris before loading. With humidity fluctuations, check that slip blocks stay in their tracks and adjust as needed.
System alerts: read codes on the control panel and keep a quick log of the error codes. Perform a reset without compromising safety; if the alert persists, inspect sensors for corrosion or moisture ingress and confirm proper grounding and power supply. For Beaumont docks or other locations, check that the control cabinet is properly vented and that humidity is kept in check to avoid false readings. If you see codes indicating overload or temperature fault, lower the load and test again with a steady, no-load cycle.
Preventive steps you can follow anywhere: maintain hydraulic fluid levels and replace hoses showing signs of wear. Use covers to protect exposed components from rain, hail, and sun. Regularly clean tracks and rails and lubricate moving parts with manufacturer-approved lubricants. These practices keep the growing list of amenities around your site functioning and reduce the chances of unexpected slippage. They also help ensure your boats stay safe when parked in less-than-ideal weather. Maintain a log with the location and settings for easy repetition.
Budget-friendly maintenance plan: schedule monthly checks, track levels of wear, and pick two or three upgrades each season to stay affordable. For example, replace worn bunks or sliders when wear exceeds recommended limits, swap worn cables, and keep spare parts in a location closet. A simple, steady routine can prevent costly repairs and keeps multiple vessels secure. If you own boats at Beaumont or other locations, this approach offers advantages such as easier winterization and faster response to alerts. Thank you for following these steps and keeping your operation smooth, anywhere you keep boats.