

 Resolving Starting Issues in Outboard Motors – Troubleshooting Guide">

Begin by testing the battery voltage and inspecting the terminals; clean corroded connections to restore a solid ground and prompt ignition. Use a multimeter and verify a sufficient charge: about 12.6V at rest and 13.5–14.5V when the charging system is active. Ensure the main grounding strap is tight and free of oxidation to prevent intermittent power to the solenoid, helping the engine moving reliably.
Given these conditions, fault tracing often starts in the fuel and electrical systems. Following these checks, confirm fuel is reaching the intake: inspect filters, hoses for cracks, and the fuel pump output. Ensure the tank vent is clear and there is sufficient pressure when cranking. If fuel delivery is confirmed, 移動 to the next checks rather than guesswork, reducing downtime for moving crews and sailors alike.
Inspect safety and control circuits: kill switch, tilt sensor, and ignition switch. A corroded or loose ground on these devices can block energizing the solenoid or disrupt spark. Clean or replace connectors as needed; verify a solid ground path to the engine control module or ignition coil. This is especially important for vessels underway, where reliability matters for your sailing operations.
For persistent faults, professionals will test the harness, verify power and signal grounds, and examine the main coil and spark plugs. They will review wiring routes, inspect the terminals at the battery and control box, and confirm that the tilt/trim circuit does not impede energizing. A professional assessment often prevents recurring failures and minimizes downtime between legs of a voyage.
Long-term prevention involves choosing a practical maintenance cadence that covers battery health, fuel-system cleanliness, and corrosion protection. Use a reliable charging routine and store connectors with anti-corrosion grease. These steps, following a documented plan, help you keep moving and reduce risk during long passages or day sails. When assessing potential faults, focus on these things: listening for abnormal sounds, feeling for loss of power, and confirming that systems respond under load.
Outboard Motors Troubleshooting Series
Test ignition with a spark tester; if you find a strong, consistent spark, move to fuel delivery and diagnostic checks. If there’s no spark, repair coil or wiring first. This quick check often finds the cause in minutes and saves you from chasing faulty fuel or sensor faults.
edward, the dockside technician, notes that a frustrating start is frequently caused by a loose connection or a weak ground. Ensuring the harness is clean and properly seated makes the engine more reliable, and it lets you enjoy trouble-free starts from your steed.
-
Basic visual and electrical assessment
- Verify battery voltage (12V with no load) and clean, tight ground strap. Replace dull terminals. Brush contacts in starter or ignition switch should be clean and bright. Inspect the outboards harness for corrosion and reseat connections to ensure solid seating.
- Inspect all connections from battery to kill switch and coil packs; reseat and apply dielectric grease where needed. Ensure wire insulation is intact and look for frayed or nicked segments.
- Ensure indicator bulbs on the panel illuminate with the key ON; if not, trace power and ground issues in the wiring loop.
- Check for corrosion on terminal blocks and within the harness; clean oxide with a brass brush and reseal to prevent future corrosion.
-
Fuel delivery and air path
- Confirm fuel in the tank is fresh; check the primer bulb for a firm feel. Replace a hard or spongy bulb to restore proper priming.
- Inspect fuel lines for cracks or leaks; ensure clamps are tight and hoses are not kinked. Replace damaged hoses promptly.
- Check inline fuel filter; replace if clogged or dark. A restricted supply directly reduces performance.
- Note: there’s no fuel in the line means the pump won’t push fuel; prime again and check for leaks to avoid air locks.
-
Ignition and timing
- Perform a compression check if the model supports it; compare results to the manufacturer spec. Low compression signals a mechanical fault that requires further attention.
- Check timing marks if static timing adjustment is possible; align per service manual and re-test.
- Replace worn spark plugs and wires; verify the correct gap and ensure proper seating in the cylinder boots.
-
Diagnostics and fault codes
- If the unit is equipped for diagnostics, pull fault codes and interpret with the manual. Record codes for reference and follow the prescribed repair path.
- Clear codes after fixes and re-test; if codes reappear, re-check the related system and wiring harness for intermittent faults.
-
Cooling and mechanical condition
- Inspect the water pump and cooling passages; ensure a steady water output at idle. A weak stream indicates an impeller wear or a blocked passage.
- Check the impeller blades for wear or damage; replace if worn to restore proper cooling flow.
-
Verification, safety, and notes
- Run under load to verify steady RPM and smooth acceleration. Only perform checks with the engine off and battery disconnected when disconnecting connectors. This ensures personal safety and prevents shorts.
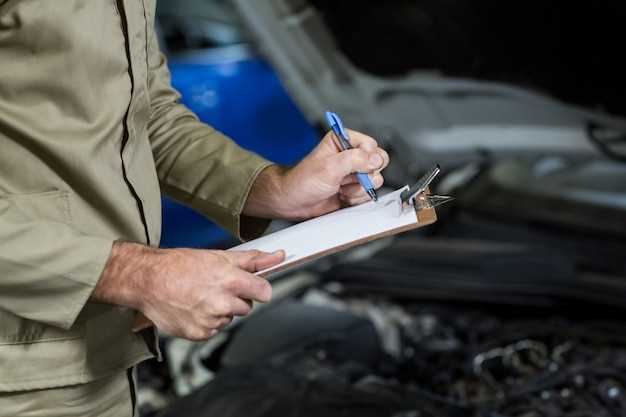
- Document the fault, fix, and observed performance in a simple log; you’ll find future diagnosing sessions faster and more reliable, making maintenance feel less frustrating and more like a routine, enjoyable task for your outboards.
Resolving Starting Issues in Outboard Motors: Yamaha Fuel System Starting Issues
First, perform a simple fuel-pressure test on the Yamaha fuel system using a marine-grade gauge; ensure sufficient pressure during cranking, and replacing the in-line filter if pressure bleeds off. A firm primer bulb and an intact wire harness are essential for accurate results.
Significant deposits from ethanol-blended fuel can foul injectors or carb jets; fouled spark plugs and clogged filters are common signs. For a dinghy or other small craft, proactive maintenance and replacing worn parts reduce recurrence.
On the first attempt at diagnosing, listen for aural cues of misfires and inspect the wire harness connections; loose or damaged connectors disrupt the fuel-spark coordination and can cause hesitation or uneven idle.
Use fresh, clean fuel and, when advised by your technician, apply a marine fuel-system cleaner to dissolve varnish deposits. Keep fuel in approved containers and avoid long-term storage. Ensure your tool kit is equipped for quick checks on the water.
At times, deposits become significant or the system becomes contaminated; if so, replacing worn pumps, filters, or seals is warranted and a qualified technician should perform a full inspection.
To prevent repeat symptoms, adopt a proactive prep: schedule seasonal services, ensure the harness remains dry and connected, and test fuel pressure at times before you go afloat. This approach helps ensure reliable operation of your dinghy.
Learning from a qualified technician will offer practical tips; if the system fails to respond after applying these checks, book services promptly and follow the technician’s recommended course.
Check Fuel Quality and Water Contamination
Test fuel quality now: if a drop of water sits in a clear sample, suspect contamination and drain the tank immediately to prevent water from entering the fuel pickup; this means trouble later.
Regular checks should help boats stay reliable. Sample fuel from the line in a transparent container and look for free water, visible sediment, or a cloudy color that signals moisture in the condition.
Unseal the drain to remove water and proceed to replace filters or worn parts. Inspect cables near the fuel path for corrosion from moisture; damaged cables mirror fuel contamination and can cause trouble.
Lower the risk by fitting a proper water separator and keeping hoses tight; check the filter condition and replace if it is failing; loose fittings can cause intermittent performance loss.
Protect the system with clean, dry fuel from trusted stations; avoid poor-quality blends that absorb water and make the fuel unstable; some blends wont protect against moisture, especially after long storage; when stored long, fill tanks and add stabilizer to prevent varnish and wear.
Make a plan for ongoing checks: regular sample the tank, drain water, and keep spare parts like seals and filters; if problems persist, consult an expert to identify the actual cause and prevent further trouble.
Keep protection in mind: clean tanks, dry storage area, and non-rusted caps prevent water ingress; wear resistant seals extend life and keep the system free from trouble; proper storage makes the setup reliable.
Inspect Fuel Lines, Primer Bulb, and Tank Setup
Immediately verify that all fuel-line connections are tight, inspect the primer bulb for proper functioning, and replace any cracked or loose parts.
Inspect behind the cowling for signs of wear: kinked hoses, damaged fittings, and loose clamps. These findings affect every fuel-delivery path and are necessary for ease of inspecting fuel-feed issues and reliable operation.
To troubleshoot the system, check the primer bulb for step-by-step indicators of fuel feed: it should feel firm and return quickly when squeezed; a squishy or slow bulb points to air leaks or a blocked check valve, likely causing loss of prime and reduced performance. If present, inspect an electric primer path for loose connections and clear debris from the flow route.
Open the tank cap and inspect the vent, gasket, and pickup. A closed vent or damaged gasket can starve the line, and tilt of the engine position can affect feed. Route lines behind the engine and avoid tight bends; keep them simple and well-supported to ensure dependable supply for operating performance.
If checks pass but performance remains off, replace the suspect part–hose, bulb, or gasket–and verify the assembly with a live test. When in doubt, consult a certified service technician immediately; youll know the repair is done right, a move any sailor appreciates.
Assess Fuel Delivery: Pump, Filter, and Pressure
Test fuel pressure at the rail using a calibrated gauge and compare to the value in your shop manual; if it’s below spec by more than 1–2 psi, focus on the pump, relay, and filter first before attempting to crank again.
- Electrical path and pump check: With the key in ON and during cranking turns, verify the pump receives proper voltage. Listen for the relay click behind the dash or near the tank; if there’s no click, inspect fuses and connections. Tighten loose terminals, and remove corroded contacts as needed. This part combines with the filter and lines to deliver fuel; a failing relay or worn wiring can cause an unexpected drop in pressure, often creating a significant gap between what you expect and what you measure.
- Filter inspection and replacement: Remove the filter and look for wear, debris, discoloration, or water. A clogged element blocks flow; a corroded seal or corroded end fittings can leak. If the element looks worn or corroded, replace it now. After installing a new filter, wait a few seconds for priming before re-testing.
- Fuel lines and fittings: Examine all hoses between the pump, filter, and engine for block, crack, or swelling. Check behind the tank for kinks or collapsed lines; ensure clamps are tight and fittings are properly seated. Wear on hose ends or damaged clamps can create air leaks that reduce pressure; remove and replace damaged sections as needed.
- Pressure testing procedure: With the system primed, apply a test and record static pressure, then recheck while cranking. A healthy setup should hold pressure briefly after cranking stops; a rapid drop suggests a leak, blocked line, or a weak pump. If pressure recovers slowly, the issue may be the pump or relay; also verify the return path if your configuration uses one.
- What to watch and corrective steps: If you notice an unexpected drop behind the filter or between components, address the most accessible part first–replace the filter, reseat connectors, or swap in a known‑good pump or relay to confirm. After any change, wait a moment to prime again, then test the details once more. This best practice helps you pinpoint wear or block and move toward a solid fix for your boats.
Review Cold Start, Choke, and Primer Procedures
Concrete recommendation: Ensure the battery is connected, switch ignition on, prime the fuel line with the primer bulb until firm, and set the choke for a cold condition. Take two attempts: crank 2-3 seconds, pause 10 seconds, then attempt again. If the engine does not ignite, double-check wiring behind the panels and ensure all hoses are tight and bulbs are firm. This routine will offer a dependable path to bring a cold unit to life, while a trusted technician can confirm no wiring faults exist.
Carbureted procedure: For carbureted units, close the choke fully for a cold start, give the throttle a light touch to prevent flooding, then crank. When you hear a smooth idle, begin opening the choke to maintain steady revs. Verify hoses and primer bulbs for cracks or leaks, and ensure the primer bulb remains firm after prime; also confirm wiring behind the cowl is connected and free of corrosion. This basic method combines manual choke with fuel delivery for reliable first-run behavior.
Fuel-injected approach: No choke is used; keep ignition on and attempt a short crank. If no ignition after 5-7 seconds, test fuel pressure and verify that the pump cycles; check wiring to sensors behind the throttle body; connect any loose wires, and replace damaged harnesses. If uncertainty remains, store the unit and consult a certified technician; a diagnostic check can reveal injector or sensor faults.
Operational note: A clear fuel and air path helps the engine sail smoothly, reducing flooding risk during cold starts and making routine checks quicker and more effective.
| Initial checks | connected battery, ignition on, gear in neutral, kill switch secured; inspect hoses for wear; verify bulbs are firm; confirm wiring behind the panels is intact |
| Carbureted cold-start steps | Choke closed; throttle lightly opened; crank for 2-3 s; pause; when firing begins, open choke to idle; ensure hoses are not kinked and wiring connects behind the cowling |
| Fuel-injected steps | No choke; ignition on; crank briefly; if no start, test fuel pressure and pump operation; inspect sensor wiring and injector connectors behind the throttle body; ensure all wires are secure |
| Primer bulb and hoses check | Squeeze primer until firm; inspect for leaks; ensure hoses are connected, clamps tight, and bulbs hold firm after prime |
| Preventive and storage actions | Follow preventive service intervals; store in a dry location; replace worn wiring and hoses; document changes with a trusted technician for future reference |
Evaluate Spark Plugs and Ignition System Health
Replace worn spark plugs and verify ignition coil health before pursuing other checks. Prepare a full set of tools: spark plug wrench, gap gauge, feeler gauge, insulated pliers, multimeter, and a timing light if available. With the battery disconnected and the motor secured, inspect each plug for electrode wear and fouling; if a plug shows oil, heavy carbon, or a damaged ceramic, it needs immediate replacement. Even a single faulty plug can drop energy in the system and slow cranking, leaving a stubborn misfire.
Condition indicators: examine the plug color after a dry run; a healthy plug typically shows a light tan to gray insulator with evenly worn electrodes. A sooty black deposit signals a rich fuel condition or weak ignition; a white or chalky crust points to detonation or a lean mix; oil on the electrode or threads indicates oil intrusion from seals. In salt environments, corrosion on threads and connector pins can be significant; exposed metal may create a voltage drop and weaken circuit integrity.
Gap and seating: set the electrode gap to the engine manufacturer’s spec; many small engines use 0.030-0.040 inches (0.76-1.02 mm). If the gap is out of spec, adjust slowly with a proper gap tool or replace the plug. Ensure the spark plug seat is clean and the threads engage straight to prevent cross-thread damage. Torque the plug to the manual’s specification and verify firm seating; residue on the seat can create a poor seal and lead to intermittent firing.
Ignition circuit check: perform a spark test by grounding a spare plug and cranking the motor to observe a strong, blue spark. A weak or orange spark indicates a fault in the coil, lead, or switch and requires fixes. Inspect ignition leads for cracks, exposed copper, or loose terminals; confirm all connections are securely connected to prevent voltage drop. Verify the kill switch and safety lanyard circuit are ready and functional; a faulty switch can cut spark unexpectedly while in use.
Salt and exposure: salt spray accelerates corrosion on plugs, caps, and leads. After use, rinse with fresh water when safe, dry thoroughly, and inspect connector pins for corrosion; replace severely corroded components. On a dinghy or other small craft, keep a prepared spare set of plugs and leads to minimize downtime. For marine use, apply only manufacturer-approved dielectric grease at connections to slow oxidation and preserve a solid connection.
Decision path: if ignition health tests pass but misfire persists under load, the fault may lie in fuel delivery or compression; a mechanic should diagnose further. If tests indicate a weak component, replace the problematic coil or ignition module; significant corrosion or visible damage warrants a broader inspection. Given exposure and age, consider a preventive package of parts and a prepared maintenance plan to reduce future time on shore. Familiarize yourself with service levels and keep the system connected and ready for the next voyage.