

 寒さの中で水上スキーとウェイクボードを楽しむ方法 – 必須のヒント、ギア、安全性">

簡単なルールから始めましょう。水温が10℃を下回るか、風が湖面をざわつかせる場合は、セッションを延期してください。. Build a checklist 水に入る前に、風速、気温、水質を確認してください。安全を確保し、すべての瞬間を最大限に活用できる計画を立て、起こりうる結果を視野に入れておきましょう。.
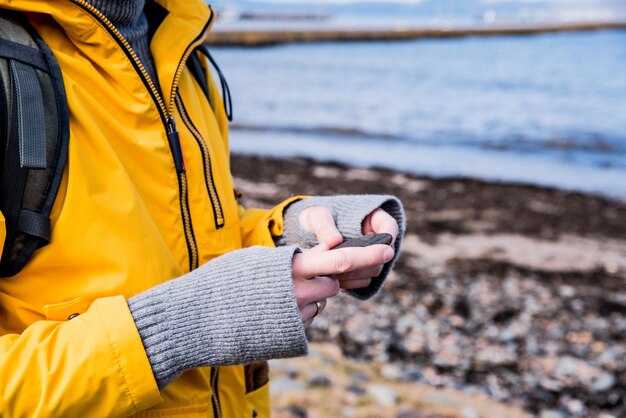
ギアとセットアップドライスーツまたは4~6mmのウェットスーツに、ブーティ、グローブ、防風アウターレイヤーを着用してください。A 座席 桟橋や船上での使用により、スムーズな乗降を助け、そして、a ケーブル tow は湖面で安定した引っ張りを提供します。ロープの端が closed and inspect for wear. Plan for several minutes ラン間のウォームアップを心がけ、予備のグローブを近くに置いておいてください。.
冷水でのテクニック浅瀬から始め、低くコントロールされた姿勢で、ハンドルに仕事を任せましょう。スキーの場合は、体重を中央に保ち、安定したテイクオフのために左足を前に出します。ウェイクボードの場合は、ハンドルと一直線に立ちましょう。寒い気候では、痺れやピリピリ感を感じ始めたら、少し速度を落とし、短い minutes- 手と体の中を温めるための長い休憩を取る。動きは意図的に、決して無理な引っ張りをしない。.
スキーとウェイクボードの異なるセットアップ: スキーはセキュアなバインディングとしっかりとしたエッジを必要とし、ウェイクボードはぴったりとしたバインディングと適切な足の位置合わせが必要です。使用する際は、 ケーブル system, try different コースで最も簡単なラインを暗い場所で見つける。コーチやチームメイトに。 review your form after each run and keep a checklist 良いテクニックを強化するための手がかり。.
Safety and planning: 寒冷な湖では、凍傷の危険性があります。浮力のあるベスト、寒さ対策のグローブ、および必要な場合はヘルメットを着用してください。風速と水面を監視してください。湖が なると closed または近くの地域が表示します。 rule change, switch to an indoor practice or a sheltered site. In places like オーストリア, 急速に冷える水に備えて計画を立て、気象情報を維持してください。 review 外出の前に。.
チェックリストと改善: 終わったら、素早く review of conditions and performance. Keep a simple log: water temperature in 摂氏, 気温、風、そして minutes of active skiing. Use the checklist to build a million small improvements over time, and consider courses あるいは、寒さの中でも進捗を促すためのコーチングセッション。.
寒冷地でウェイクサーフィンとウェイクボードをする方法:ヒント、ギア、安全対策
具体的なスタートとして、断熱性の高いフルウェットスーツ、ブーティ、グローブ、そして必要に応じてフードを手に入れましょう。確かに、このセットアップはあなたの体を暖かく保ち、ライディングの準備を整えます。今ギアを探すことで、より長いランで疲労を軽減し、冷たい空気の中で水上に長く滞在するのに役立つオプションが見つかります。.
水に入る前に、状況とキャンセルポリシーを確認してください。気温と水温、風、波の状態によって、セッションを短縮したり、完全にキャンセルしたりする必要がある場合があります。注:急速に変化する融解水が急速にあなたを冷やすリスクがあるため、短い間隔で計画し、ライド中にどのように感じるかを監視してください。.
衣類の重ね着は重要です。吸湿発散性のベースレイヤーから始めて、ネオプレン断熱材を追加し、最後に防風アウターレイヤーを重ねます。この追加により、湖の温度が下がっても暖かく保たれ、肩や脚の可動性を長く維持できます。.
履物と手の保温は重要です。グリップの良いブーティを選び、ランニング間の休憩に使い捨てカイロを持参してください。水上スポーツ用に設計された断熱グローブを着用すると、グリップを保護し、疲労を軽減し、ブーティは冷たい足によるけいれんを防ぎます。.
乗車中は必ず安全装備を着用してください。適切にフィットした救命胴衣(ライフジャケット)を着用し、笛または信号発信機がすぐに使える状態にしておいてください。ぴったりとしたフィット感は、ずり落ちるリスクを軽減し、曇天時でも視認性を高く保ちます。.
ライドエリアと距離が重要です。ボートや岸でのアクティビティから離れた、湖の穏やかなエリアを選び、他の水上交通手段から十分な距離を確保してください。安全エリアを維持することで、ラン間の回復を迅速に行い、交通による急な停止の可能性を減らすことができます。.
寒冷な気象下では、シンプルなテクニックを維持する:体幹を締め、肩を後ろに、膝を曲げ、目はボートを見る。冷たい水は反応時間を左右する可能性があるため、滑らかな入力と、各プル前にスポットターとの明確なコミュニケーションを維持してください。.
陸上でのウォームアップは不可欠です。股関節、足首、肩をターゲットにした5~10分のダイナミックウォームアップを行いましょう。このフィジカルトレーニングは怪我のリスクを軽減し、最初のランニングをより快適なものにします。ゆっくりと始め、血流と柔軟性を高めるために、少しずつ反復回数を増やしてください。.
セッションの準備はいいですか? 体が寒さに慣れるにつれて、徐々に距離を伸ばしながら、短い距離から始めましょう。もしセッションがうまくいかないと感じたら、より安全な距離と速度に戻して、水上での自信を再構築してください。.
ギアはどこで買うべきか? 寒さ対策のオプションと明確な返品ポリシーを備えた信頼できる店を探し、暖かさとフィット感に関してユーザーからのフィードバックを確認してください。 レイクに適したウェットスーツにグローブ、ブーティー、防風シェルを組み合わせたバンドルを見つける可能性が高いでしょう。.
サイト計画も重要です。風よけがあり、水質が安定している場所を選び、ギア交換が容易な打ち上げエリアであることを確認してください。急ぐ必要はありません。時間をかけて、思慮深くセットアップして、水上に長くいることができるようにしましょう。.
各セッション後にはレビューを行い、何がうまくいったか、何がうまくいかなかったか、レイヤー、ギア、距離の調整点を記録してください。簡単なデブリーフは、自信を築き、さまざまな状況やスポーツの焦点に対応して一貫性を維持するのに役立ちます。.
| Item | Purpose | Recommendation |
|---|---|---|
| ウェットスーツの断熱材 (mm) | 熱保護、柔軟性 | 水温により4/3または5/4+mm;必要に応じてブーティー(2–4mm)を追加 |
| Booties | Grip, warmth, foot protection | 3–4mm with sticky sole; consider 2mm if land temps are mild |
| Gloves | Hand warmth, grip | 3–5mm neoprene or lobster style for dexterity |
| Hood | Head insulation, heat retention | Thin neoprene hood for water under 60°F (15°C) |
| PFD (life vest) | Buoyancy, chest warmth | Firm fit, high-visibility color; ensure proper certification |
| Base layer | Moisture transport, warmth | Long-sleeve synthetic or wool underlayer |
| Windproof outer layer | Protects against wind chill | Light shell or wind breaker over wetsuit |
| Hand warmers | Between runs warmth | Disposable packets in gloves or pockets |
| Sun and eye protection | Glare and wind safety | Polarized sunglasses; wraparound style |
Wake Area FAQ and Practical Guidance
Use a pre-session checklist to cover gear, weather, and safety before you head out. youll confirm that your suits fit, check that neoprene is thick enough, and verify a certified PFD, rope, and hardware. Choose thick gloves for wind chill and bring a little spare gear for cases of cold hands. Sip coffee on shore between runs to stay warm.
FAQ: How cold is too cold? The rule is to reassess gear when water temperature falls below 60F (15C) and the wind adds chill. In most cases, you should consider a drysuit below 50F (10C). fall sessions on alpine lakes or in austria camps can drop to near 40F (4C). In any case, listen to your body: shivering, numb fingers, or loss of dexterity signal hypothermia risk. Then take a break and warm up.
Gear setup: wear a thick wetsuit or a drysuit with a minimum of 3/2 mm for cool weather and add booties, gloves, and a helmet if you ride near fixed hazards. Use a snug vest and inspect the seams; replace worn parts. For extra warmth, layer under a hood or fleece. Where possible, test different suits at camps to find the fit that stays comfortable during long sessions.
Steps for cold-water sessions: 1) survey the wake area and check below water for hazards, 2) set a safe exit and clear line, 3) establish a clear hand signal with the operator, 4) keep turns shallow at first to avoid overexertion, 5) if you fall, roll away from the line and glide to the boat, 6) drink a warm beverage between runs.
Hypothermia awareness: watch for shivering that climbs from mild to intense, numb lips, mental fog, and slowed movement. If you notice signs, cut the session short, head to shore, remove wet gear, and warm up gradually with dry clothes and a hot drink. Do not rely on caffeine alone; use a proper warm-up, and if symptoms persist, seek medical care.
Where practice matters: pick designated wake zones, stay with a buddy, and avoid high-traffic hours. In colder regions, early morning light helps; many camps run practice blocks and warm-up sessions. austria lakes near salzburg or tyrol offer reliable cold-water training in fall.
Wear Guide: Layering, Accessories, and Fit for Cold Water
Start with a snug base layer that fits tight against the skin, then add a mid-layer and outer shell to stay warm and dry. This arrangement reduces heat loss and helps you enjoy a longer ride in cold water.
- Base layer: choose a synthetic compression top and bottom or a lightweight merino set. Fit should be tight but not restrictive, with cuffs that seal wrists and ankles to block water entry. This right fit keeps warmth close to your core as you move.
- Mid-layer: fleece or lightweight insulated layer that breathes. A zip-front option helps vent heat toward the chest during breaks or when the sun warms the lake toward sunset.
- Outer shell: waterproof, windproof shell with taped seams. Ensure a full range of motion for the arms and tight cuffs to prevent drafts during throws or landings.
- Bottom protection: consider a 4–6 mm drysuit or 3–5 mm neoprene pants for water around 50–60 fahrenheit; for 50–60 fahrenheit, a 2–3 mm wetsuit with booties is comfortable for many riders.
- Accessories: gloves or mittens (3–5 mm), a thermal beanie, and neoprene booties with good grip. Use chemical hand warmers or battery-powered warmers inside gloves for long sessions; toe warmers work well with booties to preserve mobility.
- Rope and equipment setup: check that the rope and skis align straight, with the rope staying taut but not tight during starts. Beginners should start with a shorter rope distance of 50–60 feet and work up toward 60–75 feet as balance improves; this difference makes a big impact on control and safety.
- Fit and mobility: ensure the base and mid-layers don’t ride up when you bend knees or reach toward the handle. Arms should move freely; cuffs at wrists and ankles should seal without restricting circulation; torso layers should feel snug at the level of the ribs but not crush the chest.
Weather-Ready Gear: Wetsuits, Drysuits, Neoprene Boots, Gloves, and Hoods
Start with the basics: wear a 4/3 wetsuit, 3–5 mm neoprene boots, and 3–5 mm gloves for wakeboarding in cold water. If air is icy or wind is strong, add a 2–3 mm hood and consider a drysuit over that base. Thickness choices may vary, depending on water temperature. A drysuit with a thermal layer gives you extra freedom to stay warm during acceleration.
Fit matters: look for a snug seal at wrists and ankles, flexible knees, and smooth cuffs; looseness drains heat and slows you. For stability, choose a snug wetsuit with a slightly firm boot wedge that keeps the ankle aligned during turns. If a suit fits poorly, it can affect grip and control, so try before you buy. They adjust layers to balance warmth and mobility depending on wind and sun, which helps every wakeboard session.
Layer choices: underlayers made of moisture-wicking fabric improve comfort; avoid cotton. When wearing a drysuit, add a light fleece underlayer to prevent sweating. Since the body works harder in cold, consider using a thin tank top under the base layer to manage moisture. This approach helps if you also surf or try surfing in similar conditions.
Gear care and checks: rinse after the session, dry thoroughly, and store flat. Inspect seams and zippers; replace worn gloves before the next ride. Basic steps like these reduce irritation and extend gear life.
Safety planning: check the forecast and wind; cancellation risk rises with squalls or heavy frost. Plan a flexible schedule with your camps or group; bring snacks for energy between runs and keep everyone warm.
Who wears what: everyone is different; participants with lower tolerance to cold should start earlier with extra layers. Kids and beginners may need tighter fits and easier-access zippers; wearing a drysuit often helps longer sessions.
Wakeboarders in austria train at camps and use weather-ready gear; coaches like Miller emphasize that gear choice affects performance as much as technique.
Maintenance plan: after a season, assess boot wear, seam integrity, and glove thinning; replace as needed.
Cold-Weather Equipment Setup: Skis or Board, Bindings, and Rope Length
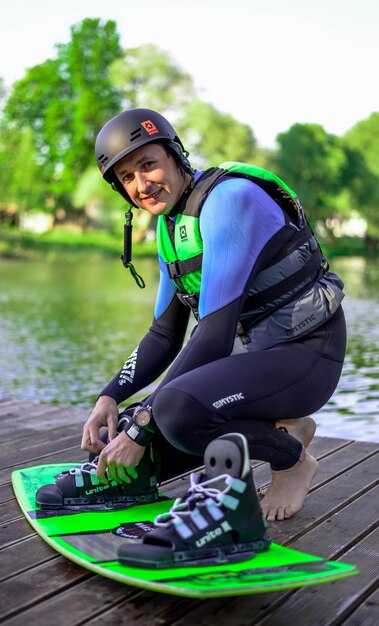
Choose wakeboard for cold-season boating; this isnt the time to chase skis if you want easier lift and quicker control on freezing water, since a single board with snug bindings simplifies the steps to get up. This also helps you lift cleanly when you ride through light chop.
In winter conditions, wakeboards stay more forgiving than skis on chop, helping you keep a lower center of gravity and better level edge control. The combination of board and bindings reduces the learning curve and speeds up getting through the steps. If you insist on skis, you’ll face more difficult starts, longer setup, and less predictable planing when water is freezing. When downhill chop appears, stay compact and lift with the knees.
Bindings: pick warm, snug wakeboard bindings and set a practical stance. If you have wakeboards, check binding compatibility across boards to keep the needed grip. For riders, aim for a lower level setup with the front foot toward the boat and the rear foot closer to center to guide the foot into a secure position as water is slick.
Rope length: for beginners, start around 50–60 ft; as you gain confidence and the water remains cold yet predictable, you can move to 60–65 ft. A shorter rope reduces acceleration and keeps you in the wake, which helps you stay dry and focused.
Before you ride, run through the steps: verify bindings are tight, rope is secure to the boat, and the board is dry. Practice a gentle stand-up in shallow water to reduce exposure time, and ensure you’re wearing a wetsuit or drysuit with gloves and booties. Keep the block of spray away from your face by edging smoothly and lifting the board early.
Season safety: hypothermia is a real risk in freezing water, so keep moving between sets, pick a warm layering system, and limit total time on the water. In common cases, riders find that a quick rewarm between bouts helps performance and mood. Boating operations should stay within a safe speed and follow local rules to avoid added stress on riders.
Safety Protocols in Cold Water: Hypothermia Prevention, Rescue Procedures, and First Aid
We recommend wearing a drysuit or a full 4/3 wetsuit with booties and gloves before entering cold water to keep the core warm and reduce hypothermia risk.
Hypothermia prevention
- Check temperatures before tow day: temps and conditions on the lake determine needed protection. If temperatures are near or below 60°F (15°C), tighten your clothing layers and prepare for shorter sessions; at lower values, rely on a drysuit and insulated accessories.
- Choose the right gear: base layer, mid-layer insulation, and an outer shell; suits or drysuits must fit snugly without restricting movement. Ensure boots are sealed and gloves provide grip for handling rope and cable.
- Plan pre-tow safety: pre-tow checks include rope and cable inspection, knot integrity, and confirming the wedge and handles are secure; review spots and safe entry points here and at the left and right shore areas.
- Control exposure time: limit continuous immersion to 15–20 minutes depending on gear and skill; alternate with warm rests in a sheltered, heated spot or a vehicle when season demands it.
- Fuel and snacks: bring snacks and warm drinks for energy and warmth between runs; maintain steady energy to support body heat in cold conditions.
Rescue procedures
- Spotters must stand at ready: assign a left and a right observer to watch participants and communicate with the operator via the cable system.
- Respond to signs of distress: shivering that stops, numbness, confusion, or clumsiness indicates rapid cooling; the person must be moved to shore immediately.
- Use appropriate rescue tools: deploy a throwable flotation device or rope, and if needed, a reach tool or wedge to bring the rider into a safe zone without forcing movements into the water.
- Move to warm surroundings: once on land, remove wet clothing and wrap in dry clothing; apply blankets first to the trunk to protect the core, then arms and legs.
- Call for medical help when risk persists: tickets or course leaders should contact local emergency services if there is any concern about core temperature or altered mental status.
First aid and recovery
- Assess basics: check airway, breathing, and circulation for every participant; begin CPR if there is no pulse and no breathing, and there is no other responder ready to assist.
- Gradual rewarming: replace wet clothing with dry garments, place warm (not hot) blankets around the trunk, and use warm drinks if the person is fully conscious; avoid direct heat on limbs or chest.
- Monitor after rewarming: keep the person lying flat if possible, monitor the skin color and responsiveness, and observe for rewarming shock or sudden changes in condition.
- Document and learn: note what conditions and temperatures were present, what gear was used, and any differences between wetsuit and drysuit performance; share lessons in the next school or course so another group benefits.
- Return to activities with caution: once fully recovered and cleared by a supervisor, reassess ability to rejoin the course or resume water sports on the lake; if there is any doubt, pause and reassess before continuing.
Drills for Cold Weather: Balance, Edge Control, and Safe Exits
Plan a 2-hour cold-weather block with a checklist focused on balance, edge control, and safe exits. Dress in closed-toe wear and add warmers for hands and feet; bring a spare layer for transitions and stay hydrated. Have a buddy observe from shore and note cues that signal fatigue or technique drift.
Balance drills: on dry land or a calm shoreline, stand on a board or balance pad with feet shoulder-width apart, knees soft, and spine neutral. Hold 30 seconds, then transfer weight to the downhill edge for 5 seconds, back to center for 10, and repeat for 4 rounds. When you move to the water, maintain a quiet upper body and a steady gaze to reduce wobble, then add a light tow to feel the same load without rushing the turn.
Edge control drills: approach the wake with controlled speed and practice a deliberate carve from heel to toe, keeping hips over ankles and shoulders aligned with the skis. Do 3 sequences of 6–8 seconds each, focusing on smooth arc progression and finished edge hold. Include a wedge drill for beginners to reinforce early speed management, then progress to a fuller edge as balance improves.
Safe exits: after finishing a run, release the handle, tuck the chin, and push with the right foot to stand and clear the line. Step away from the wake toward a calmer, right-hand side if possible, using a 2-step motion to avoid entangling with lines or waves. Reference towers or buoys for spacing and keep eyes scanning for incoming chop so you can re-enter safely or call a break if needed.
For Dylan and everyone, adapt the field cues to conditions: free water, small waves, and moderate wind demand shorter, tighter drills, while calmer mornings allow longer holds and bigger edges. A stronger body and better balance come from consistent, progressive reps in this structure, turning a routine into solid readiness that stays practical in real water.