

 How to Wakeboard – The Ultimate Guide for Beginners">

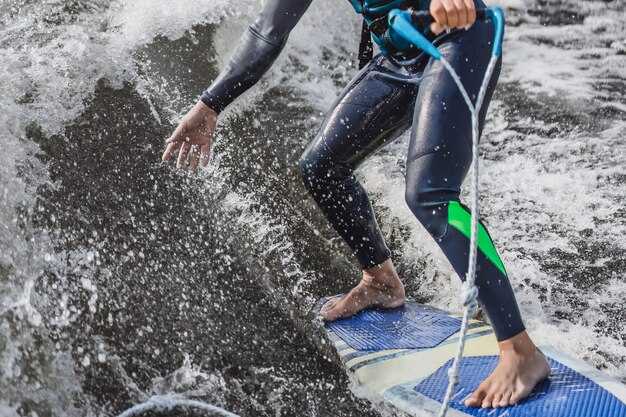
ガード承認のライフジャケットと、ぴったりしたウェットスーツまたはスーツから始めましょう。ロープの長さは約60〜65フィート、ボートの速度はきれいに引っ張るために20mph近くに。腰を重心の上に置き、かかとを下げて胸を張ったスクワットの姿勢で、最初の乗りからバランスを保ちましょう。.
グーフィースタンスのウェイクボーダーは、肩をボートと正対させ、重心を中央に置くこと。クイックなエッジングでウェイクに合わせる。ドライバーとのコミュニケーションが重要:準備ができたら親指を立てて合図、ラインが張ったら安定した牽引を。ガード承認のセットアップはリスクを軽減し、焦らず落ち着いてコントロールされたスタートを切ることが、自信につながる。.
プログレッションプラン:小さなステップを刻むこと。最初は起き上がることに集中し、次にウェイクを越えて簡単にエッジを効かせる。バランスが取れてきたら、水路のウェイクの中でスピンを試み、その後、スポッターをつけて意図的にフリップを行う。転倒した場合は、横に転がり、ボートに近づき、膝を胸に引き寄せ、再度挑戦する前に体勢を立て直す。より早く回復するために、運動量の中心に近い位置を保つこと。.
練習は、穏やかな小規模な水路で行われます。天候や航路は変化し、風向きの変化が引き波の形を変えるため、風の影響を受けにくい場所を選び、常に警戒してください。状況の変化に応じて速度やラインを調整するために、ボートの乗組員とのコミュニケーションは不可欠であり、他のボートや遊泳者にも注意して安全を確保してください。.
装備チェックリストと注意点:バインディングのフィット感を検査し、スーツがぴったり合っているか確認、安全具を確認ください。強靭な脚と体幹に集中。特にクイックプル中は、低く、中心に構えた姿勢を維持。ウェイクやボートに近づく際は、かかとでボードをセンターラインに沿って誘導しコントロールを維持。最初は小さなミスはつきもの。反復練習し、着実な進歩を、監視員の承認を得た上で祝いましょう。.
ウェイクボードを始めるのに必要な道具
浮力のある、体に合った個人用浮揚装置(PFD)を入手してください。スタートと着陸時に浮力をサポートするはずです。体重に合わせたサイズのウェイクボードに、ボードにしっかりと固定されたバインディングを取り付けます。バインディングはきつく締めすぎず、 chest が動くことができ、操縦中に安定していると感じられるようにします。.
幅広のハンドルが付いた約20〜23mの牽引ロープは疲労を軽減します。ロープを船尾近くの牽引ポイントにクリップで留め、ラインに張力を持たせることで、ライダーが水平を保つようにします。胸を上向きに保ち、スタート時のプルを補助する浮力のあるPFDを使用してください。.
ヘルメットは頭部を保護します。水面が混雑している場合や国際水路では、チェストプロテクターやインパクトベストの着用を検討してください。安全装備が体にフィットし、動きを妨げず、次回トリックに挑戦する際にスムーズに操縦できるようにしましょう。.
幅広のボードとソフトなエッジから始めましょう。初心者は安定性から恩恵を受けます。ビンディングはぴったりとフィットさせ、持ち上げる動きに合わせて胸が上がり、肩が一直線になるようにします。ギアの clutter が少ないほど、フォームに集中できます。胸を高く、背中を平らに、腰を肩の下に保ち、リフトとバランスを向上させましょう。.
上達するにつれて、次のアップグレードには、より寛容なロッカーを備えた軽量ボードが含まれます。海外のショップでは、さまざまな重量、サイズ、ブーツフィッティングを提供しています。スピードを出す前に、快適なスタンスを取れることを確認してください。ギアの過積載は避け、シンプル、安定、予測可能な状態を保ち、スキルを構築しましょう。.
体重とスキルに基づいた適切なウェイクボードのサイズの選び方
体重別の範囲を選択してください: 60 kg未満: 120–132 cm; 60–75 kg: 132–136 cm; 75–90 kg: 136–139 cm; 90–105 kg: 139–141 cm; 105+ kg: 141–143 cm。この選択で、すでに安定したプラットフォームが得られ、離陸時のグリップが向上し、最初のセッションからスムーズさを保つのに役立ちます。初心者ライダーの場合、自分のカテゴリーの中間に留まることで安定性が向上し、立ち上がりが容易になります。.
スキルが向上するにつれて、特にジャンプや水上でのライディングでは、より迅速な反応とコントロールのために、レンジの下限に移行することを試すことができます。ウェイクボードでは、レンジ内の短いボードはより速いカットを提供し、丸みを帯びたエッジはスタート時のグリップを維持します。さらに、膝を曲げたリラックスした姿勢は、バランスを高め、疲労を軽減し、新しいトリックを行う際に冷静さを保つのに役立ちます。すべてのステップがスキルアップをサポートし、このアプローチは現実的な進歩を維持します。.
集中したワークアウトは、体幹、脚、背中を強化し、ライディング中のバランスとコントロールを高めます。筋肉が鍛えられ、このルーチンはすでにセッションをスムーズに進めるのに役立ち、見落としがちなディテールを防ぎ、ウォーター上でより自信を持ち、集中できるようにし、ウェイクボードをエキサイティングなものにします。.
| Weight (kg) | ボード長 (cm) | 備考 |
|---|---|---|
| 60歳未満 | 120–132 | 安定性;丸みを帯びたエッジでグリップが向上;初心者ライダーに最適 |
| 60–75 | 132–136 | しっかりとした中庸、容易なプレーニングと浮遊性 |
| 75–90 | 136–139 | バランスの取れたコントロールとポップ。初心者から中級者へのステップアップに最適。 |
| 90–105 | 139–141 | よりレスポンスが向上;ヘルプジャンプが短く、素早い方向転換が可能;湾曲したエッジがグリップを補助 |
| 105+ | 141–143 | より体重の重いライダーに最適。安定性とスムーズな着地を重視。 |
ビンディングとボードタイプ:フレックス、ロッカー、スタンス
Choose a 中程度のフレックス クローズドトゥービンディングと組み合わせたウェイクボードは、学習中の安定した着水と予測可能な反応を実現する必要があります。.
フレックスはボードの硬さを表します。柔らかいフレックスは、転倒時におけるリカバリー性能を高め、硬いフレックスは、ターンでの操作性やトランジションへの飛び出しやすさを向上させます。.
ロッカー形状はプレーニングとフィーリングに影響を与えます。コンティニュアスロッカーはスムーズな加速を提供し、スリーステージセットアップはノーズを素早く持ち上げます。注意深くチューニングすることで、トランポリンのようなバウンドを避け、トランジション中のバランスを向上させることができます。.
スタンスの選択肢には、幅、角度、ヒップアライメントなどがあります。テールを先行させたセットアップは、後半のエッジ切り替えに役立ちます。練習を通して調整しましょう。リーディングフットの位置は、コントロールとバランスに影響します。足首に近いストラップ配置は、安全性を高めます。.
各部の名称を理解することで、コーチとのコミュニケーションが円滑になります。ビンディング、ストラップ、グリップ、ベースプレート、パッドなどの名称を知っておきましょう。.
基本を超えて、専用のビンディングやマンタにインスパイアされた形状に注目してください。ハードウェアのミスマッチは危険なセットアップにつながります。付属のボルトとワッシャーは、乗る前に必ず締めてください。.
小さな打撃の移行とジャンプに徐々に取り組みましょう。セッションを通して安定したフォームを維持するために、バランスとタイミングを活用し、基本的な動きを活かすことで進歩がみられるでしょう。.
フィット感を入念に確認することで、快適性と安全性が確保されます。ブーツのサイズとバインディングの摩耗具合を確認してください。締め付けすぎず、ぴったりとフィットしているか、ストラップがくるぶしのすぐ上にくるように確認する必要があります。.
初心者向け安全装備:ライフジャケット、ヘルメット、インパクトベスト
沿岸警備隊承認のライフジャケット(PFD)を選び、体にぴったりとフィットし、十分な可動域を確保できるものを選びましょう。普段着る服を着込んだ状態で試着し、サイズを確認します。着用後、簡単なスクワットとリーチのテストを行い、動きやすさを確認します。体に合ったジャケットは、ハーフターンや基本的なトリックの際に適切な姿勢を維持するのに役立ち、爽快でありながら制御された体験を提供します。事前に、ストラップ、縫い目、フォームパネルを点検し、摩耗した部品は速やかに交換してください。通常、カジュアルな水遊びであっても、水上では専用のライフジャケットが不可欠です。.
-
Life Jacket
- タイプ:水上活動中の浮力をサポートするように設計されたタイプIII PFD。.
- フィット:ぴったりとフィットし、腕の動きを妨げない。肩ストラップは擦れずにしっかりと固定される。.
- 安全性:ジッパーとラップストラップをテストする。浅瀬で監視下のもと、簡単な水泳テストを実施する。.
- お手入れと保管:使用後はすすぎ洗いし、室内で陰干ししてください。熱を避け、乾燥した換気の良い袋に入れて保管してください。化学物質の移行を防ぐため、ウェットスーツとは分けて保管してください。.
-
Helmet
- 基準:衝撃認証付きウォータースポーツ用ヘルメット。ライナー密度とシェルの完全性を確認すること。.
- フィット:ヘルメットは水平に装着し、ストラップは顎の下で動きを防ぐ程度にしっかりと、かつ快適に締める。左右と上方向に軽く引っ張ってテストする。.
- 使用方法:毎回使用後に点検し、ひび割れたシェルや摩耗したストラップは速やかに交換してください。.
- お手入れと保管:使用後はすすぎ、日光を避けて乾燥させ、通気性の良い場所で重いギアとは別に保管してください。.
-
Impact Vest
- Role: provides chest protection; can offer some buoyancy, but does not replace a PFD; combine with jacket in higher-risk environments.
- Fit and protection: choose a vest with padded panels over ribs and sternum; snug without limiting arm movement.
- Buoyancy note: buoyant enough for casual sessions but not as flotation as a dedicated jacket; generally about half of overall flotation when paired with a PFD.
- Care: rinse after sessions, dry flat away from heat; storage in a cool, shaded area is best; keep it apart from heavy equipment to maintain padding.
visual checks matter before stepping onto water. In groups, separate responsibilities and agreed signals help; this reduces risk during tricks and spinning. Each session should begin with a simple workout focused on stance and controlled turns; therefore, set a relaxed pace that would become intense as skills grow. Falls happen; when they do, turn hips with shoulders to regain balance, then reattempt a trick with deliberate effort. Storage habits matter: dry gear between uses, storage apart from wet equipment, and regular inspections extend longevity. Routine workouts benefit from clear drills and plenty of repetition on basic moves to build confidence and safety.
Rope, Handle, and Tow Setup: What You Need to Start
65 ft rope length; boat speed around 18 mph; center grip on handle; confirm quick-release is secure; better balance comes from stable line tension.
Thoughts from experienced wakeboarders frequently emphasize center pull and smooth transition. Bent elbows degrade control; keep wrists relaxed. Maintain shoulders square, grip firm, and balance while navigating wake edge.
If youve got a plan, use this baseline as a reference to adjust to own style.
- Step 1: Rope and handle selection
- Rope: 65 ft length, floating, high-visibility color, low stretch; helps keep line tension predictable.
- Handle: padded grip, durable core, easy to secure end; look for a center grip and a quick-release.
- Step 2: Tow configurations
- Centerline pull aligns with center of mass; slight left or right offset can support stance preferences.
- Test several configurations, several times, to identify which feels better; keep a consistent center line during runs.
- Step 3: Speed, cadence, and technique
- Start around 18 mph; increase in small increments to 20 mph as control improves. Maintain a steady cadence; avoid fast, jerky pulls that trigger spinning or losing balance.
- Move weight slowly into each new stance to prevent overcorrection and keep board flat.
- Avoid moves that cause you to lose line tension or drift off wake edge.
- Step 4: Safety and checks
- Inspect line for nicks; verify connection to tow point; check vest fit and deck grip; ensure operator has clear view of rider.
Women riders may adjust stance width and grip pressure to strengthen control; a well prepared setup helps navigate water conditions more reliably.
This concise tutorial on Rope, Handle, and Tow setup serves as baseline guidance; use it to refine style, technique, and confidence, aiming at maximum control.
Clothing and Comfort: Wetsuit, Rash Guard, and Weather-Ready Layers
Choose a 3/2 mm fullsuit for most spring and autumn riding; flatlock seams prevent chafing, and a smooth interior helps absorb moisture without adding bulk.
Underneath, wear a long-sleeve rash guard to protect skin from friction and UV; it traps a thin layer of warmth without bulk; rash guard itself offers abrasion protection and absorbs only sweat.
For variable weather, pair rash guard with a lightweight windbreaker or spray-top when wind bites; for cooler mornings, add a thin fleece under wetsuit; on hot days, switch to rash guard with board shorts; slower starts benefit from extra warmth. Riding safety shares basics with skiing discipline: stay relaxed and focused. Understand how layering affects mobility.
Fit matters: choose a relaxed cut with room at shoulders to stay able to move during riding; you should avoid tight sleeves that hinder front-side reach; ensure wrists stay covered when arms extend; stay alright by keeping gear comfortable.
Protection and comfort: booties with 2–4 mm thickness provide warmth and foot protection; make sure legs stay relaxed, ankles flex, and heels stay free for quick edge grip.
Equipment setup: if a finn fin is present on your board, check fit and secure mounting before taking off; before mounting, understand how gear layers affect stance.
Towboat operations and boats safety: establish communication with operator and spotter; use simple hand signals to indicate hazards, water depth, or your need to come in.
Weather-ready layering: carry a compact wetsuit vest or a windbreaker in your bag; when sun warms, remove outer layer gradually; wind chill can hit quickly on wakeboard sessions; this setup supports workout and recovery.
For half-day sessions, plan hydration and cooldown, though you may stay on water longer.
Learning tip: keep shoulders tension-free and jaw relaxed to support smoother front-side moves.