

 How to Use Two Anchors on Your Boat for Safer Mooring">

Deploy two anchors in a V from the bow with equal rode lengths to reduce swing and roll during swells. This setup creates a stable triangle that keeps your boat more level and predictable as cycle of waves changes, giving you better control in changing conditions.
Begin with a practical plan: mark the anchor positions on a chart, then record every deployment. Use a simple log to capture conditions, water depth, wind direction, and current, especially during gusts. After mooring, produce a brief report on how the setup held through a full swell cycle and how the boat behaved under load. Collected data from nearby harbors and clubs can help you adjust rode lengths and spread for the next run.
Choose equal rode lengths and test under a calm cycle and a moderate wind cycle to ensure stability. This practical approach helps reduce the impact of gusts and keeps the boat’s power under control, especially when the bottom is squishy. In soft-bottom areas, increase scope to prevent dragging and keep the second anchor from losing grip.
Attach a secondary line from the boat to the second anchor to pull the bow into the wind and to share load. This gives you redundancy if one anchor drags, and it helps keep the hull from scratching against pilings or from rubbing on swells rolling under the keel. Those in crowded harbors benefit from a steady triangle that tolerates current shifts and depth changes.
Finish with a quick post-mooring report: record what held, what drift occurred, and what needs tightening. However, stay ready to adjust for deeper water, stronger current, or a shift in wind. For those who log conditions, you gain a practical template to compare across tides and seasons. By collected data and reviewing logs, you reduce risk and improve consistency in future moorings.
Dual-Anchors Mooring: Practical Setup for Stability
Deploy two full-size anchors in a broad V on the bow, 60 degrees apart, to minimize drift and keep the yacht steady in times of heavy weather in the oceans. Use equal-weight anchors and set each rode to 7:1–10:1 of the water depth; extend to 12:1 in gusty conditions. Protect rodes with chafe sleeves and separate through-bolts to ensure smooth operation, especially when goods or gear shift with the roll.
- Deployment order: drop Anchor A first, let it settle, then drop Anchor B while keeping both lines clear of the prop wash. After both rodes lay on the bottom, back the yacht slowly to set each anchor and then snug both lines.
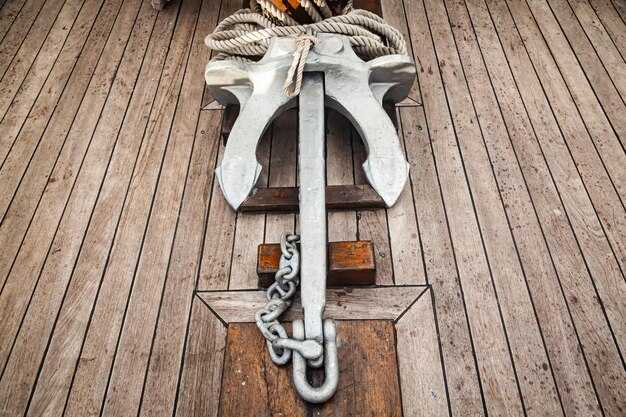
- Anchor weight and type: choose two heavy, full-size anchors of equal weight. For mid-size yachts (12–16 m), 25–40 kg each works well; for larger cruisers (16–22 m), 40–60 kg each improves penetration in soft bottoms.
- Rode length and attachment: use a combination of chain and rope to achieve 7:1–10:1 scope; if seabed bottoms are soft, consider a longer length (up to 12:1) and add a rope protector near chafe-prone areas; ensure both rodes are secured to equal-length bow cleats for balanced loading.
- Bottoms and placement: sand and mud bottoms bite securely with larger flukes; rocky bottoms require anchors with robust flukes and appropriate grip. In soft bottoms, heavy gear helps penetration, but avoid overloading the bow forward momentum; adjust angle if a strong current shifts.
- Testing and monitoring: conduct a short testing drift after seating both anchors–record position every 30 seconds for 5 minutes in the forecasted wind. Aim for drift under 3–5 meters at 4–6 knots; if drift exceeds this, pause, recheck line tension, and adjust the angle or length.
Tips for ease and reliability: orient rodes to minimize chafe, use two independent fairleads, and routinely inspect shackles and swivel connections. If youve got a subscription to a weather provider, set alerts for approaching squalls and adjust the mooring plan before the next ocean crossing. The istikus source data (источник) from local harbor authorities can guide bottom selection and typical holding in your area.
- Equipment checklist: two heavy anchors, two lengths of high-strength rode (with chain and line), chafe protection, two bow cleats or fairleads, a small windlass for ease, and proper deck hardware rated for the load.
- Operational cadence: perform deployment during daylight and favorable tides, test during slack water if possible, and monitor lines after deployment until the yacht sits firmly in position.
Maintenance routine: inspect lines for UV wear, verify knot security, and retest after any major weather event. For longer trips, record deployment times and outcomes to refine techniques on future passages; this approach reduces roll and improves overall stability through repeated ocean conditions. Thanks for reading and safe anchoring out there.
Anchor and rode selection for dual anchoring
Always pick two identical, licensed anchors sized for your boat and pair each with its own rode of equal length. Use a robust chain or a nylon rope option that minimizes stretch, and keep extra length for surge absorption. Include hardware from a trusted provider and keep the setup ready for updates in changing conditions.
- Anchor type by bottom: sand or soft mud favors a Danforth-style anchor; rock, weed, or uncertain bottoms perform better with a plow/claw design. For larger boats, choose a larger model with a strong bite and a rounded crown to improve holding in mixed bottoms.
- Rode and hardware: use chain where possible for abrasion resistance and weight, plus a nylon rode portion for shock absorption. Attach a plated or stainless steel pendant and rounded shackles to the bow roller to ease handling and reduce snag risk.
- Scope and length: target 5:1 to 7:1 in calm conditions; extend to 7:1–10:1 under wave or wind stress. Per anchor, keep length equal and add extra margin so the load shares evenly as conditions shift toward the boat’s centerline.
- Arrangement: set the two rodes at a 45°–60° angle to form a broad V. This keeps the boat from twisting toward either anchor and improves resistance to wave action. Rounded lines and even tension support a supreme balance of pull between both anchors.
- Drop the first anchor toward the expected wind/wave direction, slowly pay out the rode, and watch for a clean bite. Confirm you are getting a solid set before letting out the second anchor.
- Place the second anchor on the opposite side at a 45°–60° sweep from the first, ensuring the rodes do not cross. Keep the lines toward the bow and away from stern gear to avoid chafe and snag.
- Test load distribution: gently pull each anchor in turn to verify secured holding. Adjust the angle or length if one side shows movement or a worse bite than the other.
- Follow a backup plan: if weather updates shift, be ready to move rodes, adjust scope, or add a third line for stability in extreme conditions.
Documentation and mindset: record the setup in a simple log, including anchor type, length, scope, and bottom conditions. Use updates from the latest forecast to refine the following mooring plan. Keeping notes helps you reproduce the arrangement with consistent results and reduces the time to respond when conditions change, minding safer, easier retrieval and ongoing secured control of the vessel.
Bow and stern placement considerations for a balanced moor
Set the bow and stern anchors so their pulls form a balanced cross around the yacht. Use similar line lengths and angles to avoid a heavy bias, and keep the setup simple for crew to manage, youre able to adjust easier if wind or current shifts, there.
Distance matters: offshore conditions require five boat lengths minimum of rode; onshore shelter allows three to four lengths. Keep the bow line and stern line from crossing, which reduces interference with steering and keeps the hull aligned front to stern.
Angle guidance: aim for about 30–40 degrees off the front and aft axes so the two anchors pull in roughly symmetrical directions. This balance lowers yaw and improves steadiness in gusts. If you need to adjust, do so gradually and sometimes test each adjustment individually for predictable response.
Bottom and hardware: in sand or soft seabed, attach heavier chain or use longer chain on each rode to improve bite and catenary. If the bottom is soft, you might need occasional resets; set a plan for an overnight check to confirm the anchor holds. The five-minute routine helps you stay sure about the position when storms threaten.
Inaccuracies in depth, current, and rode length can creep in. Before you leave the marina, double-check line slack and angle; after you get out there, re-check and adjust as needed. If something looks off, pull a quick test to avoid drift.
Attached gear and number of components: ensure every connection is attached and in good condition–cleats, shackles, swivels, and the chain itself. Using heavy hardware helps reliability, and a simple spare anchor arrangement reduces risk. The number of moving parts should stay low to limit failure modes.
Onshore or offshore planning: monitor for changes in wind and current; keep crew onshore or aloft to watch lines. Eyes aloft help you spot movement early. Getting this two-anchor setup right is easier with practice; five sessions typically yield steady improvements.
Scope rules: calculating rope/chain lengths for wind and current
Need baseline: total scope equals depth × 2.0. For offshore or exposed conditions, push to depth × 3.0; in calm sheltered waters, 1.8–2.0 works. For a 50-foot boat in 6–8 m water, plan about 40–60 ft of total line.
Split the load with a practical approach: use chain about one third of the total scope and rope about two thirds. Keep the rope attached to the chain with a proper splice or soft shackle, and feed it through a fairlead to minimize friction. Ensure the line is full and tight under load to avoid flutter, and choose rigging that reduces tangling. When you deploy, use spliced connections and protected fittings to extend life and reduce wear.
To adapt quickly, there is space to adjust by ±0.5x depth if you need to reduce the risk of tangling or to accommodate different wind directions. For a beach or shallow offshore site, reduce scope slightly to avoid dragging the chain along bottom, then reset after a shift. Airflow around the bow affects line tension, so test the setup with modest tension before fully cleating the mooring. Use a shank-friendly arrangement and verify that the attached hardware remains full and tight under gusts.
Two-anchor moorings help with balance: attach each line to a separate bow point and equalize loads by keeping lengths similar. Weigh the lines after setting to ensure both anchors share the pull evenly, and avoid tangling by keeping loops clear of the hull and other lines. Updates from the rigging team (including Manson rigging) may refine lengths, especially in Australia where local conditions vary. A well-planned two-anchor rigging provides added resilience without compromising speed or ease of handling, and it stays helpful for ship maneuvering in gusty conditions. If you work offshore, use longer lengths to maintain a steady angle and prevent the line from snagging the shank or deck fittings; if you operate near a beach, keep the scope sufficient to absorb surge while avoiding seabed contact.
| Depth (m) | Wind (knots) | Current (knots) | Scale (× depth) | Total scope (m) | Chain (m) | Rope (m) | 備考 |
|---|---|---|---|---|---|---|---|
| 6 | 12 | 1 | 2.0 | 12 | 4 | 8 | Baseline |
| 12 | 25 | 2 | 3.0 | 36 | 12 | 24 | Exposed, offshore |
| 9 | 8 | 0.5 | 2.5 | 22.5 | 7.5 | 15 | Calm |
Step-by-step deployment: setting up both anchors safely
Deploy the primary anchor first, then place the secondary to form a combined holding that keeps the boat steady in wind. Use a rocna as the primary and a backup manson for the second; these two grips widen the footprint and reduce dragging.
Before deployment, verify you have licensed gear, a personal PFD, and lines that can operate independently. Ensure the lines are provided with spare snubbers and kept separate to avoid tangling when you set both anchors.
Drop the primary anchor to the bottom and let it set, then back the boat gently to help the bite take. Observe the rode for initial movement; if the anchor drags, stop, reposition, and re-drop until the bite holds.
From the bow, deploy the secondary anchor at a 30–60 degree offset from the first, at a distance that gives room for the combined pull. Let it reach the bottom and verify both anchors bite; if wind shifts, adjust gradually to maintain balance between lines.
With both anchors set, keep the lines taut enough to control the boat but not so tight they pull at unsafe angles. Usually you should have some slack to absorb surge, extra safety, and to prevent one line from becoming a solid vector that pulls the boat out of position.
Monitor for dragging: if either anchor moves, re-spot the second and, if needed, reposition the primary; aim to keep the furthest anchor line clear of the hull to avoid entanglement and to preserve protective angles in the current bottom conditions.
Communication remains key: use wireless links and send a smstext to the crew to confirm each anchor’s status. Agree on roles with the sailor, independently verify holds, and proceed only when both anchors are secured. In bahamian waters, this approach helps maintain control whether the bottom is sand, weed, or rock, and keeps the boat kept steady in a changing breeze.
Ongoing management: monitoring tension and adjusting as conditions change
Set a target tension for each anchor and test it every length of rode to confirm equal load sharing; log data after each adjustment. Using a simple gauge, or a two-point pull test on both lines, sailors can compare readings and keep tension balanced. This takes clear attention from everyone and stabilizes a mooring that stays anchored as conditions shift.
Maintain a dedicated locker with spare shackles, pins, and a small contact wrench; keep spare material to swap in quickly. The routine should be simple: inspect line material for wear, lubricate shackles where needed, and verify that pins are tight. Testing the line across every length helps detect hidden wear before it fails, and using data from your checks guides safe adjustments. Keep the process personal and friendly so sailors feel confident, and store tools away from the rode to keep the deck clear, away from lines.
Anticipated shifts in wind, tide, or swell change how the two anchors share load. If you notice unequal pull, ease or take in the rode on the side with less tension, then re-check within minutes. When bottom is sand, set the anchor more securely by adjusting rode length and ensure the shackle remains straightforward; this practice makes the system easier to manage and reduces snag risk.
Involve sailors of all skill levels: assign a contact person for each check, so everyone knows the steps and what to observe. Mind the readings, notice drift, and record wind speed, tide, and tension in a simple log. By using data from testing and the live feel of the boat, you can anticipate changes and keep the system safe away from trouble. If readings were off, adjust. If something seems off, relocate gradually and update the site plan to reflect new anchor angles and role allocations; isnt a sign to panic, but a signal to act.