

 Exumas Sailing Itinerary – The Ultimate 7-Day Bahamas Sailing Guide">

日の光が射し始めたら、ヤシの木に囲まれた岸辺の近くの保護された水路に停泊し、熱帯の風、潮、燃料データを収集して、自信を持って航行する。.
各航路は、物資やスペアパーツを提供するバハマの港と、保護された入り江を組み合わせたものです。あなたのセーラボートは、風の強い午後用に予備を残して、航路間で燃料を調整する必要があります。強風や潮流を予測するために、潮の満ち引きと風の向きの変化を記録しておいてください。計画が変更された場合は、船上の他の乗組員が協力してくれるはずです。当番を分担し、天候の変化に注意を払ってくれるでしょう。.
Day 1 は穏やかな出入りに焦点を当て、マングローブの端近くに錨を張り、その後、三日月形のビーチまで短い移動を行います。距離は6~8マイル、時速4~5ノットで約1.5~2.5時間です。Day 2 は、保護されたラグーンに面した水路を探検します。地元の販売業者または小さな店からシーフードを収集し、必要に応じて弱い風に対する長い距離を移動した後、疲れたエンジンを修理します。.
3日目は、珊瑚礁の周辺でのシュノーケリングが楽しめます。コンパクトなチャートを使って場所の間を移動し、風向きに注意を払い、安全のために珊瑚礁に守られた深度を優先してください。4日目は、より大きな海岸沿いのハブに戻り、燃料ドックやお店で新鮮な農産物が入手できます。ここに燃料を補給し、必要に応じて水を補充する計画を立ててください。.
Day 5 は穏やかな入り江を目指し、マングローブの近くに錨を下ろすことを求めています。必要に応じて、エンジン冷却に看護技術を使用してください。Day 6 は、サンダウナーに最適な穏やかな水域のアンカレージに向かいます。陸上での時間は、貝殻を集めたり、バハマの販売者と取引したりして過ごすことができます。最後に、夕暮れに縁取られた港は、穏やかな風上からの別れを提供します。.
このループは穏やかな風と安定した航海を好むため、結び目を正しく保ち、潮の流れを追跡し、乗組員が騒ぎなく思い出を収集するのを支援するために、あらゆる場所を活用してください。ここに、月の満ち欠けごとに何かが変わり、クルーザーは信頼できるバハマの港に戻り、他の人とアドバイスを共有します。横風は気まぐれなので、常に代替案を用意し、次の区間前に食料品を十分に備蓄してください。.
Exumas セーリング航路:実践的7日間バハマガイド
ハイバーン・ケイ付近で夕暮れ時にアンカーを落とし、リーを背に強めの潮流を避けることから始めます。保護された場所を選び、船首を4〜6フィートの水に保ち、アンカーロープが十分な長さで張られていることを確認してください。.
通常、エグズーマを時計回りにループし、アンカーポイント間を2つのジャンプで計画します。礁や場所を把握しておくと、ナビゲーションは簡単になります。常識が安全と燃料計画を支配します。食料を補充するために、2日に1回追加のプロビジョンストップを追加します。潮流を監視し、それに応じてコースを調整してください。.
1日目、南部の港からスタンielタウンへ物資調達のため出発し、その後、リーフの後ろに錨を降ろして休息します。セールを見直し、リグの張力を確認し、近くのリーフの音に注意して次の区間の計画を立てます。また、今後の航行に関する天気予報と潮汐表も確認してください。.
実用的なコツを以下に示します。風の向きの変化に関しては、どちらの方向からも風よけ保護がある湾を優先します。浅瀬よりも高いアンカー地を選びます。珊瑚礁の近くでは、4〜8メートルの深さを確認するために音響測深儀を使用します。カモメの休息場所から離れてください。.
2日目はスタンielsへ向かい、サンダーボール・グロットエリアへ向かいます。避難できるサウンドの近くに錨を打ち、流れが変化した場合は代替コースに変更します。可能であれば、マリーナで淡水を集め、洗濯をします。.
船長は計画されたルートを優先し、保守的な速度を維持すべきです。重要な場所へ接近する際は、船上から足を離さないでください。距離はメートル単位で記録し、VHFで乗組員と連携して、気象情報とシフトについて調整してください。.
最終走で保護された港に到着し、より穏やかな流れに注意し、営巣地の島々で鳥が少ないことに気づくこと。日没後、ロープを止め、装備品を固定し、港での補給を終えるために次の補給計画を立てること。.
日々のルート(距離と推定航行時間)
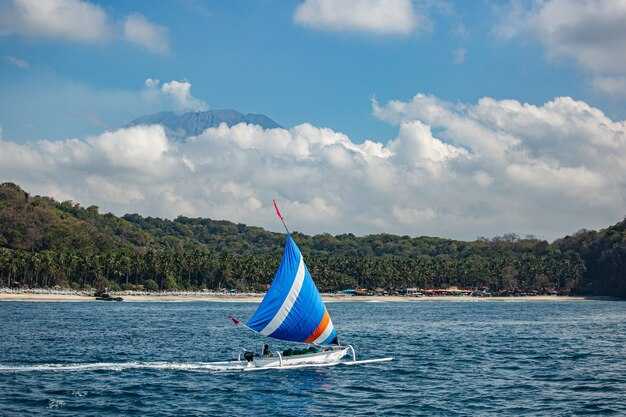
潮風のチェックから始めて、浅瀬のアプローチやマークされた礁に注意し、よりスムーズな長距離航海のために日の出後すぐに開始してください。必要なことは、まずハイボーン・ケイを目指して計画することです。そこでは、深い係留索と基本的な店舗が、次の航海前の補給を容易にします。熱帯の景色が待ち受けており、入り江の近くではロブスターが見られ、日の光が当たる浅瀬をエイが巡回しています。この旅程は約22マイルで、安定した貿易風の下では条件が良好になる可能性があります。マークされた航路に従い、強い潮流時には浅瀬を走るようにすることでリスクを回避してください。流れに沿って進むと遅くなるので、可能な限り潮流に乗るように計画してください。この探検家向けのルートは、慎重な計画を必要とし、島好きには比類のない景色を提供します。装備と精神を準備すれば、1週間は順調に進みます。注意すべき点:最初の立ち寄り先には限られたサービスがあるので、それに応じて備蓄してください。手元にボートとプロビジョンのある状態であれば、快適に過ごし、重要なことに集中できます。回避された経路はリスクを最小限に抑えるためにマークされています。.
| Day | From – To | 距離 (マイル) | 推定時間 (時間) | Moorings/Marina | 潮/メモ | Highlights |
|---|---|---|---|---|---|---|
| 1 | Southern gateway marina – Highborne Cay | 22マイル | 4 | 深海係留; 近くにマリーナは限られている | 潮位良好;入り江付近で潮流が止まる;明確な水路 | 比類なき眺め; 熱帯の風景; フラットでのレイとロブスター; 最初の補給の旅 |
| 2 | Highborne Cay – Cambridge Cay | 12マイル | 3 | ケンブリッジ・ケイの係留地点;アンカーに優しい | 穏やかな流れ; 日中の風は突風になることがある。 | Spot スノーケルスポット; ターコイズブルーの海; 島々の生息地 |
| 3 | Cambridge Cay – Shroud Cay | 9マイル | 2.5 | Shroud Cay anchorage; 深い停泊地。 | 潮汐の影響が少ない;浅瀬に注意 | Rays in the pass; マングローブの風景; 静かな入り江 |
| 4 | Shroud Cay – Lee Stocking Island | 16マイル | 3.5-4 | Lee Stocking への係留; マリーナおよび基本的なアメニティ | 潮汐範囲は中程度です。潮汐表に基づいて計画を立ててください。 | ターコイズブルーの景色;ビーチ;入り江近くのロブスター |
| 5 | リー・ストッキング・アイランド – ノルマンズ・ケイ | 25マイル | 4.5-5 | cayの近くの係留場所;限られたマリーナのオプション | 流れが強い;浅瀬付近には注意;潮位を確認 | 長距離移動; 目標地点への経路表示; 探検者による遠隔地調査 |
| 6 | Norman’s Cay – Stocking Island | 22マイル | 4-5 | Stocking Islandには、目印のついた係留索と小さな水辺があります。 | 潮汐サイクル;流れは切り込みを下る | 夕日の景色;地元の店;トロピカルな雰囲気 |
| 7 | Stocking Island – southern gateway harbor | 6 mile | 1.5-2 | Harbor marina with fuel and water | Slack water in morning; light crossing | Short final hop; last views of island scenery; lobster dinner possible |
Tide Windows and Current Timing for Exuma Cuts
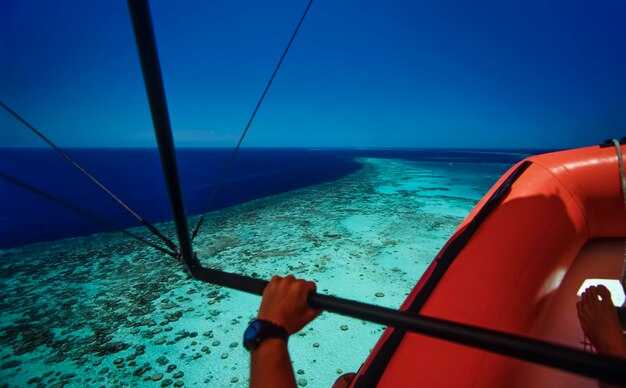
background data from tide tables informs safe crossing windows for Highbourne Cut; note serves as help for cruisers with plans to move between anchorages and busy islands. stay flexible as moon phase and wind shift currents. water color shifts from bright turquoise to cobalt near deeper channels, signaling channel edges. others on board notice changing water tone. visited anchorages within the chain reveal safer passage options for sailing yachts and their crews. within this region, mind wind and current; youre able to make better decisions and spend time on water with confidence.
- Best window: Slack water around high or low tide provides smooth approach. expect a crossing window roughly 50–70 minutes around those moments; verify exact times on tide tables or a trusted app before departure; captain should confirm with youre crew prior to start.
- Current timing and speeds: during slack, currents stay under 0.5 knots; as flood begins, flows commonly run 1–3 knots; ebb can reach similar speeds. in strong breeze (15–20 knots), add 1–2 knots to those figures; plan margins accordingly.
- Direction and safety tips: flood current usually east-to-west during rising tide, ebb opposite. approach from shoulder of current to avoid stern drift; maintain a slow but steady speed to stay in control; longer passes demand careful steering.
- Anchorages, dock options, and shore plans: after crossing, shelter lies at anchorages near Highbourne or within nearby coves; dock facilities are limited, but a yacht captain can arrange a tender ride (taxi) to shore markets. spend time surveying bottom and reef color, select deeper water if shoals are present; always use bow and stern anchor when needed.
- Wildlife and fishing considerations: sharks patrol edges near channel mouths; avoid luring or chasing; lobster spots show around current breaks; fishing boats may operate nearby; keep distance and follow local rules; youre likely to see more action on calm days.
Longer planning window helps stay ahead of busy schedules. Plans should include fallback options to stay within protected anchorages if currents surge or visibility drops. Mind background currents and wind forecasts before heading into exposed cuts; youre more prepared when visited anchorages within reach. This approach makes cruising safer and more enjoyable for experienced crews and for others cruising alongside.
Depths, Currents, and Passability of Popular Channel Cuts
Always verify depths with a chart and marked markers before entering channel cuts; keep a compass on deck, watch currents, and stay within blue water along palm and shore.
In majors cuts, depths typically range 8–25 ft at mid-tide, with some sunken bars near bends. Southeast winds push currents toward entrances at 2–4 knots; slack water reduces pace to under 1 knot, easing transit for cruisers.
Between reef tips and shoals, passability stays high for cruisers and kayaking when winds stay under 15 knots; avoid longer runs where breakers loom and glare hides hazards.
youll learn to navigate by marked lanes, avoiding cross-currents, and using a palm compass or handheld GPS. what youll need: additional line, spare anchor, doesnt rely on one option.
Restaurants sit along shore edges; between heads and shore, fishing crews and cruisers share space; stay inside marked channels to minimize risk. Those crossings can shift with southeast winds, and you may see ball markers and blue buoys marking safer lines in calmer water, making planning easier.
what to watch: southeast currents can change fast; additional checks include tide charts, sun angle, and depth alarms; those details come from experience and matter for passability.
Other channel cuts follow same pattern: verify depths, keep to marked lanes, and watch southeast currents and wind shifts.
Protected Overnight Anchors and Calm Night Spots
Anchor on north shore of highbourne cay in a lee pocket behind reef; set 6–10 ft of clean sand; back bow to right breezes; winter nights stay unusually calm here.
Other solid calm spots lie along harbors and island coves where a shallow bay offers safety from chop; locations above reef reduce surge and keep the factor of wake low, areas remain ever quiet at night.
Nearby restaurants and a beach club appear within easy reach; grab a quick dinner and enjoy beautiful views after anchoring, with nurse sharks sometimes seen beyond reef and a gentle right breeze.
Safety notes: stop engines and approach slowly when entering a new spot; verify anchor set in sandy patches away from seagrass; avoid swimming near nurse sharks unless invited by local guides.
Practical tip: enjoying calm nights on common routes across this island chain is truly rewarding; heads up to travelers: keep distances from coral heads, monitor winds, and favor anchoring in winter when breezes stay steady.
Ports, Marinas, and Provisioning Stops Across the Exumas
Recommendation: Provision in George Town first, then head to Staniel Cay for fuel, groceries, and laundry; allocate 2–3 hours per stop for provisioning and dock chores; this plan minimizes backtracking and maximizes cruising time under light winds.
George Town – provisioning hub
Located at central anchorages along western side of island chain, George Town offers full-service market, fresh produce, fisheries stalls, and a dockside laundry. Hours typically 8:00–17:00; during summer months some shops extend hours. This stop is a solid example for provisioning because it combines fuel docks, fresh water, and groceries within walking distance of slips. Bring something to stock: staples, snacks, and spare parts. Expect calm waters in protected coves; outside, waves rise and driftwood piles may line beaches.
Staniel Cay Yacht Club marina
Staniel Cay Yacht Club offers fuel dock, showers, laundry, and provisioning shop; plan ahead for current slip availability by calling latest schedule. Hours are roughly 8:00–18:00; club facilities include a small restaurant and social area; choosing this stop gives you quick access to navigation tools and a chance to refresh crew. Winds typically favor shorter hops southward; waters remain clear around coves, with good scenery and rays at times.
Compass Cay Marina
Compass Cay Marina provides gas dock, fresh water, and a provisioning shop; hours 9:00–17:00; located a short hop south of Staniel Cay. This stop is a practical example for mid-cruise stock-up and a chance to kayaking around nearby flats. Navigation from here runs smoothly in light winds; scenery includes white sand beaches and rays near seagrass flats.
Other notes: For planning, seasonal shifts matter since weather can shift; expect provisioning windows to move by months; generally allow 3–5 hours per stop to account for shopping, laundry, and fuel. Since everything is located along a compact arc, you can base your day around one main stop and do a short excursion to a second. What you choose depends on winds, currents, and your cruising pace, so be flexible. Each stop covers a different area, so adjust for scenery and provisioning needs.
Overall planning should focus on reliable provisioning windows, with flexibility for weather. Mind currents, and keep an eye on waves and driftwood when approaching anchorages.