

 Describe a Water Sport You’d Like to Try – Part 23">

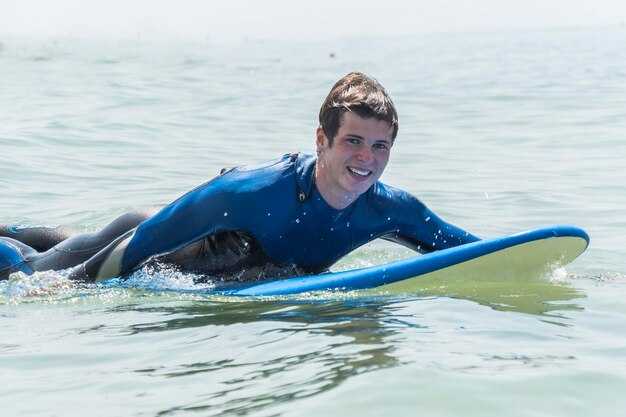
Choose a calm Maui morning and book a short, hands-on lesson on a soft-top board at Napili Beach. With friends or family, you’ll have a ready, controlled introduction to the pace of the ocean and a practical sense of balance on the board. Then you can note what to adjust next for ongoing safety and comfort.
Equipment and technique start with a 7–8 ft soft-board, a leg leash, wax, and sun protection. Stay in shallow water, practice popping up from knees, then rise to your feet, and monitor the sensation as you go down into stance depth. Progress often comes from staying relaxed on the small ripples and focusing on form; tubes may appear, but keep your eyes on stability and avoid rushing.
Nature dictates pace: wind shifts, swell height, and the depth near the sandy bottom determine when to push further. Check government advisories and follow lifeguard instructions; if conditions look challenging, skip the session and regroup next time. This stance reduces risk while preserving progress.
Coordinate with family and friends to compare notes after each encounter; this routine can pair with ielts preparation while you describe sensations and the sequence of steps. Practice reinforces readiness and helps you advance to the next phase, aiming for longer rides and occasional tubes in the same safe setting.
Water Sports Exploration Guide
Start with a 90-minute intro on a stable stand-up paddleboard in a sheltered inlet; this sport offers the most natural, gentle entry into aquatic recreation. A certified instructor will adjust board width, paddle length, and stance until balance feels well established. Bring a snug wetsuit, personal flotation device, and ankle leash; surface is calm, which helps you hear clear coaching. For boarding basics, select a wide, stable board (about 8’6″–9’6″) and a short paddle to enhance control. This arrangement is perfect for new learners.
Progress appears quickly when you stay within comfort. This isnt about pushing speed; focus on breathing, knee-bend, and smooth weight transfer to maintain glide. After the first session, go again within a week, because time on the surface builds confidence. Most learners discover a love for quiet moments on calm surface, watching birds skim the surface while the board responds to subtle shifts in balance. General safety rules include staying within sight of your instructor, wearing a PFD, and avoiding crowded ramps. Because gear selection matters, choose a paddle with adjustable length and a leash for the board. Many havent had formal training, so guided sessions help set a solid baseline. For planning, browser comparison of local studios helps set expectations.
Beyond initial basics, you can explore other routes that offer variety: wind-assisted boarding with a sailboard, gentle surfing on small waves at a controlled beach, or a surface-tune navigation course in a sheltered cove. Even modest gusts alter balance, so keep practice sessions short. If you plan to go toward higher-adrenaline routes, book a guided session; many centers provide gear rental, safety briefing, and time windows that fit beginners. Time on the surface matters; you believe progress comes with repeating sessions, so schedule regular practice. Because outcomes vary by location, always check forecasts and local currents before going out.
| Aspect | Recommendation | 備考 |
|---|---|---|
| Conditions | Flat calm surface, light breeze | Best for first steps |
| Gear | Wide, stable board; adjustable paddle; PFD; ankle leash | Leash on when on board |
| Progression | Knee-to-stand drills; short glides; 1–2 sessions per week | Record time and distance |
| 安全性 | Tell someone, check forecasts, follow local rules | Wear PFD; avoid crowded areas |
Assess Your Current Fitness, Balance, and Breath Control for On-Water Basics
Start with a four-week baseline to quantify three pillars: physical readiness, balance, and breath cadence. On dry land, perform a 60-second single-leg stand on a foam pad, then switch to a tandem stance for 45 seconds. Record results and target a 15–20% improvement by week four. These checks are useful to decide whether you’re ready to begin light kayaking or paddleboarding near beaches with family.
Breath cadence matters. Practice slow, controlled cycles: inhale 4 counts, exhale 6 counts, for 5 minutes, twice daily. A steady tempo helps tame adrenaline during a wave and keeps your core engaged. Use calm nature spaces such as beaches or sheltered coves to build ideal confidence before real action.
Balance drills on firm ground translate to stability in practice. Do three 60-second cycles: single-leg stand on a foam pad, tandem stance with eyes open, then a weight-shift drill with a light resistance band. Add a paddleboarding stance on a balance board to mimic drift and prepare for gentle wave conditions. Include boarding drills to build symmetry. Optional addition: attach a light bungee to a fixed point to add resistance during stance holds.
Navigation and progression: begin with 10- to 15-minute sessions in mild conditions near beaches; increase to 20–25 minutes as balance and breath stabilize. Work with a buddy to keep safety high, especially in Maui, where fishing trips and calm seas attract families. Maintain a simple training log; this источник of motivation helps you assess whether you’re moving toward general goals and the ideal pace. As you dive into practice, you’ll see how working on the basics helps navigate transitions and maintain control when conditions shift.
Shortlist Suitable Water Sports Based on Region, Access, and Cost
Choose kayaking on a calm river with public access and rental gear to minimize upfront costs, while building skills and personal awareness.
Region-oriented options
- River corridors: calm segments surrounded by forests and natural scenery; public ramps and club docks provide quick start; gear includes kayak, paddle, life vest; wetsuit optional for temps below 18°C; equipment packages may reduce daily rate; cost: rental $15-25/day; starter bundles may lower overall spend.
- Lakes and reservoirs: open spaces, wind can vary; less current; access via lake launches; gear similar; wetsuit optional; cost: $12-28/day; optional spray skirt for wind days.
- Protected bays and inlets: mild wind and gentle currents; good for sit-on-top or touring kayaks; cost: $25-40/day; add spray skirt or drysuit if chilly; awareness of tides matters; feeling of independence grows with each session.
- Rivers with rapids (difficult): helmets and guides recommended; cost: $60-120/day; opt-out of owning full gear; never push beyond limits; the question of whether to buy upfront or rent guides your decision; personal progress depends on coaching.
Access and logistics
- Public ramps and clubs: easy urban access, parking, hours; gear included with rentals; life jacket mandatory; check access rules for seasons.
- Guided operators: structured programs; safety function; offers clear personal plan; whether you want to join depends on life schedule and budget.
- Transport and storage: roof rack required; if lacking, choose rentals near you; some shops offer delivery options.
- Opt-out path: if you only want to test interest, select rent-first plans; never force ownership; create a trial period to measure personal feeling and progress.
Cost considerations and practical recommendations
- Starter kit costs: kayak (poly) roughly 300-800, paddle 25-80, life vest 20-60, wetsuit 50-150, spray skirt 40-70; total initial investment around 450-1100 if buying everything; renting often lowers entry barrier; equipment values vary by brand and region.
- Recurring expenses: daily rental 15-40, weekly packages 100-250, lessons 40-120; group rates and student discounts may apply; offers vary by region.
- Return on investment: increase fitness and nature awareness; overall, cost per session declines with frequency; feeling of personal achievement grows, life balance improves.
Bottom line: test several options via rentals, track your feeling and physical response, and choose a path that aligns with region and budget while staying mindful of safety.
Plan a 4-Week Beginner Progression: Skills, Drills, and Milestones
Begin with a concrete schedule: three 60-minute sessions weekly at a calm lakeside with a mild current and a sandy shore. Start with 5 minutes on shore for mobility, 25 minutes on the board focusing on stance, paddle grip, and a straight gaze, then 5 minutes cooldown near the sand. Pack cookies for quick energy. Always wear a PFD and use a board leash; follow local government safety guidelines and weather checks before you begin.
Week 1 targets focus on balance and control: answer a common question–how long can you stay upright while propelling in a straight line? Achieve a stable stance for 60 seconds with even power on both sides, and complete basic forward strokes with a clean catch and smooth exit. Drills: 3 sets of 8–12 strokes per side, 2 seconds paused at the catch, 30 seconds rest between sets; keep feet shoulder-width apart, knees soft, hips squared. End with a 5-minute coast and a light reflection on technique; look for small improvements in stance stability on the next session.
Week 2 expands duration to about 75 minutes and adds turning, edging, and interval work. Drills: 4 × 20–30 m push-pull repetitions, 1-minute rests; practice 90-degree turns with hips leading, then a gentle sweep to re-center. Emphasize a tall, relaxed posture and a steady breath to manage adrenaline spikes – the goal is controlled movement rather than speed. The trademark cue is to keep hips forward and shoulders relaxed. This creates a bungee-like resistance sensation but remains controllable. Track progress by cadence and balance marks; identify your strongest 20 m segment and repeat it twice per session. This approach helps you feel united with the craft and with local paddlers sharing the lakes environment, surrounded by coves and shoreline scenery.
Week 3 focuses on endurance and environmental awareness: paddle longer, anticipate current shifts, and plan a simple route along a shoreline. Drills: continuous paddling for 30–40 minutes with 2–3 minute micro-breaks, include a lower-leg bend and core engagement to keep power efficient; add a self-rescue drill from kneeling to standing, ensuring you can re-enter in calm conditions. Use a model of good form: hips squared, chest open, hands light. After each block, review a quick Q&A note about weight distribution and how your feet adjust to wind and water flow.
Week 4 proves readiness with a solid milestone set: 60–90 minutes of uninterrupted paddling, a controlled 360-degree pivot on demand, and a reliable re-entry drill after a brief fall. Target distance of 1 km at a steady pace, with downwind sections tackled using gentle edging and efficient paddle catch. End with a debrief: evaluate progress against the pre-week metrics, plan the next phase, and celebrate with a snack on the sand; remind yourself you love the process, believe you can advance, and aim to increase the length and complexity gradually in the coming sessions. An unforgettable milestone for many is this expanded endurance that increases confidence, while you look back on the four weeks and feel united with the lakes, local teams, and the people who offered encouragement.
Find Local Lessons, Rentals, and Safe Practice Zones Near You
推奨: 有名なビーチクラブで今日、初心者向けのインストラクター主導のセッションを予約して、このための確かな基盤を確立しましょう。 activity. 一般的な安全性を考慮すると、個人コーチングと少人数のグループを組み合わせたプログラムを選択してください。これにより、他の参加者と一緒に進歩し、家族のサポートを得ながら精神的な自信を築くことができます。.
お買い得商品を見つけるには、近隣の市レクリエーション施設、地元のサーフスクール、スタンドアップパドルショップ、ビーチクラブを確認してください。マウイでは、最新のスケジュール、免責事項、ギアリストを公開している経験豊富な業者と連携してください。明確な安全計画、資格のあるガイド、初心者に適した緩やかなペースを見つけてください。条件が良好な場合は、より長いコースに申し込む前に体験レッスンをリクエストしてください。.
レンタル: ボードの種類とサイズを、お客様の体重とスキルレベルに合わせてご確認ください。初心者向けのギアは幅が広く、安定性に優れています。短いコーチングセッション、リーシュ、ポンプを含むバンドルをご検討ください。ボードのレンタル料金は、通常 $25 から $60 / 時刻ですが、長時間利用の場合割引があります。特許取得済みの安全装備と、認定を受けたライフベストをリクエストして、お客様の安全性を高めてください。.
安全なエリア:明確に区画された初心者向けエリア、係留浮子、ライフガードの配置があるビーチを選びましょう。水に入る際の掲示されているフラッグや現地のルールを確認し、リップ・カレントを避けるために、十分慣れるまでは海岸の近くに留まりましょう。パートナーと練習し、インストラクターの腕の届く範囲に留まり、天候に注意を払いましょう。, wave 厳しい状況、そして群衆の中での安全を最優先し、危険な設定を避け、セッションごとに自信を高めてください。.
コミュニティと計画: 地元のクラブと連携し、信頼できる人々と進捗状況を共有し、一緒に楽しめる家族向けのスケジュールを検討してください。質問がある場合は、ギア、進捗、安全に関して明確な回答を求めましょう。その会話は、期待値を一致させるのに役立ちます。現在の詳細のソース(источник)は、市のレクリエーション部門とオペレーター自身です。多くのプログラムでは柔軟なスケジュールが提供されているため、週末の計画にアクティビティを組み込み、制御された楽しい環境でアドレナリンを徐々に高めることができます。.
安全規則の確立: 天候、装備点検、および緊急手順
出発前に天気予報を確認してください。風速が15ノットを超えたり、突風が25ノットに達したり、または海面が荒れている場合は、キャンセルして再スケジュールしてください。ブラウザを使って最新の沿岸警報を取得し、潮汐データを確認し、日の長さを確認してください。これらのデータは、行くかどうかを判断するのに役立ちます。.
意思決定ポイントを設定する:突風が吹くときは保護された入り江に留まり、開けた水路を避け、他のものから十分な距離を保ちます。状況が変化した場合は、再評価して安全な選択肢を選びます。この考え方は、カヤックルートにも当てはまります。.
個人装備の点検: 救命胴衣に摩耗がないか確認し、ストラップがしっかりとバックルされているか確認し、作動するホイッスルが取り付けられていることを確認し、カヤックのプリースカートの密閉性をテストし、パドルブレードが破損していないことを確認し、予備チューブを防水バッグに基本的な修理キットと一緒に梱包してください。.
緊急時の手順:パートナーを指名し、密閉された電話または衛星ビーコンを通じて現在地を共有し、VHF無線機と信号発信機を携帯し、簡単な合図と集合場所を設定し、アクティビティの前にパートナーと自己救助および支援救助の手順をリハーサルしてください。.
近くでパラセーリングのアクティビティが行われている場合、飛行区域を避け、速度の遅い交通に対して優先権を与え、掲示されている指示に従ってください。混雑した区域では、安全な距離を保ち、アイコンタクトを使用して誤解を避けてください。.
サンプルチェックリスト:天候判断、装備点検、相棒プラン、信号機材、緊急連絡先;打ち上げ前にクルーと計画を確認してください。.
クイックチェックのスコアから、ほとんどのクルーが簡潔で実行可能なステップを求めていることがわかります。その対策は、自信を高め、リスクを軽減するのに役立ちます。.
安全を最優先する文化を醸成し、アドレナリンを正確な行動へと転換し、自然を尊重し、関わるすべての人が計画を理解し、迅速に対応できるようにすることを保証する。.
何を大切にすべきかを考えてください。各ルールが存在する理由、装備が提供するもの、そして信号が失われるときに何が起こるか。安全という言葉が、あなたが下すあらゆる決断を導くべきです。.