

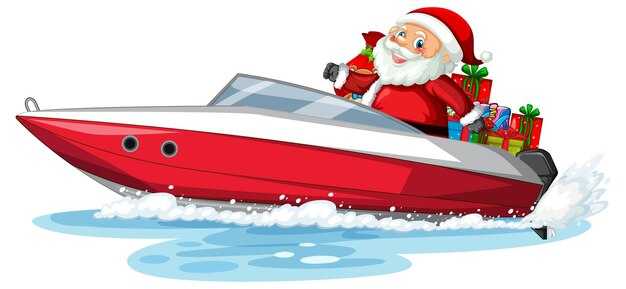
 Deck The Hull – The Proper Way to Light Up Your Boat for a Christmas Boat Parade">

Recommendation: 専用の12V回路から始め、マニュアルを参照して総負荷を計算する。持ち運び可能で、船舶用規格適合のLED照明器具を選び、5~8メートルの距離から見た明るさを確認する。許容ワット数を超えないようにし、穏やかな風の日にテストを実施する。.
早期計画では、船首と船尾のレールに沿った配置を計画し、照明器具の間隔を1.2~1.8mに設定し、訪問者や通行人への視認性を最大限に高めるために、色のアクセントを赤・白・緑の系統に保ち、風や人出の流れに合わせて調整できる柔軟な計画を最初から立てること。.
配線経路は、水しぶきや人の往来から保護する必要があり、耐候性コネクタ、ストレインリリーフ、およびGFCI保護を使用してください。サンタをテーマにした瞬間や、休日のシーンでは、別途携帯可能な電源パックで駆動される軽量のシルエットを使用してください。すべてのコンポーネントがしっかりと固定され、船舶用に評価されていることを確認してください。.
備品は手すりの下に設置し、コードが表面に出ないようにして、ゲストの安全を確保してください。通路を横断するコードの配線は避けてください。ラインベースの設置には、ご自身で簡単な引っ張り機構を使用できます。防水スイッチパネルを使用し、予備のヒューズを手元に用意してください。接続を定期的にチェックし、焦げ付きや変色が見られる照明部分は交換してください。.
ニューポートの港から、休日には多くの観光客が訪れます。簡単なルートマップを作成し、以下を提供します。 hereセルフサービスでのトラブルシューティングのための実践的ガイドです。計画段階では、過度な演出を控え、全体的な光量を適度に保ち、ウォーターラインが見えすぎることなく快適に鑑賞できるようにしてください。サンタクロースや感謝祭の色合いは、コントラストの強い要素を少数に絞るべきです。.
小型船舶の灯火及び固縛に関する段階的な手引き
まず、耐候性LEDストリップをガンネルに沿って、船舶用グレードのクランプで取り付けます。各セクションを30cmごとにステンレス製タイで固定し、電源は船尾近くの専用ヒューズ付きフィードに配線します。この方法により、点検が容易になります。.
照明の選択:12Vまたは24VのLED;IP68等級;色温度約2700〜3200Kで温かい光を実現;総消費電力を確認し、過負荷を防ぐ。5050 LEDのような選択肢は、コンパクトな設備で堅牢。.
配線経路:内部隔壁間、およびつま先レール沿いにグロメット、防水コネクタを使用し配線する。歩行路を横切る緩い配線は避ける。スプライス箇所は熱収縮チューブで保護する。予備のヒューズをすぐに取り出せるように準備しておく。必要に応じて、予備のヒューズを迅速に見つける。.
固定方法:ステンレス製クランプ、耐紫外線性結束バンドを使用、必要に応じてケーブルの周りに発泡断熱材を使用。張力により動作中の動きを防ぐようにしてください。リード線の固定を忘れると、擦れのリスクがあります。.
ポジショニング:照明エリア両側に沿って空間照明を配置、パイロットハウスへのグレアを最小限に抑えるため下向きに角度を調整、ディスプレイ全体で一貫したテーマを維持。.
電源の安全対策:防水パネルに防滴スイッチを取り付け、GFCIまたは同様の保護装置を取り付け、使用目的を明確に表示し、コードがビルジや通行 зонуを横切らないようにしてください。.
テスト:起動前に接続が乾燥していることを確認すること。日曜日のチェックを推奨。過負荷が発生しないことを確認すること。回路間のバランスが保たれていることを確認すること。.
ナイジェルは過負荷について注意を促しており、安全性というテーマは、モジュール化された実行、より容易なトラブルシューティング、および長いデイジーチェーンを避けることを強調しています。.
運航上のヒント:港の状況が異なる場合は、高さと間隔を調整してください。南側の照明はボートに乗る人へのグレアを軽減します。数千の港湾灯が規模を示しています。ブイや標識に沿って航行するにはクリアランスが必要です。ヨットも同様の制約を受けます。.
交換部品の調達は、船内に保管された少量の在庫があれば容易になります。テーマに応じて、色の使い方を調整してください。メンテナンス時には、明確なラベル、予備のヒューズ、およびコンパクトなツールキットを含みます。.
パレード規則に準拠した、人目を引く照明計画を立てる
夜間の視認性を提供するように設計された、発電機駆動のLEDアレイから始めましょう。. 高さ8–10フィートの2本の高いポールを船首と船尾の位置に設置し、港や川沿いのルートから見て40〜45度の角度で梁を配置します。白色の主要照明が主体とし、ルドルフの小さなアクセントを加えて、シーンを圧倒することなく伝統をほのめかします。.
選択肢には、発電機とバックアップバッテリーで供給される主電源トランク、または電力供給が安定している場合は発電機のみの設定があります。耐候性コンジットを1本通し、IP定格のコネクタで照明器具を接続します。つまずきを防ぐために配線を固定してください。価格帯:ベーシックキットは約800~1200、カラーアクセント付きの中級キットは約1500~2200、プレミアムパッケージは約2500+です。ニューポートまたはカロライナの市場のベンダーは、ターンキーバンドルを提供しています。これらは港湾当局からの承認を迅速化することができます。.
耐候性は重要;船舶用グレードの固定具を使用;電気供給が確実に水から保護されていることを確認。感謝祭周辺の年次祝典中には、ココア色の暖かい夕暮れ時の早期テストが役立ちます。複数の角度からどのコンポーネントがはっきりと見えるかを確認するために、ビデオチェックを実行することをお勧めします。2本の焦点となる柱が直線に沿って均一な照明を運び、ルドルフとココアの温かさにうなずく装飾のヒントと結びついていることに、視聴者は感銘を受けました。.
港湾当局と連携し、短い動画のモックアップを共有し、書面による承認を得てください。 Coastal Marine Supplyのナイジェルは、早期の注文が輸送とテストを簡素化すると述べています。装飾の計画は最小限にとどめ、安全な操作を確保するために、2つの焦点に結び付けられた装飾の合図に焦点を当てながら、散らかりを避けます。.
テストと調整:感謝祭の2週間前にドライリハーサルを実施し、複数の角度からビデオを撮影。すべてのケーブルがテープで固定またはクリップで留められていることを確認。電力供給はノイズと燃料消費量を抑えるために単一の発電機から供給。このアプローチはニューポートハーバールート沿いの観察者にとって安全かつ非常に目立つように見えるため、初期の微調整後、視聴数は大幅に増加するでしょう。.
マリングレードのLED、カラーアクセント、および防水規格を選択してください
IP68準拠のマリングレードLEDストリップまたはモジュールを選択してください。定格12V、1メートルあたり60個のLED、14.4W/mで900~1200ルーメン/mを提供。CRI 80+、色温度域2700K~6500Kを使用し、柔軟なパレットを実現します。光を均一にするために、ディフューザー付きのアルミニウムプロファイル内に設置し、塩水噴霧に耐えるようにシリコンで終端を密閉します。電圧降下と熱を最小限に抑えるために、乾燥した換気の良い電源と定電流ドライバを組み合わせてください。.
カラーアクセント:RGBWまたは調色可能な白色モジュールを選択して、キャンバスの端、レール、装飾フレームに沿ってパレットを作成します。シンプルなPWMコントローラーまたは小型コンソールで、スムーズなフェードと正確なタイミングを実現します。配置については、ホットスポットを避けるためにセクション間の間隔を均等にし、ディフュージョンを使用してディテールを洗い流すことなくトランジションを柔らかくします。.
配色のテーマの選択からイベントの実行まで、newportは効率的に回路を敷設しました。特に花火大会ルドルフは、まず最初にコンソールコースを見てから、最初からビデオを選んだ場所で、それぞれの安全性、雪、光景、回路をオンラインで秋に引き込み、マナティーを飾って輪を作る。早期の計画が重要です。コンソール設定での最初のテストはバランスを調整するのに役立ちます。雪のテストは遠くからの視界を確保します。秋の天候はより多くのストレインリリーフを必要とします。ライトを点灯する前に、必ずオンラインで回路の健全性を確認してください。.
電力管理:負荷の推定、バッテリーの設定、安全なケーブル配線
P_totalを今すぐ概算し、25~50%の予備容量を持つ12Vバンクを選び、ヘッドルームを計画してください。船舶用ケーブルを使用し、電源に近い場所にヒューズブロックを設置し、耐候性コンジットを通して配線してください。水上での活動中は、すべての配線を可動部品や湿った場所から遠ざけてください。.
-
負荷推定
- 白熱電球ストリングライト:電球数 × 15W;一般的なフェストゥーン用ストリングライトは 5~10m の長さで、ストリングあたり 20~30 個の電球が使用されます。例:15W のストリングライト 6 本 = 合計 90W。.
- LED装飾:ランプ数 × 0.5~2W。例:LEDノード60個 × 0.8W ≈ 48W。.
- 他のデバイス(ファン、充電器、または小さなアクセントなど):ワット数を合計し、20~30%の安全マージンを追加します。.
- 二つの実践的なシナリオ:
- LEDのみのディスプレイ、P_total ≈ 50W、稼働時間 ≈ 3時間:I ≈ 4.2A、必要Ah ≈ 12.6Ah;25%の予備を含めると≈ 16Ah。20–30Ahのバンクを選択。.
- 白熱灯+LED、P_total ≈ 120W、稼働時間 ≈ 2時間:I ≈ 10A、必要Ah ≈ 20Ah;25%使用時予備 ≈ 25Ah。40–60Ahのバンクを選択。.
-
バッテリー設定:
- オプションA:LiFePO4 100–120Ahバンク。コンパクトで深放電に強く、船内の換気の良い乾燥した箱に保管してください。船舶グレードのBMSと、リチウム化学に調整された充電器を使用してください。.
- オプションB:密閉型鉛蓄電池100〜120Ahバンク。放電は遅いものの、重量が増加。高品質の充電器と換気を確保。どちらの場合も、バッテリーの寿命を最大限に延ばすために、通常の使用では50〜60%の放電深度を超えないようにすることを目指してください。.
- 配置場所:配電盤に近い中央のバンク、熱源から離れた場所。日当たりの良い場所で、シアトルでのフェスティバル開始前のココア休憩のような状況では、発熱を抑えるために発泡パッドまたはマイラーブランケットを使用してください。.
- 保護:各バッテリーから12~18インチ以内に、予想される最大電流に適合する定格のヒューズブロック(例:15~30A)を設置する。メンテナンスや安全点検のために、クイックディスコネクトを取り付ける。.
-
ケーブルの配線と配置:
- ワイヤゲージ:12Vラインの場合、数メートルを超える配線や5〜8Aを超える電流にはAWG 14〜12を使用してください。AWG 16は、短距離配線で5A未満の軽負荷には適しています。配線が長くなるほど、電圧降下を抑えるために太いゲージが必要です。.
- 電圧降下の経験則:目安 12V未満の配線では、電圧降下は0.5V未満にすること。配線が長くなる場合は、より太いゲージの電線を使用するか、配線経路を短くすること。例:12V、8Aで15フィートの配線の場合、AWG 14~12が適しています。12Aで25フィートの配線の場合、AWG 12が適しています。.
- 配線:ケーブルは保護された経路に通し、歩行面を横断させないこと。ケーブルが隔壁を貫通する箇所にはグロメットを使用すること。必要に応じて、船舶用シリコーンで密閉すること。.
- コネクター:防水、耐腐食性のインラインコネクターを使用してください。複数のアダプターを介して電力をデイジーチェーン接続することは避けてください。迅速な確認のために、カバー付きのアクセスが可能な単一のコンセントボックスを使用してください。.
- マイラーの使用法:熱吸収を最小限に抑え、光の有効性を最大限に高め、動作中のデバイスをより低温に保つため、反射マイラーシールドで繊細な部分を包みます。.
-
安全と運用:
- 負荷を模擬的にかけた状態で試運転を行い、異音やオーバーヒートがないか確認してください。いずれかの部品が著しく熱を帯びる場合は、負荷を減らすか、配線をアップグレードしてください。.
- すべての接続部をきれいにしっかりと締めてください。緩い接続は発熱を引き起こし、塩分の多い空気中では腐食のリスクを高めます。イベント前に定期的に点検してください。.
- セットアップの際、照明がデッキの金物や手すりと干渉しないように、器具の配置場所をマークすること。ケーブルが生放送の視聴者のつまずきの原因にならないように注意すること。.
- ドキュメンテーション:ログエネルギー計算をオンラインで、クイックリファレンスシートを使って記録しましょう。後続のイベント時や、安全な装飾に関する資料をサウスコーストやシアトル地域の団体と共有する際に、きっと役に立つはずです。.
- 悪天候対策:雪や雨の中では、露出した接続箇所をIP定格のエンクロージャで覆い、ドリップループを使用して湿気の侵入を防ぎます。必ずコンセントの保護を確認し、ココア休憩は短時間にして、露出を避けてください。.
- 電力動作:負荷を複数の回路に分散することで安定性が向上します。定格容量を超えて単一の延長線に二重に接続しないでください。.
-
クイックセットアップのヒント:
- 水に入る前に、自宅でオンラインでテストしてください。どのアイテムがどれだけの電流を消費するか正確に把握できます。.
- メイン電源ハブは、ケーブルの長さを最小限に抑え、電圧降下を減らすため、船体中心部付近の乾燥した高い場所に設置してください。.
- お祭りやボートクラブ、全国的団体が主催する集まりでは、すぐに交換できるよう予備のヒューズと小型のバッテリージャンプキットを手元に置いておきましょう。.
- イベント中、人流の変化に応じて即座に調整できるよう、各稼働状況にワット数と消費電流を明記してください。.
- 迷ったら、単純化する。独立したヒューズを持つ2つの回路に分け、白熱アクセントや大型LEDパネルのような高ワット数のアイテム専用のラインを別途確保する。.
最初の締結方法:非貫通クリップと屋外対応ストラップ
レールやエッジ構造に照明を取り付ける際は、表面を貫通する留め具は避け、非貫通クリップと屋外対応ストラップを使用し固定してください。.
ストラップの幅は 1.5〜2 インチ、長さは 12〜24 インチを選択してください。耐 UV 性のマリングレードナイロン製で、ステンレス製の金具が付いています。クリップはレール金具またはスタンションに巻き付けられ、穴あけやコーティングの貫通なしに安定したアンカーを提供します。.
配線はストラップに沿わせ、可動部品や摩擦箇所から離して配線すること。摩耗を防ぐため、接触箇所にはパッドを当ててください。配線制限と最大負荷については、マニュアルまたはガイドを参照してください。接続は必ず右舷側とコンセント付近で確認してください。.
設置の際、レールリングの周りにクリップを配置し、ストリングライトをストラップに沿って配線し、結束バンドで固定し、空いているコンセントまたは船舶用電源を使用して点灯テストを行ってください。ターポンマーカーやサンタクロースの飾り周辺に隙間を確保し、引っ掛かりを防いでください。.
情報源からのアドバイスは、スポーツマンシップにのっとったアプローチを重視しており、リスクを軽減し、構造をクリーンに保ちつつ、装飾は長年にわたって簡単に取り外せるようにすることを強調しています。セクション間では、配線がきちんと整理され、動きや振動によってアンカーが緩む可能性のある箇所から離れていることを確認してください。.
部品を選択する際は、316グレードのステンレス製金具とUV定格のナイロンを探し、剛性と取り外しやすさのバランスが取れたものを選びましょう。この方法はヨットや船舶での検査が容易で、サイズは右舷と隣接するセクションのレールの円周に合わせ、摩耗を最小限に抑える自由な配線経路を確保する必要があります。.
2つ目の固定方法: エッジガードと、張力緩和のための溝が付いた結束バンド
ウォータークラフトのフレームに沿って予め定義されたチャネルにエッジガード付きの結束バンドを取り付け、すべてのアンカーでストレインリリーフを確保します。ストリングライトを、ラインが金属のエッジやリベットに触れないようにチャネルに通し、バランスを保ち、摩耗を軽減します。各結束バンドをぴったりと締め付け、緩みを防ぐのに十分な長さのテールを残しつつ、引っ掛かり点を作らないようにします。.
電力は発電機またはインバーターから供給されます。屋外用コードと防水コネクターを使用してください。電源はエッジガード付きのチャネルに沿って専用の接続部に配線し、電源を乾燥した状態に保ち、可動部品から離しておきます。大型ディスプレイはより大きな電流を必要とします。最大のセグメントがいずれの分岐にも過負荷をかけないように配線を配置し、ドックから見たときに安定した性能を確保します。.
展開戦略:クロスオーバーを最小限に抑えるように配置を計画し、街からの視界を鮮明にするために水路に沿って白色灯を走らせます。マイラー反射板は、光を装飾ゾーンに誘導し、散らかりを減らしながらリーチを拡大します。光源から、均等な間隔を維持し、線に沿ってホットスポットを避けてください。.
安全性と保守: セットアップ時と短いテスト走行後に結束バンドを点検してください。ほつれた箇所は交換し、予備のエッジガード、結束バンド、および予備のチャンネルを保管してください。動きの中でずれを防ぐため、重いケーブルは頑丈な金属製部品に沿って配置し、滑る可能性のある固い結び目を避けてください。感謝祭の週の間、このセットアップは部品の追加や取り外しが容易に調整できます。.
保管上の注意:使用しないときは、電源を切り、ケーブルをきれいに巻き取り、部品を乾燥した場所に保管してください。信頼性の向上は、より大きな電源を手元に置いておくことで実現します。ガイドラインが含まれており、発電機を利用できることは、非常用照明の実用的なソースとなり得ます。.
テストし、耐候性コネクタを取り付け、開演前に素早く修正する
ポータブルマルチメーターを使用して、電源接点の簡単な電気的健全性チェックから始めます。照明された配線全体の導通を確認し、絶縁抵抗が定格電圧で100MΩ以上であることを確認します。異常な測定値を記録し、回路に明確なラベルを貼ってください。長年の実地試験により、早期発見がより大きな停止を防ぐことが示されています。.
耐候性コネクタの点検:IP67以上の保護等級であることを確認し、ひび割れのあるガスケットを調べ、損傷したシールを交換する。シールする前に、接点に船舶用グレードの絶縁グリスを塗布し、漏れを防ぐために手で締め付ける。可能な限り、市販グレードの製品を使用する。.
現場での応急処置:予備のガスケット、Oリング、ストレインリリーフ、および接着剤付き熱収縮チューブを携帯してください。適切な圧着端子を使用してワイヤーを再終端処理します。端子を選択する際はサイズが重要です。湿気が見られる場合は、シリコンまたは船舶用シーラントでジョイントを再密閉してください。.
ケーブル、ライン、および取り付けに関する注意点:ラインを可動部品から遠ざけてください。摩耗を防ぐため、波形コンジットまたは硬質チューブに通してください。絶縁体を摩耗させる可能性のある金属製タイは避け、ナイロン製ファスナーで固定してください。木製の取り付け面は綿密な検査が必要です。腐った箇所は交換してください。秋の雨の時期には、接続部にレインカバーを追加することで保護効果が高まります。.
負荷管理と安全性: ABYCガイドラインに通常準拠; 各回路を定格の約80%に制限、フィクスチャのデイジーチェーン接続は避ける; 可能であれば別回路を使用。コネクタを乾燥状態に保つ; 雨や水しぶきでの暴露を最小限に抑えるルートを計画。そのため、追加の保護が重要; コネクタが乾燥状態を保つと安全マージンが増加。ソーシャルな連携はセットアップ中に実際に向上する。.
| 耐候性評価 | IP67+; ガスケットが破損している場合は交換してください |
| 導通試験 | 回路全体をテスト;ほぼゼロオームを想定;記録文書化 |
| ケーブル保護 | 波付管またはチューブ。急な曲げは避けてください。 |
| 負荷分散 | ワット数を分散させ、回路容量の80%未満に抑えてください。 |
| 材料確認 | 木材の取り付け面を点検し、腐食した部分を交換し、留め具を締め付けてください。 |