

 Cooking Aboard Totem’s Galley Essentials – A Practical Guide">

乾物を保管する専用の場所を必ず確保し、信頼できる thermos 手元に。現代の船舶厨房では、, 気密 コンテナとコンパクト glasses ラックを使えば、散らかりを減らし、準備を効率化できるため、無駄な動きなく準備から盛り付けへと移行できます。.
電力の利用状況に応じて、スピードと味が両立する食事を計画しましょう。. すぐに焼けるキャセロール in a ファミリーサイズ 料理は時間を節約し、そしてあなたは layer 乗組員やゲストのために量を調整するための材料.
収納用品や調理器具は丈夫であるべきで、 balanced. 。調理器具を選ぶ際には、 features うねりの中でも動きにくいもの、丈夫な鍋は熱を均一に保ち、シンプルな蓋はキャセロールに役立ち、飛び散りを防ぎます。小さなスパイスジャーを 気密 調味料をスピードアップするために、コンロの近くに置いてください。.
軽食や飲み物には、 グリップスティック 蓋をしっかり掴み、丈夫で glasses 可動中に壊れやすいものが固定されるように、ラックは壊れやすいように設計されています。. thats ドリンクウェア専用の場所が重要な理由、そしてコンパクトな抽出器があれば、食事の流れを妨げることなく、数分で温かいお茶やコーヒーを提供できる理由。.
この取り決め 長い調理時間でも柔軟に対応でき、必要に応じてメインのコンロから離れた補助ステーションに作業を移すことができます。これにより、メインのバーナーで煮込み料理をしている間、重ね焼きキャセロールや作り置き料理の準備ができ、監視時間中のボトルネックを防ぎます。.
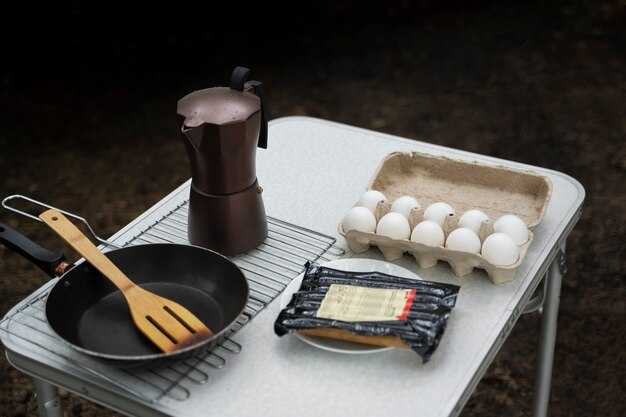
トーテムヴェッセル ギャレーガイド
Recommendation: 小麦粉や乾燥食品は、密閉された遮光性の瓶に入れて保存し、鮮度を保ち、カビを防ぎましょう。在庫は2週間程度で入れ替え、容器は清潔で水平な場所に、熱源から離して保管してください。.
クッキーは、密閉できる缶に入れ、日光を避けた涼しく乾燥した場所に保管すると、サクサクの状態を保てます。中身が一目でわかる透明な容器を使用し、湿気が見られたらすぐに密閉部分を交換してください。.
コンパクトで軽量なナイフセットとまな板を維持し、定期的に研ぎ、刃の寿命を延ばし事故を防ぐために、それぞれの作業に適した表面を使用する。.
オーブンの出番は、安定した予熱から。ほとんどのクッキーやクイックブレッドなら、約175℃(350°F)に設定し、平らな天板で焼き上げ、網に移して冷ます。均一に広げ、生地を丁寧に扱うことで、より長持ちする仕上がりに。.
専用のバーナーで湯を沸かし、小型のケトルを手元に置いておく。耐熱性の調理器具と丈夫な鍋敷きを使用し、塗装面や未塗装の面に熱い鍋を置いて損傷を防ぐこと。.
すべての容器に日付と推定保存期間をラベル付けし、すべてを移動させずに必要なものを grab できるように簡単な保留計画を立ててください。適切なラベル付けは在庫管理に違いをもたらし、無駄を減らします。.
食品以外の表面は、gunkelなどの専用スプレーで清掃し、拭いて乾燥させてください。清掃用具は食品の準備場所とは別に保管してください。水分の移動を防ぐため、すすぎ洗いと自然乾燥を徹底してください。.
太陽光発電が利用できる場合は、調理作業を日中の時間帯に合わせる。可能であれば、鍋を断熱し、反射板を使用する。沸騰時間を計画的に調整し、太陽光の利用可能な時間に合わせてエネルギーを節約する。.
週に一度、在庫レベルとコンテナの封印を簡単に写真に撮ってください。これは使用状況を追跡し、品質の低下が食事に影響を与える前に気づくのに役立ちます。常にナイフを研ぎ、次の作業に備えてください。.
トーテム号のギャレーでの料理:パスタをより早く調理するための実用的なガイド
コンパクトなスペース向けに設計された、軽量で耐久性のある11点セットから始めましょう。滑り止めマット、鋳鉄製スキレット、グリドル、ファミリーサイズの鍋、ザル、ナイフ2本、ミニまな板、ミキシングスプーン、計量カップ、そしてぴったりと閉まる蓋が含まれます。この準備万端のセットアップなら、パスタとソースを盛り付ける十分なスペースを確保し、調理場への行き来を最小限に抑えられます。.
- 計画と準備: 迅速なワークフローを計画する。1クォートサイズの鍋にたっぷりの水を入れ、惜しみなく塩を加え、コンロの前のバーナーに置く。調味料用のミニボウルと、ニンニク、ハーブ、チーズ用の小さなまな板を用意しておく。こうすることで、ミスを減らし、工程をスピードアップできる。.
- パスタを茹でる:沸騰したお湯にパスタを入れ、くっつかないように混ぜるスプーンでかき混ぜる。最初は強火で沸騰させ、その後は勢いのある弱火で、アルデンテになるまで茹で、味見をして確認する。.
- ソースは別添えで:パスタを茹でている間に、グリドルまたは鋳鉄のフライパンでオリーブオイルでニンニクを炒め、自家製ソースを加えます。焦げ付かないように火加減に注意し、パスタの茹で汁を少し加えてソースを乳化させます。.
- 水気を切り、混ぜ合わせる:パスタをざるにあげ、ゆで汁を少し取っておく。パスタを鍋に戻し、ソースを麺にかけ、全体に絡むように混ぜ合わせる。必要に応じて塩胡椒で味を調える。.
- 盛り付け、保存、持ち運び:すぐに友人や家族に提供するか、一人分ずつに分けてください。事前に計画する場合は、余ったソースをクォートバッグに入れて冷凍したり、自家製ペストを冷凍可能な容器に入れて保存してください。冷凍しておくと、大変な日にすぐに使える食事を確保できます。この方法なら、忙しい船旅の時間を節約できるでしょう。.
素早く沸騰させるのに適した鍋のサイズと蓋
コンパクトなストーブで最速の沸騰を実現するには、1.5~2.0Lの鍋で、ぴったりと閉まり、素早く装着できる蓋のものが適しています。この推奨サイズは、1~2人分の調理に効率的で、エネルギー消費を最小限に抑えながら、沸騰時間を予測可能に保ちます。.
まず、計量カップで容量を校正し、1.5〜2.0Lの目標値を確認します。適切なサイズが重要です。1.0Lの鍋は水を素早く沸騰させますが、料理の幅が狭まります。一方、2.0Lの鍋は、2人分のパスタや複数カップの穀物を調理できます。実際には、ほとんどの作業で1.5〜2.0Lを目安にしてください。大きい鍋は沸騰時間が倍増し、エネルギーを浪費します。.
蓋は重要です。通気孔が内蔵された金属製の蓋は、安定した沸騰を持続させます。シリコン製の蓋(シリコーン製)は密閉性は高いものの、通気孔が塞がると蒸気がこもる可能性があります。安全に通気できる、ぴったりと閉まる蓋または蓋のセットが、素早く沸騰させるには最適です。.
あると便利なもの:小さな鍋敷きがあると、鍋がバーナーから離れて焦げ付きを防ぎます。ふきんを手元に置いて、結露を拭き取り、整理整頓のために洗い物の計画を立てましょう。船の取扱説明書に理想的なセットアップの写真が載っているので参考に。パスタや野菜を入れたら、再び沸騰したらすぐに蓋をして、鍋にエネルギーを集中させましょう。.
沸騰時間とエネルギー:750~1000Wのコンロの場合、1.5Lの水が沸騰するまで約6~9分、2.0Lでは約8~12分かかります。あらかじめぬるま湯で水を温めておくと、エネルギー消費を15~25%削減できます。続けて料理をする場合は、別の鍋やケトルを使って水を事前に温めておきましょう。.
実用的な注意点:ちょっとした軽食のために何かを温める必要がある場合、ヨーグルトは沸騰したお湯に直接入れず、沸騰後、小さな容器に入れて弱火で温めることができます。最初の沸騰前に蓋がきちんと閉まるか確認し、吹きこぼれを防ぎましょう。パスタを茹でる際は、塩を入れ、かき混ぜてから蓋をして、鍋に熱が集中するようにしてください。.
重要なポイント
| 鉢のサイズ (L) | ふたのタイプ | Ideal use | 推定沸騰時間(分) |
|---|---|---|---|
| 1.0 | Vent-cap metal lid | Single serving, grains, light veg | 5–7 |
| 1.5 | Metal lid with vent | 1–2 servings, pasta, potatoes | 6–9 |
| 2.0 | Silicone lid or vented metal lid | 2–3 servings, soups, larger portions | 8–12 |
Salt, water volume, and when to add pasta
Recommendation: use 4–5 L of water for 400 g pasta, bring to a rolling boil in lightweight cookers, add 60–80 g salt (about 4–5 tablespoons) and stir evenly. On liveaboards with a yacht-based setup, this method minimizes energy use and splatter while keeping the pot clean for the next cook.
When to add pasta: drop pasta after the water returns to a vigorous boil and salt has dissolved, then maintain a steady boil and stir to prevent clumps. Times for common shapes: spaghetti 8–10 min, penne 10–12, fusilli 12–14. Reserve 120–180 ml of starchy cooking water per 400 g pasta to loosen sauce if needed. If cooking with veggies, add slices 2–3 minutes before pasta finishes to keep texture balanced. This method takes the guesswork out of making pasta for a person or crew, and it seems reliable across situations.
Tips for keeping the space tidy: preheat with a kettle to cut energy use, finish on the cooker, drain quickly to avoid gunkel forming on the bottom, and tilt the lid slightly to reduce splatter. Store leftovers in a clean, mould-free container; use replacement lids or kettles when worn. This approach adds value and experience for every person cooking and works during pizza nights or simple veggie bowls, with something easy to replicate every time.
One-pot pasta workflow: boil, simmer, toss
Start with a large space-saving pot on the stove. Have salted water at a rolling boil, drop in pasta and cook to al dente, stirring only as needed to prevent sticking. weve trimmed prep by using a single pot.
Simmer a simple sauce in the same pot: olive oils, garlic, and crushed tomatoes. If you want creaminess, simply add a splash of milk toward the end and simmer until lightly glossy.
Keep the energy level steady by maintaining a gentle simmer rather than a furious boil. Stir evenly and adjust heat to keep the liquid just covering the pasta. Use the least amount of liquid that still allows the pasta to move freely.
Toss in greens, cheese, or mushrooms toward the end; the whole dish should be balanced and glossy. Share with friends. Plate onto a serving dish. Avoid heavy sauces; aim for a light coating that clings evenly.
Choose sturdy, lightweight accessories, such as a kuhn pot or a yachtfridtjof lid set. Moulds can hold silicone mats or spare lids; these space-saving options keep space free for a cloth and a few utensils.
Storing and transporting: after cooling, store leftovers in a container or glass jar; keep in the lowest possible temperature and reuse the same pot to reduce washing. For transport, stack the pot and lid, wrap in a cloth, and keep oils and spices sealed to avoid leaks. Store leftovers in any suitable container–anything that seals well.
Prep sauce and toppings while water heats
Recommended approach: heat a small iron pan on the back burner and prep a quick sauce base. While water heats, wash and chop a piece of garlic, measure 1–2 tbsp stock or cream, and lay out herbs. This keeps the kitchen ready for a fast finish as the boil comes up.
Choose a compact set of tools: spoon, whisk, hand blender, fine sieve. Included items include two pans (iron and nonstick), a trivet, cutting board, knife, and washable towels. Planning takes five minutes and pays off in texture and speed, providing several solid ways to adapt on the fly.
Technique: when water reaches a gentle simmer, reduce heat and swirl in the base; it takes 3–5 minutes to meld flavors. For pureeing, use the hand blender directly in the pan or transfer to a small jar and pulse once or twice. If you want ultra smooth, try three ways: immersion blending in the pan, pureeing in a jar, or passing through a sieve. The magic is how the texture becomes velvet with minimal effort.
Top with toppings: offer three smaller bowls–grated cheese, chopped olives, and toasted nuts or seeds. youll want to choose items that complement the main dish, keeping portions small. This view keeps the flow smooth and allows you to clean the pans and hands quickly; thanks for planning ahead and using washable tools.
Timing and methods: water heating very often takes 4–7 minutes on a marine stove; a double sauce can be held warm on a trivet while you finish other steps. If solar power aids the setup, adjust timing by a few minutes. Smaller steps, careful planning, and steady hand make this an easy, great workflow for the chef.