Arrive before dawn カンガルー島のフリンダース・チェイス沿岸で、夜明けの光の中でリマーカブル・ロックスを撮影。このオープニングショットは、大胆な構図と正確な露出がいかに岩の質感と波しぶきを明らかにするかを示しており、あなたのオーストラリア写真ツアーの明確な起点となるでしょう。.
KIから、グレートオーシャンロードを通って十二使徒へ。最高の光は、夕方遅くに、波から霧が立ち上る時に訪れます。; bring 広角と細部を捉えるズーム。 head 水平線を維持して、見晴らしの良い景色を確保し、山のようなシルエットを空に重ねてダイナミックな構図を追求しましょう。.
今夜は、ガイド付きボートクルーズでカカドゥのイエローウォーターの夕焼け時に野生動物を観察し、その後、光が葦の間から差し込む遊歩道を散策しましょう。人気のオプションのため、早めに到着し、水辺での寄り道も考慮して時間を確保してください。ここでは、ミズカケトリ、シラサギ、そしてワニを一枚の写真に収めるチャンスです。.
ゆりかご タスマニアの山には、高山湖と険しいドレライトの尖塔があります。. 騎乗生物のムードについて, 旅行者の中には、その光と岩をツェルマットに例える人もいます。春は野花が咲き、日も長くなるので、ダブ湖と周辺の山々の日の出を目指しましょう。丈夫な三脚と、ガラスのように澄んだ水面のぎらつきを抑える偏光フィルターを持参し、長時間露光ができるように穏やかなシーンを保ちましょう。.
cinque 南海岸沿いのひときわ優れた沿岸スポットでは、さまざまな日の出と日の入りの機会が得られます。オトウェイ岬、ロック・アード渓谷、ポートランド・ヘッド・ライトは、劇的な岩棚、波しぶき、灯台の光を提供し、構図に重ねることができます。タイミングが合えば、広大な水平線から親密な海岸の風景まで、一度の訪問で多様なフレームをいくつも撮影できます。.
終わりに efficiency, 光と距離で一日を区切りましょう。穏やかな入江でウォーミングアップを済ませてから、見晴らしの良い広大な景色に挑みましょう。予備のバッテリー、メモリーカード、簡単な撮影のためのライターキットも忘れずに。この方法なら時間を節約でき、誰にとっても快適なペースを保てます。 person 午後の遅い時間から出発すると、すぐに日が暮れてしまうので、旅行の際は注意が必要です。.
ドラマチックな風景のための最高の日の出&日の入りスポット
モーニントン半島のシャンク岬からスタートし、日の出の無限の眺めを楽しみましょう。崖や海食柱はピンク色のアルペンローゼで輝き、そよ風が前景の草を揺らし、質感を与えます。三脚を使用し、広角で撮影して風景を固定し、その後、水平線を強調するようにトリミングします。.
グレートオーシャンロード沿い、十二使徒付近で、日の出のシルエットを捉えましょう。 夜明けの30分~60分前に位置取りを。長時間露光で水面を滑らかにし、ブラケット撮影のようなテクニックで空と海のバランスを保ちます。これらのヒントが、あなたの夜明けの写真をより力強くします。.
タスマニアのウェリントン山からは、ホバートの街並みを一望できる絶景が広がります。夜明けに到着して、街の灯りが消えていくにつれて、パステルカラーの空を眺めましょう。可能であれば、人混みを避けて、独占的な眺望が得られる私有地の展望台にアクセスしてみましょう。ただし、標高が高い場所では冷たい風が吹くので、防寒対策を忘れずに。.
ウルルの日の出や日の入りは、岩肌を鮮やかで暖かな輝きで染め上げます。三脚と絞り値を小さくして空をシャープに捉え、スケール感を強調するためにパノラマ撮影を検討しましょう。.
カンガルー島では、ケープ・デュ・クーエディやアドミラルズ・アーチで夕日を眺めることができます。営業時間中であれば、近くの保護区でコアラを見かけるかもしれません。望遠レンズを使ってシルエットを際立たせ、水面に映るオレンジ色の輝きを捉えましょう。.
ブルニー島のザ・ネックは、夕焼け時に水平線が綺麗に見え、波しぶきと灯台が前景を際立たせます。光の状態を一定に保ち、選択肢を増やすには、私有地のロッジに滞在するのが便利です。タイミングとテクニックを組み合わせることで、象徴的な景色が生まれます。.
野生動物との出会い:カンガルー、コアラ、鳥類に安全に出会える場所
カンガルー島で少人数制の夜明けツアーを予約して、ゴツゴツした海岸線沿いのカンガルーを観察しましょう。倫理的な観察ルールに従う、資格を持ったガイドと午前中たっぷり過ごし、距離を保ち、フラッシュをオフにする手伝いをしてもらいます。非常に美しい光をとらえ、野生生物にストレスを与えずに写真を撮るために、早めに到着しましょう。事前に予約し、南海岸のロッジと計画を立てると、旅行が簡単になります。また、航空運賃オプションは旅行の費用を抑えるのに役立ちます。.
安全な出会いを最大限に増やすための5つの実用的なヒントをご紹介します:
道標に従い、指定された道を進んでください。動物を観察する際は、適切な距離を保ち、触ったり餌を与えたりしないでください。ゆっくりと移動し、鳥や哺乳類が安心して過ごせるよう、静かにしてください。.
カンガルーとコアラに会える最高の場所
ビクトリア州のグレートオーシャンロード沿いにあるケネットリバーでは、道の両側に並ぶユーカリの木にコアラが高確率で生息しています。動物たちが活発な朝がおすすめです。カンガルーを見るなら、カンガルー島が最適です。フリンダースチェイス近郊には広大な平原が広がり、動物たちへの影響を最小限に抑えるように設計されたトレイルでガイド付きのツアーに参加できます。主要都市から飛行機で到着後、移動時間を短縮し、野生動物との時間を最大限に楽しむために、サウスコーストのロッジに宿泊を検討すると良いでしょう。.
バードウォッチングの名所
カカドゥ国立公園へ北上し、多種多様な水鳥や渉禽類を探しましょう。乾季(5月~10月)は安定した観察が期待できます。ビクトリア州のギプスランド湖や海岸線では、ペリカン、アジサシ、シギ・チドリ類を観察小屋や遊歩道から観察。日の出の撮影はドラマチックな光を生み出します。海岸での撮影後、内陸に向かえば、オーストラリアアルプスの丘陵地帯が印象的な高地の背景を提供してくれます。.
| Spot | Wildlife | 観測に最適な時間 | Safety Tips |
|---|---|---|---|
| 南オーストラリア州、カンガルー島 | カンガルー、コアラ | Dawn to early morning | 線路から離れないでください。車間距離を保ってください。フラッシュをオフにしてください。案内係をご利用ください。 |
| ケネットリバー、グレートオーシャンロード、ビクトリア州 | コアラ | Morning | 道路から観覧してください。指定された場所に駐車してください。エンジン音を抑えてください。 |
| ノーザンテリトリー、カカドゥ国立公園 | 水鳥、ジャビル | Dry season (May–Oct) | ガイド付きツアーに参加する;文化的な場所を尊重する;騒がしい行動は慎む |
| ビクトリア州、ギップスランド湖 | ペリカン、渉禽類 | 夜明け | 隠れてください。騒音を抑えてください。野生動物に餌を与えないでください。 |
機材リスト:カメラ、レンズ、三脚、フィルター、およびメモリーカード

デュアルカードスロットと高速オートフォーカスを備えたコンパクトなミラーレスボディを選び、24-105mm相当のズームレンズと組み合わせましょう。カロリンはこの構成を4日間の旅行におすすめしています。公園の夜明け、緑豊かな海岸線、険しい渓谷などに対応でき、レンズ交換を頻繁に行わなくても、固有の野生動物から親密な美しさまで、あらゆるものを撮影できます。夜間撮影には、明るい単焦点レンズ(35mmまたは50mm)と頑丈な三脚を追加してください。.
本体とレンズ
グループで旅行する場合は、2台目のボディを用意して、転送がバックグラウンドで実行されている間も撮影現場に残れるようにします。日中の撮影には、メインカメラに24-70mmのズームレンズを装着し、遠くの鳥や哺乳類には望遠レンズ(200-300mm)を追加し、広大な風景を捉えるには広角単焦点レンズ(16-35mm)が役立ちます。ジョージはよく、初心者にはまず汎用性の高いズームレンズから始め、自信がついたら単焦点レンズを追加することを勧めています。固有の野生生物、峡谷の美しさ、緑豊かな森の縁をよく観察して、より豊かな物語を語りましょう。そして、光が柔らかくなり、アドリア海のような光がアースカラーのバランスを教えてくれる、夜明けと夕暮れ時の撮影に挑戦してみてください。.
アクセサリとワークフロー
三脚:カーボンファイバー製、脚部調整可能、センターコラムはローアングル撮影用に折りたたみ可能、ボールヘッドはスムーズなパンニングを提供し、正確なフレーミングが可能。フィルター:水面や植物の照り返しをカットする偏光フィルター、そして公園や滝での長時間露光用のND4からND1000までのNDフィルター。レンズに合わせて82mmまたは77mmのスレッドを選択。メモリーカード:128GBまたは256GBのUHS-II SDカードを2枚用意すれば、RAWでの連写も余裕。旅行前にカメラでフォーマットしておけば、1日の終わりにラップトップやスマートフォンへの転送も迅速に行える。グループに参加する場合は、転送を効率化し、すべての目的地のバックアップコピーを確保するために、共有ストレージを手配する。すべてにラベルを貼り、整理整頓し、公園に足を踏み入れた瞬間、地球が信じられないほどの美しさで目覚め、渓谷が写真に撮られるのを待ち望んでいる、その瞬間を撮影できるように準備を整えて到着すること。.
撮影設定早見表:風景 vs 野生動物

風景:f/8~f/11、ISO 100、シャッター速度1/125~1/200秒、三脚、RAW、PLフィルター、過焦点距離でロックしてマニュアルに切り替え、空が明るい場合や水が動的な場合は-2/0/+2 EVでブラケット撮影。.
野生動物:望遠400~600mm、絞りf/5.6~f/8、シャッター速度1/1000~1/3200秒、ISO 400~3200(+0.3~+1.0 EVの露出補正をかけたオートISO)、AF-CまたはAIサーボ、シングルポイントAFまたはダイナミックゾーンAF、高速連写6~12コマ/秒、一脚または手すりや木に固定してコンパクトかつ安定性を保つ。.
ワークフローとガイド:沿岸での撮影効率を高く保つためのシンプルな学習計画の概要。撮影前チェックリストの準備:バッテリーの充電、カードのフォーマット、レンズの清掃、WBを5200〜5600Kに設定するか、光の変化に応じてオートに設定。ヒストグラムの確認、RAWでの撮影、水面と空のハイライトを保護するための露出補正の有効化。風景撮影にはコンパクトな三脚、野生動物撮影には軽量な三脚または一脚を携帯。これにより、混雑した海岸線や私有地での時間短縮になります。.
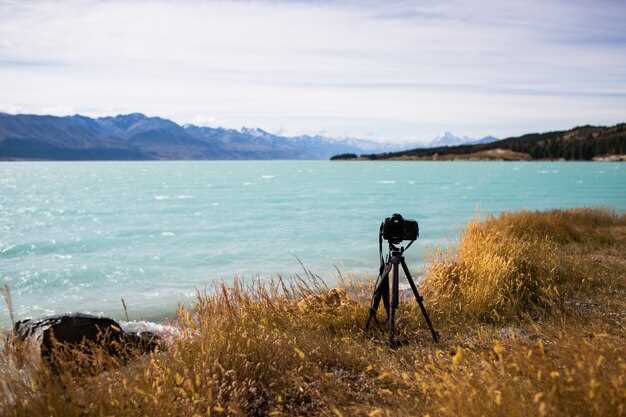
サイトの考察:海岸線は、絶えず変化する波、水の質感、そして劇的な空を提供します。 必要に応じて、グラデーションまたはニュートラルデンシティフィルターを使用して、明るい空と遠くの暗い山々のバランスを取りましょう。岩や砂の質感を強調する柔らかな光を得るために、夜明けまたは夕暮れ時に撮影する計画を立ててください。また、鮮明さに影響を与える可能性のある風や水しぶきにも注意してください。.
例:パースの海岸線に近い私有保護区で、ユーカリの木に立ち止まるコアラの小グループ。400〜600mmのレンズ、シャッター速度1/500〜1/1250秒、絞りf/5.6〜f/8、ISO400〜1600を使用。日陰が変化する場合は、オートISOが役立ちます。動物の環境を楽しみながら、まばたきやゆっくりとした動きを捉えるために、連続撮影を試すことができます。.
木曜の計画:海岸沿いの道を地図に描き、水と山々の開けた景色が見える展望地の近くに滞在し、予備のバッテリーと、潮汐の湾を探索する場合は小型ボートまたはディンギーを持参し、早朝に備えて軽いジャケットを手元に置いてください。波と水の相互作用を事前に視覚化し、構築するガイドからの即時フィードバックを活用して、空と山々のこの世界での次の旅行を改善してください。.
構図の戦術:オーストラリアの景観におけるスケール、奥行き、フレーミング
**手前に大胆なアンカーを置いてスケール感を伝え、視線をフレームに誘導します。** 次に、中景と背景を重ねて奥行きを構築し、見る人の関心を引きつけ続けるようにします。.
スケールとフォアグラウンドアンカー
- 力強い前景要素を選びましょう。岩の露頭、水たまり、またはプライベートなキャビンテラスなど、スケール感を示し、視線をフレーム全体へと誘うように。.
- カリジニ国立公園とその荒々しい渓谷では、アンカーを低い位置に置き、カメラを上向きに傾けて、峡谷の壁の高さを強調しましょう。.
- 遠景に向かって伸びる線を含めてください。.
- 可能な限り、専用バスルーム付きの物件の近くで撮影して、人混みから離れた穏やかなシーンを捉えましょう。.
- 地域の南に通じる道路を数日かけて巡り、様々な目的地で撮影した写真を比較検討して、最も多様な写真群を構築する。.
奥行き、レイヤー、フレーミング
- 前景、中景、背景の3つの平面を重ね、それぞれのレイヤーにテクスチャと色をつけて区別し、奥行きと変化を加えてください。.
- 広角レンズで空間を捉え、望遠レンズで遠くの峡谷を圧縮して一枚のフレームに収めるなど、レンズを使い分けましょう。.
- 自然の境界線、たとえばアーチ道、岩の張り出し、あるいは木々などでフレームを作り、視線をシーン全体へと誘導しましょう。.
- 南では、岩肌や水面の色の変化を際立たせるため、ゴールデンアワーに撮影すると、彩度の高い色調が得られます。.
- 地平線を中央より下に保ち、前景の質感を強調し、上下のレイヤーをつなげます。.
StyxとKarijiniの設定は、丁寧なスタートがいかに一枚の画像を物語に変えられるかを示しています。つまり、下から遠くに向かって伸びる誘導線が、鑑賞者の視線を崖やその向こうの空へと引き込むのです。他の場所で撮影された画像を見て、構図に関するアイデアを得て、チームと共有しましょう。.
志を同じくする探検家仲間と、何を捉えたいか話し合いましょう。このアプローチは、私有地や敷地をカバーし、人混みを避け、複数日やルートにわたって最も多様な画像を作成するのに役立ちます。キャビンやエンスイート(専用バス・トイレ付き)オプションを含めれば、カリジニから国内の他の目的地まで、南部地域とその人里離れた道を光を追いかける間、快適に過ごせるでしょう。.

 Australia Photo Tour – Best Spots for Landscape and Wildlife Photography">