

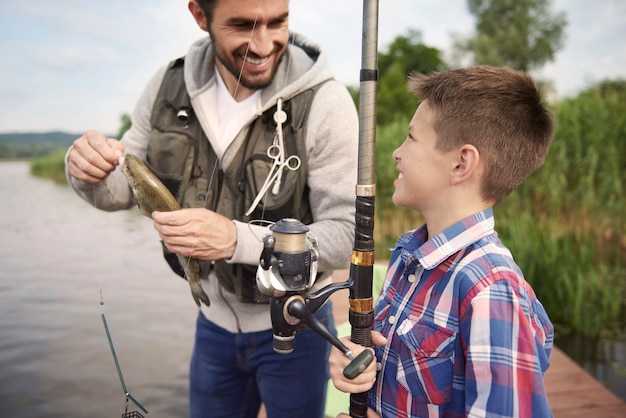
 6 Pro Fishing Tips – How to Become a Better Fisherman">

There is one concrete recommendation to jump-start your progress: set up a dependable, compact rig and test it on the water. For an adult angler aiming to improve quickly, use a 6’6″–7’0″ medium-light rod, 8–12 lb test line, and a diameter 0.28–0.30 mm line. Pair with a size 6–8 hook and a small slip-float or light jig. This combo will provide consistent feel and fewer tangles, so you can practice timing and line control more effectively and allow quicker feedback.
適用 a clean casting rhythm: stand with feet shoulder-width apart, keep your shoulder aligned to the target, and use a controlled wrist flick backed by hip rotation. This definitely builds strength and accuracy, and you can study images from local events to refine your form.
Read the water by watching weed edges, sunfish haunts, and the first drop-offs near the woods. Identify place where currents converge and baitfish swirl; these spots work well, especially early morning.
Keep a simple kit with extra jigs, hooks, and a spare bobber. If you spot sunfish showing quick movements, try a bright jig on a short line and a slow, irregular rhythm. This approach lets you test different lures quickly and learn what can happen under changing light.
Keep a compact log: date, location, wind, water clarity, lure tried, and result. Review images from your sessions to spot patterns, then apply what you learned next time. A few focused sessions raise your bites per hour and help you place consistent catches.
Advanced Angling Mastery: Practical Steps for Real Results
Start with a precise line diameter check and re-tie all critical knots to prevent failures; this gives you instant reliability on every cast and builds a sturdy platform for training, something you can count on.
Understand water structure by mapping current seams, depth changes, and forage zones where fish concentrate, especially in morning light. Note the colour of the water and bottom, then choose lures and leaders that match the forage and the pattern you expect. For brook and other species, adjust diameter and leader length to the target size; use a 0.12–0.18 mm leader in tight brooks and a 0.20–0.25 mm leader where clarity is higher. Cast unto the bank near weed edges to test how the current influences bait presentation.
Try special, uncommon rigs for shallow, calm runs; a dropper setup with a small bead and a light fluorocarbon leader keeps the presentation natural and reduces line glare, helping fish take easily. In beattie Brook, locals call the stretch beattie, a place to test subtle actions. The brook tests the method under changing light. Channel a superman mindset. Hold the rod with a steady, confident grip, and if a take occurs, lift smoothly and relax your grip. Maintain a deliberate cadence; this approach shines in green weed edges where hides are tight.
At events across various waters, compare results and log what works. Track bite windows as light shifts and adjust your cast angle to keep line quiet; short, controlled sweeps win in tight cover. Understand when to switch from broad presentations to subtle taps; this adaptation reduces the problem of missed takes and improves consistency.
Maintain gear care and place discipline into daily routine: clean reels, examine drag, and replace worn lines or beads. The habit gives training value and translates to real results, with the performance becoming smoother each week. After each session, store gear in a dry place and check knots once more; this simple step prevents surprises and keeps you on track for future catches. This approach has been tested by guides and pros, and it continues to yield reliable outcomes.
Choose the Right Rod and Reel for Your Target Species
Begin with a versatile setup: a 6 ft 6 in to 7 ft rod, medium-light power, fast action, paired with a 2500 reel. This answer gives you sensitivity for shy bites along brush and in brook pockets, plus enough backbone to handle adult fish in moderate current. Ask staff for guidance on line diameter and reel size for your local conditions, but start with 6–8 lb test in clear water or 10–14 lb in stained water. A small fluorocarbon leader (2–4 ft) helps you stay stealthy and keep everything presenting cleanly.
-
Trout, brook trout, and panfish: 6 ft 6 in to 7 ft, medium-light, fast action; reel 1000–2500; line 4–8 lb test; line diameter kept minimal for quiet presentations in shade. Fish near brush and along the bank to locate likely bites; you should be able to lodge the rod in a holder during pauses. This setup is nice for small jigs, live bait, and light lures on clear streams.
-
Bass and larger open-water fish: 7 ft to 7 ft 4 in, medium-heavy, fast action; reel 3000–4000; line 12–20 lb test; consider black braided line with a fluorocarbon leader. This tactic handles cover and be reached through weed edges and open water alike, where you need steady backbone. Use a larger spool to avoid line twist and keep pressure on the fish without overtaxing your shoulder.
-
Walleye and river species: 7 ft to 7 ft 6 in, medium, moderate action; reel 2500–3000; line 6–14 lb test; use a fluoro leader for subtle presentations in clear water. Its diameter is a compromise between sensitivity and abrasion resistance, and you can easily adjust to stealthy, accurate casts to structure and lanes where fish hide.
-
Large predators or heavy cover: 7 ft 6 in to 8 ft, medium-heavy, fast action; reel 5000+, line 20–30 lb test; consider a strong, dark braid for abrasion resistance. In thick brush or fallen timber, a longer rod helps you keep pressure on the fish while you lodge the line and keep the presentation tight. This setup is ideal when you expect big bites after a long beat along bank and rock, and it gives you control where the fish are likely to sit.
Read Water: Identify Structure, Currents, and Likely Hangouts
Start by reading water in three steps: identify structure, pinpoint currents, and mark likely hangouts. For beginners this quick read yields immediate targets and boosts confidence on the water. Note the opportunity to move to better angles; the easier you see early structure, the sooner you can target key spots with precision. Throughout the day, many guides taught this three-zone read as a simple, repeatable routine – and the beauty of it is how fast you can gain confidence and make smarter calls. Never underestimate the clarity a few minutes of water reading gives you.
Identify structure quickly. Scan the shoreline and water column for sunken cover (trees, limbs), rock piles, and abrupt depth changes. Use your eyes to trace weed edges and edge transitions. When you find a point or bend that turns toward deeper water, mark it as a target. Move your boat or adjust your approach so your cast travels along the edge, not across it–this puts the lure into the hold zones where fish sit. Elite anglers and bassmaster competitors stress structure first; regardless of lake or season, structure holds more bites than open water. Note the location of cover that breaks the current and creates an ambush zone. For coaches who teach clients, the structure read builds confidence and speed. The leader mindset follows this rule: structure first, every time. Three cues to watch: cover, ledge, and edge.
Read currents to locate seams. Look for fast water meeting slower pockets, places where a point creates a seam, and eddies behind rocks or brush. These seams concentrate bait and increase your chance to get a bite. Cast up current and drift your lure along the edge, pausing to let the bait sink into the target depth. Use a steady speed on the retrieve; speed up slightly in faster seams and slow down in slow sections. Three-second counts to depth work well for moderate water; in clear lakes you can see depth transitions with your depth finder, if you have one. What happens next often hinges on timing, so keep a mental clock and adjust accordingly. Reels should run smooth to maximize feel and efficiency.
Target likely hangouts and apply a targeted plan. Inside bends, outside bends, and points that drop into deeper water are your primary hangouts. Inside bends hold fish that feed under varying light conditions; outside bends hold cruising fish that ambush from the current edge; points offer a funnel and a quick drop to deeper holds. Regardless of lake clarity, weed lines and timber edges attract prey and bass alike. Use targeting to pick three spots on your map and run through them in order before moving to the next area. Note how many bites you get at each spot and whether your lure should run shallower or deeper to keep pace with depth change. Many followers and coaching clients see more success when they stay disciplined and targeting the obvious ambush zones.
Practical moves you can apply now. Keep reels silky; a smooth retrieve helps you feel subtle bites. Place three casts per structure to verify depth and reaction, then shift downstream to the next structure. Build confidence by repeating this pattern with different lures: a spinnerbait or swimbait on windy days, and a soft jerkbait on calm mornings. The founder of many local clubs and the sport’s leaders would tell you that consistency beats flashes; practice the same routine across three spots per lake, regardless of mood. This habit creates more opportunities, moves your average catch upward, and trains you to read water with elite-level discipline.
Set Up Your Tackle: Hooks, Lines, and Weights to Match Your Lure
Always start with a braided main line in the 60–80 lb range and a 60–100 lb fluorocarbon leader; match hooks and weights to lure size for the conditions and the windows of opportunity you’re pursuing. For muskies, use bigger gear to handle heavy plugs and aggressive hits, and keep the setup balanced so you can learn quickly and stay confident on the water.
Hooks, not leaders, set the hook. For muskies choose heavy-wire trebles in the 8/0–12/0 range or dependable singles in the 9/0–11/0 range when the lure calls for a stout bite. For smaller lures aimed at smallmouths chasing in lakes, 2/0–4/0 trebles or offset singles keep action clean and reduce missed grabs. Pick rust-resistant finishes (black nickel or mega-strong stainless) and keep gaps matched to lure mouth size; making this fit is the simple step that boosts hookups every time you swing for the front edge of weedbeds or rocky shoals.
Line choice matters as much as the hook. Use braided main line in the 60–100 lb class for muskies, paired with a leader in the 60–120 lb range when you fish through timber or rough rock. If you target smallmouths in clear lakes, a 10–20 lb fluorocarbon leader pairs well with mid-weight plugs. Wire leaders are an option for razor-sharp teeth or heavy cover, but they reduce feel; test both in local waters to see what gives you the best balance. After tying, run a quick patrol of the knot to verify security.
Weights must match lure weight and technique. Start with jig heads around 1/4–3/8 oz for finesse presentations; switch to 1/2–2 oz for mid-size swimbaits; for big musky baits, 3–6 oz or more keeps your lure deep and lively in current or wind. In backcountry lakes with deeper structure, use the heavier end; in calm, shallow bays, lower the weight to improve the lure’s action and sound.
A simple rule: heavier gear for bigger, louder lures; lighter gear for smaller, more subtle baits. This approach makes it easier to control the drop and anticipate the hit, which improves your learning and confidence over multiple sessions, last season on the water highlighted how small changes added up. If you fish with a buddy like mike or a lady angler on a local lake, share notes after each outing; multiple small changes add up to a big gain over the season.
Keep a quick-change kit ready: extra hooks, spare leaders in multiple lengths, and weights in varied sizes. This setup minimizes gaps in your tackle, keeps you safe on the water, and helps you stay focused on improving every outing–whether you’re chasing muskies in backcountry lakes or smallmouths along Brook streams. Continuous adjustment makes you faster, more precise, and ready for whatever the day brings.
水温と季節に合わせたベイトとルアーの選択
水温が低い時期は、より深く、よりゆっくりとした設定で。水温が上昇し春に向かうにつれて、中型のスイムベイトや万能なクランクベイトに移行。暑い日は、スピードとウィードラインでの待ち伏せが有利。このアプローチは、ルアーを魚が捕食しやすい時間帯に合わせることで、即座に有利な状況を作り出します。.
- 冷水(10℃ / 50°F以下)
- ベイトとルアー:クロー系トレーラー付きのジグ、フィネススイムベイト(3~4インチ)、ドロップショットリグ、そしてディープダイビングクランクベイト。すべてコンパクトにまとめること。
- セットアップ:フロロカーボンまたはブレイド-フロロリーダーを使用、フィネスには6~12lbライン、1/8~3/8ozジグヘッド;ブラシやウィードエッジを超えた深めのサドル周辺を狙う
- 釣り場:深めのフラット、緩やかに傾斜する岸辺、ドロップオフ付近のストラクチャー;春先の早朝または夕暮れ時が最も釣果が期待できる
- パターン:底でのゆっくりとした触覚的な感覚を探る。水温が低いと魚の活性が鈍くなるため、かすかなアタリを読み取ることを学び続ける。
- 移行期 (10–16°C / 50–60°F)
- ベイトとルアー:リップレスクランクベイト、ミッドサイズのスイムベイト(4~5インチ)、クリーチャーベイト、コンパクトブレード付きスピナーベイト
- セットアップ:3/16~1/2オンスのジグとクロー系トレーラー、12~14lbライン。ブッシュとオープンウォーターの両方をカバーできる汎用性。カラーはナチュラルな緑や茶色を基調に調整。
- 釣り場:ウィードラインのエッジ、水面下50~150cmのブッシュ、浅い湾とより深い水域との移行帯
- パターン: スクーリング活動の変動と水質の向上に注目。水が澄んでいる時期は、アグレッシブなバイトが多い傾向があります。
- 温水 (16–21°C / 60–70°F)
- ベイトとルアー:大きめのスイムベイト(5~7インチ)、バイブレーションジグ、チャターベイト、および中~高速で引けるクランクベイト
- 仕掛け:1/2~3/4オンスのジグ、または重めのヘッドにスイムベイトを使用。より遠投するために12~20ポンドのラインを使用。ウィードラインや岬を一定の速度で、中程度のペースで探る。
- 釣り場:ウィードエッジ、日光の当たるフラット、茂みやアシの周辺のポケット;オンタリオ湖の春の暖かさでは、前線通過後に強いフィーディングが見られる。
- パターン:早朝と夕暮れ時はトップウォーターが炸裂、日中は太陽が水温を上げるとミッドレンジのカバーにバイトが移行
- 暑い日(>21°C / >70°F)
- ベイトとルアー:速巻きスイムベイト、スクエアビル/クランクベイト、チャターベイト。日の出後最初の1時間はトップウォータープラグ。
- セットアップ:スピードと敏捷性を高めるには、軽いヘッドを使用し、14~20lbのラインを使用。素早く交換できるよう、予備の軽いセットアップを用意。浅瀬の日当たりの良いフラットやウィードポケットを狙う。
- 釣り場:浅瀬のブッシュ付近、緑のウィードラインのエッジ、流れのある場所に隣接するポイント
- パターン:明るい光の下にいる魚の群れを探す;食いの時間帯は短くなるので、ホットスポット間を素早く移動する準備を
時期を通して、柔軟な考え方を維持し、水に対する魚の感覚を追跡する。オンタリオ地方のアングラーは、春先に2つの明確な変化を目の当たりにする場合が多い。それは、シーズン初期の茂みやウィードラインでの活動、そしてシーズン中盤には、より深く、より冷たい場所に移動することだ。即座に対応できるよう、顧客スタイルのコンパクトなセットアップを用意し、キャストの合間に短い学習ループを実践して、パターン認識を研ぎ澄まそう。水温と季節に合わせてベイトを調整することで、確かな優位性を得て、推測を追いかけるのではなく、ゲームに集中し続けられる。.
完璧なキャスティングと回収:ペース、ポーズ、フッキング
ルール:リトリーブのペースは、狙う水深とタナに合わせて調整する。リズムを水深に合わせ、ロッドティップで常にラインを張り、アタリに集中する。正確なキャスト後、意図的に0.5秒ポーズを置き、60~90cmのリールスイープを行う。これを1回の流しで6~8回繰り返してタイミングを掴む。このアプローチにより、最初のアタリが明確になり、ミスヒットを減らすことができる。.
年間を通しての釣りの合図を取り入れ、水温と視界に合わせて速度を調整します。涼しい早朝には、ルアーをより深く落とし、ポーズを長くします。明るく暖かい午後には、ポーズを短くし、より積極的にリールを巻きます。ラインに注目することで、明白ではないかすかなアタリを検出できます。ラインへのプレッシャーと、ルアーをストライクゾーンに移動させ続けたいという衝動の間には、微妙なバランスがあります。.
糸の太さやルアーのアクションを研究すると、最高のパフォーマンスを発揮する人は状況に合わせてギアを調整しています。澄んだ水では、細い糸の方が感度が向上し、ヘビーカバーでは、太い糸の方がひっかかりにくく、障害物を引き抜くのに役立ちます。色々な組み合わせで練習すれば、バイトが増えるのがわかるでしょう。.
スピンキャストリールはスムーズな学習に適していますが、故障に注意し、適宜調整する必要があります。キャスト時に糸ふけが生じたり、巻き取りがざらつく場合は、ドラグを少し締め、より軽いルアーを試してください。その後、状況が許せば、よりコントロール性の高いスピニングリールに移行し、全体的な精度を向上させましょう。.
フッキングは、意図的かつ自信に満ちた動作を必要とします。アタリを感じたら、肩を使ってロッドを鋭くあおり、フッキングを口の中に叩き込みます。その後、一定のテンションを維持して、確実に仕留めます。アタリを感じたら、素早く、的確な反応を心がけ、無駄な力を使う手首だけのぎこちない動きは避けましょう。それは、ストライクのポイントを逃すことに繋がります。.
分割された練習セッションは、必要な直感を養うのに役立ちます。ペースと一時停止に焦点を当てたドリルと、正確なフックセットに焦点を当てたセッションを交互に行います。一貫した短いセッションは、散発的な長い努力よりも効果的であることが示されています。その改善は、釣りをするすべての湖や川で明らかです。すでに、この方法はガイドや釣り人からの信頼を得ています。.
| 状態別クイックリファレンス | |
| Condition | Tip |
|---|---|
| 浅瀬の澄んだ水 | 短いポーズ、より速いリールの刻み、感度を高めるための細径ライン |
| 深場かヘビーカバー | 長めのポーズ、より遅いリトリーブ、スナッグに強い太めのライン |
| 爽やかな、涼しい朝 | もっと遠投し、ポーズの頂点で保持時間を増やし、必要に応じて重めのルアーに傾倒する。 |
| 年間を通しての練習 | 一貫したリズムを維持し、時間とテイクを記録してルールに基づく決定を洗練する |
魚と生息地を守るために、迅速かつ人道的なリリースを実践しましょう
迅速かつ人道的にリリースする:魚を水中に保持したまま針を外し、一瞬のリズムで、理想的には30秒以内にリリースを完了させる。バーブレスフックを使用すること。この一瞬のリズムが時間を節約し、魚へのストレスを軽減します。.
手を濡らし、体を優しく支え、鰓や目に触れないようにする。腹部を支え、魚体を水平に保ち、蘇生のために流れに戻す。放す前に一瞬だけ間を置き、魚が再び呼吸しているか確認する。.
オンタリオの海域でボートから魚を扱う際は、水底から離れて水面近くにとどまることで、空気への露出を最小限に抑え、特に活動と鰓の反応が変化する秋には、魚をまっすぐに戻してください。持ち上げる必要がある場合は、頭を尾より上に保ち、ねじれを避けてください。これは回復を早め、体を傷つけないようにするのに役立ちます。.
何を追い求め、何ができるかを知っておきましょう。オンタリオの海域では、サークルhookやバーブレスのシングルフックを使用すると、内臓の損傷を減らし、リリースを迅速化できます。ウォールアイ、バス、パンフィッシュなど、ターゲットとする種類を理解し、それらの習性がターゲットの成功にどのように影響するか、そして、傷つきやすさが素早い取り扱いにどのように反応するかを理解しましょう。最近では、Ellisの戦術のヒントが、オンタリオの湖や川全体の生息地の質を維持するのに役立っています。.
クイックリリースを上達させるには、まず良いルーチンを確立することから始めましょう。道具を準備し、フックを外す練習をし、魚の感覚に注意を払うのです。少し練習すればタイミングが掴めるようになり、プロセスが迅速化され、生息地を保護することにもつながります。風が強い日や水面が荒れている日は、冷静で慎重なリズムを保つのが最初は難しく感じるかもしれませんが、一度ペースに乗ってしまえば、魚を水に戻し、回復するのを見守るうちに、水しぶきの音が消えていくのが聞こえるでしょう。その一瞬の静けさが、素晴らしい個体数を維持することに繋がるのです。.