

 Waterskiing and Wakeboarding – The Complete Guide">

Raccomandazione: inizia con lo sci nautico per sviluppare l'equilibrio dietro a una barca; passa a tavole stile wakeboard per i trick più avanti. Un appello ai lettori: provate entrambe le opzioni in una giornata tranquilla per valutare sensazioni personali, sicurezza, affluenza.
Quando si esaminano le differenze tra le configurazioni, l'equilibrio, l'altezza della corda, il controllo della lamina, il tipo di scarpone, l'influenza della posizione e la stabilità. quali aspetti contano di più In pratica; lo sci nautico tende a mantenere il corpo più eretto dietro la barca; il wakeboard si inclina verso la flessione del ginocchio per curvare lungo le scie. Esistono somiglianze nelle basi: postura, altezza della corda, tempismo, controllo della superficie; questi fattori guidano la progressione in entrambe le discipline. I rider, guardando l'acqua, cambiano stile dopo aver appreso le abilità di base, una volta che la fiducia cresce.
Per chi è curioso della cultura radicata del consiglio di amministrazione, il wakesurf diventa un ponte tra disciplina della velocità, controllo della superficie. Questa opzione può essere popolare attraverso i laghi; prima di tentare trucchi avanzati, impara postura pulita, equilibrio, transizioni di spigolo. spesso iniziano lentamente in acque più calme, utilizzando una corda di lunghezza inferiore. Se vuoi sapere quale stile ti si addice, prova una breve sessione con entrambi gli stili in una giornata tranquilla; valuta come risponde il corpo, analizza i primi risultati. Per il controllo del corpo, inclinati leggermente per sterzare, tieni i fianchi in dentro, guarda avanti piuttosto che ai piedi. Una volta acquisito l'equilibrio, la progressione verso trick di superficie o drop diventa fattibile sia per i professionisti che per i dilettanti.
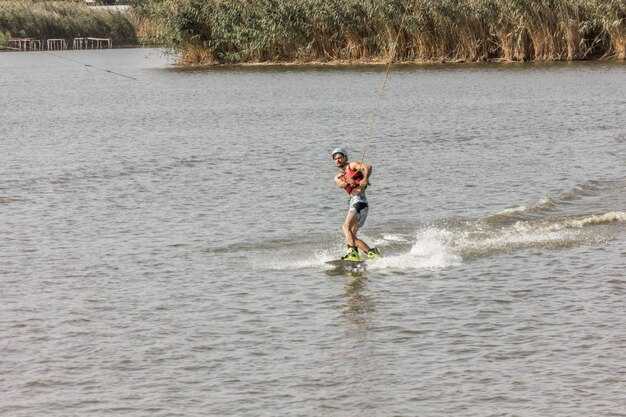
Prima di iniziare, prepara correttamente l'attrezzatura: la lunghezza della corda da sci nautico è in genere di circa 9-15 m, a seconda delle preferenze; la corda da wakeboard è più corta per aumentare il controllo. La sicurezza prima di tutto In ogni sessione. Velocità della barca per principianti: circa 29–39 km/h; regolala in base alle sensazioni. Le persone sul molo esultano mentre ti pieghi nella tua prima virata; mantieni le ginocchia piegate, il petto in alto. Inizia con piccole onde; progredisci verso strutture più grandi; scegli una sezione calma e limpida del lago.
Per creare un circolo di pratica efficace, prepara un piano settimanale: riscaldati con posizioni statiche, esercita le transizioni tra le posizioni, registra i progressi. Trick come le rotazioni sulla superficie richiedono slancio adeguato, linea visiva, tempismo del toe-kick; i progressi nel tricking derivano dalla padronanza delle basi. Questo approccio è adatto ai professionisti che cercano coerenza; per molti studenti, sessioni brevi con esercizi mirati producono risultati più rapidi rispetto a lunghe sessioni poco focalizzate.
Consigli pratici per motociclisti principianti ed esperti
Inizia con esercizi in acque calme; padroneggia la postura, l'impugnatura, la tempistica; mantieni le spalle sopra i fianchi, le ginocchia morbide, gli occhi in avanti. Costruisci l'equilibrio rilassando le spalle alle maniglie; mantieni un leggero contatto con la corda. Dopo tre sessioni, rivedi brevi clip video dai media per individuare piccoli cambiamenti di equilibrio. Questo approccio è stato convalidato dai dati di sessione.
Focus sull'attrezzatura: il rider deve scegliere attacchi adatti alla misura degli scarponi, testare lo sgancio prima di entrare in acqua; assicurarsi che la tensione degli attacchi sia adeguata al livello di abilità; le piastre fissate mantengono gli attacchi stabili durante i tentativi di alzata. Tenere a bordo un paio di maniglie di scorta, in caso di grovigli; il rider deve rimanere comodo. Indossare una muta per galleggiamento, protezione e ridurre la fatica. Controlli raccomandati: compatibilità scarpone, vestibilità aderente, facile rilascio.
Le discipline differiscono per posizione, velocità della corda, messa a fuoco degli occhi; tieni un registro dei progressi collegato a un servizio in abbonamento che offre esercizi, feedback video, consigli di coaching.
I cavalieri in cerca di sfide partecipano a tornei locali una volta che le basi sembrano stabili; esaminano i regolamenti vigenti, i segnali dei giudici, il layout del percorso; preparano allenamenti di ritmo in ogni sessione.
Pressione inferiore, controllo delle lamine, larghezza dell'assetto e efficienza nella conduzione; pratica a curvare lungo ogni lamina in entrambe le direzioni; mantieni i fianchi neutrali, l'assetto confortevole e lo sguardo fisso.
Quando sei pronto, parla con l'equipaggio della barca; specifica la lunghezza della corda, la velocità target, le condizioni dell'acqua; assicurati che la corda sia attaccata al punto di traino corretto, senza nodi; inizia con tiri facili, aumenta gradualmente la velocità.
Le recensioni dei media aiutano i rider a individuare gli errori; studia i video dei migliori atleti per imitare il controllo delle lamine; evita le mosse rischiose senza un'adeguata supervisione da parte di un allenatore.
Gli abbonamenti forniscono esercizi strutturati per varie discipline; abbina questo agli aggiornamenti dalle imbarcazioni sulle condizioni meteo e dell'acqua; tenere traccia dei risultati supporta la decisione di provare nuove mosse, fissando obiettivi realistici.
Basi dell'attrezzatura: Sci, tavole, attacchi e funi di traino
Raccomandazione: Scegli un setup specifico per lo sci nautico, un attacco indulgente, un paio di sci stabili, una tavola in stile surf e una cima da traino con un'elasticità moderata per mantenere la stabilità durante le partenze.
L'organizzazione è fondamentale in barca. Etichetta i compartimenti per cime, giubbotti, kit di riparazione; tieni guanti di ricambio, cera, asciugamani a portata di mano; i rider traggono vantaggio da un ponte pulito e da una cima da traino ad attacco rapido.
Le differenze nella scelta dell'attrezzatura risiedono in superficie, rocker, controllo delle lamine. Un principiante spesso prediligerà una tavola più larga e galleggiante per un contatto stabile con l'acqua, mentre un rider competitivo potrebbe dare priorità a attrezzature affini allo sci con lamine più strette e risposta più rapida, offrendo ai rider un'emozionante corsa all'indietro. Caratteristiche da controllare: altezza del rocker, larghezza del contatto, materiale della base, costruzione del nucleo, compatibilità con le calzature, punti di attacco.
-
Sci; tavole – note per l'apprendimento: per imparare, una tavola stile surf offre stabilità sull'acqua; per migliorare le tecniche, gli sci offrono un controllo delle lamine più rapido; la lunghezza complessiva dovrebbe essere allineata con l'altezza del rider; intervalli tipici per adulti: sci 60–66 pollici (152–168 cm), tavole 124–136 cm; ricorda che la superficie influisce sulla stabilità durante la fase in piedi.
-
Attacchi – regolazione: larghezza stance regolabile, misure di scarponi approssimativamente tra US 5–14, sicurezza puntale, blocco del tallone, protezione dallo sgancio. Gli attacchi open-toe tollerano svariate posizioni del piede; gli attacchi closed-toe offrono un controllo costante. Per i principianti, scegliete attacchi permissivi con plantari imbottiti; assicuratevi della rigidità della fibbia, della tenuta della cinghia. Testerete la mobilità prima di uscire; regolate le impostazioni su terreno asciutto.
-
Cime da traino – preparazione: una lunghezza di 18–21 m (60–70 piedi) è adatta alla maggior parte dei rider; le cime a bassa elasticità in Dyneema o Spectra offrono una trazione prevedibile; assicurarsi che le estremità siano dotate di codice colore per una rapida identificazione; i tralicci sull'imbarcazione offrono opzioni di instradamento; ispezionare i nodi, indossare le guaine, tenere la cima lontana dagli scafi; durante le sessioni, tenere la cima sotto l'acqua limpida per evitare che si aggrovigli.
-
Sicurezza, manutenzione – controlli di routine: ispezionare l'hardware, sostituire le cinghie usurate, risciacquare la corda dopo l'uso, asciugare l'attrezzatura prima di riporla; organizzare i materiali di consumo in una sacca stagna; manterrai le prestazioni, prolungherai la durata dell'attrezzatura.
Preparazione per la sicurezza: Dispositivi di galleggiamento personali, osservatori e controlli meteo
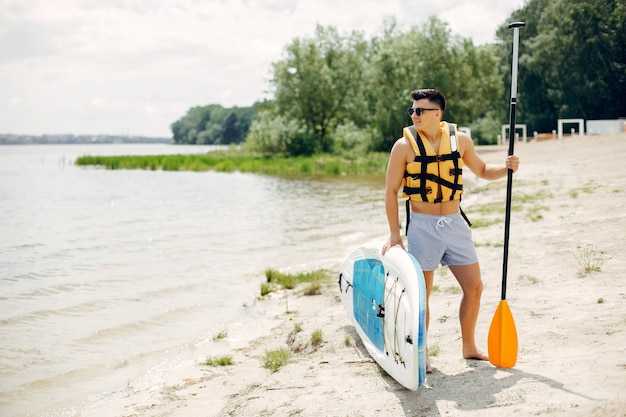
Scegliere un giubbotto di salvataggio di Tipo III con galleggiamento certificato; verificarne la corretta aderenza prima di salire sulla banchina. Eseguire un rapido controllo del galleggiamento: sollevare le spalle; il giubbotto rimane in posizione mentre il busto si alza.
Controlla le previsioni locali 60 minuti prima del lancio; annota la velocità del vento, le raffiche, la probabilità di pioggia, il rischio di fulmini. Se si avvicinano tempeste all'area regionale, posticipa la sessione. I club regionali segnalano un boom di attrezzature di sicurezza in tutti gli sport.
Assegna uno spotter esperto a riva o in barca; lo spotter tiene gli occhi addosso al rider; guida la gestione della corda; segnala le fermate quando necessario.
Mantenere attrezzatura sufficiente per risposte rapide: giubbotto, corda, maniglie; ispezionare la corda per sfilacciature; testare lo sgancio rapido sull'attrezzatura della barca per rispondere rapidamente.
Il wakesurf presenta molte somiglianze con il setup dello skimboard; la disciplina ideale per la sicurezza è presente nei club di tutta la nazione. L'impugnatura salda garantisce la sicurezza mentre le maniglie rimangono nel palmo del rider durante i lanci.
Gli istruttori erano molto apprezzati; i club a livello nazionale forniscono controlli strutturati, risposte più rapide, routine di prevenzione degli infortuni esistenti; i motociclisti beneficiavano di vantaggi durante gli eventi.
Alzarsi: tecnica passo passo per alzarsi in piedi e iniziare a guidare
Alzati rapidamente entro 0,5-1,5 secondi dopo che la corda si è tesa; fianchi sopra la tavola, ginocchia piegate, schiena incurvata; peso centrato sul ponte; mani sul maniglione vicino alla vita; occhi in avanti; petto in alto.
Passaggio 1: Assumere la posizione prima della partenza; la posizione è basata sulla corporatura del rider; piedi alla larghezza delle spalle; dita dei piedi rivolte in avanti; ginocchia rilassate; sguardo dritto davanti a sé.
Fase 2: Quando la tensione aumenta, spingi le anche in avanti; estendi le gambe; sollevati in posizione eretta; mantieni la linea collegata al busto tramite le mani sull'impugnatura; gomiti morbidi; pinne attaccate, se presenti; guarda avanti.
Passo 3: Stabilizzare la posizione; spostare il peso verso l'avampiede; tenere i talloni abbassati; mantenere una postura eretta; respirare; schiena arrotondata; rimanere relativamente centrati; velocità della barca; scia; angolo della corda impatto sull'equilibrio; regolare di conseguenza con i fianchi.
Errori comuni: alzarsi troppo presto; rimedi: attendere la tensione della corda; mani sempre sulla maniglia; mantenere la schiena arrotondata; guardare avanti mantiene l'equilibrio; la pratica migliora la stabilità nello sci nautico grazie al coinvolgimento del core; il controllo della fune riduce l'oscillazione; le mosse estreme richiedono una tempistica precisa.
I wakeboarder ricevono feedback dagli istruttori; esistono sessioni scolastiche; eventi esistenti; le competizioni portano pressione per esibirsi; le barche forniscono la trazione, il vento, gli spruzzi; la sensazione è esaltante, relativamente controllabile; decidi tu il ritmo in base all'esperienza.
| Step | Cue | Errore comune | Regolazione |
|---|---|---|---|
| 1 | Posizione prima della trazione | Installazione rapida | Pausa fino alla tensione del filo prima di sollevarsi |
| 2 | Rise through hips | Arms lead | Engage core; keep hands on handle |
| 3 | Weight over midfoot | Heels lift | Lower center of mass; maintain balance |
| 4 | Eyes forward | Looking down | Gaze forward; fix posture |
| 5 | Ride posture | Wobble with speed change | Recalibrate with hips; keep fins attached |
Riding fundamentals: Stance, edges, balance, and wake control
Start with a shoulder-width stance; knees lightly bent; chest up; eyes forward; weight centered over the midline of the ride.
Edge control relies on a deliberate weight shift: toward toes for a forward edge; toward heels for a back edge; maintain even pressure through the wake arc.
Balancing requires minimal upper-body motion; involved athletes develop core tightness; shoulders level; hips square to direction; gaze on horizon to reduce sway; core strength acts as engine behind every move.
Wake control emerges from timing, speed, rail angle; compress ankles to flatten the board before crossing the wake; release pressure just after the crest to drive a clean line, highly reducing splash.
These skills transfer to existing gear; skis stable at speed; nylon lines fatigue less; kneeboard setups serve as back-up for tricking; popular designs emphasize wide bases for balance; many competitors report improved impact control, smoother flying off wake, consistent riding across long runs, enhanced balancing.
Progression: start with shallow wakes, move to extreme lines; long passes build stamina; back foot pressure to pop onto edge; switch directions smoothly; during flying off wake, land with knees bent; include these drills into weekly practice for consistent gains.
For setup, choose existing skis with balanced rocker; popular nylon bindings; if possible, test different widths; extreme moves benefit from kneeboard options delivering alternative feel; a solid routine includes several runs per session, focusing on edge transitions, balance, wake control.
Maintenance and care: Cleaning, storage, and gear longevity
Rinse equipment after every session; dry thoroughly; store in a dry, shaded area until next use.
Cleaning plan relies on fresh water, mild soap, a soft brush; remove salt across surfaces; boots, bindings, fins receive a gentle scrub; embedded salt can become resistant to removal; wipe contact surfaces dry easily; some boards feature a v-shaped channel, clean along its keel.
Dry storage factors: store lengthwise against a wall on a ventilated rack; keep within a dry bag; avoid contact with moisture at floor level.
Seasonal checks: if you decided to maximize longevity, inspect wear on boot liners, straps, quick-release hardware; track each item monthly; replace worn parts if loose, cracked, or corroded.
Barefooting gear care: wash barefooting boot liners separately; dry inside-out; avoid contact with salt during storage; until next session, keep in a breathable bag.
Active-use tips: for tricking setups, inspect hardware for looseness across length; check grips; replace worn pads; keep those components within recommended torque levels; watch for cant in seating or mounting surfaces.
Boat storage approach: popular options include a portable rack aboard; a single cover; a breathable bag; avoid stacking gear to prevent pressure marks; summer heat can accelerate material wear; these measures yield relatively fewer signs of wear across seasons.
Wear-focused maintenance: prioritize those components prone to wear, such as boot beds, bindings, grips, line attachments; routine checks across those elements reduce cost, downtime; a single monthly cycle improves longevity.
Rack care: pad arms of storage stands to avoid contact with gear; place gear away from direct sun; schedule quarterly inspections for corrosion on metal parts.