

 Fit to Be Tied – 5 Essential Boating Knots You Should Know">

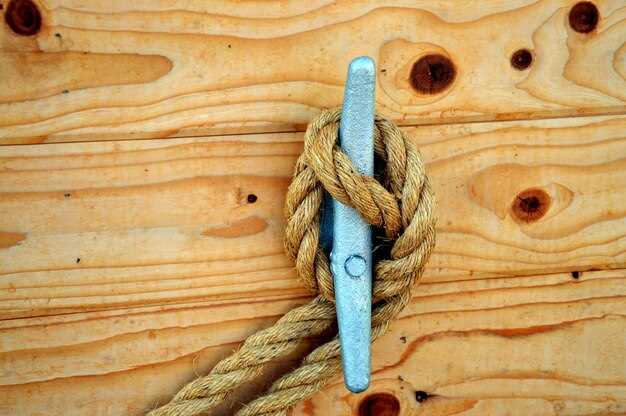
Start with loop-to-loop around a cleat for most docking tasks; it offers simple release, solid grip, and excellent adjustability under varying loads, making it the default choice for many on-water needs. This approach links key sections of the line and passes the test in mixed rope types.
The loop-to-loop around a post or cleat also lets the rope thread back through to tighten or ease tension, and it does not require passing a tag end through a hole in the device itself. This tie works for most docking, anchor lines, and round posts, offering a reliable hold behind rails at each turn, especially when wind makes the line twist.
The bowline creates a fixed loop at the rope’s end without slip under load; this provides a dependable anchor for fenders or mooring lines. To form it, thread the rope around itself to form a loop, then bring the working end up through the loop, around the standing part, and back down to secure. Sometimes it needs a quick dress when used in slick conditions, but in most types of tasks the loop stays stable behind a post or ring. It’s also useful for a turn around a post if needed, comes in handy for many purposes.
The clove hitch is a fast, adjustable bind around a post or rail; two turns around the object followed by a turn under the standing part locks in place. However, it can slip if the rope is slick or if the load shifts, so a pass behind or a round-turn with an extra hitch adds protection for most operations.
The round-turn with two half-hitches distributes load along a line and resists creeping when tied behind a cleat or dock rail. It’s often used for lines that must stay put for longer periods, and both turns reduce wear on the rope while keeping the tail out of the way. For easy removal, keep the tail short and pass it neatly.
The figure-eight on a bite provides a strong end loop that resists pull-through; twist the rope into a clean loop, thread the tail through the bite, and snug it against the standing part. This setup comes in handy when a secure, untidy-run line must be tied off temporarily, and it’s excellent for making a backup anchor behind a piling. For those who have practiced, youve mastered the sequence: blog discussions often compare its reliability to loop-to-loop in mixed conditions, and the guidance is to drill the routine until it becomes automatic.
Guide to Boating Knots
Start with a standing line secured to a cleat: wrap once around, pass a round turn, then set two half-hitches. This sequence keeps tension down and the boat from drifting during docking.
Preparing gear means keeping one handy working end ready, with a second short tail for adjustments. If youve got a second line for backup, keep it coiled and ready. Because wind can shift quickly, the range of line lengths matters: too long adds slack, too short makes tying awkward.
Docking near a pole or piling: use a clove hitch to guide the approach, then secure with a round-turn and a pair of hitches to lock tension.
Launching and retrieval: lines are often adjusted as the craft comes alongside. Keep lines away from moving parts, avoid wrapping too tight, and increase or decrease tension as needed to maintain control.
Master these basics and apply them with different line diameters; working with a bowline or a round-turn + two half-hitches yields reliable results under load.
Fit to Be Tied: 5 Must-Know Boating Knots You Should Know; Clove Hitch Knot
Use a basic, temporary binding: rope around a post, twist to form a tidy cross, then feed the end under the last pass and pull tight. This creates a secure grip with minimal fuss for quick adjustments.
When mooring or attaching gear to a fixed object, this approach around the post offers a dependable hold. Their loops stay neat, and the tail can be released to slip back to slack without reworking the entire setup.
To execute, start with a couple of round turns, keep the loops flat, pinch the end, and guide it behind the standing rope before the final pass. This common routine is fast and reliable for standing lines.
Common mistakes include letting the binding loosen when the object spins or when the end pinches and jams. If tension grows, add a second hitch behind the binding to keep things from creeping. Look for any pinch points and adjust before stress rises.
For a visual reference, animatedknotscom offers animated demonstrations. A blog can share variations, including a loop behind a mooring post, aiding confidence in real conditions. Looking at these links helps map a workflow that matches gear.
Maintenance tip: inspect rope for wear, feed fresh loops when needed, and keep things behind the post aligned. The same technique works across common rigging, and this path can be reused for multiple tasks in a deck setup.
Bowline Knot: How to Tie a Secure Fixed Loop for Halyards, Lanyards, and Rescue
Tie a fixed Bowline to create a reliable fixed loop for halyards, lanyards, and rescue tasks on sailing craft; this arrangement keeps the end from loosening and yields a true knot. The name Bowline is among the simplest to master, making it a staple when safe handling and fast deployment are needed, and the loop forms a ring that accepts the working end as it passes through. From a practical standpoint, keep the ends tidy and avoid loose slack that can snag hardware during launching or passing.
- Form a small loop in the standing part near the end; pinch to hold the shape and prevent deformation while the line is worked.
- Pass the working end up through the loop from the underside, like the rabbit coming out of the hole, creating the initial turn.
- Twist the working end around the standing part and behind the loop, then bring it back toward the loop to begin the final wrap.
- Pull the working end down through the original loop to complete the core of the fixed loop and set the basic structure.
- Dress the knot by tightening the standing part while easing the tail; ensure a slight tail remains and the ends stay clean for quick checks.
- For added security, make a second turn around the standing part before returning through the loop; this second action yields excellent hold under hard loads during launching or passing lines through a ring.
- Use a backup stopper if dynamic forces are expected; a simple figure-eight on the tail behind the standing part can prevent escape under shock while still allowing quick release if needed.
- Application notes: this setup works well for halyards, lanyards, and rescue lines, with the fixed loop remaining behind hardware and maintaining control of the line in demanding conditions.
- Tail length matters: ends should extend enough to allow a confident pull, but not so long that they interfere with handling; some operators prefer a 15–20 cm tail for flexible use.
- Verification: test by applying moderate load on the standing part and ends; if any creeping occurs, re-dress and reseat the loop for a firmer hold.
- Visual learners can consult animated demonstrations at animatedknotscom to see the path clearly and understand how the rabbit, tree, and hole interact during making, creating, and solidifying the fixed loop.
Figure Eight Knot: Create a Reliable Stopper and Strong Load-Bearing Tie
Feed the working end through the bottom leg of a figure-eight formation, then around the standing part and back through the loop to form a secure stopper. Tighten fully, lay the tail underneath the main line, and snug the bite against the bottom of the eight. This delivers a dependable stopper and a strong, load-bearing tie for end-of-line use during mooring, launching, or securing gear.
Versatile for attaching to rings, cleats, or mooring hardware, the figure-eight stopper stays between the standing part and tail as tension builds. Start with a clean eight, then feed the end through the second pass to lock, and, on the third pass, snug the tail along the standing line. When loaded, the bite bites harder against the line, delivering more grip and reducing creep even on wet ropes.
Today’s routine checks include inspecting underneath the stopper for wear, ensuring the loop-to-loop path remains neat, and verifying that the bottom sits flush. theres minimal slack when the path stays clean and the bottom bite is even. If the rope shows fray, replace the line before loading; test by applying twice the expected force to confirm reliability for mooring and launching tasks.
During practice, feed the tail through the middle of the loop and again between the standing part and the end to keep a clean profile. This spacing helps when launching or attaching additional hitches, or when adjusting from a short mooring to a longer line today. With proper setup, the figure-eight stopper remains stable, robust, and ready for daily use.
Sheet Bend: Safe, Easy Joining of Different Rope Sizes for Mooring Lines
Recommendation: use a Sheet Bend to connect larger and smaller lines for docking, delivering a secure join that unties cleanly after launching. The larger rope forms a base loop located underneath the standing part; the working end of the smaller line passes up through that loop, goes around the back of the larger rope, and down through the loop again. When tightened, the finish sits flat across the bottom of both lines, creating a tidy, reliable connection across diameters and speeds today.
Key notes: this method works across common rope materials and stays handy in many docking tasks. For an uneven size difference, a second turn around the back of the larger line (twice) increases grip, with a final pull to set the work. If the two lines are similar, a single wrap is enough, while a third wrap may be used in high-load situations to keep things secure. A slight misalignment can be corrected by twisting the smaller end before final snug, and the whole setup remains safe to depend on during slow shifts or quick turnarounds at the dock.
Below are precise steps for practical use, including when to apply extra wraps and how to test the result before allowing load to increase.
| Step | Action | Note |
|---|---|---|
| 1 | form a base loop in the larger rope and position it underneath the standing part | keep the loop neat; this is the bottom reference point |
| 2 | bring the working end of the smaller rope up through the loop, then around the back of the larger rope | this creates the cross that holds the two lines together |
| 3 | tuck the smaller end down through the loop again and snug the joint | for extra safety on larger differences, add a second turn around the back and repeat the tuck (twice) |
| 4 | gently pull on both standing parts to settle the finish against the bottom of both lines | test with modest load; if needed, apply a final twist to align loops |
| 5 | verify the agreement at the attachment point on the dock or cleat | ensure the same tension across both sides; avoid rabbit ear formations |
When used in everyday boating practice, this approach creates an all-purpose, reliable join for docking and launching tasks. It remains an excellent choice for anglers and fishermans alike, providing a straightforward method to attach lines across diverse diameters and bottom surfaces, with predictable behavior under twist and load.
Trucker’s Hitch: Harness Maximum Tension with a Simple, Releasable Knot
Create a fixed loop around the standing line near the load, then pass the working end under and back through that loop to form a basic pulley. Grab tension on the master line and tighten until the bottom of the load sits flush against the pole or cleat; this starting setup is common and quick to reproduce.
Finishing involves two short loops around the standing line and a passing release: tie a rabbit knot-style detent, then lock with a quick hitch. This also provides a reliable, releasable finish that remains secure under pressure.
Technique notes: turn the working end around the standing part twice before looping back through; crossing the line and passing through the loop creates a strong hitch that holds under load. The repeated crossing increases friction and reduces slip in rough conditions.
Uses and safety: common on deck for attaching gear to a cleat, pole, or deck hole; attaching the line here keeps it orderly and safe, and the approach works with common rope varieties. The system stays tight even with shifting loads, and their gear benefits from a predictable tension.
Maintenance tips: inspect the loop and fixed point for wear; when the moment to release comes, pull the master line and ease the release loop; this makes the knot come free without damage and lets the setup be redone quickly.
Bottom line: this approach delivers tighter, repeatable tension with multiple loops and passing; there are more variations, but the core stays simple: a loop, then turn, then finish with a fixed hitch, more variations exist, leaving both hands free for other tasks and enabling boat-ed operations to stay safe.