

 10 Tips for Choosing a Wakeboard – The Ultimate Guide">

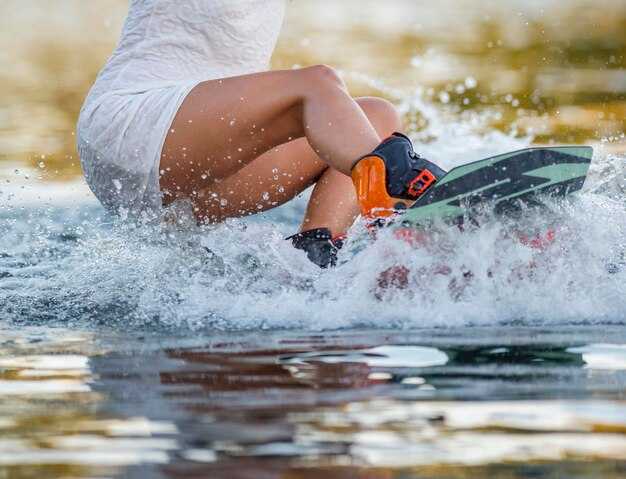
Begin with soft, 134–139 cm board; it suits young riders looking to master transitions.
Durability matters; arms have strength, hands, and wrists absorb impact, so choose a model with reinforced core and rugged decking to support performing.
Using maddox sizes chart at centre helps pick length; typical options include 132, 135, 139 cm, with 135–139 cm fitting riders around 155–175 cm tall.
In cable parks, removable fins help stability; such a setup aids early presses, helping transitions, and reducing grinds.
Riders understand theyre not merely gear; progress makes skill, driven by stance, a stable centre, and controlled forza, while looking into each bend accelerates performing.
Wakeboard Selection and Maintenance: Practical Tips
Begin with a twin-tip board, 135–139 cm, weight range 60–95 kg. This sizing yields balanced handling, easier carving, and steadier starts. Heavier riders step up 2–4 cm; becoming a confident rider and boarder begins with correct sizing, round edges, and a forgiving deck. A rockered profile in the mid range helps water starts and jumps, and feels great when you throw into the wake. Although progress is gradual, the right board speeds learning.
- Board shape: twin-tip with round nose and tail supports most styles and reduces catching during early carves, while keeping balance where you need it most.
- Sizing guidance: use weight-based sizing, not height; most riders fit 135–139 cm; adjust by 2–4 cm if you’re toward the upper or lower end of the range.
- Bindings and setup: bindings suited to boot size, with direct mounting to minimize deck play; choose softer bindings for ease of entry and less ankle wear.
- Stance considerations: start with a neutral stance, then fine-tune toe-in (0–15 degrees) and width (18–22 inches) to match comfort and carving feel.
Maintenance routine protects this investment. After sessions on water, rinse the board with fresh water and dry completely. Remove bindings if storing long term to avoid compression and strap wear; re-torque binding screws after initial rides and at the start of each season. Inspect edges and fins for chips or cracks; replace damaged parts before riding again. Store away from direct sun in a cool, ventilated area; keep in a padded bag to prevent dings.
- Cleaning schedule: rinse after salt water or chlorinated water, then dry; avoid leaving damp in storage.
- Hardware check: tighten binding screws to factory torque; replace stripped screws.
- Edge care: inspect bevels and fins; file or replace if chipped.
- Storage conditions: keep out of sun, lay flat or store upright in a supported rack.
- Stance setup: width 18–22 inches; toe-in degrees 0–15; hips aligned with the wake to improve balance during turns.
- Carve technique: start with a light edge, then deepen to carry speed into the wake; rotate hips and shoulders together to direct the board and carve into the wake.
- Jump readiness: gain balance on straight runs, then add a controlled jump into the wake; maintain soft knees and a smooth throw to land softly on the balls of feet.
- Styles and progression: most progress comes from practicing forward momentum across different environments; adapt stance to park, cable, or lake riding as needed.
Buyers should check warranty coverage, service access, and parts availability. Look for signals of a solid choice: consistent support, clear specs on sizing and rocker, and a history of reliable replacement parts. If a board feels undersized, overly stiff, or lacks confidence under your weight, switch to a setup suited to your skill level, water conditions, and growth trajectory. Wakeboarding is towed behind a boat, so coordinate signals with the operator; with the right combination, you’ll reach great balance and confidence quickly.
Define riding style and rider metrics to select board length
Picking right length begins with precise view of riding style and rider metrics available. Beginner learning riders gain extra stability, while riders becoming more confident seek different lengths. Thing here is balancing main stability with control.
- Weight and height: map to length ranges. 125–131 cm (<60 kg); 130–136 cm (60–75 kg); 134–140 cm (75–90 kg); 139–145 cm (90+ kg). Heights above 188 cm tend toward upper end of bands.
- Skill level: beginner and learning benefit from longer length, which increases stability; as you become comfortable, pick shorter within the band to gain quicker edge control.
- Riding style and environment: cruising in shallow water with angled stance benefits from longer length offering main stability; jumps and tricks demand shorter length within band to increase rotations. Boards featuring soft edges plus stiffness ratings align with rider preference.
- Starts and height: longer length increases surface area, aiding starts; break height underfoot matters in shallow water, making length a key stability factor.
- Available options and ratings: review models offering different stiffness and rocker shapes within your weight band; pay attention to ratings indicating forgiveness and durability.
- Ideal and specific guidance: if you sit between bands, choose the longer end to maintain learning continuity; although quick starts appeal, main priority remains balance and control.
- Progression path: as rider becomes more comfortable, shift toward shorter within band to improve control and transitions; really helps edging precision.
- Rider stance and sit alignment: preferred stance width influences length. A longer board sits securely under a wide stance; a shorter board sits higher under a narrow stance.
Choose rocker profile and deck shape to match your goals
Scegli un three-stage rocker to maximize jumps and keep landings soft during learning new tricks. That setup delivers stronger control through turns, and these features translate into steadier passes through water. There are price ranges to compare, and this selection can give lasting reliability behind your boat.
Typically, degrees matter: a low-degree rocker planes quickly and maintains speed, while higher degrees push more lift, supporting bigger jumps. If learning edge control, pick a softer deck with forgiving edges; arms stay relaxed, and you retain balance through turns.
Deck shape parity: combined features such as rounded tips and softer rails increase stability behind the boat, especially when you keep arms close and wrists loose. In setups with a tower, stable rods help maintain line through turns, boosting overall control.
Chart your priorities: control, speed, pop, and learning curve; there are many rockers and deck shapes to compare, so picking a model becomes practical. Consider price, weight, and how these rockers perform through chop; a soft deck typically weighs less and costs less than stiff wood composites, yet many combined options deliver durable life.
Story from riders shows how a soft deck with a moderate three-stage rocker suits beginners, while stiffer combinations deliver speed at the expense of balance; once you know your goals, you can pick between models that fit your skill path.
Bindings: dimensione dello scarpone, tipo di attacco, larghezza della posizione e setback
La misura dello scarpone deve corrispondere al tuo piede; allaccia saldamente per fissare il blocco del tallone, lasciando 1–2 mm di gioco nell'avampiede quando allacciato. Questa configurazione mantiene i rider di wakeboard stabili all'inizio e a terra, evitando spostamenti durante la guida.
Le tipologie di attacchi includono attacchi chiusi, attacchi aperti e design ibridi. Gli attacchi chiusi offrono un controllo costante durante le partenze, con caratteristiche come cinghie per la caviglia sicure; gli attacchi aperti offrono spazio per la crescita ai giovani rider, con lacci regolabili per adattarsi a varie larghezze. Tali design basati sulla forma del piede offrono ai rider una vestibilità e una sensazione precise.
La larghezza della posizione influisce sull'equilibrio attraverso l'area di movimento. L'intervallo pratico è di 18–22 pollici (46–56 cm) per la maggior parte dei piloti; gli atleti più alti possono spingere verso i 23–24 pollici (58–61 cm). Inizia vicino alla larghezza delle spalle, testa con incrementi di 1 cm. Una posizione più ampia significa maggiore stabilità durante i traini e i movimenti da bordo a bordo; una posizione più stretta migliora il controllo dei bordi su salti e percorsi in acque calme.
Setback significa centro di collegamento dietro la linea mediana. Un setup neutro si trova a 0 pollici; spostarsi di 1–2 pollici verso la coda sposta il peso verso il piede posteriore, influenzando dove si atterra e come si gestiscono le transizioni sul lato. Questo equilibrio assomiglia a due ruote sotto carico, mantenendo la stabilità durante le curve.
Consideration involves weight, height, and skill; you've got to tailor gear to ride style, whether you chase jumps, rides, or quick starts. This involves signals from body and gear: check boot tightness, binding tension, and stance comfort after each session. Keeping notes helps; some wakeboarders adjust boot size, binding type, setback, and stance width to match their area of movement, like a sport based system designed to ensure control during starts and landings.
Materiali e hardware per tavole: tipo di anima, pinne, bordi e durata.
Scegli una tavola a nucleo di legno con composito ad alta densità e fondo rinforzato; questa scelta aumenta la consistenza della distribuzione del peso, migliora la stabilità all'atterraggio e offre una durata a lungo termine. Anche se più pesante, il nucleo di legno offre una sensazione affidabile e resilienza sotto stress. La geometria Vertex abbinata a uno strato esterno denso aumenta la durata e aiuta la comunicazione tra l'input del pilota e la risposta della tavola.
Types of cores influence riding vibe: this kind of info helps riders pick; wood cores offer forward pop and stiffness; foam keeps weight down but wears quicker; some hybrids blend a wood veneer with foam to balance weight, safety, and durability. sizing should match weight and riding style; bigger boards stabilise while smaller ones respond faster. This isnt a must to pick wood; foam has its place, and thats why hybrid options exist.
Removable fins attach with simple hardware, offering quick tuning between sessions. hai opzioni per regolare la presa o la lassità a seconda delle condizioni dell'acqua. Il design del bordo è importante: i binari dritti offrono una presa in avanti e una rapida preparazione del bordo; i bordi arrotondati ammorbidiscono il contatto all'atterraggio; le bisellature possono aumentare la sicurezza e il rilascio precoce. Il contorno Vertex lungo la sezione centrale e i canali sul fondo migliorano la stabilità durante la guida e riducono la cattura indesiderata sulla superficie dell'acqua. Quando l'hardware è fissato saldamente e dimensionato in base alla larghezza della tavola, la sicurezza aumenta e la manutenzione viene completata con uno sforzo minimo.
| Core type | Pros | Cons |
|---|---|---|
| Legno | durevole, trasferimento di energia forte, risposta prevedibile | più pesante, costo più elevato |
| Schiuma | leggero, a basso costo, facile da stampare | minore resilienza, usura più rapida |
| Ibrido | peso equilibrato, sensazione solida, buona durata | prezzo più maggiore, costruzione più complessa |
Cura e conservazione post-corso: risciacquo, asciugatura, ispezione e protezione
Risciacquare le wakeboard con acqua dolce entro 15 minuti dalla fine di ogni sessione di navigazione per rimuovere sale, sabbia e cloro. Tenere la tavola al centro, sostenere la punta e il tallone e spruzzare con un getto delicato; che permette alle goccioline residue di defluire liberamente prima dell'asciugatura.
Asciugare accuratamente con un panno in microfibra, quindi asciugare all'aria in un'area ombreggiata e ben ventilata. Assicurarsi che le legature e l'imbottitura siano completamente asciutte; evitare di lasciare cinghie o fodera umidi, poiché la muffa può formarsi durante l'uso per tutta la stagione. Questi passaggi aiutano i principianti a mantenere una planata coerente e a ridurre la perdita di presa quando la velocità varia durante le sequenze di salto.
Ispezionare problemi comuni: scheggiature sui bordi, crepe nel decking, punti deboli vicino agli inserti o segni di delaminazione intorno ai binari. Eseguire una rapida serie di controlli lungo il bordo posteriore per usura; assicurarsi che le viti e la ferramenta di fissaggio siano salde; sostituire le viti o i fissaggi mancanti o danneggiati. Eseguire una rapida prova di scorrimento appoggiando un dito su un binario per rilevare qualsiasi sensazione di vuoto che indichi danni al nucleo. Se i risultati indicano danni, non utilizzare la tavola; organizzare una valutazione professionale per determinare le esigenze di riparazione.
Linee guida per la protezione e lo stoccaggio: risciacquare e asciugare completamente, quindi riporre le tavole da wakeboard in un luogo fresco e asciutto, lontano dalla luce solare diretta. Utilizzare una borsa o una copertura imbottita per proteggerle da polvere e graffi; posizionarle su una rastrelliera o un supporto in modo che il peso non prema su un unico punto. Mantenere una temperatura ambiente stabile; evitare temperature estreme, sia calde che fredde, che possono influire sulla resina e sulle forme. I piloti esperti, così come i principianti, beneficiano di queste misure per mantenere la velocità, lo scivolamento e l'aderenza della tavola la prossima stagione. Quando si impilano, separare le tavole con distanziatori morbidi per evitare il contatto schiena a schiena; se si utilizzano più tavole, ruotare le posizioni in modo che le punte o i talloni più arrotondati non rimangano premuti l'uno contro l'altro per lunghi periodi.