

 Electrolysis on Yachts – Causes, Signs, and Fixes Owners Often Miss">

Recommendation: Minden víz alatti szerelvényen cserélje ki az elhasználódott cinkeket; ez a proaktív intézkedés védi a fémszerkezeteket, elkerülve az ellenőrizetlen korróziót a part közelében; ha bármelyik cinken túlzott kopás látható, indulás előtt gondoskodjon a javított cseréről.
Minden esetben apró eltolódásokat látva az elektromos értékekben; a kémiai folyamatok átgondolása tisztázza, hogy az ellenőrizetlen elektronáramlás miért rontja a szerelvények állapotát; molekula a tengervízi kölcsönhatások a védőrétegek elvesztéséhez vezetnek; ez nem feltételezésen alapul; a kábelezés útvonalainak, szerelvényeinek ellenőrzése; a csatlakozóblokk feltárja, hogy az ezüstözött hardveren megmaradt-e a védelem.
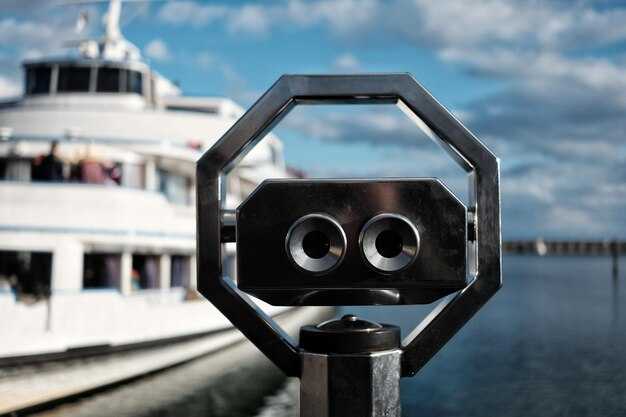
Jachtokon, az eset a propellerek körüli cinkvédelemre épül; a nem ellenőrzött romlás késői károkat okoz; a finom jelek közé tartozik a csavarok közelében lévő korrózió; a csökkent áramértékek; ezek a jelzések javításokat sürgetnek a következő út előtt.
A megoldások közé tartozik új cinkek beépítése; szerelvények meghúzása; szigetelés korszerűsítése; megfelelő áramlás biztosítása; a proaktív rutin megbízható víz alatti működést eredményez; ez csökkenti a meglepetéseket, a javításokat kisebb alkatrészekre korlátozva; a javítás utáni javulást mutató mutatók ösztönzik a következő szerviz tervezését.
Gyakorlati diagnosztika és javítás sós vízi jachtokhoz és sport halászhajókhoz
Először is, alkalmazz közvetlen, gyakorlati megközelítést: a szivárgás okának felderítése a vízvonaltól a hajótest szerelvényein át az akkumulátor bankig terjedő folytonosság vizsgálatával; az izolátorok korróziójának ellenőrzése; a különböző fém párok megjegyzése; ez a hajlam hajlamos a tengervízben korrodálódni; az árboc hardverének, a csörlőláncnak, a szablyacsatlakozóknak a hő, kopás szempontjából történő ellenőrzése; a gyanús csatlakozók leválasztása ellenőrzés céljából. Ez az állapot hajlamos felgyorsítani a korróziót a tengervízben.
- Áramút azonosítás: nagy impedanciájú mérővel mérje meg a szigetelési ellenállást az aktív vezetők között; tesztelje a hajótest-oldali szivárgást; jegyezze fel az áramszivárgási értékeket; hasonlítsa össze a tavalyi alapértékkel; keressen olyan értékeket, amelyek jelentősen meghaladják a várt tartományt.
- Vízvonal és hajótesten keresztüli szerelvények épsége: vizsgálja meg a vízvonali szerelvényeket korrózió, repedés vagy vízszivárgás jelei szempontjából; ellenőrizze a tömlők méretét és állapotát; cserélje ki a sérült szerelvényeket; győződjön meg arról, hogy a bilincsek szorosan vannak meghúzva, hogy megakadályozzák az áramutakat a nedves fenéken keresztül.
- Leválasztók; galvanikus egyensúly: ellenőrizze a leválasztó állapotát; győződjön meg arról, hogy minden különböző fém találkozásánál van leválasztó; cserélje ki az elhasználódott darabokat; használjon dielektromos zsírt takarékosan az ellenállás változásának csökkentésére; ellenőrizze, hogy a leválasztó vonal a hajótesten keresztül a akkumulátorig húzódik-e.
- Árbocrögzítések, szablyacsatlakozások, csörlőlánc-csatlakozások alkatrészvizsgálata; korrózió, hőkárosodás vagy kopott menetek keresése; a kifáradt alkatrészek cseréje vagy visszahelyezése; a rögzítőelemek gyártói specifikáció szerinti meghúzása.
- Javítási stratégia: előnyben részesíteném a tengerészeti minősítésű, moduláris cseréket; a galvanikus leválasztás fenntartása; a megfelelő kábelszélesség megtartása; kompatibilis áramerősség használata; alkatrészek tartása a fedélzeten; az összeszerelés utáni tesztelés minimális terheléssel történő bekapcsolással.
- Dokumentáció; karbantartási terv: rögzített év; helyszín; elvégzett szerviz; ütemezett nyomon követési ellenőrzések; a huzalozási rajzok tárolása böngésző alapú mappában; a különböző fémfutások közötti eltérésekre való hivatkozás; annak biztosítása, hogy az árboc-vízvonal útvonalán ne legyen interferencia.
Fő Okok: Galvanikus Elemek, Szórt Áramok és Hiányos Potenciálkiegyenlítés a Hajótesten
Javaslat: végezzen alaphelyzeti hajótest-víz feszültségmérést nagy impedanciájú mérőműszerrel; térképezze fel a feszültségértékeket a felületen; válassza le a parti áramellátást a tesztelés során; szereljen fel egy dedikált összekötő sínt, hogy az áramutak kiszámíthatóak maradjanak; végezzen újratesztelést, amíg az eredmények stabilak nem maradnak; dokumentálja az évről évre történő változásokat.
Galvánelemek alakulnak ki eltérő fémek elektrokémiai érintkezése révén természetes tengervízben; negatív potenciálok hajtják az áramot a hajótesten átmenő szerelvényeknél, cinkeknél, bronz alkatrészeknél; a festék a kötési felületeken blokkolja a fémkontaktust; távolítsa el a festéket, amíg a csupasz fém meg nem jelenik a kötési pontokon; a közvetlen érintkezés csökkenti az ellenállást, kiszámíthatóbbá téve az áramutakat.
A szórt áram származhat parti áram hibákból, sérült szigetelésből, rosszul bekötött berendezésekből; ezek általában észrevétlenek maradnak, amíg a korrózió ki nem mutatkozik; a villámcsapások megemelhetik a feszültséget; az útvonalakra való gondolkodás segít azonosítani azokat a helyeket, ahol a halak mozgása vagy a biofouling szivárgást okoz; a tesztelés kiterjed a szervizkábelezésre, a töltőáramkörökre és a hajótesten átmenő szerelvényekre.
A hajótesteken lévő nem megfelelő kötések megszakítják a folyamatos fémutat; a kötési pontokon nem lehet festék; távolítsa el a festéket a csupasz fémig; csatlakoztasson egy megfelelő kötősínt; alkalmazzon szilárd kötőpántokat a motorblokkon, a hajótest-átvezetéseken és a gerincen; ellenőrizze a folytonosságot multiméterrel; a csörlőlánc ideiglenes kötésként szolgálhat a helyszínek közötti teszteléshez; a lehetséges útvonalak átgondolása segít biztosítani, hogy a kötés továbbra is működjön, megfelelően legyen csatlakoztatva.
Beneteau, Oceanis hajókra vonatkozó, típusfüggő ellenőrzések: ellenőrizze a hajótest átvezetőket, a vízzáró csapokat, a kötőelemeket; győződjön meg a szigetelő integritásáról; távolítsa el a festéket a kötési pontokon; tartsa fenn a csupasz fém érintkezést; tesztelje az áramelosztást a hajótesten vezérelt terheléssel; ellenőrizze a szerviznaplókat, ütemezzen be éves ellenőrzéseket; vezessen naplót; azonnal jelentse a feszültségugrásokat.
Korai figyelmeztető jelek: Pontkorrózió, áldozati anód kimerülése és bevonat leválása
Havonta végezzen ellenőrzéseket, melyek a pittingre, a védőanódok kimerülésére és a bevonat leválására összpontosítanak; a megállapításokat fényképekkel és mérésekkel dokumentálja.
A pitting apró gödröcskék formájában jelenik meg a hajótesten a tengelyek körül, a hajótesten átmenő szerelvényeknél, a tolókorlát tartó közelében lévő érintkezési pontokon, különösen ott, ahol zöld oxidáció vagy rögzítőelemek vannak kitéve.
Ellenőrizze az áldozati anódokat mérlegeléssel vagy a megmaradt tömeg összehasonlításával; cserélje ki, ha az eredeti súlyuk kevesebb, mint ötven százalékára csökkentek, vagy ha a rögzítési felületeken látható korrózió jelentős veszteséget mutat; vegye figyelembe, hogy a tengervíz kloridja felgyorsítja a támadást a hajótesten lévő átvezetéseknél.
A bevonat leválása hólyagok, festékpelyhek vagy a hámló rétegek alatti zöldes oxid formájában jelentkezik; a problémás területek felderítéséhez végezzen szigetelésvizsgálatot; tervezze be a javítást epoxigyanta alapú védőréteggel a csupasz acél vagy alumínium kockázatos területein.
Aktív galvánelemek alakulnak ki a parti áramcsatlakozások közelében, amikor a zöld vezetékek a hajótest szerelvényeit fém alkatrészekhez kötik; a tengervízben lévő elektrokémiai gradiensek támadást indítanak el az aktív területeken; leválasztás transzformátorral; a rögzítőelemeket tartsa festve; biztosítsa a leválasztást a tengelyeknél, motoroknál, tolókorlát elemeknél.
Küszöbértékek karbantartási útmutató: a sérült anódokat ki kell cserélni, ha a tömegveszteség meghaladja az 50 százalékot; a 0,3 mm-nél mélyebb gödrök felülvizsgálatot igényelnek; a 30 mm2-t meghaladó delaminációs terület bevonatjavítást tesz szükségessé, mielőtt a só behatolása továbbterjedne.
Egy Lauderdale-ben állomásozó Beneteau flottához hasonló jachtok esetében, biztosítson számukra speciális útmutatást; a tegnapi publikáció kiemeli a partmenti áram leválasztását a téli leállás alatt; gyakorlati felülvizsgálat a csatlakozásokról minden egyes szárazdokkoláskor; frissítse a zöld bevonatokat a magas páratartalmú területeken.
Az ellenőrzés során végezzen érintéses vizsgálatot a tengelytömítések, a farhajtómű vagy bármely aktív festéktörés közelében lévő fém érintkezési pontokon; tartson magánál nagy hajózási szerszámokat; jegyezze fel a korróziós jeleket a jövőbeli intézkedésekhez.
Nincs helye a félreértelmezésnek, amikor a hajónaplóba bejegyzések kerülnek. Ezek világos, adatokon alapuló rutin előnyeit élvezik.
Fedélzeti diagnosztika: Multiméteres ellenőrzések, kötési folytonosság és hajótestpotenciál-értékek
Kezdje egy professzionális multiméteres ellenőrzéssel: tesztelje a potenciált a motorblokk földelőszalagja között; a hajótesten átmenő csövek között; a rögzítőbilincsek között; győződjön meg róla, hogy az értékek alapjárati körülmények között kis eltérésen belül maradnak.
Földelő folytonosság: ellenőrizze a folytonos útvonalat a fő földelő hálózaton; mérje meg az egyenáramú ellenállást a far szerkezetétől a propellertengely rögzítési pontjaiig; cél a 0,1 ohm alatti érték; bármilyen 0,5 ohm feletti emelkedés korrózióra vagy laza bilincsekre utal; tisztítsa meg az érintkező felületeket, helyezze vissza a hardvert, és ellenőrizze újra.
Hull potenciálértékek leolvasása: helyezze a referenciaelektródát a tengerbe a hajótest közelében; végezzen méréseket a hajótest mentén több ponton 360 fokos útvonalon; használjon differenciál üzemmódú mérőt; várjon nulla körüli értékeket, amíg a rendszerek inaktívak; a kiugró értékek >0,2 V vagy < -0,2 V jelzés esetén kötési problémák a hajótesten, melyek a hajótest átvezető kábelek ellenérzését igénylik; ellenőrizze a korróziót az átvezető peremeken, kábeltömszelencéken; az értékek eltérése kóboráramokra utal, melyeket kezelni kell.
Karbantartási terv: értékek rögzítése, a magas korróziós területek megjelölése, éves ellenőrzések ütemezése; színkódolt kábelek és kapcsok használata; a javításhoz vezető út magában foglalhatja a darukat, rögzítő talpakat, hajótesten átvezetéseket; a biztonságosabb működés költségvetésének, kockázatértékelésének és hosszú távú megvalósításának támogatása érdekében teljes naplót kell vezetni a hajó egészén.
| Teszt | Equipment | Elfogadható tartomány | Művelet, ha hatótávon kívül |
|---|---|---|---|
| Potenciálkiegyenlítő szalag a hajótesthez | Professzionális minőségű multiméter, szigetelt mérővezetékek | 0,0 és ±0,05 V közötti differenciális terhelés alatt | Kötőelemek visszahelyezése, rögzítőelemek meghúzása; kábelvezetés ellenőrzése; újramérés |
| Fő potenciálkiegyenlítő hálózati folytonosság | DC ohmmérő, mérőcsipeszek | DC ellenállás < 0,1 ohm | Tisztítsa meg az érintkező felületeket; cserélje ki a korrodált csatlakozókat; végezzen újratesztelést |
| Hull potenciál több ponton | Referencia elektród, tengervízminta | Near zero to ±0.1 V; drift < 0.1 V with load | Inspect thru-hull seals, replace faulty cables; adjust bonding strap lengths |
| Documentation and trend checks | Logbook, markers, timestamp device | Consistent drift within established baseline | Initiate targeted inspection across vessel layout; schedule corrective actions |
Practical Fixes for Sailors: Anode Replacement, Bonding Upgrades, and Protective Coatings
Schedule anode replacement during the next haul-out; attach bronze grounds to the shaft coupling; stern gear; through-hull bonding points. Use bronze or zinc anodes sized for the vessel; label positions; log replacement date.
Bonding upgrades: install a dedicated low-resistance conductor network; using copper or tinned copper; connect stern gear, prop shaft, engine block, keel, chain plates.
Coatings: apply epoxy primer; topcoat with a protective coating that resists seawater; cover exposed bolts, shaft intersections, lug plates.
Testing steps: first check continuity between bonding points; then run a controlled current test; until readings stabilize; note any hotspots.
Maintenance notes: on a yacht, this approach keeps the electrical path clear; watch vessel response; sparks may appear during high-current checks; keep electrolyte away from non-metal fittings; leave the log with dates, details; tell crew what to monitor, which points to recheck next. Next, complete the check by verifying bond continuity after each haul-out. Then plan routine re-checks to remain within safe tolerances; if any doubt remains, seek a specialized review from a marine electrician.
Sportfishing-Specific Considerations: Livewells, Tackle Setup, and Electrical Paths that Elevate Corrosion Risk
Recommendation: place a complete galvanic separation between livewells; tackle frames; plus motor mounts; use a dedicated isolated battery circuit for livewell pumps; solar charging for that circuit reduces load on the main bus; this improves long-term stability. This approach balances electrical paths; together, reduces unnoticed corrosion along dissimilar metal joints.
Livewells configuration: choose non‑corrosive materials for tanks, like roto-molded plastic; avoid contact between dissimilar metals; mount pumps, sensors, fittings with insulated hardware; route wiring in grommets; keep electrolyte away from metal walls; whenever possible, placed in a dedicated compartment with ventilation.
Tackle storage: keep reels; rods; tackle props placed away from the galvanic plane; use non-conductive spacers; avoid direct metal contact between stainless hardware and aluminum frames; route lines along protected channels; install marine-grade coatings to reduce direct exposure.
leading concept in electrical-path management: portsmouth context explains how electrical paths raise risk; publication from stan researchers definitely highlights a process where electrolyte from seawater; dissimilar metals accelerate corrosion; like fish on a line, live well layout with props placed near motor mounts creates a matrix where corrosion eats metal joints; both livewells; tackle gear become susceptible when feeds share a return path through saltwater; first step in management: right material choices; sabre tool to modify insulation; separate positive runs; atom-level potentials measured to ensure unnoticed voltage; solar charger behavior checked; this complete approach reduces risk; this method explains why each location matters; with careful routing; regular cleaning; balance remains strong; sound results show longer life for livewell components, tackle props, motor mounts.