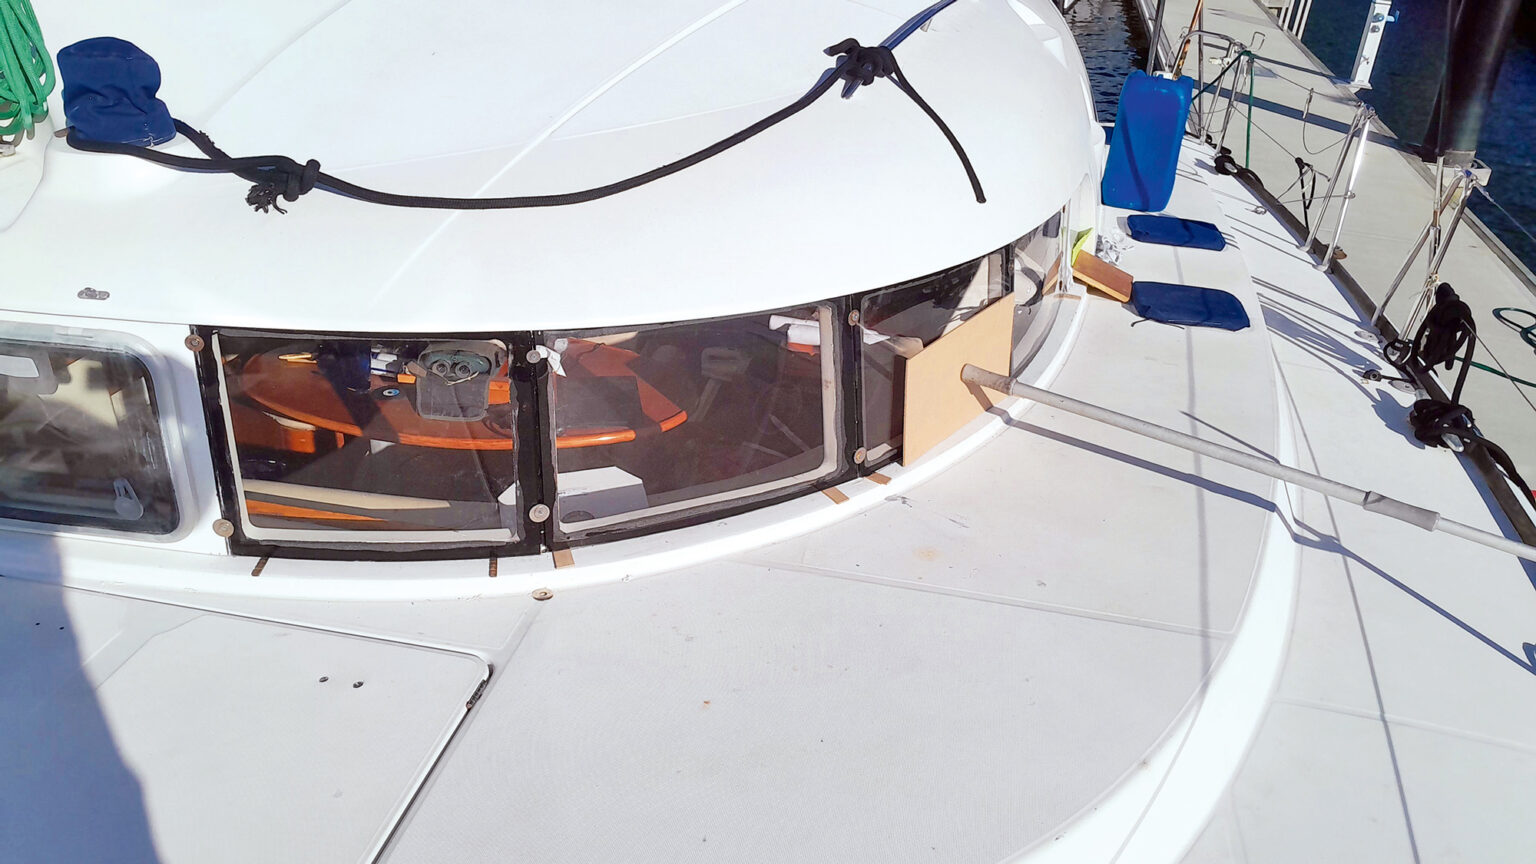
Replacing your boat’s saloon windows might seem like a daunting task, but with the right approach, it’s quite achievable. This guide will delve into the intricacies of bending acrylic material for a perfect fit, ensuring that your view from the cabin remains spectacular and unblemished.
The Need for Window Replacement
Issues with saloon windows often arise from environmental factors, wear, and exposure to the elements. Acrylic materials, while durable, can develop cracks or crazing over time, particularly on boats that sail in various climates. An owner of a Lagoon 410, for example, faced such challenges with crazed windows, which significantly detracted from the aesthetic appeal and functionality of the vessel. It became apparent that the time had come for a replacement.
Understanding Acrylic Bending
Bending acrylic is essential when replacing curved windows since it requires precise shaping to fit the frame. A crucial factor in this process is the curvature of the window; for instance, a width of 700mm may bow out by 15mm. This slight curve means straightforward installation isn’t an option. Instead, the replacement panes must be created to match the original curvature.
Preparation Steps for Window Replacement
The first step involves removing the old panes carefully. This seems straightforward but requires caution to prevent damaging the surrounding frame. After removing the old windows, measuring the thickness of the existing acrylic is necessary. An average thickness might be around 8mm, which is substantial and robust. This thickness must be taken into account when ordering new acrylic sheets to ensure they are oversized enough for fitting.
Bending Process: Trial and Error
Bending acrylic can be tricky. Initial attempts might involve clamping the acrylic piece to the frame and applying heat with a heat gun. However, reaching the desired temperature range requires precision, typically between 150-160°C. The importance of achieving the correct temperature cannot be overstated; insufficient heating could lead to a poorly warped pane when attempted to fit it.
Tools Needed
- Heat gun
- Laser thermometer
- Old charts for patterns
- Router for trimming
- Former made from plywood or MDF
- Weights to hold down acrylic sheets while cooling
- UV-resistant adhesive for installation
Building a Former for Better Results
To improve the bending outcomes, creating a former—a mold that mirrors the desired curve—is highly recommended. This involves measuring the curvature accurately and stacking thin sheets of wood to achieve the necessary height at the correct intervals. A lightweight material, such as thin MDF, serves well for the shaping process.
Heating Options
A practical solution is to utilize a large barbecue or a commercial oven to apply heat evenly across the acrylic sheet. Wrapping the sheet in aluminum foil helps ensure an even distribution of warmth during the heating process, reducing the risk of overheating and causing bubbles.
Checking for Quality
Post-bending, it’s vital to inspect the acrylic pane for imperfections. Look for bubbles and discoloration, which may indicate overheating during the process. Ideally, the aim should be to produce a clear, flawless window that matches the original aesthetic of the yacht.
Adhesive Application and Installation
For installation, using a high-quality adhesive is crucial. A product like Sika 295UV can be ideal, but it necessitates a primer to ensure proper adhesion between the acrylic and the boat frame. Applying the adhesive requires attention: providing an even bead will help improve durability and flexibility, accommodating the boat’s movements as it navigates waters.
Step-by-Step: Bending Acrylic for Windows
- Verify the thickness of the current pane and order a replacement sheet.
- Remove the old window using appropriate tools.
- Create a paper pattern based on the existing pane shape.
- Cut the new acrylic sheet, ensuring it remains slightly oversized.
- Construct a former with the precise curve for shape assistance.
- Utilize high-heat options for optimal bending results.
- Thoroughly clean the surface of the acrylic before heating.
- Place the acrylic in the preheated oven at recommended temperatures.
- Drape the pliable acrylic across the former and let it cool.
- Ensure a snug fit against the frame and trim edges as necessary.
- Apply adhesive and allow ample time for curing.
- Finish the installation with appropriate sealants to protect against water ingress.
Acrylic vs. Polycarbonate: A Quick Comparison
| Acrylic | Polycarbonate |
| Aka: Perspex, Plexiglass | Aka: Lexan |
| Pros: Affordable, UV resistant | Pros: Superior impact resistance |
| Cons: Prone to crazing over time | Cons: Can yellow due to UV exposure |
| Ideal for: Hatches and smaller windows | Ideal for: Larger panes with protective layers |
Through the journey of replacing saloon windows, it’s clear that gaining hands-on experience not only enhances skills but also lends a deep appreciation for maintenance aboard a boat. For those seeking adventure on the high seas or tranquil days at the beach, the right windows are integral for maintaining the alluring views, which makes such repairs worth the effort. The opportunity for challenges—much like sailing—adds to the art of boating. Experience all that your next maritime expedition has to offer by renting a boat that’s perfectly suited to your journey, be it with friends or a romantic getaway. Should you choose to explore options for boat rentals, GetBoat.com offers a wholesome selection suited for various budgets and desires, ensuring each sailing adventure is memorable. So, set your course and embark on delightful escapades with the wind at your back, and the sun shining bright. Don’t let the tides of tradition hold you back; embrace the freedom the sea has to offer. If your next venture takes you to the coast, consider the unique experiences boat rentals will provide. After all, every inlet and lagoon tells a story waiting to be discovered. Explore all possibilities at GetBoat.com.

 Bending Acrylic for Boat Saloon Windows">
