

 Land Based Lure Fishing Tips – Essential Techniques for Shore Casting Success">

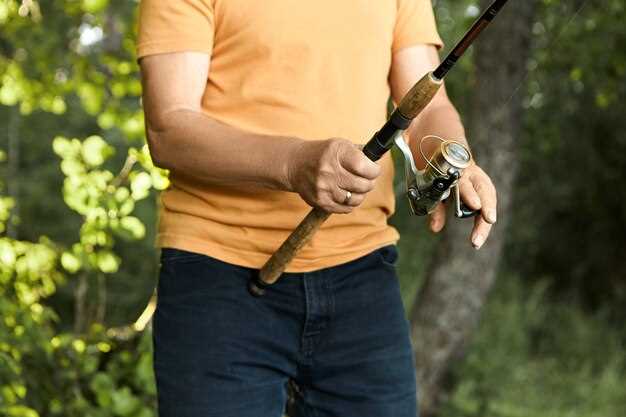
Use a front-drag reel for seaside bank throws to gain immediate bite detection and smoother drag response when a big fish pulls. Set the initial drag to roughly 25–30% of line breaking strain and adjust with the rate of retrieved line as you progress. This simply lets you manage runs and reduces the risk of breakage during a strike.
In flats and current edges, presenting baits so they are swimming naturally is critical. To match the retrieved cadence, set a pace that mirrors the rate at which fish feed: slow on the first 6–8 m, then a sharp burst to trigger bites. With the right plan, you can keep the bait swimming along the seam and lets you cover more water, increasing opportunity for bites.
Rig and gear: a fluorocarbon or wire leader protects against toothy species; choose leader length 15–30 cm depending on wind and target depth. Pair with a main line of 15–30 lb; keep the spool tension moderate when casting to prevent tangles. Pack a variety of weights from 14 g to 40 g to match depth and current, plus some topwater options for swimming action over flats. Power and control come from matching the weight to wind and current.
Wind and tide control rate; during different tides you probably see bite windows change; keep to a simple plan: when the current pushes, cast slightly down-current and retrieve with a steady rate; in calm conditions try a slower, longer pull to keep the bait on the surface. In the world of coastal angling, reading water features–edges, channels, flats, and drop-offs–is key; the best approach is to adjust the plan to stay close to structure and keep line taut so you can feel more bites, ever ready to adapt.
Gear management: keep a pack with spares, spare spools, a front-drag reel, a selection of leaders (wire and fluorocarbon), pliers, a knife, and a measuring tape. In most sessions, check the weather and tide beforehand and adjust your plan accordingly. The opportunity to land a big fish often comes in the next session, when conditions align and you stay patient. When a fish grabs the bait, feel the bite and lift smoothly to set the hook; dont jerk, just apply steady tension and let the fish take line if needed to secure the capture.
Coastal Baits and Bankside Casting: Traditional Artificial Bait Types
Start with a 10–12 ft rod and a tournament-grade setup; cast toward structure at about 40–60 degrees to maximise distance and accuracy, then keep the presentation moving with a steady, regular pace to produce bites.
Gear and Setup
- Rods: 10–12 ft, medium-heavy action for longer casts and solid control.
- Main line and leader: braided 20–40 lb with a 15–25 lb fluorocarbon leader; longer leaders reduce snagging near confined structures.
- Terminal tackle: pair of hooks or a single offset with barbs; consider barbless if regulations require.
- Weights: 1/2–1 oz depending on current and wind; adjust to keep bait moving near the bottom.
- Setup notes: ensure knot strength and forward alignment of components to minimise snag risk; this actually improves bite response.
Common Artificial Bait Types and When to Use Them
- Minnow-imitating soft baits: most versatile in clear to moderately stained water; usually produce regular catches when retrieved straight and slowly, producing a natural wobble that attracts minnows and game fish alike.
- Crankbaits: best for covering water fast; choose shallow to mid-divers to match depth at a point where fish hold; the difference between shallow and deep runners can be decisive in prime conditions.
- Surface plugs: topwater action with a surface jump or a wide walk; use when fish are actively feeding and the surface is calm to attract attention at the surface.
- Frogs: frog imitations shine in weed-choked flats and pads; stay with a longer pause between retrieves to produce a sharp splash that attracts moving fish.
- Soft swimbaits: flexible for adjusting length and color; pair with a jighead or weight that keeps the body moving just above the bottom for a strong moving profile.
- Jigs: versatile for deeper holes, drop-offs, and weed edges; use a slow, methodical bounce or a fast hopping motion to produce a noticeable vibration and snap.
- Spoons: lighter, compact spoons for a flash-and-fall presentation; often a good choice in windy, confined channels to attract attention.
Retrieval and Presentation Principles
Base decisions on a theory-driven approach; adjust speed, pauses, and rod taps based on water clarity, structure, and target species. Moving water usually calls for a faster cadence, while stagnant depths benefit a slower, deliberate crawl.
Key patterns include: forward casts with a snap retrieve, pauses to let the bait sink to the prime depth, and occasional short jumps or twitches to provoke bites. As a rule, begin with a forward cast, add a half-second pause, then a short snap to mimic a fleeing baitfish. This forward–pause–snap sequence can produce the most opportunities when bass and other predators are feeding on schooling minnows.
Carry a pair of color options and a couple of item designs to cover both murky and clear water; the best advantage is flexibility. Also, ensure regular maintenance: check hook sharpness, replace worn parts, and turn to barbs if local rules permit. The prime goal is to attract bites and convert them into catches, which usually requires a quick, decisive strike and a firm set.
In practice, frog and minnow profiles often outperform other designs in mixed weed and open-water zones; frogs excel in heavy cover, minnows excel in clear runs, and both offer strong opportunities to catch. The theory behind color shifting and action change is based on how fish perceive contrast and movement, so turning to a contrasting palette can yield a noticeable rise in catches.
Land Based Lure Fishing Tips: Shore Casting Strategies and Common Traditional Lure Types
Start with a compact sinking spoon or jig that lands tight to structure, then reel with a steady, low-angle motion to keep contact with the bottom.
Gear setup uses relatively sturdy line in the 20–30 lb range on a smooth spool, paired with reliable reels and a predictable drag; check knots and replace worn components before long sessions along the coast to ensure you find consistent performance.
Depth management targets deeper pockets: cast beyond edge lines and let the target sink longer, then begin a gradual retrieve at about 10–45 degrees of rod angle, adjusting to current and water clarity.
Items include spoons, jigs, crankbaits, and soft plastics on jigheads; popularity is supported by field notes, source reports, and здесь источник popularity confirms this trend.
Near rocks, cast slightly beyond and let the lure fall into gaps; use short, snapping retrieves to imitate fleeing prey; if you snag, pause, then pull free with a couple of smooth snaps; if you feel ikes from the current, switch color or pattern.
Seasonal tips: in shallow water, bright patterns and quick retrieves get bites; in deeper zones or on cooler days, darker colors with longer pauses perform better. Thinking ahead about tides and days helps you plan next trips; somebody with years of coast practice talked that matching patterns to water clarity is key.
Bass often respond to slower retrieves and chrome colors; Murray talked about the value of trying several items, and thinking in terms of degrees of retrieve helps you find the next pattern that gets bites.
Next steps: assemble an option kit with 4–6 items that cover shallow and deeper zones; prefer colors that match the water source and water clarity; keep notes on days and conditions to refine your approach; retrieve gradually and adjust by feel, this gives better odds on bass and other targets.
Spoon styles: cadence and retrieves along the bank
Begin with a steady, regular retrieve that keeps the spoon tracing a shallow arc near the surface, with short pauses of 0.5–1.0 seconds every 6–8 pulls to check depth response and tune cadence. The matter is consistency in cadence and line control.
In deeper zones or when wind pushes current, switch to spoons designed to sink to 3–4 ft, then perform 1–2 second pulls with 1 second stops to haul the spoon through the midwater column and trigger bites. Pulls should feel instinctively natural, not forced.
Rigging basics: tie a clean knot, add an 18–24 in fluorocarbon leader, 12–20 lb test; use a small swivel to cut twists and keep line from kinking; sizes range 1/8–3/4 oz, with 3/8–1/2 oz handling regular chop and wind; needs vary with conditions so adjust length and weight accordingly. This setup reflects the different rigs designed to meet anglers’ needs and basics alike.
Style differences matter: brass, copper, and silver finishes behave similarly yet represent different surface reflectivity; have a set that covers shallow hits and deeper action; designed to ride through surface ripple and through low-contrast water; through transition zones, switch styles; though some days a single size works, other days you benefit from multiple sizes and finishes to cover different depths; remember some rules: summer light makes brighter finishes shine; sizes matter; like the way larger spoons pull deeper than smaller ones; Somebody new to this game benefits from a two-size start and then increases when conditions demand it; certainly these choices puts you in position to strike, which affects bite timing.
Remember: an average session benefits from rotating among 2–3 sizes and at least two styles to identify the strike window that makes sense locally; instinctively you’ll tune cadence as water clears or muddy; though conditions shift, the approach puts you in position to strike; through practice, you learn deeper targets and shallower passes, and you’ll fish with confidence yourself.
Crankbaits and plugs: selection for shoreline structure
Recommendation: start with a compact, mid-depth crankbait around 3.5 cm that dives to about 1.5 m. Load a 20–30 lb braid and spool a short fluorocarbon leader (12–18 in) in rugged zones. Retrieve at a steady pace, then inject short pauses to trigger a follow along the edge where structure rises toward the surface. This approach is productive along rock faces, weed lines, and pilings.
Common shoreline structure along estuaries includes rock ledges, weed beds, troughs, and pilings. Choose crankbaits and plugs that press slightly deeper than the active zone to stay in touch with the edge as current carries the presentation. A bigger profile can attract bigger targets in stained water, while interchangeable slugs and tails expand the options; split your pack so you can adapt quickly when variables shift.
Market options offering a range of favourites. Colour choice matters: colour can be subtle in clear days and noticeable in stained water. Try 2–3 colour patterns per session, focusing on patterns that attract in low light or over structure. The right colour puts the bait in the strike window without prompting hesitation; instinctively adjust speed and rod load to keep tension as the tail sways and the body responds to structure. Feel the bite and adjust accordingly; worth trying a different colour if results stall.
Estuaries and nearshore flats present several variables: tide level, current strength, water clarity, wind, and boat traffic. When you follow the edge, think about how the bait loads the spool and whether to switch to a deeper option or alter the retrieve. Years of field testing show the best outcomes come from mixing approaches, not sticking to a single option; a flexible temperament lets you respond to the mood of the day. These factors involved in estuarine environments require adaptable methods and a calm approach.
| Crankbait option | Depth range | Structure match | Colour guidance | Notes |
|---|---|---|---|---|
| 3.5 cm mid-diver | 0.8–1.4 m | weed edges, weed lines | natural, subtle with flash | good general use along estuaries |
| 4.5 cm mid-range diver | 1.2–1.8 m | rock ledges, drop-offs | brighter for stained water | keep pull along the edge; adjust pace |
| 4.0–4.8 cm deeper diver | 1.8–2.5 m | ledge, deeper troughs | high-contrast patterns, chartreuse/yellow | use when current is strong |
| Lipless/slugs style | 0.4–1.0 m | shallow flats near structure | silver, gold flash | excellent when current carries the bait along edge |
Soft plastics: rigging and swim patterns for beach targets
Recommendation: half-ounce weight, a 4–5 inch paddle-tail on a single 3/0 hook, with a 15–20 lb leader. Cover the first 6–10 m with a steady, medium-speed retrieve, then pause 0.5–1 s to spark a noticeable tail kick. Keep line slack during the pause to avoid drag, and snap the rod to drive the bait back toward the foam. This approach delivers more strikes from large, hungry, predatory fish that already patrol the wash; the best results come when tides shift and fish move into troughs.
Basics of rigging: use a nose- or belly-weighted setup to keep the head of the bait near the bottom. In light current, run 1/8–1/4 oz; in heavier surge, step up to 1/2 oz. Utilisez un single hook in the 1/0–3/0 range on a straight-wired style, with a 12–18 inch fluorocarbon leader to ensure stealth. Pick soft plastics in high-contrast palettes or natural tones; add a small bead ahead of the bait to create a brief flash, making the setup easier to spot. The design should stay compact, with concentré indices de couleur et actions qui produisent une nage propre et stable sans effrayer les poissons.
Motifs de nage sur la plage : Deux approches principales couvrent la plupart des journées. Premièrement, une récupération linéaire et régulière avec de subtils coups de queue ; deuxièmement, des mouvements brusques et erratiques avec des réalignements pour provoquer une réaction de prédation. Pour augmenter la visibilité, visez un noticeable cadence de 3–5 tressaillement par cycle, puis une pause. Un virage brusque au sommet de chaque tressaillement, ramenant l'appât vers le reflux, imite un poisson-appât blessé et est un striking Signal aux poissons affamés. Demi-tour L'alternance entre les contractions aide à maintenir la profondeur dans le sable et la mousse mélangés, et vous permet de couvrir plus d'eau sans surmener le montage. Évitez de faire le même mouvement à chaque lancer.
Notes sur l'espèce et ajustements : Les truites le long des voies extérieures réagissent bien à des schémas plus lents et plus resserrés ; en eau claire, préférez les tons naturels, tandis qu'en eau trouble, le chartreuse vif ou le blanc sont plus efficaces. Example Les montages incluent une queue chartreuse sur un corps naturel, ou une finition pailletée qui reste dans les. soixante palette. Si vous manquez quelques bouchées, essayez une autre size Bien sûr, fournissez-moi le texte à traduire en français. six casts, ou passer à un moule plus unique motif; remember, l'objectif est de rester près de la zone de strike sans trop s'engager. Si un schéma semble favourite, continuez, mais n'hésitez pas à mélanger avec une autre option pour éviter de trop insister sur une seule présentation.
Rapport et cadence : moulinet dans le 2500–3500 conjuguez la capacité de la bobine à la distance de lancer. Associez-le à 12–20 lb ligne pour maintenir le contrôle du mou et éviter les perruques. Tailles qui correspondent à la charge utile de l'appât aident à maintenir la ligne tendue pendant la touche. After Une touche, moulinez promptement pour maintenir la tension, puis balayez le scion de la canne pour faire avancer l'appât. Si la touche s'estompe, baissez légèrement le scion pour maintenir le contact avec l'appât, et n'hésitez pas à faire une nouvelle pause. Le favourite est une rotation à deux schémas, une approche de haute précision qui anyone peut adopter, et lets vous restez dans le coup pendant une longue session. Il en résulte des touches plus régulières et une meilleure couverture de la plage, en particulier lorsqu'une laisse de marée abrite une large fenêtre de prédateurs.
Jigs et leurres métalliques : contrôle de la profondeur et lancers assistés par le vent
Commencez avec un jig de type slug de 60 à 110 g pour atteindre la profondeur en 2 à 4 secondes ; lancez bien au-delà du clapot et comptez deux à trois secondes pour qu'il atteigne le fond marin, puis relevez et marquez une pause pour sentir une touche. Maintenez une tension constante sur la ligne et utilisez un angle de canne modéré afin que le naufrage soit contrôlé plutôt qu'en chute libre. Cette approche vous assure un contact fiable et constant avec la structure du fond le long de la côte, où les bancs de sardines et de coquillages sont une source de nourriture connue.
Lancers assistés par le vent : lorsque la brise favorise un vol long et plané, positionnez le corps face au vent ; utilisez un lancer arrière plus long, puis secouez la canne pour générer une ligne tendue ; maintenez la ligne tendue pendant l'atterrissage et moulinez rapidement pour maintenir le contact. En gardant la côte à l'esprit, vous remarquerez que la ligne suit mieux sa trajectoire et qu'elle zigzague moins à cause des rafales.
Contrôle de la profondeur en fonction des marées : dans les courants, ajoutez 5 à 15 g de poids supplémentaire ou raccourcissez le bas de ligne pour que le slug reste en contact avec le fond ; sur un fond plat, essayez une descente plus lente en utilisant un jig plus léger et une descente plus courte ; si vous détectez que vous planez au-dessus du chenal, hachez l’eau avec une série de sauts électriques et de pauses pour maintenir le slug près du fond, là où se trouvent les crustacés et autres sources de nourriture connues.
Méthode : après la descente, effectuez une série de longs balayages avec de courtes pauses près du fond ; alternez avec des arrêts très lents pour provoquer les touches. En juillet, l'eau plus chaude pousse les cibles plus près de la structure côtière, alors répétez cette série de lancers à la même profondeur pour de meilleurs résultats. Gardez les moulinets en bon état, vérifiez la ligne et assurez-vous que la bobine ne vrille pas, et laissez la source d'expérience guider vos prochaines actions à partir de sessions déjà éprouvées.
Spinnerbaits et leurres de type poisson nageur : cas pratiques d'utilisation depuis la berge
En commençant avec un spinnerbait de 3,5 g (1/8 oz) sur une ligne tressée de 9 à 13,5 kg (20–30 lb) et un bas de ligne en fluorocarbone de 30 à 45 cm (12–18 po), lancer au-delà de la zone de déferlement, puis varier la récupération, permet de multiplier les touches. En septembre, l'activité concentrée des poissons-appâts se déroule souvent le long du bord de la rive, ce qui rend cette configuration particulièrement productive avec les grandes et moyennes cibles. Modifiez la profondeur en ajustant la longueur du bas de ligne et l'angle de lancer, et gardez des palettes de rechange à portée de main pour vous adapter à l'eau trouble au-dessus du fond. Ces bases vous aident à réagir plus rapidement et à continuer à pêcher lorsque ça mord, restez adaptable.
- Courants de déferlement : lancez au-delà de la ligne d'écume, puis récupérez à un rythme régulier avec des mouvements brusques occasionnels. Dans les eaux troubles, passez à un modèle plus lourd de 1/4 oz et à une palette Colorado d'un diamètre d'environ 2,5 cm pour produire un signal plus fort. Si vous accrochez un gros poisson, maintenez la canne haute et exercez une pression constante ; si un accroc mord, donnez une courte levée et reculez pour vous libérer ; ils sont souvent attirés par cette présentation près d'une zone d'alimentation.
- Bords de zones envahies par les herbes et à risque d'accrochage : utilisez un spinnerbait lourd de 7 g avec une seule palette feuille de saule pour percer les herbiers tout en restant réactif. Gardez une cadence serrée, avec des tirées sèches rapides suivies d'une pause plus longue pour laisser les poches se dégager. En cas d'accrochage, baissez le scion de la canne et tirez lentement vers l'arrière ; s'il devient improbable de se libérer, passez à un montage plus compact qui passe à travers les interstices.
- Eaux claires et zones peu profondes : optez pour un spinnerbait de 3,5 g avec une petite palette ; associez une tresse de 4,5 à 6,8 kg à un bas de ligne léger. Utilisez une cadence lente et un dandinement serré près du fond, en tenant compte de la profondeur. En cas de touche, maintenez le scion de la canne haut pour ferrer, et utilisez un mouvement minime pour ne pas effrayer le poisson.
- Fenêtres de faible luminosité à l'aube ou au crépuscule : faites briller la lame et maintenez un balayage régulier et peu profond le long de la première rupture de profondeur au-dessus de la berge. Ils sont plus actifs pendant ces périodes, donc une approche cohérente a tendance à produire plus de prises ; ajustez la vitesse en fonction de la couleur de l'eau et du vent.
- Appâts de type poisson-nageur en alternative : passer à une imitation de poisson-nageur de 5 à 7,5 cm avec une action naturelle ; utiliser un bas de ligne en fluorocarbone fin de 5,5 à 9 kg, et conserver une tresse en corps de ligne de 4,5 à 7 kg. Conserver une cadence de nage naturelle avec des pauses occasionnelles ; cette approche peut devenir l'option principale lorsque les mouvements naturels portent leurs fruits, et attirer l'attention sur la cible près de la surface.